

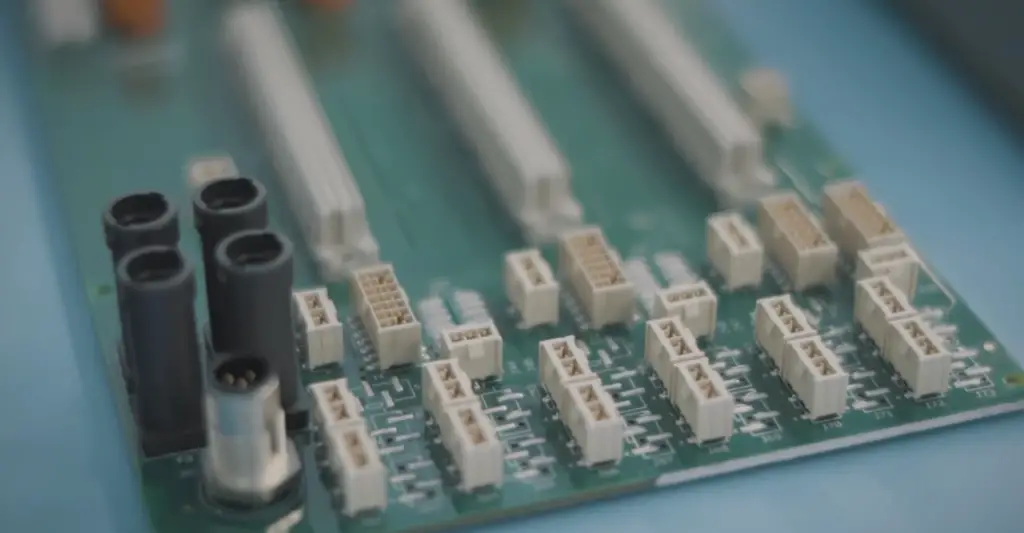
A PCB consists of several layers of conductive material, such as copper, separated by insulating material, such as fiberglass or ceramic. The number and arrangement of these layers are critical factors in the performance of the PCB, and this arrangement is called the PCB layer stack-up (or stackup).
Today, designers can use PCB layer stack-up capabilities to create PCBs with hundreds of layers, each with specific electrical properties and routing patterns. Advanced PCB layer stack-up techniques, such as blind and buried vias, allow designers to create high-density interconnects that reduce the size and weight of electronic devices while increasing their performance.
In this article, we will explore the various PCB layer stack-up capabilities and techniques used in modern PCB design. We will examine the benefits and limitations of different stack-up configurations, including the number of layers, layer thickness, and materials used. We will also discuss how different layer stack-up techniques can impact the performance of the PCB, including signal integrity, power distribution, and thermal management.
What Is a PCB Layer Stackup?
A typical PCB consists of multiple layers of conductive material, such as copper, separated by insulating material, such as fiberglass or ceramic. The layer stackup of a PCB is critical to its performance, as it determines the electrical, mechanical, and thermal properties of the PCB [1].
The number and arrangement of layers in a PCB layer stackup depend on the requirements of the specific application. For example, a simple two-layer PCB may be sufficient for a low-cost consumer electronic device, while a high-end server may require a multilayer PCB with dozens or even hundreds of layers.
The layer stackup of a PCB determines the routing and placement of traces, components, and vias.
The layer stackup also determines the thickness and materials used in each layer, which can impact the performance of the PCB.
Designers use PCB layer stackup software and tools to optimize the layer stackup for a specific application. The layer stackup must consider various factors, such as signal integrity, power distribution, thermal management, and manufacturability.
PCB layer stackup capabilities refer to the design and manufacturing techniques used to create the stackup of a PCB. The PCB layer stackup influences the electrical, mechanical, and thermal properties of the PCB, including signal integrity, power distribution, and heat dissipation. PCB designers use layer stackup capabilities to optimize the performance of the PCB for its intended application.
PCB layer stackup capabilities have evolved over time to accommodate the increasing complexity and functionality of electronic devices. Early PCBs typically had two layers, with the top layer used for components and the bottom layer for routing traces. As technology progressed, the number of layers increased, and designers began to use multilayer PCBs with up to 16 layers or more. The use of multiple layers allowed for more efficient routing of traces and better signal integrity.
Common Types of PCB Layer Stackups:
1) 2-Layer Stackup
The 2-layer stackup, also known as a double-layer PCB, is the simplest and most common type of PCB layer stackup. It consists of two layers of copper traces and a layer of insulating material, usually FR-4 fiberglass. The copper traces are typically routed on the top and bottom layers, and vias are used to connect them. The vias can be either through-hole or blind vias, which only connect two adjacent layers.
2-layer stack-ups are ideal for simple electronic designs with few components and relatively low-speed signals. They are also the most cost-effective PCB design option, as they require less material and manufacturing time than multilayer PCBs. However, 2-layer stack-ups are limited in terms of their routing capabilities, and they may not be suitable for more complex designs [2].
2) 4-Layer Stackup
The 4-layer stackup is a step up from the 2-layer stackup and is commonly used in more complex designs. It consists of four layers of copper traces and a layer of insulating material between each layer. The two inner layers are used for power and ground planes, while the top and bottom layers are used for routing signals.
4-layer stack-ups provide better signal integrity and noise immunity than 2-layer stack-ups, thanks to the separate power and ground planes. They also offer more routing options and can support higher-speed signals. 4-layer stack-ups are commonly used in applications such as power supplies, audio amplifiers, and industrial control systems.
3) 6-Layer Stackup
The 6-layer stackup is another common option for more complex electronic designs. It consists of six layers of copper traces and insulating material, with power and ground planes on the inner layers and signal traces on the outer layers.
6-layer stack-ups offer even better signal integrity and noise immunity than 4-layer stack-ups, thanks to the additional power and ground planes. They also provide more flexibility in terms of routing and can support higher-speed signals. 6-layer stack-ups are commonly used in applications such as high-speed digital circuits, telecommunications equipment, and medical devices.
4) 8-Layer Stackup
The 8-layer stackup is a popular choice for even more complex electronic designs. It consists of eight layers of copper traces and insulating material, with additional power and ground planes, and signal layers.
8-layer stack-ups provide excellent signal integrity and noise immunity, as well as improved power distribution and thermal management. They are commonly used in applications such as networking equipment, high-end computers, and aerospace systems [3].
5) 10-Layer Stackup
The 10-layer stackup is the highest layer count commonly used in PCB designs. It consists of ten layers of copper traces and insulating material, with multiple power and ground planes and signal layers.
10-layer stack-ups offer the highest level of signal integrity, noise immunity, power distribution, and thermal management. They are commonly used in applications such as high-speed digital circuits, RF/microwave systems, and advanced medical devices.
Objectives of a Multilayer PCB Stackup
The objectives of a multilayer PCB stackup are to provide a reliable and efficient design that meets the requirements of the specific application.
Some of the key objectives of a multilayer PCB stackup include:
- Signal integrity: A multilayer PCB stackup should be designed to provide optimal signal integrity, which ensures that signals can be transmitted without any loss or interference;
- Power distribution: A multilayer PCB stackup should provide efficient power distribution, which ensures that power is delivered to all the components on the board with minimal loss;
- Thermal management: A multilayer PCB stackup should be designed to dissipate heat generated by the components on the board, which helps prevent overheating and ensures reliable operation;
- Size and weight: A multilayer PCB stackup should be designed to minimize the size and weight of the board while still meeting the requirements of the application;
- Manufacturability: A multilayer PCB stackup should be designed with manufacturability in mind, which ensures that the board can be manufactured efficiently and reliably [4];
Benefits of PCB Layer Stackups
There are several benefits of using PCB layer stack-ups in electronic circuit designs:
- Better signal integrity: PCB layer stack-ups allow for the separation of different signal types and provide a controlled impedance environment for high-speed signals. This reduces noise and signal distortion, improving overall signal quality and data transfer rates;
- Improved power distribution: The additional layers in a multilayer PCB stackup allow for better power distribution, reducing voltage drop and minimizing noise in power and ground planes;
- Increased component density: With more layers available, it’s possible to place components more densely on the PCB, reducing the board’s size and weight;
- Enhanced thermal management: PCB layer stack-ups can incorporate heat sinks and thermal vias that help dissipate heat generated by the electronic components, reducing the risk of overheating and ensuring long-term reliability;
- Simplified routing: PCB layer stack-ups allow for more efficient routing of signals and power, reducing the likelihood of cross-talk and making the PCB design more robust;
- Better noise immunity: With PCB layer stack-ups, it’s possible to create a shielded environment for sensitive components, reducing susceptibility to electromagnetic interference (EMI);
Stack-Up Requirements:
Foil Construction Vs. Cap Construction
One of the primary considerations when designing a PCB stack-up is the choice between foil construction and cap construction.
Cap construction, on the other hand, involves using a core material with pre-bonded copper sheets that act as a capacitor, eliminating the need for additional layers of copper foil.
Foil construction is typically less expensive and more flexible, making it a popular choice for most PCBs. However, it can also be more susceptible to EMI and crosstalk due to the multiple layers of copper foil. Cap construction, on the other hand, can provide better signal integrity, lower EMI, and improved impedance control. It is often used for high-speed and high-frequency applications.
Board Component Density (Number Of Layers & Spacing)
Another important consideration when designing a PCB stack-up is the component density and spacing. The number of layers required will depend on the complexity of the circuit and the number of components needed. Higher component density often requires more layers, which can affect the overall thickness and cost of the PCB.
Spacing between components is also important to consider. The spacing between signal traces and between signal and ground planes can affect the impedance and signal integrity of the circuit. In general, a wider spacing between components can help reduce crosstalk and EMI [5].
Component Types And Interfaces (Analog, Digital, Mixed Signal, High-Speed)
The type of components and interfaces used in the circuit can also affect the PCB stack-up design:
- Analog circuits typically require more shielding and may need additional layers for proper grounding;
- Digital circuits may require less shielding but need to be designed to minimize crosstalk and EMI;
- Mixed signal circuits that combine analog and digital components require a stack-up design that can provide proper isolation and grounding;
High-speed interfaces, such as USB, Ethernet, or HDMI, require careful attention to signal integrity and impedance control. A dedicated layer or reference plane may be needed to properly terminate the signals and minimize reflections.
Board Type & Application
The type of board and application can also influence the PCB stack-up design. For example, a rigid board may require a different stack-up design than a flexible board. A board used in harsh environments, such as industrial or military applications, may require additional layers or shielding for protection against moisture, temperature, or vibration.
The application of the board can also affect the stack-up design. A board used for power electronics may require thicker copper layers to handle high currents. A board used for communication or data processing may require a specific impedance control to minimize signal loss.
Mechanical Requirements
Mechanical requirements, such as board thickness and flexibility, can also impact the PCB stack-up design. The overall thickness of the board can affect the fit and compatibility with other components in the system. The thickness may also affect the thermal properties and ability to dissipate heat.
Flexible boards, such as flex and rigid-flex PCBs, require a different stack-up design than rigid boards. Flex and rigid-flex boards require flexible layers and proper routing to allow for bending and folding without damaging the circuit.
Important Factors to Consider for PCB Stack-Up:
The Number Of Stack-Up Layers
The number of layers in a PCB stack-up is typically determined by the board’s complexity and the number of components that need to be accommodated. As a general rule, a higher number of layers can accommodate more components and provide more routing options, but it also increases the board’s cost and complexity [6].
The Sequence Of The Layers
The sequence of the layers in a PCB stack-up is also crucial. The order in which the layers are placed affects the board’s overall performance, such as signal integrity, power integrity, and thermal management. The placement of the power and ground planes is particularly important as it can impact the board’s noise performance, and the placement of signal layers can impact the signal quality.
The Spacing Between The Layers
The spacing between the layers in a PCB stack-up is important for several reasons:
- First, it determines the board’s thickness, which affects its mechanical and thermal properties;
- Second, it affects the board’s electrical performance, particularly the capacitance and impedance between adjacent layers;
Proper spacing is crucial to prevent crosstalk, noise, and other signal integrity issues.
Other important factors to consider when designing a PCB stack-up include the type and thickness of the dielectric material, the trace and via size, and the copper weight. The choice of dielectric material affects the board’s dielectric constant, which in turn affects the impedance and capacitance of the board.
It is also important to consider the manufacturing process when designing a PCB stack-up. The type of stack-up can affect the board’s manufacturability, as certain types of stack-ups require more complex manufacturing processes.
For example, a high-density interconnect (HDI) stack-up with microvias may require more advanced drilling and plating techniques than a simple 2-layer stack-up.

The Types And Number Of Planes (Ground And/Or Power) Used
When designing a PCB stack-up, it is important to consider the types and number of planes used.
They are essential in ensuring the proper functioning of the PCB by minimizing noise and providing stable power.
There are two types of planes used in PCB stack-ups: power planes and ground planes.
Power planes provide a stable voltage supply to components on the board, while ground planes provide a reference for electrical signals and help in noise reduction. The number of planes used in a PCB stack-up depends on the complexity of the design and the power requirements of the components.
A single-layer board does not have any planes. In a double-layer board, a single plane can be used as either a power plane or a ground plane. However, in most cases, double-layer boards do not have any planes, as they are not required for simple designs.
In a four-layer board, the most common stack-up includes two internal planes, one for power and one for ground. These planes are sandwiched between the top and bottom layers of the board. This stack-up provides a good balance between performance and cost.
Six-layer boards typically have two power planes and two ground planes, with the top and bottom layers used for routing signals. Eight-layer boards can have up to four power and ground planes, with the remaining layers used for signal routing. Ten-layer and higher-layer count boards typically have additional power and ground planes to meet the power requirements of high-density designs.
The number and types of planes used in a PCB stack-up are also influenced by the type of application.
For example, high-speed designs require more planes than low-speed designs to reduce noise and provide better signal integrity. Similarly, mixed-signal designs require separate planes for analog and digital signals to prevent crosstalk [7].
In addition to the number and types of planes, it is also important to consider the thickness of the planes. A thicker plane can provide better power distribution and can reduce impedance. However, thicker planes can also increase the overall cost of the board.
The Difference Between Standard Stack-Up and HDI Stack-Up
When it comes to PCB stack-ups, there are two main types to consider: standard and HDI (high-density interconnect). While both stack-up types serve the same purpose of providing the proper routing and power/ground planes for a circuit board, there are some key differences between them.
Standard stack-up, also known as through-hole technology, is a traditional method for creating PCBs. It typically consists of two to four layers and utilizes plated-through holes to connect the layers together. Standard stack-up is used for applications that require lower-density designs and less complex routing requirements. Standard stack-up is also less expensive to produce than HDI stack-up.
On the other hand, HDI stack-up is a newer technology that allows for greater component density and smaller feature sizes. HDI stack-up typically consists of four or more layers and utilizes microvias, blind vias, and buried vias to create connections between layers. Microvias are small, laser-drilled holes that can be used to connect adjacent layers in a PCB. Blind vias connect an outer layer to an inner layer without penetrating the entire board, while buried vias connect two or more inner layers without being visible on the outer layers of the board.
HDI stack-up allows for a higher number of layers and finer lines and spaces between the traces, making it ideal for applications with higher-density designs and more complex routing requirements. HDI stack-up is also more expensive to produce than standard stack-up due to the use of specialized equipment and materials.
Another difference between standard stack-up and HDI stack-up is the aspect ratio of the vias. The aspect ratio is the ratio of the depth of the via to its diameter. HDI stack-up allows for higher aspect ratios, which means that the vias can be smaller in diameter and still maintain their structural integrity. This allows for more space to be used for components and routing.
In terms of design rules, HDI stack-up requires more precise tolerances and manufacturing techniques than standard stack-up. For example, the use of microvias requires the use of laser drilling and electroless plating, which can be more difficult and costly than traditional drilling and plating methods used in standard stack-up.
Types of PCB Stack-Up Design
Metal Core PCB Stack-Up
Metal Core PCBs (MCPCBs) are designed for applications that require high thermal dissipation, such as LED lighting, power electronics, and automotive applications. The metal core acts as a heat sink, dissipating the heat generated by the components on the board. The metal core also provides rigidity and stability to the board.
The stack-up design of MCPCBs typically consists of a metal core layer, a dielectric layer, and a copper layer. The metal core layer is typically made of aluminum, copper, or a copper alloy. The dielectric layer is usually a thermally conductive material, such as ceramic-filled epoxy or polyimide. The copper layer provides the circuitry for the board [8].
High-Density Interconnect (HDI) PCB Stack-Up
High-density interconnect (HDI) PCBs are designed for applications that require high-speed data transfer, small form factors, and high component density. HDI PCBs are commonly used in mobile devices, medical devices, and aerospace applications.
The stack-up design of HDI PCBs includes multiple layers of copper and dielectric material, with microvias connecting the layers. The microvias allow for high component density and reduce the length of the signal path, resulting in faster data transfer rates.
High-Frequency PCB Stack-Up
High-frequency PCBs are designed for applications that require high-speed signal transfer and low signal loss, such as communication systems, radar systems, and satellite systems. High-frequency PCBs require careful stack-up design to ensure signal integrity and minimize signal loss.
The stack-up design of high-frequency PCBs includes multiple layers of copper and dielectric material, with the ground plane placed adjacent to the signal layer. The ground plane acts as a shield, reducing electromagnetic interference (EMI) and signal crosstalk. The thickness of the dielectric material is carefully selected to ensure the proper impedance matching of the signal.
Flex & Rigid Flex PCB Stack-Up
Flex and rigid-flex PCB stack-ups are popular for applications that require the PCB to be bent or twisted during operation. Rigid-flex PCBs are made up of both rigid and flexible layers, allowing the PCB to bend or twist while maintaining its structural integrity. Flex PCBs, on the other hand, are made up entirely of flexible layers.
When designing a flex or rigid-flex PCB stack-up, the designer must consider the specific bending or twisting requirements of the application. The flexible layers must be positioned in a way that allows them to bend without damaging any of the other layers. The rigid layers must also be positioned to provide structural support and prevent any unnecessary bending or twisting.
The number of layers in a flex or rigid-flex stack-up depends on the application requirements and the level of flexibility needed. The layers are typically composed of flexible polyimide material, and the thickness of each layer can vary depending on the application.
Rules for Properly PCB Stackup Design
- Determine the number of layers needed for the application and the appropriate layer stack-up configuration;
- Consider the thickness and material of each layer and how they will affect the overall performance of the PCB;
- Ensure that the power and ground planes are properly placed to reduce noise and ensure signal integrity;
- Keep high-speed signal traces short and as close to the reference plane as possible to minimize signal loss and interference;
- Use appropriate materials and thicknesses for vias to ensure proper connection between layers;
- Consider any specific environmental requirements, such as temperature or moisture, and choose materials and layer configurations that can withstand these conditions;
- Work closely with the PCB manufacturer to ensure that the chosen stack-up design can be manufactured with high quality and reliability [9];
PCB Stackup Design Example
To better understand the PCB stack-up design process, let’s consider an example. Suppose we need to design a 4-layer PCB for a simple microcontroller application with a single power supply and a few input/output signals.
Here’s an example stack-up configuration:
- Top Layer: Signal traces;
- Inner Layer 1: Ground Plane;
- Inner Layer 2: Power Plane;
- Bottom Layer: Signal traces;
In this configuration, the power and ground planes are sandwiched between the signal traces to reduce noise and ensure proper signal integrity. The thickness of each layer would be determined based on the application requirements and the manufacturer’s recommendations.
To ensure proper connection between layers, we would use appropriately sized and spaced vias. The high-speed signal traces would be kept short and close to the reference plane to minimize signal loss and interference.
Lastly, we would consider any specific environmental requirements and choose materials that can withstand these conditions. We would work closely with the PCB manufacturer to ensure that the chosen stack-up design can be manufactured with high quality and reliability.
Top Tips for PCB Stackup Design:
Determining The Number Of Layers
When deciding on the number of layers your board requires, it’s important to consider the current and future requirements of your design. A denser design with more complex routing out may require additional layers for the best results. Ultimately, boards should be designed in a way that takes into account any potential changes or upgrades during their lifecycle.
Materials Selection
Choosing the correct materials can make a huge difference when designing a PCB stack-up, especially when it comes to thermal management within your design.
When selecting materials, you must consider how they will interact with each other. Materials such as prepregs and cores need to be chosen carefully based on their dielectric constants, Dk values, and other material properties. In addition, the material’s thickness is a key factor when designing for high-speed signals as it can affect signal integrity.
Layer Weight And Thickness
When determining layer weight, you should consider its purpose in the stackup and make sure it provides adequate performance. In general, thinner layers are better for providing finer traces and higher-density components, while heavier layers provide added mechanical strength and increased heat dissipation. You may also need to consider other aspects such as the thermal expansion of different materials or dielectric constant mismatches between core and prepregs.
Determining The Layer Arrangement
The last step in designing a PCB stack-up is to determine the layer arrangement. This includes deciding how many layers will be used, which layers will be used for power and ground planes, where components and vias should be placed, and more. Depending on your design requirements, you may need to consider different considerations such as signal routing distance or placement of sensitive components. Ensuring that all of these factors are taken into account when assembling a board layer stack can save time and money later down the line during production.
Determining Routing And Vias
Finally, when designing a board stack-up you should also consider how signals will be routed between different levels of the board. This includes determining the size and shape of vias as well as their placement between layers.
Additionally, you may need to consider shielding techniques such as stitching or guard rings in order to maintain signal integrity. Understanding these design considerations can help create a high-quality PCB that meets all performance requirements.
FAQ
1. Why is PCB Stackup important?
The PCB stackup is crucial in determining the electrical, mechanical, and thermal properties of the PCB. The layer stackup of a PCB determines the routing and placement of traces, components, and vias, which affects the signal integrity, power distribution, and thermal management of the PCB. The thickness and materials used in each layer also impact the performance of the PCB. The stackup must be optimized for the specific application to ensure optimal performance [10].
2. What is a good 8-layer stackup?
A good 8-layer stackup for a PCB depends on the specific requirements of the application. However, a common 8-layer stackup configuration is Signal-Ground-Signal-Power-Power-Signal-Ground-Signal. This configuration allows for effective signal routing and grounding, with power planes providing stable power distribution. However, the optimal stackup configuration depends on the specific requirements of the PCB, and designers must consider factors such as signal frequency, impedance, and noise.
3. How does stack-up work?
A stackup works by arranging the conductive and insulating layers in a PCB to meet the requirements of the specific application. The stackup determines the routing and placement of traces, components, and vias, which affects the signal integrity, power distribution, and thermal management of the PCB. The thickness and materials used in each layer also impact the performance of the PCB. Designers use PCB layer stackup software and tools to optimize the stackup for a specific application.
4. How do I choose stackup?
To choose the right stackup for a PCB, designers must consider various factors such as the number of layers, thickness, materials used, and the specific requirements of the application. The stackup must be optimized for signal integrity, power distribution, and thermal management. Designers use PCB layer stackup software and tools to explore various stackup configurations and optimize the stackup for the specific requirements of the application.
5. How thick is 6-layer stackup?
The thickness of a 6-layer stackup depends on the specific requirements of the application. However, a common 6-layer stackup configuration consists of two outer layers of copper with four inner layers of insulating material, with each layer being around 0.02 inches thick. The overall thickness of a 6-layer stackup may vary depending on the thickness of the insulating material used.
6. What’s a 2 N 2 Stackup?
A 2 N 2 stackup is a four-layer PCB stackup configuration, consisting of two signal layers and two ground layers. This configuration provides good signal integrity and grounding, making it suitable for high-frequency applications such as RF and microwave circuits [11].
7. What is the order of the 4-layer PCB in stackup?
The order of a four-layer PCB in a stackup can vary depending on the specific requirements of the application. However, a common four-layer stackup configuration is Signal-Ground-Power-Signal. This configuration provides effective signal routing and grounding, with the power plane providing stable power distribution.
8. How do you make a PCB Stackup?
To make a PCB stackup, designers use PCB layer stackup software and tools to explore various stackup configurations and optimize the stackup for the specific requirements of the application. The stackup must be optimized for signal integrity, power distribution, and thermal management. Once the stackup is finalized, it is sent to the manufacturer, who uses it to produce the PCB. The manufacturer builds the stackup by layering conductive and insulating materials, bonding them together using heat and pressure, and drilling vias as necessary.
9. What is the difference between PCB Stackup core and prepreg?
The PCB stackup is made up of alternating layers of conductive material (usually copper) and insulating material (typically FR-4 or other similar materials). The core is the innermost layer, usually consisting of a solid piece of insulating material, while the prepreg is a layer of uncured insulating material that is used to bond the core and the outer layers of copper together during the manufacturing process. The core and prepreg are both essential components of the PCB stackup, but the core is more rigid and provides the structure for the PCB, while the prepreg is more flexible and allows for the layers to be bonded together.
10. What material is in a PCB stack-up?
The materials used in a PCB stackup vary depending on the specific requirements of the application. The stackup typically consists of alternating layers of conductive material (usually copper) and insulating material (typically FR-4 or other similar materials). The insulating material may be a solid core or a layer of uncured prepreg material, and the thickness of each layer varies depending on the specific requirements of the application.
11. What are the dimensions of a 4-layer PCB stack-up?
The dimensions of a 4-layer PCB stackup depend on the specific requirements of the application. However, a common 4-layer stackup configuration consists of two outer layers of copper with two inner layers of insulating material, with each layer being around 0.02 inches thick. The overall thickness of a 4-layer stack-up may vary depending on the thickness of the insulating material used.
12. What is the benefit of a 4-layer PCB?
A 4-layer PCB provides better routing capabilities than a 2-layer PCB, as it allows for internal routing of signals and provides more space for components. This makes it more suitable for complex circuits with high pin-count components. Additionally, a 4-layer PCB can provide better signal integrity and power distribution compared to a 2-layer PCB.
13. What is stack height in PCB?
The stack height in a PCB refers to the total thickness of the PCB stackup. It is the distance between the top and bottom layers of the PCB and includes the thickness of all the layers of conductive and insulating materials in the stackup.
14. What layers make up a PCB?
A PCB typically consists of alternating layers of conductive material (usually copper) and insulating material (typically FR-4 or other similar materials). The conductive layers are used for routing signals and power, while the insulating layers provide mechanical support and prevent short circuits between the conductive layers. The layers may also include vias, which are holes drilled through the layers and filled with conductive material to allow for vertical connections between the layers.
15. How thick is an 8-layer PCB stackup?
The thickness of an 8-layer PCB stackup depends on the specific requirements of the application. However, a common 8-layer stackup configuration is around 1.6mm thick, with each layer being around 0.02 inches thick [12].
16. How many layers for PCB are good?
The number of layers for a PCB depends on the specific requirements of the application.
PCBs with 6 or more layers are suitable for even more complex circuits with high-speed signals, and the number of layers can be increased as needed to meet the specific requirements of the application.
17. How thick is a 12-layer PCB?
The thickness of a 12-layer PCB depends on the specific requirements of the application. However, a common 12-layer stackup configuration is around 2.4mm thick, with each layer being around 0.02 inches thick.
18. Can a PCB have more than 2 layers?
Yes, a PCB can have more than 2 layers. The number of layers in a PCB can vary from 2 to over 50, depending on the specific requirements of the application.
19. What is a hybrid stackup?
For example, a hybrid stackup may include a combination of FR-4 and high-speed materials to provide optimal signal integrity and power distribution.
20. How thick is a 0.8 mm PCB core?
A 0.8 mm PCB core is around 0.031 inches thick [13].
21. How thick is a 24-layer PCB?
The thickness of a 24-layer PCB depends on the specific requirements of the application. However, a common 24-layer stackup configuration is around 4.8mm thick, with each layer being around 0.02 inches thick.
22. What is the advantage of layer stacking?
The advantage of layer stacking in a PCB is that it provides more space for routing signals and power, which allows for more complex circuits with higher pin-count components. Additionally, layer stacking can provide better signal integrity and power distribution compared to a PCB with fewer layers. Layer stacking also allows for more efficient use of space on the PCB, which can reduce the overall size of the PCB and improve manufacturability.
Useful Video: PCB Stack-Up and Build-Up
References
- https://www.mclpcb.com/capabilities/printed-circuit-board-layer-stack
- https://www.mclpcb.com/blog/pcb-layer-stackup-capabilities/
- https://www.pcbcart.com/pcb-capability/layer-stackup.html
- https://www.raypcb.com/advanced-circuits-stackup/
- https://www.pcbastore.com/blogs/pcb-stackup.html
- https://www.pcbgogo.com/knowledge-center/PCB_Layer_stack_up.html
- https://www.allpcb.com/6_layer_pcb.html
- https://www.nanotech-elektronik.pl/index.php/en/info/stackup
- https://resources.pcb.cadence.com/blog/2020-layer-stackup-management-techniques-in-pcb-design
- https://tempoautomation.com/blog/top-4-tips-for-pcb-stackup-design/
- https://www.sfcircuits.com/pcb-production-capabilities/pcb-stack-up
- https://www.protoexpress.com/kb/pcb-stack-up/
- https://www.twistedtraces.com/capabilities/pcb-stackups