
Harnessing the versatility of the Raspberry Pi, a credit card-sized computer celebrated for its affordability and adaptability, Homebridge brings a new dimension to your smart home experience. This guide delves into the intricacies of using Homebridge on the Raspberry Pi, offering a comprehensive walkthrough that empowers both tech enthusiasts and novices to seamlessly integrate and control a myriad of devices through a single, intuitive interface.
With a focus on clarity and practicality, we’ll guide you through each step with detailed instructions and insights, ensuring a well-rounded understanding of the Homebridge-Raspberry Pi synergy. Additionally, we’ll shed light on the benefits and potential pitfalls of this dynamic combination, helping you make informed decisions while tailoring your smart home to suit your preferences.
What Is Homebridge?
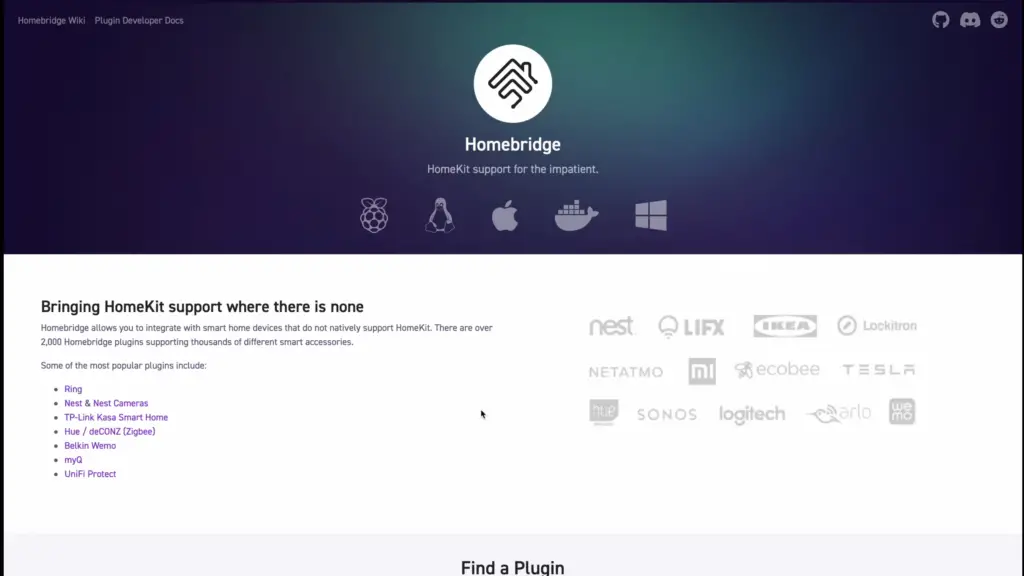
Homebridge is an open-source software project that allows you to integrate smart home devices and accessories that are not natively compatible with Apple’s HomeKit ecosystem into the HomeKit environment. HomeKit is Apple’s framework for controlling and managing smart home devices using the iOS Home app and Siri voice commands [1].
Many smart home devices on the market might not directly support HomeKit integration, as they might use different communication protocols or APIs. Homebridge acts as a bridge between these non-HomeKit devices and the HomeKit ecosystem, allowing you to control and monitor them using the Home app on your iOS device (iPhone, iPad, or Mac) and Siri voice commands.
Homebridge achieves this compatibility by emulating a HomeKit accessory and exposing the non-HomeKit device’s functionality through the HomeKit API. This way, the Home app and Siri can communicate with these devices just as if they were natively HomeKit-compatible.
Homebridge is highly customizable and extensible, thanks to its plugin-based architecture. Developers can create plugins that support various smart home devices and services, making it possible to integrate a wide range of devices, including lights, thermostats, cameras, switches, and more.
Configuration and Setup:
- Editing Configuration: You’ll need to configure Homebridge by editing a configuration file. This file defines the accessories and devices you want to expose to HomeKit;
- Installing Plugins: Depending on the devices you want to integrate, you’ll need to install the corresponding Homebridge plugins. These plugins expand Homebridge’s compatibility and allow it to communicate with various devices;
- Generating Accessory IDs: Each device you add to Homebridge needs a unique accessory ID. This ID ensures that devices are recognized correctly within the Home app;
- Pairing with HomeKit: Once Homebridge is configured and plugins are installed, you’ll need to pair it with HomeKit using the Home app. This involves scanning the HomeKit setup code provided during Homebridge setup [2];
Benefits of Using Homebridge:
- Device Compatibility: Homebridge extends HomeKit compatibility to a wide range of non-HomeKit devices, giving you greater flexibility in building your smart home;
- Unified Control: By integrating non-HomeKit devices into HomeKit, you can control all your smart home devices from a single app – the Home app. This simplifies the user experience and reduces the need for multiple device-specific apps;
- Voice Control: With Homebridge, non-HomeKit devices become compatible with Siri voice commands, allowing you to control them using natural language;
- Automation and Scenes: Homebridge enables you to incorporate non-HomeKit devices into your automation routines and scenes, creating more sophisticated and integrated smart home experiences;

Minimum Requirements to Use Homebridge
Hardware Requirements
To get started with Homebridge, you’ll need a compatible computer or single-board computer (SBC) such as a Raspberry Pi. The hardware requirements are relatively modest, making it accessible to a wide range of users.
Here’s what you’ll need:
- Computer or SBC: The heart of your Homebridge setup is the computer or SBC that will run the Homebridge software. This can be a spare computer, a Raspberry Pi, or any other device that meets the minimum requirements;
- Operating System: You’ll need an operating system installed on your computer or SBC. Common choices include Raspbian for Raspberry Pi or a Linux distribution like Ubuntu;
- Network Connection: A stable and reliable network connection is essential for Homebridge to communicate with your HomeKit devices and the Home app [3];
Software Requirements:
Once you have the hardware in place, you’ll need to set up the necessary software components to run Homebridge effectively. Here’s what you need:
- Node.js: Homebridge is built on Node.js, a JavaScript runtime. You’ll need to install Node.js on your chosen device to run Homebridge;
- Homebridge Software: Download and install the Homebridge software onto your chosen device. You can find detailed installation instructions on the Homebridge GitHub repository;
- Homebridge Plugins: Plugins are the magic behind Homebridge’s compatibility with a vast array of devices. Depending on the devices you want to integrate, you’ll need to install the relevant plugins. These plugins extend Homebridge’s capabilities and allow it to communicate with specific non-HomeKit devices;
- HomeKit Setup Code: When you set up Homebridge, you’ll be provided with a HomeKit setup code. This code is essential for adding Homebridge as a bridge within the Home app;
Why Homebridge On a Raspberry Pi?
Affordability and Accessibility
One of the standout reasons for choosing a Raspberry Pi to run Homebridge is its affordability. A Raspberry Pi is a tiny computer that packs a surprising amount of power for its size and cost. Compared to traditional computers or dedicated servers, a Raspberry Pi comes at a fraction of the price, making it an accessible option for a wide range of users. Whether you’re a tech enthusiast looking to tinker or a casual smart home user, the Raspberry Pi’s affordability ensures that Homebridge is within reach [4].
Compact and Energy-Efficient
The compact nature of the Raspberry Pi makes it an ideal fit for Homebridge. Its small form factor means it can be discreetly tucked away, whether that’s on a shelf, inside a cabinet, or even mounted behind a TV. This makes it easy to integrate into your home environment without adding clutter. Additionally, the Raspberry Pi is known for its energy efficiency. It consumes minimal power, making it an eco-friendly and cost-effective choice for running Homebridge around the clock.

DIY Enthusiast’s Dream
For DIY enthusiasts, the Raspberry Pi offers an exciting platform for experimentation and customization. Setting up Homebridge on a Raspberry Pi allows you to dive into the world of home automation, coding, and tinkering. You can explore different plugins, create custom scripts, and tailor your smart home experience to your preferences. The Raspberry Pi’s versatility empowers you to not only run Homebridge but also embark on countless other projects, making it a playground for innovation.
Low Maintenance
Running Homebridge on a Raspberry Pi is remarkably low maintenance. Once you’ve set up the software and configured your plugins, it can run reliably without frequent interventions. This hands-off approach is perfect for users who want the benefits of Homebridge without dedicating excessive time to upkeep. It’s a “set it and forget it” solution that lets you focus on enjoying your smart home rather than constantly managing the technical details.
Community and Support
The Raspberry Pi boasts a vibrant and passionate community of users and developers. This means you’re never far from assistance if you run into any issues while setting up or using Homebridge. Online forums, documentation, and user-contributed guides are readily available to help you navigate any challenges you might encounter. Whether you’re a newcomer or an experienced user, the Raspberry Pi community ensures that you’ll find the support you need.
Installing Homebridge On the Raspberry Pi:
1. Required Equipment:
- Raspberry Pi: A versatile, credit card-sized computer that serves as the foundation of your Homebridge setup;
- Micro SD Card: The storage for your Raspberry Pi’s operating system and Homebridge software;
- Power Supply: To provide reliable power to your Raspberry Pi;
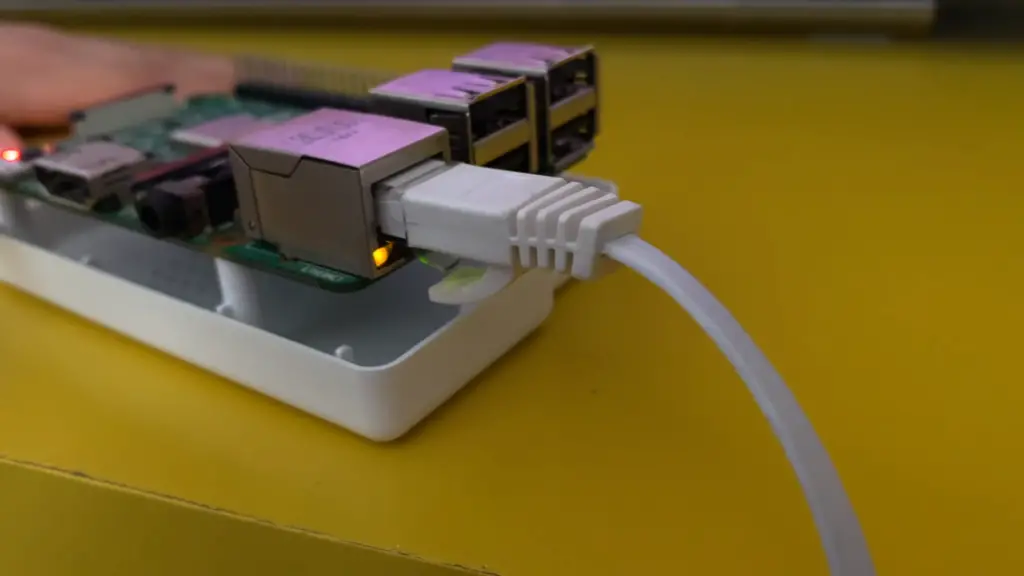
- Ethernet Cable or Wi-Fi: For network connectivity;
- Raspberry Pi Case: Protect your Raspberry Pi and keep it organized;
- USB Keyboard and Mouse: Useful for initial setup and configuration;
- HDMI Cable: For connecting your Raspberry Pi to a monitor during setup [5];
2. Installing Node:
Before you can install Homebridge, you need to make sure Node.js is up and running on your Raspberry Pi. Here’s how to do it:
- Installing Node: Begin by opening the terminal on your Raspberry Pi and entering the command to install Node.js;
- Update Node Package Manager: Make sure your Node Package Manager (npm) is up to date;
3. Installing Homebridge:
With Node.js in place, you can proceed to install Homebridge. Follow these steps:
- Start Homebridge Service: Use npm to install the Homebridge service;
- Configuring Homebridge and iOS: Configure the Homebridge settings, including the Homebridge username and PIN. This step ensures that your iOS device can communicate with Homebridge;
- Setting Up Accessories: Add accessories to Homebridge by editing the configuration file. Each accessory you add should have a unique identifier and a specific plugin associated with it;

4. Adding Scenes:
Scenes in Homebridge allow you to create predefined combinations of actions for multiple devices. Here’s how to get started with scenes:
- What Is a Scene: Understand the concept of scenes and how they enhance your smart home experience;
- Add a New Scene: Create a new scene within the Home app and configure it with the desired devices and actions;
- Example of a Scene: Explore a practical example of a scene, such as “Good Morning”, which turns on specific lights, adjusts the thermostat, and opens the blinds;
5. Using Homebridge on a Raspberry Pi:
- Some Home Automation Ideas: Discover creative and practical ways to automate tasks and enhance your daily routines using Homebridge;
- Share a Smart Home: Learn how to share your Homebridge setup with family members, enabling them to control and interact with devices seamlessly;
6. Running Homebridge
As you continue to use Homebridge, it’s important to be familiar with various aspects of its operation:
- Status: Monitor the status of your Homebridge setup to ensure everything is running smoothly;
- Plugins: Explore the wide range of Homebridge plugins available to extend compatibility and add support for various devices;
- Config: Make adjustments to your Homebridge configuration as your smart home setup evolves;
- Accessories: Manage and modify the accessories you’ve added to Homebridge as your device collection grows [6];
How To Update Homebridge:
1. Backup Your Configuration:
Before diving into the update process, it’s wise to create a backup of your Homebridge configuration. This step ensures that if anything goes wrong during the update, you can easily restore your settings and devices.
2. Check for Updates:
First, determine if a new version of Homebridge is available. Open a terminal window and run the following command: npm outdated -g homebridge
This command will display the current version of Homebridge and indicate if an update is available.
3. Update Homebridge
To update Homebridge to the latest version, use the following command: npm update -g homebridge
This command will fetch the latest version of Homebridge and update your installation.
4. Update Plugins
Homebridge relies on plugins to communicate with various devices. It’s important to keep your plugins up to date as well. To update all your Homebridge plugins, use the following command:
npm outdated -g –depth=0 | awk -F/ ‘/homebridge-/ {print $2}’ | xargs -I {} npm install -g homebridge-{}
This command will update all installed Homebridge plugins to their latest versions.
5. Restart Homebridge
After updating Homebridge and its plugins, you need to restart the Homebridge service for the changes to take effect. Use the following command:
sudo systemctl restart homebridge
6. Test Your Setup
After the update and restart, thoroughly test your Homebridge setup to ensure that all devices and accessories are functioning as expected. Check that your automation routines, scenes, and Siri voice commands are working seamlessly.
7. Monitor Compatibility
As you update Homebridge and its plugins, keep an eye on compatibility with your devices. Sometimes, updates might temporarily disrupt compatibility with certain accessories. In such cases, plugin developers usually release updates to address any issues.
8. Join the Community
Stay connected with the Homebridge community. Online forums, social media groups, and discussion boards are excellent places to learn about the latest updates, troubleshoot issues, and share experiences with other Homebridge users.
9. Regular Maintenance
Updating Homebridge is an ongoing process. It’s a good practice to check for updates and perform them regularly to ensure your smart home remains secure and optimized. Set a reminder to review your Homebridge setup every few months, or whenever you notice new updates becoming available [7].
How To Uninstall Homebridge?
1. Remove Accessories and Plugins
Before uninstalling Homebridge, it’s important to remove all accessories and plugins associated with it. Open your Homebridge configuration file and carefully remove or comment out each accessory entry. Similarly, disable or uninstall any Homebridge plugins you’ve added. This step ensures a clean removal process.
2. Stop the Homebridge Service
To uninstall Homebridge, you need to stop the Homebridge service. Open a terminal window and enter the following command:
sudo systemctl stop homebridge
This command will halt the Homebridge service on your system.
3. Uninstall Homebridge and Dependencies
Next, you’ll need to uninstall Homebridge and its dependencies. In your terminal, use the following command:
sudo npm uninstall -g homebridge
This command removes the Homebridge package from your global Node.js modules.
4. Remove Homebridge Directory
Homebridge creates a directory to store its configuration and other files. To completely remove Homebridge, you should delete this directory. Use the following command:
sudo rm -rf ~/.homebridge
Please exercise caution when using the rm -rf command, as it irreversibly deletes the specified directory and its contents.
5. Clean Up Node.js Packages
To ensure a thorough uninstallation, you can clean up any remaining Node.js packages that were associated with Homebridge. Run the following command [8]:
npm prune -g

6. Restart Your System
After completing the uninstallation process, it’s a good practice to restart your system to ensure all changes take effect.
7. Verify Uninstallation
To confirm that Homebridge has been successfully uninstalled, attempt to run Homebridge commands in your terminal. If Homebridge is truly uninstalled, the commands should not produce any output.
8. Check for Residual Files
While the above steps should remove the majority of Homebridge-related files, it’s wise to double-check for any residual files or configurations that may have been left behind. Search for any remaining Homebridge directories or files and manually delete them if necessary.
Homebridge Alternatives
1. OpenHAB
OpenHAB is a powerful open-source home automation platform that provides a unified interface for controlling and monitoring various smart devices. It supports a wide range of protocols, making it an excellent choice for integrating diverse devices into a single ecosystem. OpenHAB’s rule engine allows for complex automation scenarios, and its customizable user interface caters to both beginner and advanced users.
2. Domoticz
3. ioBroker
ioBroker is a comprehensive home automation solution that integrates devices from different manufacturers and platforms. Its modular architecture allows you to choose from a wide range of adapters to connect various devices. ioBroker’s visual rule engine simplifies automation tasks, making it accessible to users with varying levels of technical expertise.
4. FHEM
FHEM (stands for “Freundliche Hausautomatisierung und Energie-Messung”) is a flexible home automation platform that focuses on compatibility with a diverse array of devices. It supports a wide range of protocols and offers extensive customization options. FHEM’s scripting capabilities allow you to create intricate automation routines, making it a versatile choice for those seeking a high level of control.
5. Hubitat Elevation
Hubitat Elevation is a local home automation hub that focuses on privacy and security. It operates entirely within your home network, reducing reliance on cloud services. Hubitat supports a variety of protocols and devices, making it a suitable alternative for creating a robust smart home setup while maintaining data privacy.
Warnings About The Use Of Homebridge on Raspberry Pi:
Hardware Limitations
Raspberry Pi is a versatile and cost-effective platform, but it does have limitations in terms of processing power, memory, and storage. Running Homebridge and multiple plugins simultaneously can strain Raspberry Pi’s resources, leading to slower performance, lag, or even crashes. To mitigate these issues, carefully choose the plugins you install and avoid overloading the system [10].
Compatibility Issues
While Homebridge aims to enhance compatibility, not all plugins are created equal. Some plugins may not be well-maintained or may lack support for certain devices. This can result in issues such as devices not functioning properly, delayed responses, or even compatibility conflicts with other plugins. Before installing a plugin, research its compatibility and user reviews to ensure a reliable experience.
Configuration Challenges
Configuring Homebridge and its plugins requires a certain level of technical know-how. Editing configuration files, setting up accessories, and troubleshooting potential errors can be daunting for those unfamiliar with command-line interfaces and programming concepts. If you’re not comfortable with these tasks, you may face difficulties during setup and maintenance.
Frequent Updates
Homebridge and its plugins are actively developed to improve performance, add features, and enhance compatibility. While updates are beneficial, they can also introduce new bugs or compatibility issues. Regularly updating Homebridge without thoroughly testing the changes can disrupt your smart home setup and lead to unexpected issues.
Security Concerns
Running Homebridge on a Raspberry Pi exposes your home network to potential security risks. If not properly secured, unauthorized access to your smart home devices is a possibility. It’s crucial to follow best practices for network security, such as using strong passwords, enabling two-factor authentication, and keeping your Raspberry Pi’s operating system and Homebridge updated.
Power Interruptions
Raspberry Pi relies on a stable power source. Sudden power outages or fluctuations can cause corruption of the microSD card, leading to data loss or system crashes. Consider using an Uninterruptible Power Supply (UPS) or surge protector to safeguard your Raspberry Pi and smart home devices from power-related issues.
Regular Maintenance
Homebridge and Raspberry Pi require ongoing maintenance. As your smart home ecosystem evolves and updates are released, you’ll need to periodically check for plugin updates, compatibility changes, and system improvements. Neglecting regular maintenance can result in degraded performance or potential compatibility issues.
FAQ:
1. Can you run Homebridge on Raspberry Pi?
Yes, you can run Homebridge on a Raspberry Pi. The Raspberry Pi is a popular platform for running Homebridge due to its affordability, flexibility, and compatibility with various smart home devices.
2. How to get Homebridge on my Raspberry Pi?
To get Homebridge on your Raspberry Pi, follow these steps:
- Open a terminal on your Raspberry Pi;
- Install Node.js by running sudo apt-get install -y nodejs;
- Install Homebridge using npm with sudo npm install -g –unsafe-perm Homebridge;
- Create a configuration file by running sudo nano /var/lib/homebridge/config.json. Add your devices and settings to this file;
- Start Homebridge by typing Homebridge [11];
3. How to log into my Raspberry Pi Homebridge?
You can log into your Raspberry Pi Homebridge via SSH using the terminal or an SSH client. Use the IP address of your Raspberry Pi and the default username “pi” (unless you’ve changed it) to connect.
4. How to connect to Homebridge?
To connect to Homebridge, you need to use the Home app on your iOS device. Open the app, tap the “+” icon to add a new accessory, and select “Don’t Have a Code or Can’t Scan?” Choose your Homebridge instance from the list, and enter the Homebridge setup code.
5. How to set up Homebridge for HomeKit?
To set up Homebridge for HomeKit:
- Install Homebridge on your Raspberry Pi (see earlier instructions);
- Configure your devices and settings in the config.json file;
- Start Homebridge using the homebridge command;
- Open the Home app on your iOS device, tap the “+” icon, and add your Homebridge instance using the setup code;
- Assign devices to rooms and create automation routines within the Home app;
6. How to access Homebridge remotely?
You can access Homebridge remotely by setting up port forwarding on your router to allow external access to your Homebridge instance. This enables you to control your devices from outside your home network.
7. How does Homebridge work?
Homebridge acts as a bridge between non-HomeKit devices and the HomeKit ecosystem. It emulates HomeKit-compatible devices, allowing you to control non-compatible devices through the Home app and Siri.
8. How to manually start Homebridge?
You can manually start Homebridge by opening a terminal and typing homebridge.
9. How to use the Homebridge plugin?
To use a Homebridge plugin, install it using npm (npm install -g homebridge-plugin-name) and add its configuration to your config.json file [12].
10. What is the best platform to run Homebridge?
The Raspberry Pi is a popular and widely supported platform for running Homebridge, but you can also run it on other systems like Linux, macOS, or Windows.
11. Which model is the Raspberry Pi for Homebridge?
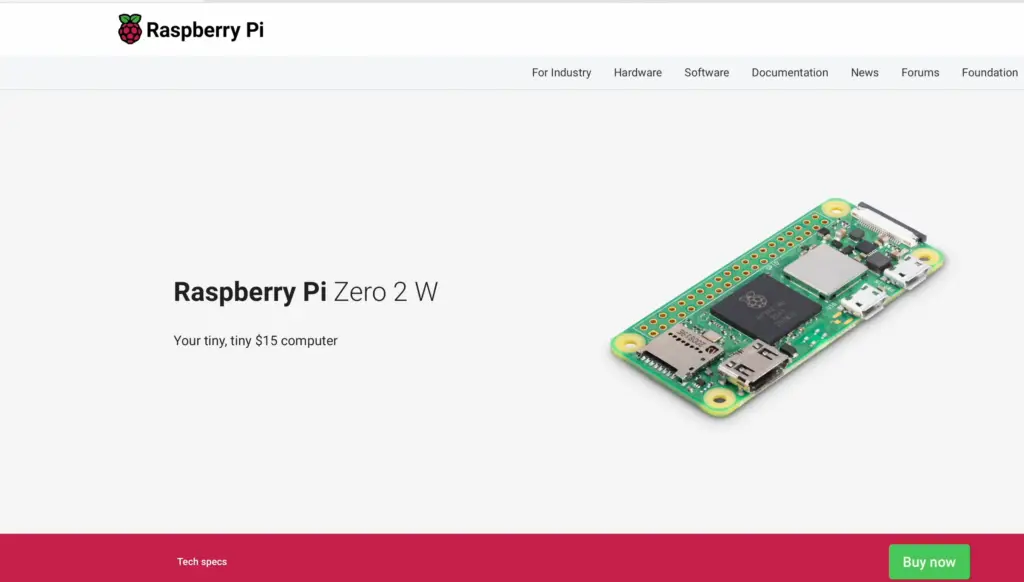
Various Raspberry Pi models, including Raspberry Pi 3, Raspberry Pi 4, and Raspberry Pi Zero, can be used for Homebridge. Raspberry Pi 4 is recommended for smoother performance.
12. How reliable is Homebridge?
Homebridge’s reliability depends on factors like hardware, configuration, and plugins used. With proper setup and maintenance, it can be quite reliable.
13. Which is better – Homebridge or Home Assistant?
Homebridge and Home Assistant serve different purposes. Homebridge focuses on HomeKit compatibility, while Home Assistant offers extensive automation and device integration capabilities. The choice depends on your needs.
14. What is the minimum Raspberry OS version for Homebridge?
Homebridge typically runs on the Raspbian OS (now known as Raspberry Pi OS). Make sure you have an up-to-date version of the OS for compatibility.
15. Can you run Homebridge on Raspberry Pi Zero?
Yes, you can run Homebridge on a Raspberry Pi Zero, but it’s recommended to use a more powerful model like Raspberry Pi 3 or 4 for better performance.
16. Is a 2GB SD card enough for Raspberry Pi?
A 2GB SD card might be sufficient for basic use, but a larger capacity card (e.g., 8GB or more) is recommended to accommodate the operating system, Homebridge, and additional software.
17. What is better – HOOBS vs Homebridge?
HOOBS (Homebridge Out Of the Box) is a user-friendly pre-packaged version of Homebridge that simplifies setup. It can be a good option for those who prefer a more streamlined experience.
18. What is the system requirement for Homebridge?
The system requirements for Homebridge depend on the number of devices and plugins you plan to use. More devices and plugins may require a more powerful Raspberry Pi model.
19. How to make my own Homebridge plugin?
You can create your own Homebridge plugin by following the Homebridge Plugin Development Guide available on the Homebridge GitHub repository.
20. What is a HomeKit bridge?
A HomeKit bridge, like Homebridge, is a device or software that connects non-HomeKit devices to the HomeKit ecosystem, allowing you to control them using the Home app and Siri.
Useful Video: Easy Step By Step Guide to Install Homebridge on a Raspberry Pi
References
- https://www.makeuseof.com/how-to-install-homebridge-on-raspberry-pi/
- https://github.com/homebridge/homebridge/wiki/Install-Homebridge-on-Raspbian
- https://pimylifeup.com/raspberry-pi-homebridge/
- https://linuxhint.com/install-homebridge-raspberry-pi/
- https://howchoo.com/pi/set-up-homebridge-on-a-raspberry-pi
- https://medium.com/@gtfunes/homebridge-hub-using-a-raspberry-pi-2c4c679b04fa
- https://levelup.gitconnected.com/set-up-homebridge-on-raspberry-pi-with-docker-3ad07961a036
- https://all3dp.com/2/homebridge-raspberry-pi-tutorial/
- https://eloutput.com/en/productos/domotica/raspberry-pi-homebridge-homekit/
- https://thomas.vanhoutte.be/miniblog/guide-installing-homebridge-on-a-raspberry-pi/
- https://www.reddit.com/r/homebridge/comments/vupgj3/whats_the_best_way_for_a_raspberry_pi_homebridge/
- https://www.wikihow.com/Set-Up-Homebridge