

In recent years, developers have been increasingly drawn to microservices and containerization as a way of managing and deploying applications. Kubernetes has become the go-to platform for container orchestration, providing an efficient and scalable solution for managing these complex architectures.
However, setting up a Kubernetes cluster can be a daunting task, requiring specialized hardware and a significant amount of resources. This is where Raspberry Pi comes in.
Raspberry Pi is a low-cost, credit card-sized computer that can be used for a variety of projects. With its small form factor and affordable price, it has become a popular choice among tech enthusiasts and developers alike.
In this guide, we will show you how to run Kubernetes on a Raspberry Pi using K3s, a lightweight distribution of Kubernetes designed specifically for IoT and edge computing devices. Whether you’re a hobbyist looking to experiment with Kubernetes or a developer in need of a cost-effective solution for running containers, this guide is for you.
Configure Raspberry Pi MicroSD
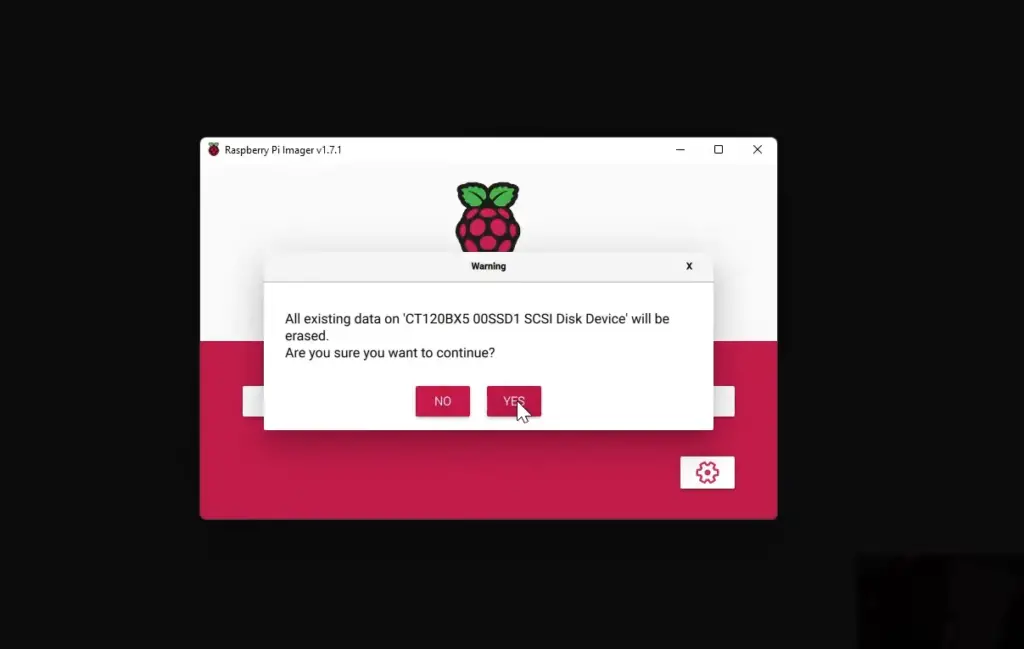
Install the OS for your Raspberry Pi
To get started on your Raspberry Pi project, you will need a Raspberry Pi 3 or a newer model. Additionally, make sure you have a MicroSD card with a minimum of 8GB storage capacity. When it comes to choosing an operating system for your Raspberry Pi, there are various options available. However, we highly recommend using Raspbian Lite, which is a lightweight version of the widely-used Debian-based OS. This particular version is specifically designed to optimize performance on the Raspberry Pi.
SSH connection to Raspberry Pi
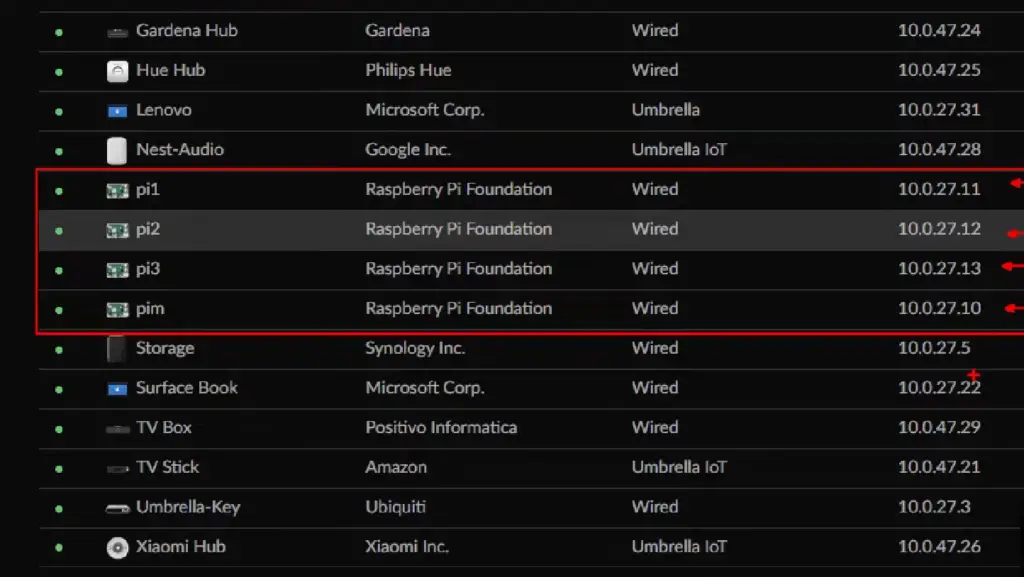
Once you have successfully configured your MicroSD card and inserted it into your Raspberry Pi, the next step is to connect to it via SSH. This will enable you to access and control your Raspberry Pi remotely. To do this, you’ll need to find out the IP address of your device.
To obtain the IP address, you can use a tool like Nmap, which is a network scanning tool that will help you locate your Raspberry Pi on the network. Once you have obtained the IP address, you can use an SSH client like Putty to connect to your device. Now, you are ready to begin setting up Kubernetes on your Raspberry Pi. [2]
Wi-Fi connection configuration
To connect your Raspberry Pi to a Wi-Fi network, you can follow these steps:
- Start by editing the wpa_supplicant.conf file on the MicroSD card. This file contains the necessary information to establish a connection.
- Within the file, you will need to provide the name (SSID) of your Wi-Fi network and its corresponding password. This ensures that your Raspberry Pi can authenticate and join the network.
- Once you have made the required changes, save the file and securely insert the MicroSD card into your Raspberry Pi.
- Power on your Raspberry Pi device, and it will automatically establish a connection to the specified Wi-Fi network. [2]
By carefully following these steps, you’ll be able to seamlessly connect your Raspberry Pi to a Wi-Fi network and enjoy uninterrupted access to the internet.
Setup Raspberry Pi headless
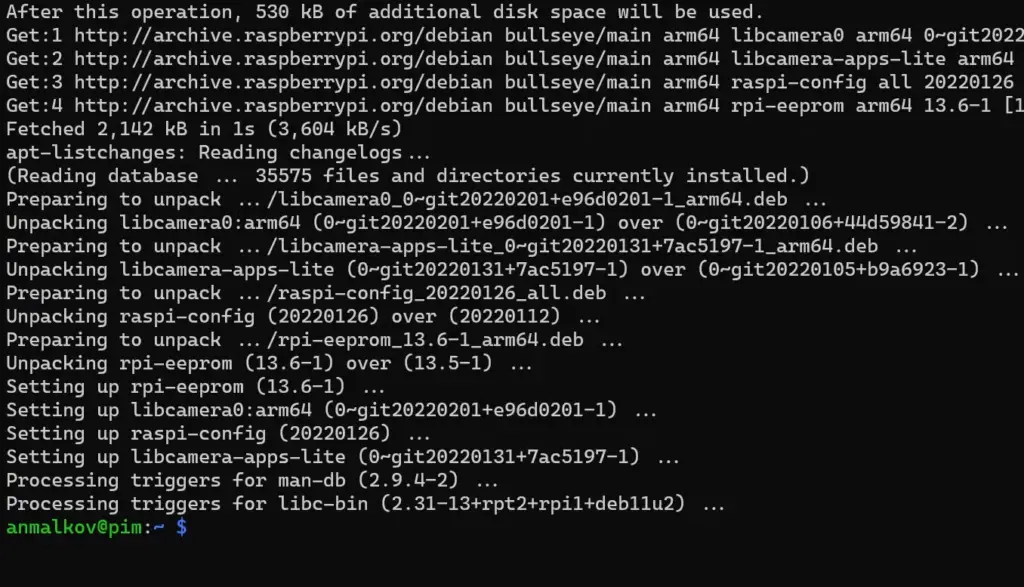
Before proceeding with the installation of K3s, you will need to ensure that your Raspberry Pi is equipped with the necessary packages. These packages are essential for a smooth setup and include:
- Curl: A versatile command-line tool that allows you to effortlessly transfer data to and from servers. It provides a seamless way to fetch files, make HTTP requests, and perform various network-related tasks.
- Git: An indispensable version control system that simplifies managing and tracking changes in your codebase. With Git, you can easily collaborate with others, maintain different versions of your software, and roll back to previous states if needed.
- To install these packages on your Raspberry Pi, you can utilize the following command:
- sudo apt-get install curl git
Once these packages have been successfully installed, you are ready to move forward with the next step of setting up K3s. [1]
Setup k3s cluster
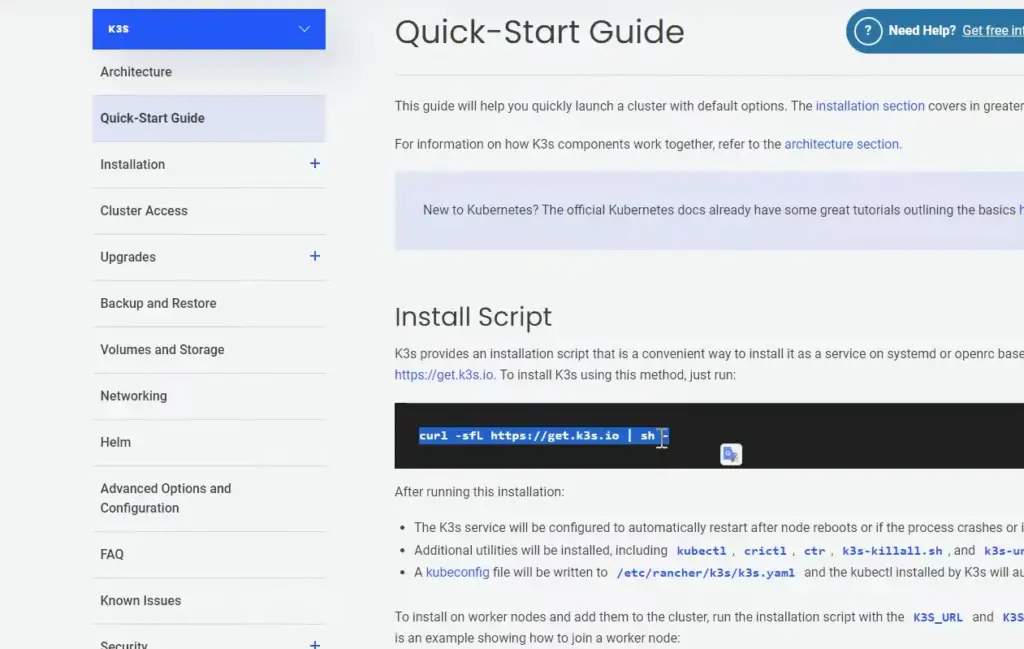
K3s is a lightweight and easy-to-use distribution of Kubernetes that provides all the necessary components to set up a fully functioning cluster on a Raspberry Pi. To get started with K3s, you’ll need to follow these steps:
- Begin by cloning the k3s repository onto your Raspberry Pi device.
- git clone https://github.com/rancher/k3s.git
- Next, navigate to the k3s directory and run the installation script.
- cd k3s && sudo ./install.sh
- This will initiate the installation process and automatically set up all the necessary components for your K3s cluster. Once completed, you can verify the status of your cluster using the following command:
- sudo kubectl get nodes
If everything was set up correctly, you should see your Raspberry Pi listed as a node in the cluster. This means that your K3s cluster is now ready to use. [1]
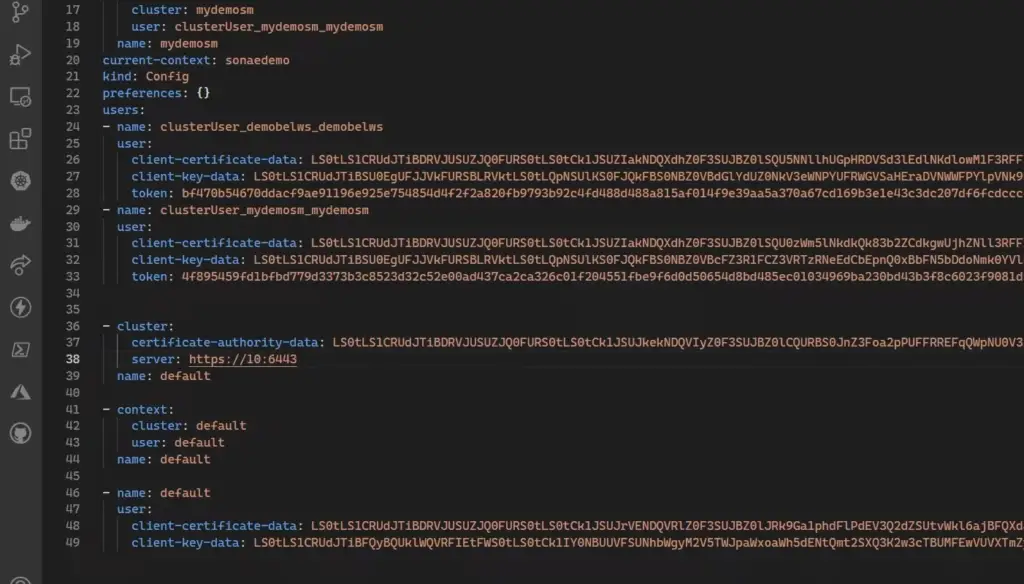
Configure kubectl on client machine
To manage your K3s cluster from a client machine, you will need to configure the `kubectl` command-line tool. This powerful tool allows you to access and control your Kubernetes cluster remotely with ease.
To get started, follow these step-by-step instructions:
- Begin by installing the `kubectl` binary on your client machine. This can be done by downloading the appropriate version for your operating system and following the installation instructions.
- Once `kubectl` is installed, you’ll need to copy over the K3s configuration file from your Raspberry Pi to the client machine. This file contains the necessary information to connect to your K3s cluster. You can use `scp` or any other file transfer tool of your choice to securely transfer the file.
- After transferring the configuration file, it’s time to set the `KUBECONFIG` environment variable on your client machine. This variable informs `kubectl` about the location of the configuration file. By properly setting this variable, you ensure that `kubectl` knows how to connect to your K3s cluster. [1]
With these steps completed, you are now ready to take full advantage of `kubectl` to manage your K3s cluster remotely. Use `kubectl` commands to deploy, manage, and monitor your applications with confidence and efficiency. Happy K3s cluster management!
Use case 0: functional test
As a developer, you understand the paramount importance of thoroughly testing your code before deploying it to the production environment. With K3s running seamlessly on Raspberry Pi, you can create a highly accessible and remarkably cost-effective test environment that closely mirrors your actual production setup.
By deploying your application onto your K3s cluster, you can meticulously run comprehensive functional tests to meticulously verify its behavior and performance. This allows you to gain the utmost confidence in the stability and reliability of your code before taking the bold step of deploying it to the production environment. In the event that any issues or discrepancies arise during testing, you have the freedom to make necessary adjustments and iterate until you achieve the desired results that truly satisfy your exacting standards.
This meticulous testing and validation process ensures that your code is thoroughly vetted and optimized for the production environment, significantly reducing the risk of potential errors or malfunctions that could adversely impact your end-users’ experience. By investing the time and effort into this rigorous testing phase, you can foster an environment of continuous improvement and deliver exceptional software solutions that consistently exceed expectations. [1]
Use case 1: deploy a MQTT broker using Helm
With K3s and its vast ecosystem of tools and utilities, deploying complex applications and services to your Raspberry Pi cluster can be effortless. One such powerful tool is Helm – a package manager for Kubernetes that enables you to easily deploy, manage, and update applications on your cluster.
As an example, we will show you how to deploy a popular MQTT broker called Mosquitto using Helm on your K3s cluster. MQTT (Message Queue Telemetry Transport) is a lightweight messaging protocol commonly used in the Internet of Things (IoT) domain for communication between devices and applications.
To deploy Mosquitto using Helm, you can follow these steps:
- Begin by setting up the `kubectl` command-line tool as discussed previously in this document. This will allow you to interact with your K3s cluster from your client machine.
- Next, add the Helm repository that contains the charts (packages) for Mosquitto by running this command:
- helm repo add stable https://kubernetes-charts.storage.googleapis.com/
- Once the repository has been added, update it using this command:
- helm repo update
- You are now ready to install Mosquitto on your K3s cluster using Helm. Execute the following command to start the installation process:
- helm install mqtt-broker stable/mosquitto
This will deploy a single instance of Mosquitto as well as an ingress resource that exposes the broker outside of the cluster.
With Helm and K3s, you can quickly and efficiently deploy your favorite applications and services onto your Raspberry Pi cluster. This provides you with the flexibility to utilize a wide range of tools and technologies that are commonly used in Kubernetes environments, without any compatibility issues or limitations imposed by traditional cloud providers. [3]
Use case 2: monitoring app on each Raspberry Pi
In a production environment, monitoring the health and performance of your applications is essential to maintain their reliability and availability. With K3s running on your Raspberry Pi cluster, you can leverage Prometheus – an open-source monitoring solution – to gain valuable insights into various metrics and statistics related to your applications.
With Prometheus, you can easily set up custom dashboards that display real-time data on the behavior and performance of your applications. Additionally, you can configure alerts and notifications to be triggered in case there are any unexpected or alarming changes in these metrics. This allows you to proactively identify and address potential issues before they escalate into full-blown problems that could negatively impact your end-users.
To utilize Prometheus on your K3s cluster, follow these steps:
- Begin by creating a new namespace on your K3s cluster using `kubectl`:
- kubectl create namespace monitoring
- Next, add the Prometheus Helm chart repository to your Helm configuration:
- helm repo add prometheus-community https://prometheus-community.github.io/helm-charts
- Install Prometheus into the newly created namespace using this command:
- helm install prometheus prometheus-community/prometheus –namespace monitoring
- To access the Prometheus dashboard, create an ingress resource using this command:
- kubectl apply -f https://raw.githubusercontent.com/kubernetes/dashboard/v2.0.4/aio/deploy/recommended.yaml
This will deploy the Kubernetes Dashboard as well as a NodePort service that you can access on your Raspberry Pi nodes.
With Prometheus, you now have the ability to monitor your applications and services running on K3s with ease. This empowers you to gain valuable insights into the health and performance of your cluster, allowing you to take proactive measures to ensure reliable and efficient operation. [3]
Use case 3: LED strip on one specific device
In addition to deploying complex applications and monitoring their performance, K3s also enables you to interact with devices connected to your Raspberry Pi cluster. As an example, we will demonstrate how you can control an LED strip connected to one specific device on your cluster using Kubernetes.
To enable this functionality, you will need to install a tool called GPIO Controller on your Raspberry Pi nodes. This tool allows you to manage and manipulate the General Purpose Input/Output (GPIO) pins on specific devices using Kubernetes APIs.
To control an LED strip connected to one of your nodes, follow these steps:
- Begin by installing the GPIO Controller onto your Raspberry Pi node using `kubectl`:
- kubectl apply -f https://raw.githubusercontent.com/mohatb/gpio-controller/master/install.yaml
- Once the controller has been successfully installed, you will need to specify the GPIO pins that are connected to your LED strip in a ConfigMap. Create this ConfigMap using this command:
- kubectl create configmap led-cfg –from-literal=pins=”
- Once the ConfigMap has been created, you can use it to deploy a pod that controls the LED strip using this command:
- kubectl apply -f https://raw.githubusercontent.com/mohatb/gpio-controller/master/deployment.yaml
- Finally, to control the LED strip, you can send API requests using `curl` or any other HTTP client. For example:
- curl -X PUT “http://:/gpio/?state=on”
This will turn on the LED connected to the specified GPIO pin.
With K3s and GPIO Controller, you can interact with devices connected to your Raspberry Pi nodes using familiar Kubernetes APIs. [3]
Ideas for further use cases
With K3s, the possibilities for deploying and managing applications on your Raspberry Pi cluster are virtually endless. Here are a few ideas for further use cases that you can explore:
- Deploying a custom web application or API service using Docker and Kubernetes.
- Setting up a CI/CD pipeline to automate the deployment of your applications onto your cluster.
- Utilizing Istio to implement advanced networking and security features for your applications.
- Creating a Kubernetes cluster federation using kubefed, allowing you to manage multiple clusters as a single entity.
Don’t limit yourself to these ideas – with the power of K3s on your Raspberry Pi, you have the freedom to experiment with different tools, technologies, and use cases until you find the perfect fit for your needs. [3]
FAQ
Is K3s compatible with K8s?
Yes, K3s is fully compatible with Kubernetes (K8s). In fact, it is a lightweight distribution of K8s that is specifically designed to run on resource-constrained devices such as Raspberry Pi. It offers all the same features and capabilities as K8s, but with a smaller footprint and simplified installation process. This makes it an ideal choice for running Kubernetes on low-powered devices.
Is K3s good for production?
Yes, K3s is a suitable option for production environments. It is lightweight and optimized for resource-constrained devices, making it an ideal choice for running Kubernetes on Raspberry Pi clusters. However, as with any technology, it is important to thoroughly test and evaluate its performance and capabilities before using it in a production setting.
Can you install Kubernetes on Raspberry Pi?
Yes, you can install Kubernetes on Raspberry Pi using K3s. K3s is a lightweight distribution of Kubernetes that is specifically designed to run on resource-constrained devices such as Raspberry Pi. It offers all the same features and capabilities as Kubernetes but with a smaller footprint and simplified installation process. This makes it an ideal choice for deploying and managing applications on Raspberry Pi clusters.
Useful Video: i built a Raspberry Pi SUPER COMPUTER!! // ft. Kubernetes (k3s cluster w/ Rancher)
Conclusion
In conclusion, K3s provides a lightweight and user-friendly solution for running Kubernetes on Raspberry Pi clusters. With its simple installation process, low resource consumption, and compatibility with Kubernetes tools and APIs, K3s enables you to deploy and manage complex applications as well as interact with devices connected to your cluster. Furthermore, the possibilities for use cases are endless – from deploying custom web applications to setting up advanced network and security features. With K3s, you have the freedom to explore and experiment until you find the perfect fit for your needs. So why wait? Start building your Raspberry Pi cluster with K3s today and unlock a whole new world of possibilities!
References
- https://medium.com/thinkport/how-to-build-a-raspberry-pi-kubernetes-cluster-with-k3s-76224788576c
- https://rpi4cluster.com/k3s/k3s-kube-setting/
- https://www.padok.fr/en/blog/raspberry-kubernetes
- https://opensource.com/article/20/3/kubernetes-raspberry-pi-k3s