
Introduction
The world of microcontrollers has witnessed remarkable advancements in recent years, with an array of options available for developers and enthusiasts. Among these, the ATtiny85 microcontroller, produced by Microchip Technology Inc., has emerged as a popular choice due to its compact size, cost-effectiveness, and impressive functionality.
However, programming the ATtiny85 can be a daunting task for those accustomed to the Arduino platform. Fortunately, Arduino enthusiasts can harness the power of their familiar development environment to program the ATtiny85, unleashing its full potential and expanding the scope of their projects.
In this comprehensive guide, we will delve into the intricacies of programming the ATtiny85 using Arduino, providing step-by-step instructions and essential insights to help you master this exciting combination. Whether you’re a hobbyist seeking to explore the possibilities of a smaller microcontroller or a professional developer aiming to create compact and efficient projects, understanding how to program the ATtiny85 with Arduino is a valuable skill that can open up a world of possibilities.
What Is the ATtiny85 Board?
However, it has fewer IO pins and less memory than an Arduino board. Despite this, it can still be used for a wide range of applications, and it is particularly useful for projects where space and power consumption are a concern.
The ATtiny85 board is often used by hobbyists and electronics enthusiasts as an alternative to the Arduino board. There are many different versions of the ATtiny85 board available, and they can be programmed using a variety of programming languages and tools.
ATtiny85 Specifications
The ATtiny85 microcontroller, developed by Microchip Technology Inc., is a powerful yet compact device that offers a wide range of features suitable for various embedded applications. Despite its small size, it boasts impressive capabilities that make it a popular choice among hobbyists and professionals alike.
Let’s explore the key specifications of the ATtiny85:
- Architecture: The ATtiny85 is based on the 8-bit RISC (Reduced Instruction Set Computer) architecture, offering a balance between performance and power efficiency;
- Flash Memory: It comes equipped with 8 kilobytes (8KB) of in-system self-programmable flash memory, which allows for the storage of program code and data;
- EEPROM: The ATtiny85 includes 512 bytes of Electrically Erasable Programmable Read-Only Memory (EEPROM). This non-volatile memory is suitable for storing data that needs to be retained even when power is disconnected;
- SRAM: It features 512 bytes of internal Static Random-Access Memory (SRAM), which is used for temporary data storage during program execution;
- GPIO Pins: The ATtiny85 offers 6 General-Purpose Input/Output (GPIO) pins, allowing for versatile digital and analog input/output operations. These pins can be configured to serve various functions, including digital I/O, analog input, PWM (Pulse Width Modulation) output, and more;
- Timers/Counters: The microcontroller incorporates two 8-bit Timer/Counter modules, each with different modes of operation, such as normal mode, PWM mode, and more. These timers enable precise timing and control in applications requiring time-sensitive operations;
- Communication: While the ATtiny85 lacks built-in hardware support for standard communication protocols like UART (Universal Asynchronous Receiver-Transmitter), it can still communicate using software-based techniques such as SoftwareSerial or I2C;
- Clock Speed: The ATtiny85 operates at a clock speed of up to 20 MHz, allowing for efficient execution of program instructions;
- Low Power Consumption: The microcontroller is designed with power efficiency in mind, featuring multiple power-saving modes and a low-power idle mode, making it suitable for battery-powered or energy-conscious applications;
- Package Options: The ATtiny85 is available in different package options, including 8-pin DIP (Dual In-line Package) and 8-pin SOIC (Small Outline Integrated Circuit), providing flexibility in terms of board design and integration [2];
With its compact form factor and impressive feature set, the ATtiny85 offers developers a versatile platform for a wide range of projects, from small-scale embedded systems to wearable electronics, IoT (Internet of Things) devices, and beyond. Its affordability, ease of use, and compatibility with the Arduino ecosystem make it an excellent choice for both beginners and experienced electronics enthusiasts.
What Is Arduino?
It consists of both hardware and software components designed to simplify the process of creating interactive projects and prototypes. Arduino provides an accessible and user-friendly platform for individuals with little to no background in electronics or programming, enabling them to bring their ideas to life.
At its core, Arduino consists of a microcontroller board, which serves as the brain of the system, and an integrated development environment (IDE) that facilitates programming and uploading code to the board. The Arduino IDE is a software tool that runs on computers and supports a simplified version of the C++ programming language.
The Arduino board comes in various models and configurations, each with its own set of features and capabilities. The most commonly used board is the Arduino Uno, which is equipped with a microcontroller, digital and analog input/output pins, power connectors, a USB interface, and other essential components. Other Arduino boards, such as the Arduino Mega or Arduino Nano, offer additional functionalities, more input/output pins, and different form factors to suit specific project requirements.
One of the key strengths of Arduino is its vast community of users, who actively contribute to the platform by sharing projects, tutorials, libraries, and code examples. This collaborative environment fosters creativity, knowledge sharing, and problem-solving. Arduino’s open-source nature also allows users to modify and customize the hardware and software according to their specific needs [3].
With Arduino, users can interface with various electronic components and sensors, such as LEDs, motors, buttons, displays, and many others, enabling the creation of interactive projects ranging from simple LED blinking to complex robotics and home automation systems. Arduino’s versatility and ease of use make it an ideal choice for educational purposes, rapid prototyping, and even professional applications.
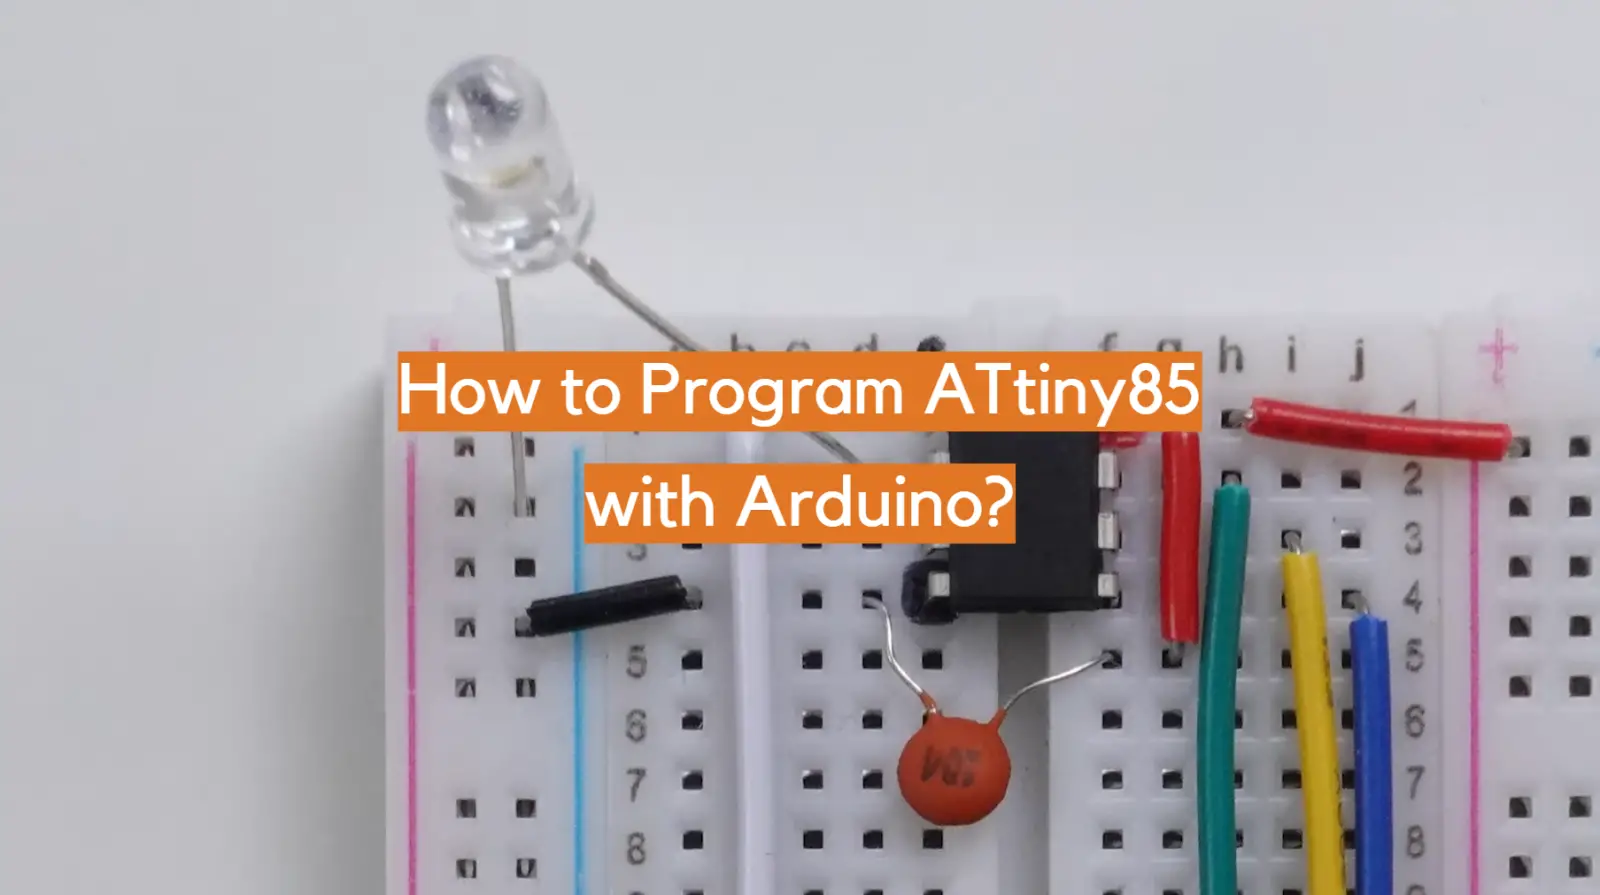
ATtiny85 Arduino Programming Tutorial
Microcontrollers have become essential tools for electronics enthusiasts, hobbyists, and professionals alike. Their ability to control and interact with the physical world has opened up a plethora of possibilities for creative projects.
One such microcontroller, the ATtiny85, offers compactness and versatility that make it an excellent choice for various applications. In this tutorial, we will explore how to program the ATtiny85 using the Arduino IDE, enabling you to unlock its full potential.
What You’ll Need:
- ATtiny85 microcontroller;
- Arduino Uno or any other Arduino board;
- Breadboard and jumper wires;
- USB cable for Arduino board;
- LED and a resistor (around 220 ohms);
- A computer with the Arduino IDE installed;
Pair the ATtiny85 with the Arduino IDE
To program the ATtiny85 using the Arduino IDE, we need to establish a connection between the ATtiny85 and an Arduino board acting as a programmer. Follow these steps to get started:
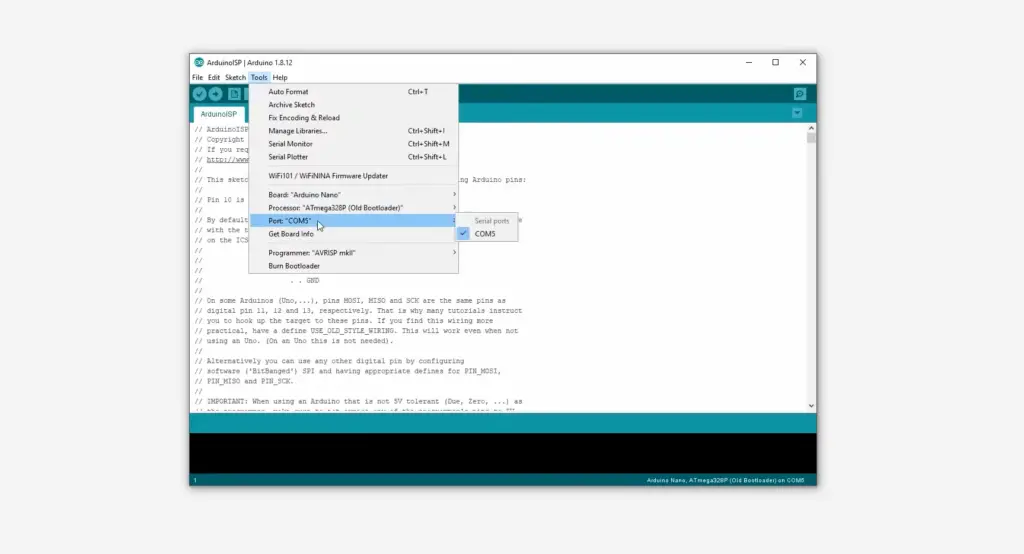
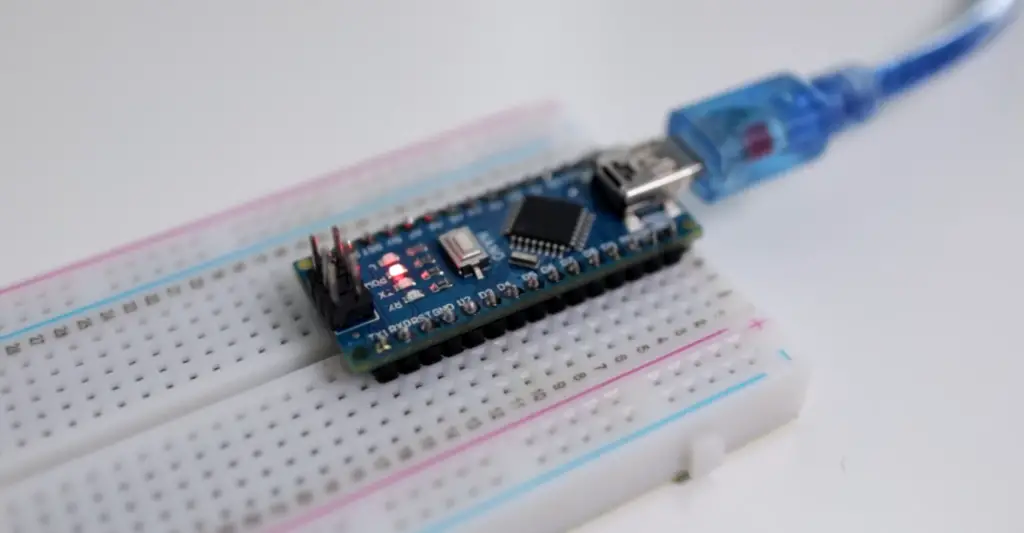
- Connect your Arduino board to your computer using the USB cable and open the Arduino IDE;
- In the Arduino IDE, go to File > Examples > ArduinoISP and open the ArduinoISP sketch;
- Upload the ArduinoISP sketch to your Arduino board by clicking on the Upload button;
- Once the upload is complete, disconnect the Arduino board from the computer;
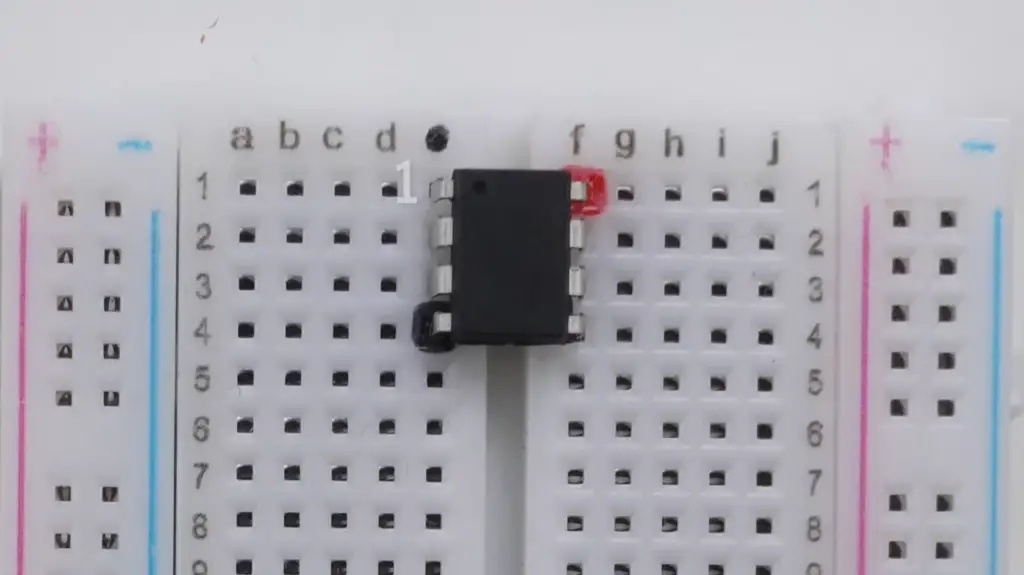
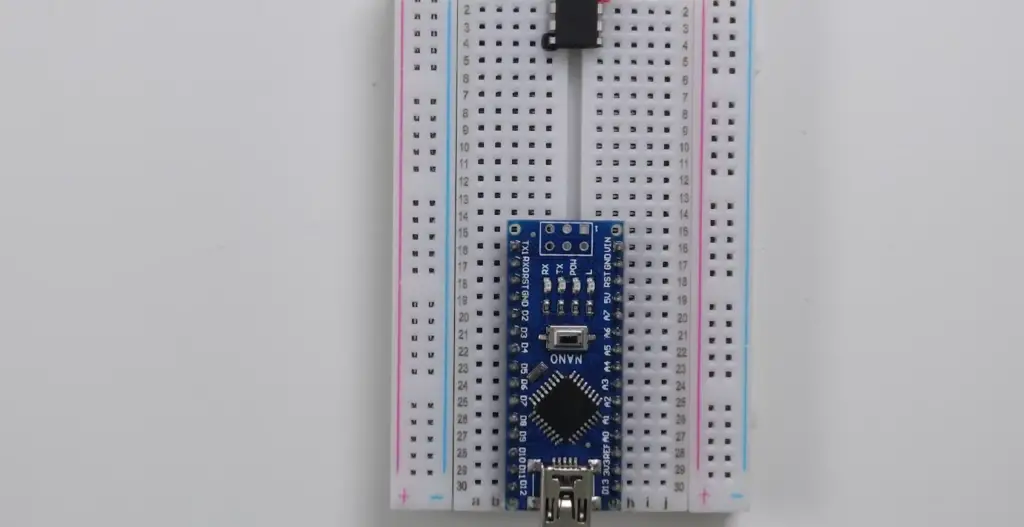
Now, connect the ATtiny85 to the Arduino board as follows:
- Pin 1 (RESET) of Arduino to Pin 1 of ATtiny85;
- Pin 10 (SS) of Arduino to Pin 5 of ATtiny85;
- Pin 11 (MOSI) of Arduino to Pin 6 of ATtiny85;
- Pin 12 (MISO) of Arduino to Pin 7 of ATtiny85;
- Pin 13 (SCK) of Arduino to Pin 8 of ATtiny85;
- Connect a 10uF capacitor between RESET and GND on the Arduino board to enable automatic reset during programming;
- Finally, connect your Arduino board back to the computer using the USB cable [4];
With the physical connections in place, we can now move on to programming the ATtiny85.
Program the ATtiny85 with Arduino
To program the ATtiny85, we need to follow a series of steps to set up the Arduino IDE correctly. Here’s what you need to do:
1) Open the Arduino IDE and go to File > Preferences
In the Preferences window, find the Additional Boards Manager URLs field and paste the following URL: raw.githubusercontent.com/damellis/attiny/ide-1.6.x-boards-manager/package_damellis_attiny_index.json
2) Click OK to close the Preferences window
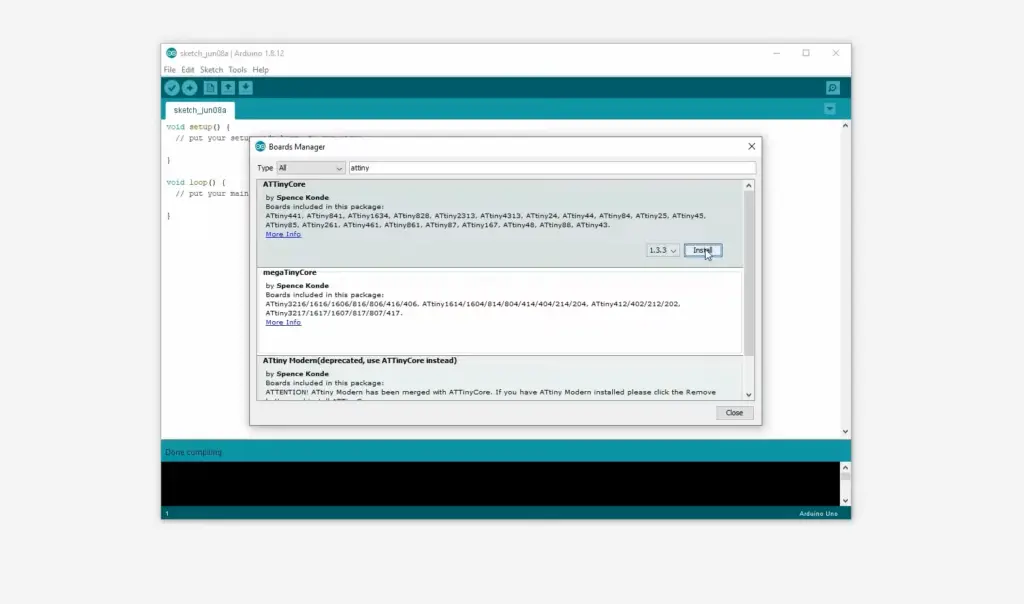
Go to Tools > Board > Boards Manager. In the Boards Manager window, type “attiny” in the search bar
Look for the attiny package and click the Install button. This package contains the necessary files to work with the ATtiny series.
After the installation is complete, go to Tools > Board and select the appropriate ATtiny entry for your specific chip. For example, choose ATtiny25/45/85.
3) Next, go to Tools > Clock and select the appropriate clock speed for your ATtiny85
The default is usually 1 MHz, but you can choose different values based on your specific requirements.
Now, go to Tools > Programmer and select Arduino as ISP.
You are now ready to program the ATtiny85. To verify everything is working correctly, let’s upload a simple Blink sketch. Go to File > Examples > Basics > Blink.
4) In the Blink Sketch
In the Blink sketch, make sure to change the LED pin to one of the ATtiny85’s available pins. For example, you can use Pin 0 (physical pin 5). Replace LED_BUILTIN with 0.
Click on the Upload button to compile and upload the Blink sketch to the ATtiny85. If all goes well, you should see the LED connected to Pin 0 on the ATtiny85 blinking at the specified interval [4].
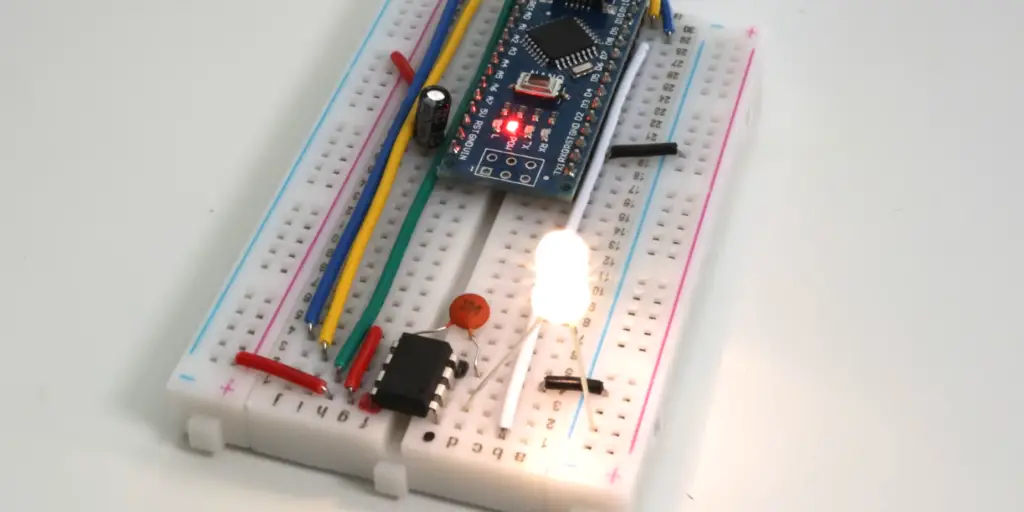
Program the ATtiny85 to Make an LED Blink
In this section, we will build upon the basic Blink sketch and add some additional functionality to control the LED connected to the ATtiny85. Follow these steps:
- Connect the long leg of an LED to Pin 0 (physical pin 5) of the ATtiny85;
- Connect the shorter leg of the LED to the ground (GND) pin on the ATtiny85 through a resistor (around 220 ohms) to limit the current;
- Open a new sketch in the Arduino IDE and save it with an appropriate name;
Add the following code to the setup function:
void setup() {
pinMode(0, OUTPUT); // Set Pin 0 as OUTPUT
}
Now, let’s make the LED blink at a specific interval. Add the following code to the loop function:
void loop() {
digitalWrite(0, HIGH); // Turn the LED on
delay(1000); // Wait for 1 second
digitalWrite(0, LOW); // Turn the LED off
delay(1000); // Wait for 1 second
}
Click on the Upload button to compile and upload the sketch to the ATtiny85. The LED connected to Pin 0 should now blink on and off at a 1-second interval.
You can experiment with different delay times to change the blink rate and create various patterns with the LED. This simple example demonstrates how to control the ATtiny85’s pins and create custom behaviors for your projects [6].
Advanced Programming with ATtiny85
The ATtiny85 offers more than just blinking LEDs. It has additional features, such as analog input, PWM output, and timers, which allow for more advanced functionality.
Here are some topics you can explore to further enhance your ATtiny85 projects:
- Analog Input: Learn how to read analog values from sensors connected to ATtiny85’s analog input pins. This opens up possibilities for reading values such as light intensity, temperature, or other analog signals;
- PWM Output: Discover how to generate Pulse Width Modulation signals on specific pins of the ATtiny85. PWM signals are useful for controlling motors, servos, or dimming LEDs;
- Timers and Interrupts: Explore the ATtiny85’s timers and interrupts to create precise timing, measure intervals, or trigger actions based on specific events;
- Communication: Although the ATtiny85 lacks built-in hardware support for communication protocols like UART or I2C, you can still implement software-based communication to interact with other devices or sensors

FAQ
1. Can you program ATtiny85 with an Arduino IDE?
Yes, you can program the ATtiny85 using the Arduino IDE with the help of the Tiny AVR Programmer, which acts as a bridge between the ATtiny85 and your computer. The programmer can be used to burn a bootloader onto the ATtiny85, which allows it to be programmed using the Arduino IDE [7].
2. What programming language is ATtiny85?
The ATtiny85 can be programmed using the Arduino programming language, which is based on C++. However, it can also be programmed using other programming languages, such as Assembly or C.
3. Does ATtiny85 have I2C?
Yes, the ATtiny85 has I2C (Inter-Integrated Circuit) communication capability. It has two pins, namely SDA (Data) and SCL (Clock), which can be used for I2C communication.
4. Is STM32 in C or C++?
The STM32 microcontroller can be programmed using both C and C++ programming languages. However, the most common language used to program STM32 microcontrollers is C.
5. Can Arduino play MIDI files?
Yes, the Arduino can play MIDI files using a software library such as the MIDI library. The library can be used to read and play MIDI files from an SD card or from a computer using a MIDI interface [8].
6. Can Arduino send MIDI?
Yes, the Arduino can send MIDI messages using a software library such as the MIDI library. The library allows you to send MIDI messages over the serial port or over a MIDI interface connected to the Arduino.
7. Does ATtiny85 have EEPROM?
Yes, the ATtiny85 has 512 bytes of EEPROM (Electrically Erasable Programmable Read-Only Memory). The EEPROM can be used to store data that needs to be retained even when the power is turned off, such as calibration values or user settings.
8. What is the voltage of ATtiny85?
The ATtiny85 can be operated with a supply voltage between 1.8V and 5.5V. However, it is recommended to operate the device with a voltage between 2.7V and 5.5V for optimal performance.
9. What can ATtiny85 be used for?
The ATtiny85 can be used for a wide range of applications, such as controlling LEDs, motors, and sensors in small electronic projects or prototypes. It is particularly useful for projects where space and power consumption are a concern and can be used in wearable electronics, remote controls, data loggers, and more. With its I/O pins and communication protocols such as I2C and SPI, it can be used as a standalone microcontroller or in combination with other electronic components.
10. What is the price of ATtiny85?
The price of an ATtiny85 microcontroller varies depending on the supplier and the quantity being purchased. They can generally be purchased for between $0.50 and $3.00 each.
11. What is a substitute for ATtiny85?
Some alternatives to the ATtiny85 microcontroller include the ATtiny45 and ATtiny25. These microcontrollers have similar pinouts and features but may have lower memory or fewer pins. Other alternatives include the PIC10F family of microcontrollers and the STM8S003F3P6 microcontroller.
12. What is the difference between ATtiny45 and ATtiny85?
The ATtiny45 and ATtiny85 microcontrollers have similar features and pinouts, but there are a few key differences. The ATtiny85 has slightly more memory (8 KB of flash memory and 512 bytes of EEPROM compared to 4 KB of flash memory and 256 bytes of EEPROM for the ATtiny45), and two additional I/O pins (two more I/O pins than the ATtiny45). The ATtiny85 also has a slightly higher operating voltage range.
13. Does ATtiny85 have analog pins?
Yes, the ATtiny85 does have analog input pins that can be used to read analog signals. It has five analog input pins (referred to as A0 through A4), which can be used with the analog-to-digital converter (ADC) to read analog voltages.
14. What is the logic level of ATtiny85?
The ATtiny85 is a 5V logic device, meaning that its input and output pins are designed to work with voltages in the range of 0V to 5V.
15. Is ATtiny a microcontroller?
Yes, the ATtiny is a type of microcontroller. It is a small, low-power microcontroller designed for use in embedded systems and other electronic applications.
16. What is the program size of ATtiny85?
The ATtiny85 has 8 KB of flash memory, which is the maximum amount of program space available for storing code. However, some of that space is used by the bootloader or other system resources, leaving approximately 6 KB of available program space for user code.
17. How many IO pins are in ATtiny85?
Two of these pins can also be used for PWM output, and one pin is dedicated to the reset function.
18. Which Arduino is best for robotics?
There is no definitive answer to this question, as the best Arduino for robotics will depend largely on the specific requirements of the project in question. However, some popular options for robotics applications include the Arduino Mega, Due, and Leonardo, which offer a range of features such as multiple serial ports, increased processing power, and a built-in USB interface. It is important to consider factors such as the number of I/O pins, processing power, and memory when selecting an Arduino for a robotics project.
19. Can Arduino handle AI?
Arduino boards alone may not have enough processing power and memory to handle complex AI tasks. However, with the help of add-on boards or shields such as the TensorFlow Lite Micro library, Arduino can be used in AI applications. It is important to note that the level of AI complexity that an Arduino can handle will be limited by its processing power and memory.
20. What is the analog range of ATtiny85?
The ATtiny85 has a 10-bit analog-to-digital converter (ADC) that can measure analog signals in the range of 0V to Vcc, which is typically 5V for the ATtiny85.
21. Which microcontroller is better than Arduino?
The answer to this question depends on the specific needs of the project. Some alternatives to Arduino microcontrollers include the Raspberry Pi, the ESP32, and the STM32, among others. These microcontrollers offer different features and may be better suited to different types of projects.
22. Can an Arduino make a sound?
Yes, an Arduino can make sound using a piezo buzzer or a speaker. By controlling the output voltage to the piezo buzzer or speaker, an Arduino can produce a variety of sound effects and tones.
23. Can Arduino detect sound?
Yes, an Arduino can detect sound using a microphone or sound sensor. The analog signal from the microphone or sound sensor can be measured using the Arduino’s ADC and processed using software to identify specific patterns or frequencies.
24. Can an Arduino run any language?
No, an Arduino can only run code written in the Arduino programming language, which is based on the C++ programming language.
25. Is Arduino better than Raspberry Pi?
Again, the answer to this question depends on the specific needs of the project. The main difference between Arduino and Raspberry Pi is that Arduino is a microcontroller while Raspberry Pi is a single-board computer. While Arduino is relatively simple and specializes in interfacing with electronic devices, Raspberry Pi is more complex and can run a full operating system with access to a wide range of software and peripherals.
26. Is Arduino Mega faster than Uno?
Yes, the Arduino Mega is faster than the Uno. While the Uno has an 8-bit AVR microcontroller running at 16 MHz, the Mega has an 8-bit AVR microcontroller running at 16 MHz or 20 MHz, depending on the board.
27. How many transistors are in ATtiny85?
The ATtiny85 microcontroller has approximately 6,000 transistors.
28. What is the sample rate of ATtiny85?
The ATtiny85 has a maximum analog-to-digital converter (ADC) sample rate of 244 Hz when using the internal 1.1V reference voltage, and 12-bit resolution at this sample rate. However, the sample rate can be reduced to increase the resolution. For example, a sample rate of 15 Hz can be achieved with an ADC resolution of 10 bits [9].
29. What is the difference between ATtiny13 and ATTINY85?
The main differences between ATtiny13 and ATtiny85 microcontrollers are their pin count and memory size. The ATtiny13 has 8 pins and 1 kB of flash memory, while the ATtiny85 has 8 pins and 8 kB of flash memory. The ATtiny85 also has additional features such as an analog-to-digital converter (ADC), more timers, and more PWM channels.
Useful Video: Program the ATTINY85 with Arduino 1.8.18
References
- https://www.instructables.com/How-to-Program-an-Attiny85-From-an-Arduino-Uno/
- https://srituhobby.com/how-to-program-attiny85-with-arduino-uno-step-by-step/
- https://circuitdigest.com/microcontroller-projects/programming-attiny85-microcontroller-ic-using-arduino
- https://iotprojectsideas.com/program-digispark-attiny85-with-arduino-ide/
- https://www.circuits-diy.com/how-to-program-attiny85-with-arduino-uno/
- https://nerdytechy.com/how-to-program-attiny85-with-arduino/
- https://www.arrow.com/en/research-and-events/articles/attiny85-arduino-tutorial
- https://atmega32-avr.com/programming-attiny85-arduino-uno/
- https://electronoobs.com/eng_blogs.php?id=216