
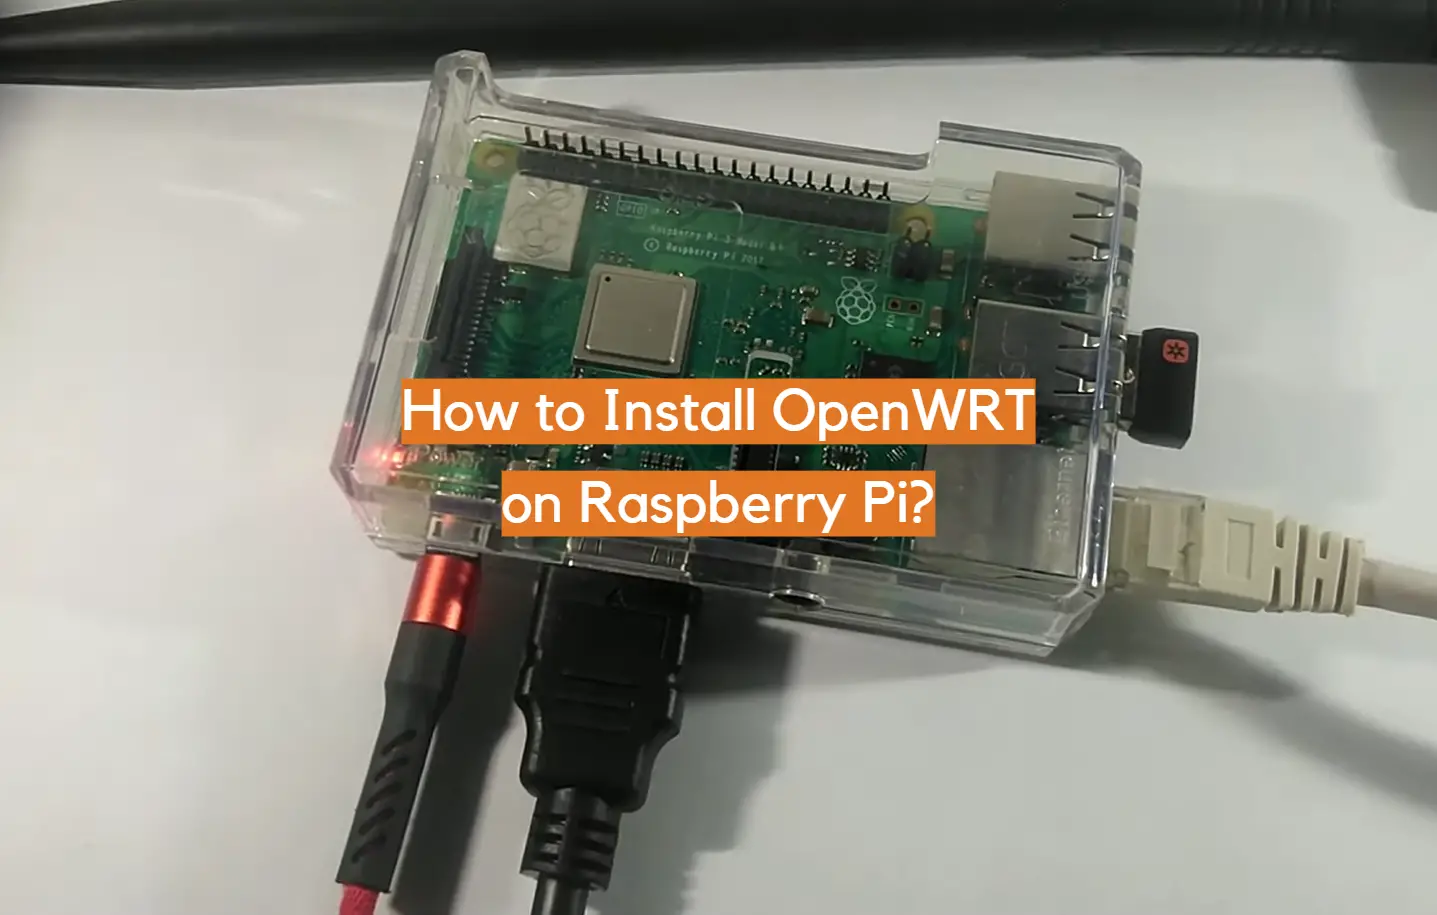
The Raspberry Pi is a versatile and affordable single-board computer that has gained immense popularity in recent years. Its flexibility allows for a wide range of projects, making it a favorite among tech enthusiasts. With the Raspberry Pi, you can build your own media center to enjoy your favorite movies and shows or create a sophisticated home automation system to control your smart devices. One of the most practical and beneficial applications of the Raspberry Pi is using it as a router. By installing OpenWRT on the Raspberry Pi, you can enhance its capabilities and transform it into a powerful networking tool. This enables you to have more control over your network settings and customize your routing preferences according to your needs. Whether you’re a tech enthusiast or a DIY enthusiast, the Raspberry Pi with OpenWRT offers endless possibilities for innovation and creativity.
What is a OpenWRT?
With OpenWRT, you gain an unparalleled level of control over your network settings, allowing you to intricately customize and meticulously optimize it according to your unique needs and preferences. This level of control empowers you to fine-tune every aspect of your network, ensuring an unparalleled level of performance and efficiency.
Whether you are a tech enthusiast, a network professional, or simply someone who values the utmost control over their network, OpenWRT is the ideal choice for unlocking the full potential of your devices and creating a network experience tailored to your exact specifications. [1]
What is a Raspberry Pi?
The Raspberry Pi is not only a low-cost, credit card-sized single-board computer, but it is also a revolution in the world of technology. Developed with the noble intention of promoting basic computer science in schools, this tiny device has surpassed all expectations and captured the hearts of tech enthusiasts and DIY hobbyists worldwide.
With its compact size, affordability, and versatility, the Raspberry Pi quickly became a favorite among those seeking to explore the endless possibilities of computing. Since its initial release in 2012, multiple versions and variations of the board have emerged, each pushing the boundaries of innovation and offering unique features and capabilities.
Powered by ARM processors and supporting various operating systems, including Linux-based ones like Raspbian and OpenWRT, the Raspberry Pi is a true marvel. Its small form factor and low power consumption make it ideal for a wide range of projects, from simple DIY gadgets to complex networking solutions.
Whether you are a student eager to learn the fundamentals of computer science or a seasoned developer looking to push the limits of creativity, the Raspberry Pi is your ultimate companion on this journey of exploration. Embrace the possibilities, unleash your imagination, and let the Raspberry Pi take you on a captivating adventure in the world of technology. [1]
Image maker download
One of the most convenient and popular ways to install OpenWRT on your Raspberry Pi is by using the Image Maker tool. This tool, which is available for download from the official website, simplifies the installation process and takes care of most of the heavy lifting for you.
To get started, all you need to do is download the appropriate version of Image Maker for your operating system. Whether you’re using Windows, Linux, or macOS, there’s a version of the tool that will work for you. Once you have it downloaded, simply follow the step-by-step instructions provided to create a bootable SD card with OpenWRT already installed.
By using Image Maker, you can eliminate the need for manually flashing the firmware onto your Raspberry Pi. This not only saves you time and effort, but also greatly speeds up the entire process. With OpenWRT up and running on your Raspberry Pi router in no time, you can start enjoying its full potential right away. [1]
So why wait any longer? Visit the official website now and download Image Maker to experience the convenience and power of OpenWRT on your Raspberry Pi.
Installing the rpi-imager tool
Another popular and highly recommended tool for installing OpenWRT on your Raspberry Pi is the rpi-imager. Developed by the Raspberry Pi Foundation, this user-friendly tool provides a simple and efficient way to flash operating systems onto SD cards, ensuring a smooth installation process.
To get started with rpi-imager, you can easily download it from the official website and install it on your computer. Once installed, simply open the tool and you will be greeted with a user-friendly interface. From there, you can effortlessly select the desired operating system image, in this case, OpenWRT, and proceed to choose the target SD card.
With just a click on the “Write” button, the flashing process will commence, ensuring that OpenWRT is installed on your Raspberry Pi in no time. This streamlined and hassle-free approach makes rpi-imager a preferred choice for both beginners and experienced users alike.
Moreover, rpi-imager doesn’t just stop at the basics. It offers a range of advanced options for those who want to fine-tune their installation process according to their specific preferences. This flexibility allows experienced users to customize their OpenWRT installation with ease, ensuring optimal performance and functionality.
Whether you’re a beginner exploring the world of Raspberry Pi or an expert looking for a reliable and versatile tool, rpi-imager is undoubtedly an essential addition to your arsenal when it comes to installing OpenWRT on your Raspberry Pi. Its intuitive interface, efficient performance, and advanced options make it a standout choice for anyone seeking a seamless and personalized OpenWRT installation experience. [1]
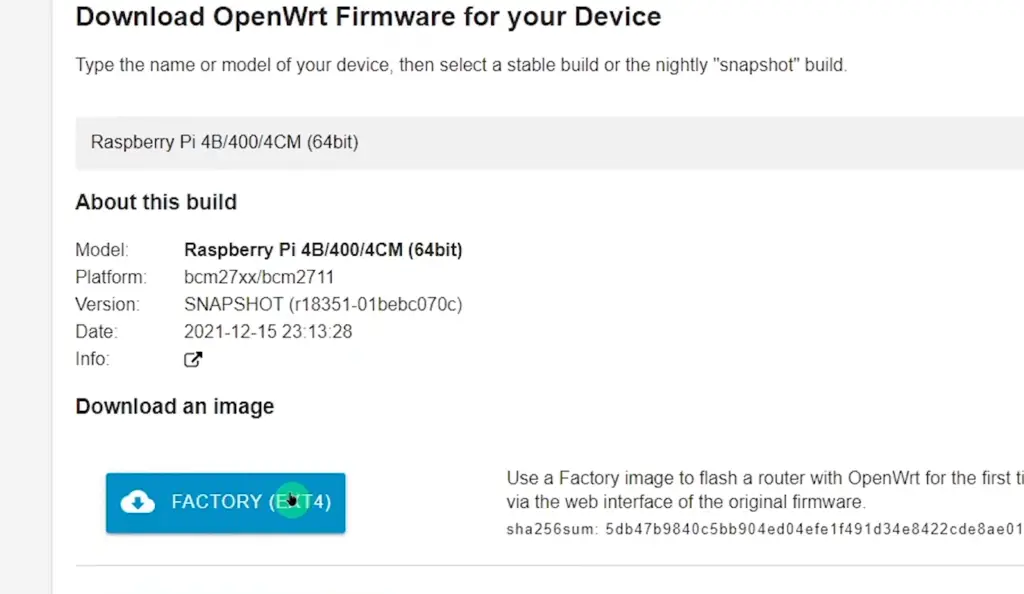
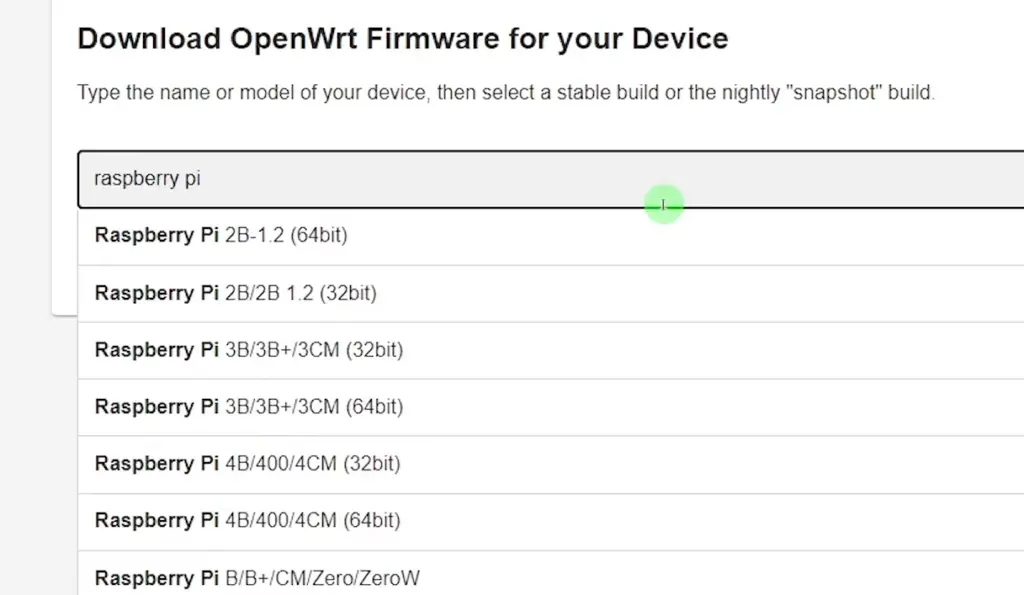
Openwrt image download and installation
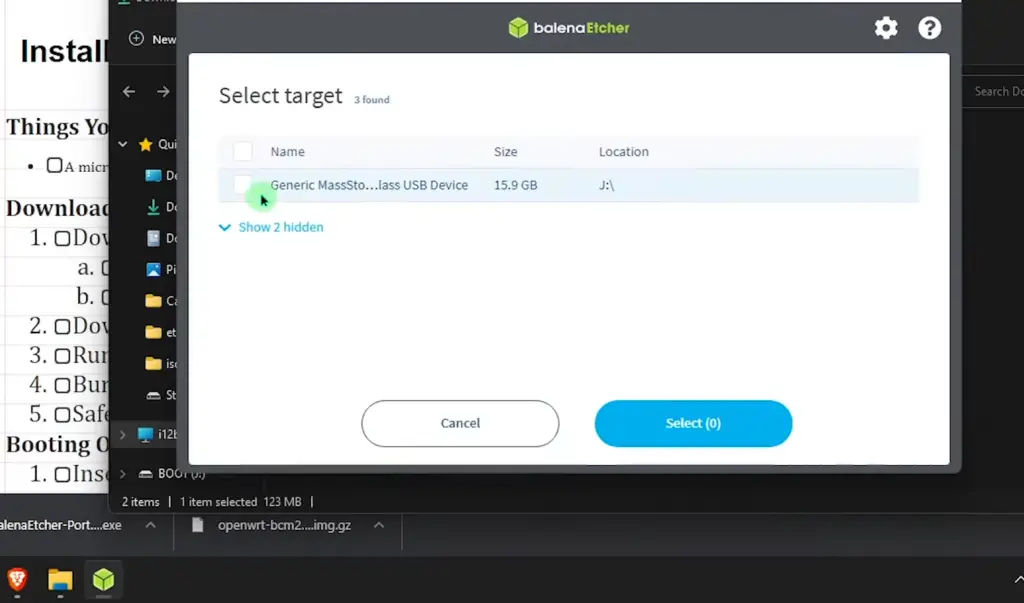
If you prefer a more traditional approach, you can also download the OpenWRT image directly from their official website and manually install it on your Raspberry Pi. This method requires a little more technical expertise and effort, but it allows for greater customization and control over the installation process.
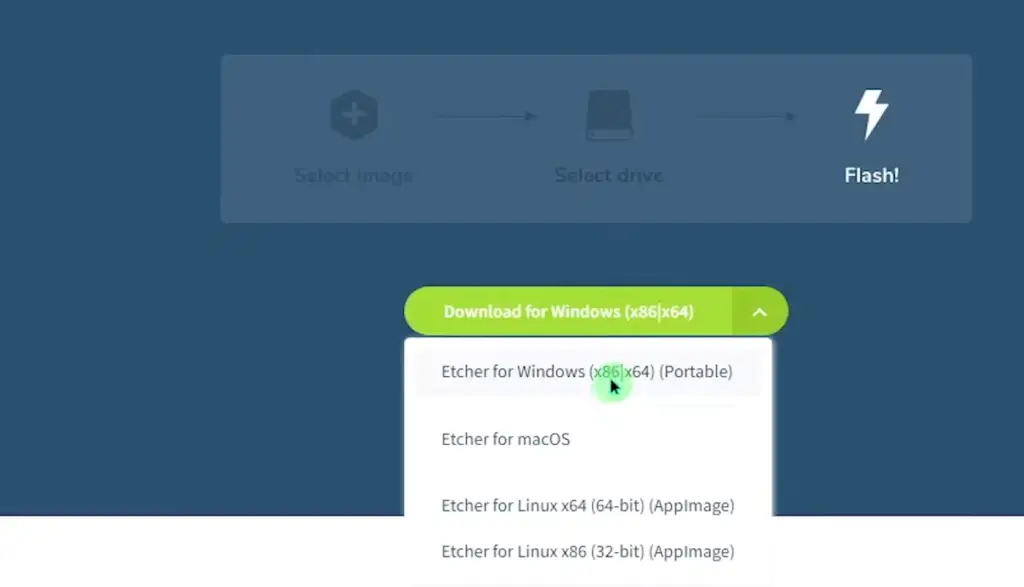
To begin, visit the OpenWRT website and navigate to the Downloads section. From there, you can select the appropriate image for your Raspberry Pi version and download it to your computer. Once downloaded, you will need to flash the image onto an SD card using a tool such as Etcher.
After flashing the image onto the SD card, you can insert it into your Raspberry Pi and power it on. The installation process will then begin, prompting you to configure your network settings and set up the router according to your preferences.
While this method may seem more complicated compared to using tools like Image Maker or rpi-imager, it offers a greater level of control and customization. This makes it ideal for those who are experienced with Raspberry Pi and want to fine-tune their OpenWRT installation for specific use cases. [3]
Using the openwrt image in rpi-imager
If you prefer the convenience of using rpi-imager but also want to have more control over your OpenWRT installation, there is a way to combine both methods. By using an OpenWRT image file in rpi-imager, you can enjoy the best of both worlds – ease of use and flexibility.
To do this, simply download the OpenWRT image file from the official website and save it to your computer. Ensure that you choose the version that is compatible with your Raspberry Pi model for optimal performance. Then, open rpi-imager and select “Use custom” in the operating system selection menu. From there, browse for the downloaded OpenWRT image file and proceed with the installation process as usual.
This method allows you to utilize the convenience of rpi-imager while also being able to customize your OpenWRT installation according to your needs. You have the freedom to modify any configuration settings, install additional packages, or tweak the system to your liking. Whether you want to set up a powerful router, a secure VPN gateway, or a versatile IoT device, this approach gives you the flexibility to tailor your OpenWRT experience.
With this knowledge, you can make the most out of both tools and create a seamless and personalized OpenWRT installation on your Raspberry Pi. Unlock the full potential of your device and enjoy the benefits of both ease of use and customization. Embrace the possibilities and embark on your OpenWRT journey today! [3]
Inserting the card with the image into the raspberry pi
After you have successfully flashed the OpenWRT image onto your SD card using either Image Maker, rpi-imager, or a manual method, it’s time to insert the card into your Raspberry Pi. To do this, simply locate the SD card slot on your device and gently push the card in until it clicks into place.
Next, power on your Raspberry Pi and wait for the boot process to complete. If everything goes smoothly, you should now have OpenWRT running on your device and ready for configuration. From here, you can access the OpenWRT web interface and begin customizing your router or use it as a versatile IoT device.
With these installation options, you can easily set up OpenWRT on your Raspberry Pi and start exploring its endless possibilities. Whether you choose the convenience of rpi-imager or the flexibility of manual installation, you can install OpenWRT with ease and enjoy all that this powerful open-source software has to offer. So go ahead and give it a try – unleash the full potential of your Raspberry Pi today! ̞[3]
Changing the interface network to the same openwrt network address
After successfully installing OpenWRT on your Raspberry Pi, you may want to change the interface network to match the OpenWRT network address for ease of access and management. To do this, first, log in to the OpenWRT web interface using the default IP address 192.168.1.1 (unless changed during installation).
Next, go to Network > Interfaces and click on the LAN interface. Under the General Setup tab, change the IPv4 address to 192.168.1.1 and subnet mask to 255.255.255.0 (or any other network address of your choice).
Save the changes and restart your Raspberry Pi for the new settings to take effect. You can now access your OpenWRT interface using the new network address and continue configuring your router or device.
Accessing openwrt using the browser
Once you have successfully installed and configured OpenWRT on your Raspberry Pi, you will have the convenience of accessing the web interface using any browser on a device connected to the same network. It’s as simple as entering the IP address of your router (e.g., 192.168.1.1) into the address bar and pressing Enter.
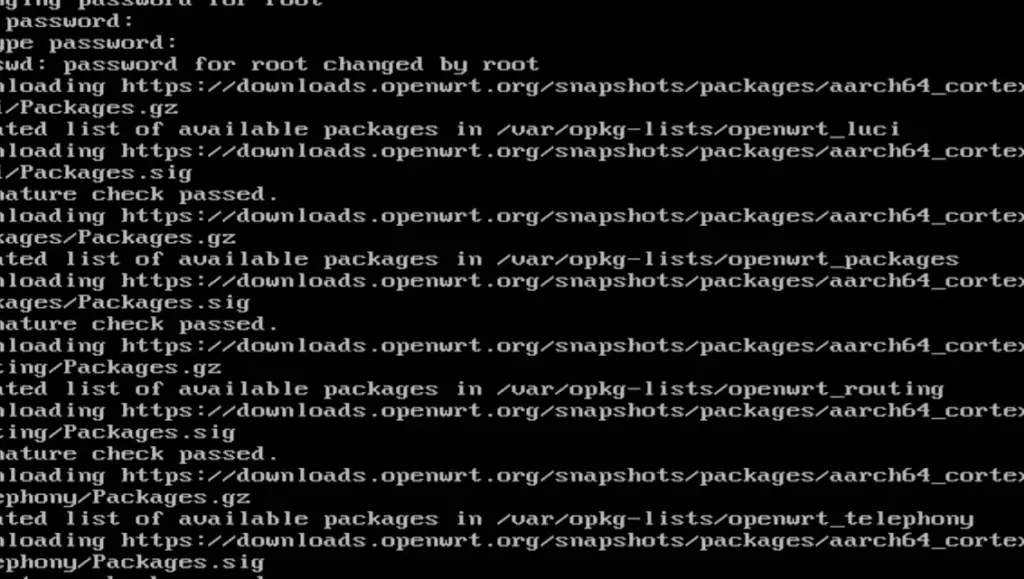
This action will direct you to the OpenWRT login page, where you can enter your username and password. By default, the username is “root” and the password is blank. Once you are logged in, a world of possibilities awaits as you explore all the features and settings of OpenWRT. This flexibility allows you to further customize your device to suit your specific needs.

With easy access through a web browser, managing your OpenWRT device becomes hassle-free and incredibly convenient. You can effortlessly make changes on-the-go or from any device connected to your network, making OpenWRT a highly versatile and accessible solution for all your networking requirements. So, dive in and unleash the full potential of your OpenWRT device! [2]
How to flash OpenWrt to MicroSD card?
Flashing OpenWRT to a MicroSD card is a straightforward process that can be done using various methods, as mentioned earlier. Once you have downloaded the correct OpenWRT image file for your Raspberry Pi model and have an SD card with sufficient space (8GB recommended), you can proceed with the following steps:
- Begin by gently inserting the MicroSD card into your computer’s SD card slot or, if you prefer, you can use a USB adapter to connect it.
- Next, you’ll need to download and install the appropriate flashing tool for your operating system. Popular options include Image Maker or rpi-imager, both of which are widely used and reliable.
- Once you have the flashing tool installed, open it up and navigate to the option that allows you to use a custom image file. This option is typically found under Advanced Options or a similar menu.
- Take a moment to locate the downloaded OpenWRT image file on your computer and ensure that it is selected within the flashing tool. This step is crucial to ensure that the correct image file is being used.
- With everything set up correctly, it’s time to initiate the flashing process. Simply click on the “Flash” or “Write” button within the flashing tool and patiently wait for the process to complete. Depending on the size of the image file and the speed of your computer, this may take a few minutes.
- Once the flashing process has finished, safely eject the SD card from your computer. Take care to follow the proper procedures for your operating system to avoid any data corruption or loss.
- Finally, insert the flashed MicroSD card into your Raspberry Pi and power on the device. Sit back and wait for OpenWRT to boot up, and you’ll be ready to explore and utilize its features and capabilities. [4]
Adding WiFi Clients to OpenWRT
A significant advantage of using OpenWRT on your Raspberry Pi is the ability to add WiFi clients and connect them to your network. This feature allows you to extend your network range or provide access for devices that do not have Ethernet ports, such as smartphones, tablets, and IoT devices.
To add a WiFi client in OpenWRT, follow these steps:
- Log in to the OpenWRT web interface and go to Network > WiFi.
- Under the Scan tab, click on “Scan” to search for available networks.
- Once the scan is complete, select your desired network and click on “Join Network”.
- Enter the password for the selected network (if applicable) and hit “Submit”.
- Your Raspberry Pi will now attempt to connect to the selected network, and once successful, you will be notified by a green checkmark.
- Save and apply your changes, and your new WiFi client will be added to your OpenWRT network.
With the ability to add WiFi clients on OpenWRT, you can easily expand your network coverage or provide access for devices that do not have Ethernet capabilities. This feature makes OpenWRT an ideal solution for creating a versatile and robust network setup at home or in a small business setting. [4]
WPA_CLI: A Powerful Tool for Managing OpenWRT
One of the most useful features of OpenWRT is its compatibility with WPA_CLI, a command-line tool used for managing WiFi connections. With WPA_CLI, you can easily view and control all aspects of your network’s wireless configuration.
To use WPA_CLI on your OpenWRT device, follow these steps:
- Connect to your device via SSH or open the command line.
- Use the command “wpa_cli” to access WPA_CLI.
- Type in “scan” to search for available networks, and then use “scan_results” to view a list of found networks.
- To connect to a specific network, use the command “add_network”.
- Next, use the “set_network” command to specify the network ID, SSID, and password of the network you want to connect to.
- Finally, use the “enable_network” command to enable the newly configured network. [4]
With WPA_CLI, managing wireless connections on your OpenWRT device becomes a breeze.
FAQ
What is the IP address for OpenWrt on Raspberry Pi?
The default IP address for OpenWRT on Raspberry Pi is 192.168.1.1. However, this may vary depending on your network configuration and settings.
How do I setup a router on my Raspberry Pi?
To set up a router on your Raspberry Pi, you can follow these steps:
- Install OpenWRT on your Raspberry Pi using the instructions mentioned earlier in this document.
- Connect your Raspberry Pi to your modem or existing network using an Ethernet cable.
- Log in to the OpenWRT web interface and navigate to Network > Interfaces.
- Click on the “Add new interface” button and select “Ethernet”.
- Under Protocol, choose either DHCP client or Static address depending on your network setup.
- Save and apply your changes, and your Raspberry Pi will now act as a router for your network.
Where can I install OpenWrt?
OpenWRT can be installed on a variety of devices, including routers, single-board computers like Raspberry Pi, and virtual machines. However, it is important to note that not all hardware is compatible with OpenWRT, so it’s best to check for compatibility before attempting to install.
How to install OpenWrt on a Raspberry Pi 4?
To install OpenWRT on a Raspberry Pi 4, you can follow the steps mentioned earlier in this document. Make sure to download the appropriate image file for your Raspberry Pi model and use an SD card with sufficient space (8GB recommended). Once you have successfully flashed the image onto the SD card, insert it into your Raspberry Pi and power on the device to start using OpenWRT.
Is OpenWrt better than DD WRT?
OpenWRT and DD WRT are both popular open-source firmware options for routers, with their own unique features and advantages. It ultimately comes down to personal preference and the specific needs of your network. Some users prefer OpenWRT for its customizable nature and robust community support, while others may prefer DD WRT for its user-friendly interface and compatibility with a wider range of routers. It’s recommended to try out both and see which one works best for your setup. Overall, both OpenWRT and DD WRT are reliable options for improving the functionality and performance of your home or small business network.
Useful Video: Raspberry Pi router with OpenWRT. Easy Tutorial for beginners. Basic WIFI router, AP configuration
Conclusion
OpenWRT is a powerful and versatile open-source firmware that can be easily installed on Raspberry Pi to create a customizable and robust network setup. With features such as adding WiFi clients and the compatibility of WPA_CLI, managing your network becomes much more efficient. Additionally, with its large community support, you can find helpful resources and guidance for any issues or customization options. Whether you’re looking to extend your network range or improve the functionality of your home or small business network, OpenWRT on Raspberry Pi is a great option to consider. So go ahead and install OpenWRT on your Raspberry Pi and explore its many features and capabilities! Happy networking!
References
- https://simplificandoredes.com/en/how-to-install-openwrt-on-raspberry-pi/
- https://github.com/mikenizo808/How-To-Install-openwrt-on-Raspberry-Pi
- https://mpolinowski.github.io/docs/DevOps/Linux/2021-09-02–openwrt-raspberry-pi/2021-09-02/
- https://www.linuxscrew.com/raspberry-pi-open-wrt