
In this document, we will explore how to use Yocto on Raspberry Pi to develop custom Linux-based systems. Yocto is a popular open source tool for creating embedded Linux distributions and offers a flexible and customizable approach to building software for embedded devices. With Yocto, developers can create their own customized distribution with only the necessary components, reducing the size and complexity of the system.
What is the Yocto Project ?
Prerequisite
Before embarking on the journey of using Yocto on Raspberry Pi, it is crucial to establish a solid foundation in embedded systems and Linux. Having a basic understanding of these concepts will pave the way for a smoother experience. Furthermore, familiarity with the command line interface (CLI) and shell scripting will prove to be advantageous when working with Yocto. These skills will empower you to navigate the intricacies of the system effortlessly.
Moreover, it is highly recommended to have some experience with cross-compilation and software development specifically tailored for embedded systems. This knowledge will not only enhance your learning process but also enable you to tackle complex challenges with ease. By equipping yourself with these valuable skills, you will be well-prepared to unleash the full potential of Yocto on your Raspberry Pi. [2]
Download Poky
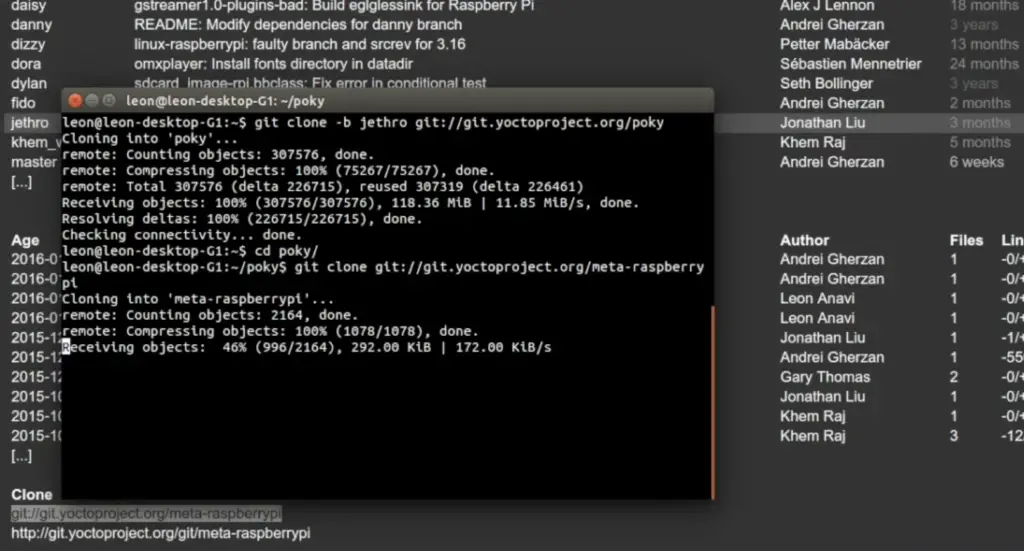
Poky, the reference distribution of Yocto, is a crucial component for utilizing Yocto on Raspberry Pi. It serves as a comprehensive package, encompassing all the requisite tools and recipes necessary for building highly customized Linux distributions. To obtain Poky, you can either visit the official website of the Yocto Project or access it through Git. Once the download is complete, simply extract the files into a directory of your preference, and you’ll be all set to embark on your Yocto journey! [2]
Download Raspberry pi meta layer
The Raspberry Pi meta layer plays a vital role as an additional component in the process of building a Linux distribution specifically tailored for the Raspberry Pi board. It encompasses all the essential configurations and recipes required to ensure seamless compatibility and optimal performance. Obtaining this layer is a straightforward process; you can either acquire it from the official Yocto layers index or clone it directly from its Git repository.
Once you have obtained the Raspberry Pi meta layer, the next step involves integrating it into your existing Poky directory. This can be achieved by simply copying and pasting the downloaded contents into the designated “poky/meta” directory. By following this crucial step, you gain the ability to customize and fine-tune your Linux distribution to perfectly align with the specifications and requirements of the Raspberry Pi board.
In summary, the Raspberry Pi meta layer serves as a fundamental building block in the creation of a tailored Linux distribution for the Raspberry Pi board. Its inclusion ensures a seamless integration of all necessary configurations and recipes, enabling you to fully harness the capabilities and potential of the Raspberry Pi platform. [2]
Step 1: Getting Ready
Before diving into the process of using Yocto on Raspberry Pi, it is essential to ensure that your system meets all the necessary prerequisites. Firstly, make sure you have approximately 15 GB of free disk space available for building images. Additionally, ensure that all the required packages and dependencies are installed on your system. These include Git, Python 3, GNU wget, and various other tools necessary for building embedded Linux systems.
Moreover, it is highly recommended to use a 64-bit operating system when working with Yocto. This enables the utilization of larger memory addressing capabilities, allowing for faster build times and enhanced performance. Furthermore, ensure that your system has adequate RAM (at least 4 GB) to handle the resource-intensive tasks involved in building images. By fulfilling these requirements, you ensure a smooth and efficient experience when working with Yocto on Raspberry Pi. [1]
Step 2: Get the Source Code
Once your system is prepared for using Yocto, the next step involves obtaining the source code. This can be achieved by cloning the repository and checking out the desired branch. The repository consists of several branches, each representing a different version of Poky. It is recommended to use the latest stable release for optimum results.
After successfully checking out the desired branch, navigate to the “poky” directory and run the “oe-init-build-env” command. This will initialize the build environment and create a directory named “build.”
Step 3: Configure Build Options
Before building the images, it is crucial to configure the build options according to your specific requirements. This can be achieved by running the “bitbake-layers add-layer” command and specifying the path to the Raspberry Pi meta layer that was previously added to your Poky directory. By doing so, you enable Yocto to include all the necessary configurations for building a Linux distribution specifically tailored for the Raspberry Pi board, ensuring optimal performance and compatibility.
Furthermore, in addition to configuring the meta layer, you have the flexibility to modify other build options to fine-tune your Linux distribution. These options include selecting the target image, specifying the machine type, and customizing the package selection. To make these modifications, you can access the “conf/local.conf” file located in the “build/conf” directory. This level of control empowers you to shape the final output of your Linux distribution, aligning it precisely with your desired specifications and requirements. [1]
Step 4: Build an Image
Once the build options are configured, the next step involves actually building the image. This can be achieved by running the “bitbake” command followed by the name of your target image (e.g., core-image-minimal). During the build process, the Yocto Project, with its powerful tools and extensive package collection, meticulously compiles and assembles all the necessary components to create a customized Linux distribution tailored to your specific requirements.
This process may take several hours to complete, depending on the complexity of your project, system specifications, and selected packages. While the Yocto build system rigorously ensures the integrity and correctness of the build, it also allows for flexibility and customization, empowering you to add or remove software packages, customize configurations, and fine-tune the resulting image.
After the successful completion of the build process, you will find the generated images in the “build/tmp/deploy/images” directory. These images, carefully crafted by Yocto, encapsulate the entire Linux distribution, including the kernel, root file system, and any additional software or applications you have included. With these images in hand, you can proceed to flash them onto an SD card and boot your Raspberry Pi board, immersing yourself in the full potential of a fully customized, robust, and reliable Linux environment.
Experience the power of Yocto as you unlock limitless possibilities to create, innovate, and shape your ideal Linux distribution. Embrace the journey of exploration and discovery, where the art of building meets the science of customization, resulting in a truly unique and tailored Linux experience for your Raspberry Pi. [1]
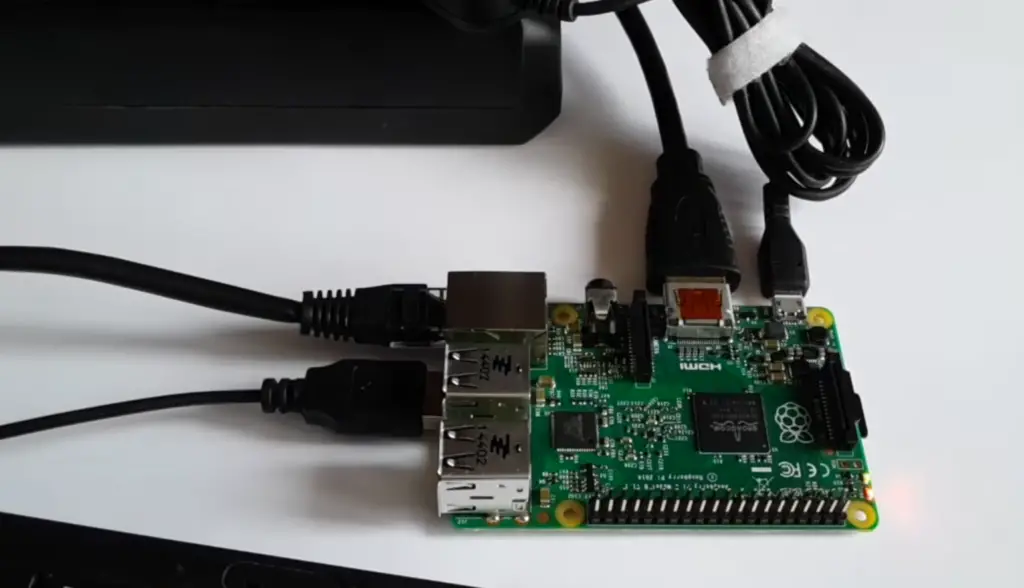
Step 5: Flash SD Card and Boot
To flash the generated images onto an SD card, you can choose from a range of tools available, such as Etcher or the dd command on Linux. These tools provide a convenient way to transfer the image to the SD card, ensuring a seamless process. Once the flashing is complete, you can insert the SD card into your Raspberry Pi board and power it on, eagerly anticipating the moment when your fully functional Linux distribution, specifically tailored for your Raspberry Pi board, greets you with its endless possibilities and capabilities. [3]
Step 6: Boot and Test Your Image
After successfully booting your customized Linux distribution, you can embark on a journey of exploration and fine-tuning to ensure it perfectly aligns with your specific needs. Dive into the vast realm of possibilities by installing additional packages or even making meticulous changes to the existing ones using the versatile opkg package manager. Furthermore, delve into the intricate world of configurations within the “conf” directory, where you can unleash your creativity and make further customizations to your image, shaping it into a true reflection of your vision. With every detail carefully crafted, your Linux distribution will become a seamless and tailored environment, enhancing your productivity and empowering your endeavors. [3]
FAQ
What is Yocto and how do you use it?
Yocto is an open-source project that provides tools and resources for building custom Linux distributions. It allows users to compile and customize their own version of Linux, tailored to their specific needs and requirements. Yocto can be used on various hardware platforms, including the Raspberry Pi board, by following a series of steps such as obtaining the source code, configuring build options, and building an image using the Yocto build system. This results in a fully functional Linux distribution that can then be flashed onto the desired hardware platform.
How to run a Linux program in Raspberry Pi?
To run a Linux program on Raspberry Pi, you must first have a valid and functional operating system installed. This can be achieved by following the steps outlined above using Yocto to build and flash your custom Linux distribution onto the Raspberry Pi board. Once this is done, you can install any necessary packages or applications using tools such as opkg, and then launch the program using the terminal or a graphical user interface.
Can you run any Linux on Raspberry Pi?
Raspberry Pi supports a variety of Linux distributions, including Raspbian, Ubuntu, and Arch Linux. However, not all versions may be compatible or optimized for the Raspberry Pi board. It is recommended to use a distribution explicitly built and configured for the Raspberry Pi using tools like Yocto for optimal performance and compatibility. So while you can technically run any Linux on Raspberry Pi, it is highly recommended to use a distribution specifically tailored for this platform. With Yocto, you can easily create your own customized Linux distribution optimized for the Raspberry Pi, ensuring a seamless and efficient experience.
How do I run a program on my Raspberry Pi?
To run a program on Raspberry Pi, you can follow these steps:
- Install a functional operating system such as Raspbian or Ubuntu using tools like Yocto.
- Use the terminal or a graphical user interface to install any necessary packages or applications.
- Launch the desired program by typing its name in the terminal or finding it in the application menu.
Is Raspberry Pi good for programming?
Yes, Raspberry Pi is an excellent platform for programming and learning about coding. Its low cost, portability, and versatility make it a popular choice among beginners and professionals in the tech industry. With tools like Yocto, you can easily create your own customized Linux environment on Raspberry Pi to meet your programming needs and preferences.
Can a Raspberry Pi run Python?
Yes, Raspberry Pi can run Python programming language. In fact, the Raspbian operating system comes with Python pre-installed. You can also install other versions of Python using tools like Yocto, which allows you to customize and fine-tune your environment based on your requirements. With its vast capabilities and potential for customization, Raspberry Pi is an ideal platform for running Python programs and experimenting with different projects.
What programming language for Raspberry Pi?
Raspberry Pi supports a variety of programming languages, including Python, Java, C++, and Scratch. The choice of language depends on your project requirements and personal preferences. With the flexibility and versatility offered by Yocto, you can easily configure your Raspberry Pi environment to support multiple programming languages simultaneously, providing you with endless opportunities for experimentation and learning.
Useful Video: Raspberry Pi Basic #001 : Yocto Build
Conclusion
In conclusion, using Yocto on Raspberry Pi allows for the creation of a customized Linux environment that meets your specific needs and preferences. With its versatile tools and resources, you can easily build and flash your own Linux distribution onto the Raspberry Pi board, providing endless possibilities for exploration and fine-tuning. Whether you are a beginner or an experienced programmer, Raspberry Pi with Yocto is the perfect platform for learning and experimentation. So why wait? Start your journey with Yocto on Raspberry Pi today and unlock the full potential of this powerful combination. Happy customizing!
References
- https://www.instructables.com/Building-GNULinux-Distribution-for-Raspberry-Pi-Us/
- https://tutorialadda.com/yocto/create-your-own-linux-image-for-the-raspberry-pi-board-using-yocto-project
- https://www.linkedin.com/pulse/yocto-embedded-linux-building-your-own-first-image-raspberry-haddad