
Have you ever wanted to unlock the power of Arduino Millis but thought it was too complicated? With this step-by-step guide, you’ll be able to learn how to use the Arduino millis function and master the skill with ease. In no time at all, you’ll be up and running with your very own Arduino project that utilizes the powerful Millis library. Get ready to create something amazing!
What is Millis()?
Millis() is a function in Arduino which returns the number of milliseconds since your Arduino board began running its current program. It is often used to time various activities within the code. For example, you can use Millis() to pause a loop for a given amount of time or to keep track of how long an event has been occurring. Additionally, it can be used as part of an interrupt service routine to measure the length of each cycle.
The easiest way to use Millis() is to assign the current value of millis() at a certain point within your program. You can then compare this value against other values as the program progresses, allowing you to measure the elapsed time between two events. For example:
“`long start = millis();
// do something here
long end = millis();
Serial.println(end – start); // prints out how long it took“`
This code will print out how many milliseconds have passed since “start” and “end” were set. This is especially useful when trying to measure how long a loop is taking to run.
Millis() can also be used in conjunction with interrupts and hardware timers to accurately measure time between events. This is useful when trying to measure the speed of a rotating motor or the frequency of an incoming signal from a sensor.
Millis() is an incredibly powerful tool that can be used for many different applications. It’s easy to use, and you don’t need to reset it each time you power on your board. With a little bit of creativity, it can help you take your projects to the next level [1]!
Arduino Multitasking Tutorial – How to use millis() in Arduino Code
What is Multitasking?
Multitasking is the ability of an Arduino program to perform multiple tasks at once. This allows a single microcontroller or processor to divide its time and resources among many processes, thus increasing efficiency in the use of its resources. Multitasking can be used for processing several inputs simultaneously, performing a variety of calculations on them, and outputting results quickly.
Why to skip delay() in Arduino?
The delay() function is a blocking function, meaning that the code will not proceed to the next line until after the delay time has elapsed. For some applications, this may be desirable, but in others, it can cause problems because other functions may need to run during the delay time and will not be able to do so. The Millis () function is a non-blocking alternative that allows multiple tasks to occur simultaneously without slowing down the Arduino.
How does millis() work?
The Millis () function is a part of the Arduino “libraries” that is included with the Arduino IDE software suite. It allows you to measure elapsed time by calculating the number of milliseconds since your program started running. By using this function, you can measure how much time has passed between two events happening in your code. This is especially useful for timing events that happen at regular intervals, like blinking an LED or sending a signal to an output pin.
Using millis() in Arduino Code
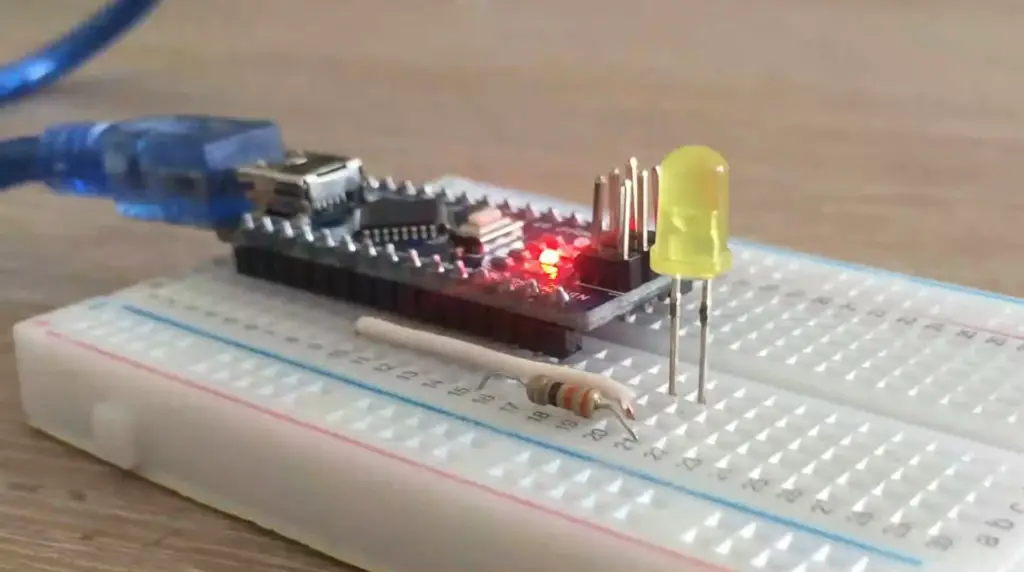
The Millis () function can be used in Arduino code to measure the elapsed time between two events. It takes no arguments and returns the number of milliseconds since your program started running (e.g., if you’ve been running for 5 seconds, it will return 5000). The following example shows how to use millis() to blink an LED every 1000 milliseconds:
“`int ledPin = 13; //setting up LED on pin 13
unsigned long lastTime = 0;//keeping track of the last time we blinked
const int interval = 1000; // blink every 1 second
void setup() {
pinMode(ledPin, OUTPUT);//set LED pin to output
}
void loop() {
unsigned long currentTime = millis();//get the current time in milliseconds
if (currentTime – lastTime >= interval) { //check if the interval has elapsed
digitalWrite(ledPin, !digitalRead(ledPin));//toggle LED state if it has been a second since last toggle lastTime = currentTime; //update the last time we toggled }
}“`
By using millis(), you can easily perform multiple tasks at once, without pausing to wait for a delay() time to elapse. This makes your Arduino code much more efficient and responsive.
#Why to use millis() ?
Using millis() in your Arduino code allows you to perform multiple tasks simultaneously, making it a much more efficient and responsive platform for your projects. It also provides easier control of timing events, such as blinking LEDs or communicating with other devices over serial communication. Using millis() is the preferred method for multitasking on Arduino projects [2].
Programming Arduino UNO for Multitasking
Achieve Arduino Multitasking with RTOS
Arduino UNO can be programmed to perform multitasking using the Real-Time Operating System (RTOS). RTOS is an operating system that manages the execution of multiple software threads in a highly deterministic manner. With an RTOS, you can assign different tasks to each thread and let them run concurrently. This allows for faster execution of larger tasks and better utilization of computing resources.
With RTOS, Arduino UNO can be used to perform complex calculations efficiently, control robots with motion-tracking systems, or support hundreds of other IoT applications that require multitasking capabilities. When programming Arduino UNO for multitasking purposes, it’s important to keep in mind the memory limitations and architecture constraints. The code should be written such that it utilizes a minimal number of processor cycles for each task and maintains a steady performance even when multiple tasks are running at the same time.
Moreover, Arduino UNO multitasking requires additional libraries to be installed on the board such as FreeRTOS, TinyCLR OS, or ChibiOS. These libraries provide APIs (Application Programming Interfaces) that allow developers to control various aspects of the system including scheduling, synchronization, memory allocation, etc.
Furthermore, these libraries come with extensive documentation and example projects which can help developers get started quickly. Overall, programming Arduino UNO for multitasking is an effective way to make use of its capabilities and enhance the performance of your applications. It requires careful selection and implementation of the RTOS library as well as efficient code implementation.
Multitasking & Scheduling
Another important aspect of programming for multitasking is scheduling. Scheduling determines which tasks should be executed at what time, and in what order. It helps to maximize the potential of a multitasking system by efficiently utilizing its hardware resources. Most RTOS libraries provide different scheduling strategies including preemptive, priority-based, round-robin, and time-slicing algorithms.
Preemptive scheduling assigns the highest priority task with the most processing time while other tasks are forced to wait until their turn comes. Priority-based scheduling allocates resources based on the importance of each task while round-robin schedules tasks in an alternating fashion without giving preference over any particular one.
Time-slicing algorithms run each task for a fixed amount of time before switching over to another task. This helps to ensure that each task gets a fair share of the processor time and avoids starvation of any particular task. Apart from these, there are other techniques such as dynamic priority scheduling which can be used to further maximize the efficiency of a multitasking system. Overall, when programming Arduino UNO for multitasking applications, it’s important to choose an RTOS library that best suits your needs and provides suitable scheduling algorithms. This will help you make full use of its hardware resources and achieve better performance from your application.
FAQ
How do I use Millis () in Arduino?
Millis () is a built-in Arduino function that returns the number of milliseconds since the Arduino board began running the current program. You can use Millis () to measure time intervals or as an alternative to delay () for non-blocking delays; meaning you can perform other tasks whilst waiting for something else to happen. To use Millis, simply call it within your code and store its return value in a variable. For example, unsigned long timer = millis();
The above will store the number of milliseconds the board has been running in the ‘timer’ variable. You can then use this value to check how much time has elapsed since some event by subtracting it from another instance of Millis(): unsigned long timeElapsed = millis() – timer; This will store the difference between the two times in ‘timeElapsed’.
Millis () is especially useful when combined with if statements, allowing you to create code that performs a certain action only after a certain amount of time has passed. For example unsigned long timer = millis(); if (millis() – timer > 5000){ // Do something after 5 seconds } The above code will execute some code after five seconds have passed since the variable ‘timer’ was set. This can be used for various tasks such as timing actions or detecting user input over some time. Millis () is an incredibly useful and versatile tool for any Arduino project.
What is delay () in Arduino?
Delay () is another built-in Arduino function that, when called, pauses the program execution for a certain amount of milliseconds specified as a parameter. For example delay(1000); The above code will pause the program for one second (1000 milliseconds). Delay() can be used to slow down programs or create animations by pausing the program repeatedly. However, its main disadvantage is that during this pause all other tasks on your board stop running; meaning you cannot perform two actions at once with delay ().
For non-blocking delays and multi-tasking applications, it’s usually better to use Millis (), as described in the previous section. This allows your program to continuously run without pauses, performing multiple tasks at once.
How do you use Millis command?
The Millis command is a built-in function of the Arduino board which returns the number of milliseconds since the board began running its current program. To use Millis, you simply call it within your code and store its return value in a variable. For example: unsigned long timer = millis(); The above code will store the number of milliseconds that have passed since the board started running its current program in ‘timer’. You can then use this value as a reference point to measure time elapsed or as an alternative to delay () for non-blocking delays. This is especially useful when combined with if statements, allowing you to create code that performs a certain action only after a certain amount of time has passed. For more detailed examples, please see the previous section.
Can I use delay and millis together in Arduino?
Yes! You can combine the delay () and Millis () functions to achieve a variety of tasks such as timing actions or detecting user input over some time. For example: unsigned long timer = millis(); delay(1000); if (millis() – timer > 5000){ // Do something after 5 seconds } The above code will use delay () to pause for one second and then measure how much time has passed since it was set using Millis (). If more than five seconds have elapsed since setting ‘timer’, the code within the if statement will be executed. This is just one way you can combine Delay() and Millis(); there are many more possibilities.
Can I use delay () to measure time elapsed?
No, delay () is not a good tool for measuring the time elapsed as it pauses all other tasks on your board while waiting for something to happen. Instead, the Millis () function should be used when measuring time intervals or creating non-blocking delays; meaning you can perform other tasks whilst waiting for something else to happen.
Does Arduino have a built-in clock?
Yes! The Arduino board contains an internal real-time clock which is available through the ‘Time’ library and related functions such as now() and Millis (). This allows you to measure absolute times rather than just relative intervals between events. For more information on these functions, please see the Arduino documentation.
What is the speed of Millis () in Arduino?
Millis () runs at a speed of one millisecond per loop cycle. This means that the time returned by Millis () is accurate up to one millisecond; however, any longer intervals may be subject to some variation due to other tasks running on your board. To ensure accuracy, it’s usually better to use the internal real-time clock when measuring absolute times such as dates and times.
What are the advantages of using Millis in Arduino?
The main advantage of using Millis () in Arduino is its versatility. It can be used for everything from timing actions or detecting user input over some time, to creating non-blocking delays or calculating relative time differences between events. Additionally, because it returns the number of milliseconds since the board started running its current program, it is not affected by delays or pauses such as those caused by delay () and other built-in functions. This makes it ideal for use in multi-tasking applications where accuracy is important. Overall, Millis () is an incredibly useful and versatile tool for any Arduino project. It can be used to measure time intervals, create non-blocking delays, detect user input over some time, and much more; making it a must-have for any Arduino enthusiast.
How to get seconds from Millis Arduino?
To get the number of seconds from Millis () in Arduino, you can simply divide the returned value by 1000. For example: unsigned long timer = millis(); unsigned long timeElapsed = timer / 1000; This will store the number of seconds that have passed since ‘timer’ was set in ‘timeElapsed’. This is especially useful for measuring absolute times rather than just relative intervals between events. You can also use this to create non-blocking delays which allow your board to perform other tasks while waiting for something else to happen. For more detailed examples and information on how Millis () works, please see the previous sections.
Why use Millis instead of delay?
Using Millis () instead of delay () is beneficial for a few reasons. Firstly, Millis () returns the number of milliseconds since the board began running its current program; meaning it is not affected by pauses or delays such as those caused by calling delay (). This makes it ideal for multi-tasking applications where accuracy is important and you need to be able to perform multiple tasks at once. Secondly, because it does not pause your program execution like delay (), you can use it to create non-blocking delays which allow your board to continuously run without pausing; making it much more efficient than using delay ().
Finally, you can combine Millis () with if statements in order to trigger events after some time has passed, which is not easily achievable with delay (). All in all, Millis () is a much more versatile and efficient tool than delay () for measuring time intervals or creating non-blocking delays. Overall, Millis () is an incredibly useful and versatile tool for any Arduino project. It can be used to measure time intervals, create non-blocking delays, detect user input over some time, and much more; making it a must-have for any Arduino enthusiast.
Useful Video: How to use millis() function to multitask in arduino code.
Conclusion Paragraph
Arduino Millis function is a useful tool for controlling time-sensitive processes within your Arduino project. It can be used to measure the elapsed time between two events accurately, ensuring that certain tasks are always carried out promptly. This makes it an invaluable resource for creating complex and multi-stage projects that require precise timing and accuracy. With just a few simple lines of code, you can use Arduino Millis to create applications such as timers, alarms, stopwatches, or even games with clocks. Experimentation and exploration will help you understand more about how this function works so that you can apply it in a variety of scenarios to improve the performance of your project!
References
- https://www.arduino.cc/reference/en/language/functions/time/millis/
- https://circuitdigest.com/microcontroller-projects/arduino-multitasking-using-millis-in-arduino