
Are you interested in learning the ins and outs of Arduino for loops? With this step-by-step guide, you will quickly become a master of Arduino for loops and be able to create amazing projects using them. From getting started to more complex topics, this guide covers the essential skills needed to understand and work with for loops on Arduino. Unlock the potential of your projects with this invaluable knowledge and start taking your Arduino coding skills to the next level!
Where to use for-loops?
For-loops can be used in many different programming languages, including Python, JavaScript, Java, and C. They are a powerful tool for performing repetitive tasks or iterating through data structures like lists and dictionaries. For-loops can also be used to create complex algorithms and search for patterns in data sets.
In short, for-loops are versatile tool that can be applied across many areas of programming. Whether you are developing an application, scripting a website, or working with data sets, for-loops can help you do it faster and more efficiently. They are an important tool in any programmer’s arsenal [1]!
How to Write For-Loops
Writing for-loops is fairly straightforward. First, you need to create a loop structure that will tell the computer how many times it should repeat the code within the loop. This structure usually involves setting up a variable and then creating a condition that must be true before the loop will run again.
Next, you must write the code inside the loop that will be repeated each time. This code can perform calculations on variables, and access elements in data structures like lists or dictionaries. Finally, you must ensure that the loop will eventually come to an end. This is done by incrementing a counter variable or making sure the condition becomes false at some point.
Once these steps are completed, your for-loop should be ready to go! More advanced topics such as nested loops and break statements can also be explored if needed.
By following these simple steps, you’ll soon be writing effective for-loops in no time! With practice and experience, you’ll be able to create complex algorithms and solve challenging problems using this powerful tool [2].
How the Arduino for loop works
The Arduino for loop is used to repeat a section of code multiple times. This can be useful when you have a set of instructions that need to be done repeatedly, such as displaying something on an LCD screen or controlling the speed of a motor. The syntax for an Arduino for loop is
“`for (initialization; condition; step) { // code to run }“`
The initialization part sets up any variables that will be used in the loop and executes once before the loop starts. The condition evaluates to either true or false, and if true, the code inside the loop will execute. If it evaluates to false, then the program skips over the block of code in curly brackets. Finally, the step part defines how the variable is modified in each iteration of the loop.
For example, if you wanted to display numbers from 1-10 on an LCD screen, you could use a for loop like this:
“`for (int i=1; i<=10; i++) { lcd.print(i); }“`
This code will run 10 times and on each iteration of the loop, it will print one number (from 1-10) onto the LCD screen. After each iteration, it will increase the value of `i` by one so that eventually it reaches 10 and stops executing.
In summary, the Arduino for loop allows us to repeat a set of instructions without having to manually write out all the individual lines of code. This can be incredibly useful when dealing with complex tasks that require a lot of repetition [3].
Parameters of the Arduino for loop
Initialise Variable
The first step when using a for loop in Arduino is to initialize the variable. This involves declaring a variable and setting it to a starting value, usually 0 or 1 depending on what you want your loop to do. It is also important to decide whether the variable is going to be an integer (a whole number) or a float (a number with decimal points).
Condition Check
The next step in using an Arduino for loop is the condition check. The condition check works by evaluating if the current value of the variable meets certain criteria that you have set out beforehand. For example, if you wanted your loop to run 10 times then you would need to make sure that the value of the variable is less than 10. If the condition check is true then the loop will move on to the next step, if false it will be terminated and the program will continue on with other tasks.
Changing Variable Value
The third step of an Arduino for loop is to change the value of the variable. This means that after each iteration of the loop, you need to update the variable for it to meet your pre-defined criteria. Generally, this involves incrementing or decrementing a number by 1 each time.
Running Code Block
The fourth and final step in using an Arduino for loop is running the code block. This is where you place all of the actual instructions that you want your loop to carry out such as reading a sensor value or printing something out to the serial monitor. It is important to remember that you can place any code inside of the for loop and it will be repeated each time until the condition check evaluates false.
Iterator
An iterator is an additional piece of code that can be used to control how many times the for loop runs. You can choose to have it run a set number of times, or you can have it run until a certain condition is met. This makes the for loop more flexible and helps you control exactly when your code will finish running.
Arduino For loop Output
The output of an Arduino for loop is whatever you have programmed it to do. This could be printing out sensor values, controlling motors or LEDs, or anything else that you want your program to do. The only limit is your imagination!

Arduino for-loop body code
The body of a for-loop is the code that will execute each time the loop runs. This can be any combination of functions, variables, and calculations that you need to make happen. It is important to remember that it needs to be enclosed within curly brackets { } so that Arduino knows which parts of the code belong inside the loop [3].
How many times the loop function runs
Infinite While loop and Finite While loop
The number of times a while loop will run depends on the type of loop. An infinite while loop does not have any fixed limit, so it will continue to execute until either an external condition is met or a break statement is encountered. On the other hand, a finite while loop has a predefined number of iterations that it will perform; once this limit is reached, the loop terminates. It is important to note that if the conditions in the while expression are never met, then an infinite while loop can cause your program to enter into an endless cycle and crash.
In order to avoid this problem, you should ensure that all loops have some sort of exit condition where they can terminate once their predefined number of iterations has been reached. This can be done by testing the condition in the while expression at the beginning of each iteration and breaking from the loop once it is met. Additionally, you should also add a counter variable that keeps track of the number of times the loop has been executed so that you can easily determine when it reaches its limit. By taking these precautions, you can ensure that your loops are well managed and not causing any undesired effects to your program.
Finally, it is important to remember that a while loop will only run as long as its condition remains true; if this condition becomes false for any reason, then the loop will immediately terminate without executing any further instructions. Therefore, it is essential to test all conditions before entering a while loop to ensure that they remain valid throughout the course of execution. This will help you avoid any unexpected behavior or errors in your code.

Infinite For loop and Finite For loop
Similarly to while loops, the number of times a for loop will run depends on its type. An infinite for loop does not have any fixed limit, so it will continue to execute until either an external condition is met or a break statement is encountered. On the other hand, a finite for loop has a predefined number of iterations that it will perform; once this limit is reached, the loop terminates. It is important to note that if the conditions in the for expression are never met, then an infinite for loop can cause your program to enter into an endless cycle and crash.
Measuring Loop Time
To measure the amount of time a loop takes to execute, you will need to use a performance monitor such as a profiler. A profiler is a tool that allows you to view and analyze the execution times of various sections of code in your program. By using this information, you can determine which loops are taking the most time to complete and optimize them accordingly. Additionally, it can also be used to identify areas where your code is running inefficiently so that it can be improved for better performance.
Measuring the length of time taken by a loop is important when creating programs with multiple loops as it allows you to ensure that no one single loop takes up too much processing power or memory resources. It also helps you identify potential bottlenecks in your code that may be causing it to run slower than expected. By understanding the time taken for each loop to complete, you can ensure that your program is running as efficiently as possible and optimize accordingly.
Overall, measuring the amount of time a loop takes to execute is an important part of creating efficient programs. With the help of a profiler, you can accurately measure how long each loop takes so that you can identify any areas where it needs improvement to achieve better performance. Additionally, it also helps you determine which loops are taking up too much processing power or memory resources so that they can be optimized for better performance.
FAQ
How to run a loop 10 times in Arduino?
You can use the for loop to run a loop 10 times in Arduino. The syntax for this is as follows:
for (int i = 0; i < 10; i++)
{ //Your code here }
This will execute your code within the brackets 10 times, incrementing ‘i’ each time. You can also replace the number 10 with a variable if you wish to change the number of times it loops according to other conditions. Also, don’t forget that when performing loops in Arduino, make sure you have an exit condition, or else it may loop infinitely and cause errors!
How do I debug my Arduino program?
Debugging involves finding and fixing errors or bugs in your program. To debug an Arduino program, you can use the Serial Monitor to view debug messages or print statements that help you identify errors and problems in your code. You can also use breakpoints while debugging, which allow you to pause your program at certain points and examine variables, as well as step through each line of code one by one until you find the issue. Finally, if needed, you can also go back and review past sketches or programs for any issues that may be related to the current problem.
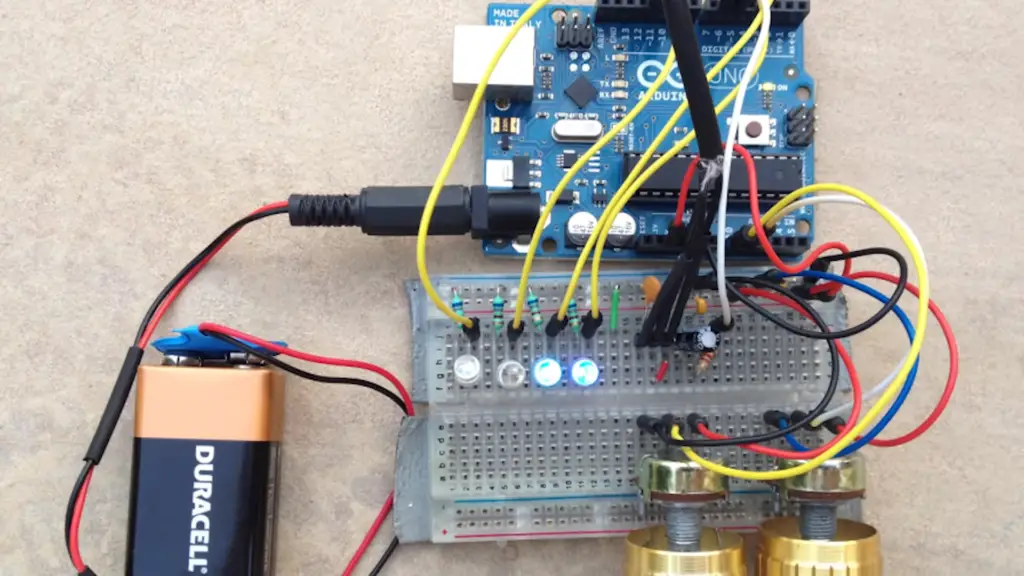
Do I need a soldering iron to assemble my Arduino circuit?
No – although it is recommended to solder components together when building an Arduino circuit for better electrical connections and durability, it is not required. You can instead use alligator clips or other types of connectors to connect your components together without soldering. However, if you plan on making a more permanent circuit, it is best to solder the components together.
What type of power supply do I need for my Arduino?
The type of power supply you need depends on the specific Arduino board model you have. Some boards require an AC adapter while others may take AA batteries as their power source. It is also possible to use a USB connection to provide power, but this will likely be slower than using dedicated power sources such as AC adapters or rechargeable batteries. Additionally, some boards have internal voltage regulation so that they can accept different voltages from different power supplies without damaging the board. Be sure to check your specific Arduino board’s documentation to determine which power sources it is compatible with.
What types of programming languages can I use with an Arduino?
The most common language used for programming Arduino boards is C/C++, but you can also use other languages such as Python and Java. Additionally, there are many libraries available for different types of functions and sensors that allow you to write code in a simplified language without having to worry about the low-level details of how the hardware works. Finally, you can also program using visual development environments such as Blockly or Scratch for a more beginner-friendly approach.
Can you use while loops in Arduino?
Yes, you can use while loops in Arduino. While loops are similar to for loops but they are slightly different in the way they execute. A while loop will keep repeating its body as long as the condition it checks stays true, whereas a for loop will run only a set number of times before exiting. The syntax for using a while loop is as follows:
while (condition) { //Your code here }
This code will repeatedly execute until the specified condition becomes false. Be sure to add an exit condition to your code or else it may end up running infinitely and causing errors!
How do I run an Arduino once in loop?
You can use the function millis() to run your Arduino code once in a loop. The syntax for this is as follows:
if (millis() > previousMillis + interval) { //Your code here previousMillis = millis(); }
This checks if the current time (in milliseconds) is greater than the last time your code was run plus an interval you specify and, if it is, it will execute the code in the brackets before setting ‘previousMillis’ to the current time so that it won’t run again until after another interval has passed.
What is Fritzing?
Fritzing is an open-source electronic design automation software used for prototyping and designing circuit boards. It features a user-friendly interface that allows you to create diagrams of your circuits using components from the Fritzing library as well as custom ones you can design yourself. Additionally, it has an inbuilt simulator which allows you to test your circuit before building it and see what happens when different components are connected together.
Can I use my Arduino board without programming?
Yes – there are some projects where no coding is necessary to get your Arduino board working, such as controlling LED lights or motors with a few simple connections. However, most projects will require at least basic programming to get the desired results. For example, if you want to build a robot using your Arduino board then you will need to write code to control its motors and sensors. Coding will also be necessary if you want to store data or connect your Arduino board to other devices such as computers or smartphones.
Can Arduino run 2 loops at once?
Yes, it is possible to run two loops at the same time on an Arduino board. This is done by using a concept called “multi-tasking” which basically allows your code to switch between different tasks quickly and efficiently as if they were running simultaneously. To use this feature, you will need to create separate functions for each loop and then call them both in the main loop.
What are some common mistakes when programming Arduino?
Some common mistakes made when programming Arduino include forgetting to initialize variables, not declaring pin modes correctly, not using delay() correctly, accidentally declaring infinite loops without an exit condition, and trying to use data types that are too large for the memory available. Additionally, some errors can only be found through debugging, which involves using a serial monitor or logic analyzer to check voltage levels, measure the frequency of pulses, and other functions. Finally, always make sure to double-check your code for any syntax errors before uploading it to your board!
Useful Video: Arduino Workshop – Chapter Three – FOR Loops
Conclusion Paragraph
Using Arduino For-Loops can be a great way to efficiently control multiple actions within your project. With the ability to easily modify the loop conditions and structure, you can customize your code for whatever task is at hand. Additionally, with its wide range of libraries and shields, Arduino For-Loops provide an easily accessible platform for beginners to explore coding solutions. Whether you are performing simple tasks like flashing LEDs or exploring more complex programming patterns, learning how to use Arduino For-Loops will enable you to create powerful projects that solve real problems.
References
- https://users.cs.utah.edu/~germain/PPS/Topics/for_loops.html
- https://learnpython.com/blog/write-for-loop-python/
- https://www.best-microcontroller-projects.com/arduino-for-loop.html