
Installing the UniFi Controller on the Raspberry Pi opens up a world of possibilities for streamlined network management and enhanced connectivity. Ubiquiti Networks’ UniFi ecosystem has garnered acclaim for its efficient networking solutions, and combining it with the power of the Raspberry Pi further amplifies its potential. This guide delves into the step-by-step process of installing the UniFi Controller on the Raspberry Pi, providing a comprehensive walkthrough for both beginners and enthusiasts alike.
By leveraging Raspberry Pi’s compact yet capable hardware and Ubiquiti’s robust network management software, you’ll be equipped to centrally manage access points, switches, routers, and other devices with ease. From the initial setup to optimizing your network’s performance, this article will equip you with the knowledge needed to transform your Raspberry Pi into a dynamic UniFi Controller hub.
Whether you’re a homeowner seeking seamless Wi-Fi coverage or an IT professional orchestrating a business network, this installation guide promises to empower you with the tools to create reliable and efficient network infrastructure. Join us on this journey as we explore the fusion of Ubiquiti’s networking prowess and the versatility of the Raspberry Pi, ultimately transforming your networking aspirations into reality.
About Ubiquiti Networks Products
Some of the key products and product lines offered by Ubiquiti Networks include:
- UniFi: The UniFi product line focuses on providing enterprise-grade networking solutions for both small and large-scale deployments. This includes access points, switches, routers, security gateways, and network management software. UniFi products are designed to be managed through a centralized software controller, allowing administrators to easily configure and monitor their network infrastructure;
- AmpliFi: AmpliFi is Ubiquiti’s consumer-focused brand, offering mesh Wi-Fi systems that provide reliable and extended coverage for home networks. These systems typically consist of a base station and satellite units that work together to create a seamless wireless network with strong coverage throughout a home;
- EdgeMAX: The EdgeMAX series includes routers and switches designed for more advanced users and small to medium-sized businesses. These products often feature more advanced routing and switching capabilities, making them suitable for more complex network setups;
- airMAX: The airMAX product line is designed for outdoor wireless communication, offering long-range wireless connectivity for applications such as point-to-point links and wireless backhaul;
- UniFi Protect: UniFi Protect is a video surveillance system that integrates with other UniFi products. It includes cameras, network video recorders (NVRs), and a management interface for monitoring and recording security footage;
- UniFi VoIP: Ubiquiti also offers VoIP (Voice over Internet Protocol) solutions, including IP phones and a communication platform designed to provide voice services over IP networks;
- UniFi LED Lighting: This product line offers energy-efficient LED lighting solutions that can be managed and controlled through the UniFi network management software;
- Accessories: Ubiquiti also provides various networking accessories, including antennas, cables, mounting hardware, and other components to complement their main product offerings;
It’s important to note that Ubiquiti Networks has gained popularity for its emphasis on providing cost-effective and easily manageable networking solutions. However, before making any purchasing decisions, it’s a good idea to research the specific product line you’re interested in, review user feedback, and consider your networking needs.
Why Do You Need These Products?
Ubiquiti Networks products serve various purposes and cater to different needs, both for consumers and businesses. Here are some reasons why you might consider using Ubiquiti Networks products:
- Improved Network Performance: Ubiquiti’s networking solutions, such as access points and switches, can significantly improve network performance by providing faster and more reliable Wi-Fi connectivity and efficient data routing;
- Expanded Coverage: Ubiquiti’s mesh Wi-Fi systems, like the AmpliFi series, can extend wireless coverage throughout your home or office, eliminating dead zones and ensuring a consistent connection in every corner;
- Scalability: Ubiquiti’s products are designed with scalability in mind, making them suitable for small setups as well as large, complex networks. You can start with a basic configuration and easily expand as your needs grow;
- Centralized Management: Products like UniFi offer a centralized management platform that allows you to monitor, configure, and control your network devices from a single interface. This simplifies network management and reduces the complexity of maintaining multiple devices;
- Advanced Features: Ubiquiti’s products often come with advanced features such as VLAN support, Quality of Service (QoS) settings, traffic shaping, and more, which can help optimize your network for specific applications or user groups;
- Cost-Effectiveness: Ubiquiti Networks is known for providing high-quality networking solutions at competitive prices, making their products an attractive option for individuals and businesses looking to achieve a balance between performance and cost;
- Security: Ubiquiti’s security gateways and surveillance products, such as UniFi Protect, can help enhance the security of your premises by providing video surveillance and network security features;
- Remote Access and Monitoring: Many Ubiquiti products offer remote access and monitoring capabilities, allowing you to manage your network and surveillance systems from anywhere using a smartphone or computer;
- Reliability: Ubiquiti products are generally well-regarded for their reliability and robustness. Their equipment is designed to handle various environmental conditions and usage scenarios;
- Tech Enthusiasts: For individuals interested in networking and technology, Ubiquiti products offer an opportunity to experiment, learn, and create custom network setups with advanced configurations
- Business Applications: Ubiquiti’s networking solutions are often employed by businesses to establish and maintain reliable and secure network infrastructures, which are crucial for operations, customer interactions, and data management;
What Is the UniFi Controller?
The UniFi Controller is a centralized management software provided by Ubiquiti Networks for configuring, monitoring, and managing various UniFi network devices. It serves as a unified interface to control and oversee your entire UniFi network infrastructure, which can include access points, switches, routers, security gateways, and more.
Key features and functions of the UniFi Controller include:
- Device Management: The controller allows you to adopt and configure UniFi devices, set up wireless networks, define VLANs, and manage network settings. It provides a comprehensive view of all connected devices and their status;
- Wireless Network Management: You can create and manage wireless networks, configure SSIDs, set security options, and monitor wireless performance. The controller helps ensure seamless roaming and consistent connectivity for Wi-Fi clients;
- Guest Network Setup: UniFi Controller facilitates the creation of guest networks with customizable authentication methods, captive portals, and bandwidth restrictions, allowing you to provide internet access to visitors while maintaining network security;
- Network Analytics: The controller provides insights into network traffic, usage patterns, and performance metrics through graphical representations and statistics. This data helps you identify potential bottlenecks and optimize your network;
- Firmware Management: You can easily update and manage firmware for all UniFi devices from a central location. This ensures that your network remains secure and up-to-date with the latest features and enhancements;
- User Access Control: The controller enables you to define user roles, permissions, and access policies, granting specific levels of control and management to different administrators or users;
- Multi-Site Management: For users with multiple locations or networks, the UniFi Controller allows you to manage and monitor multiple sites from a single interface, streamlining network management across different physical locations;
- Integration with Other UniFi Services: The UniFi Controller can be integrated with other Ubiquiti services, such as UniFi Protect for video surveillance or UniFi Access for access control systems [2];
- Remote Management: You can access and manage your UniFi network from anywhere using the UniFi mobile app or a web browser. This feature is particularly useful for remote troubleshooting and monitoring;
- Customization: The UniFi Controller provides various customization options, allowing you to tailor your network settings, branding, and user experience to meet your specific needs;
The UniFi Controller can be installed on various platforms, including Windows, macOS, and Linux, and can also run on dedicated hardware called UniFi Cloud Key. It plays a crucial role in simplifying network administration and ensuring the efficient operation of your UniFi network ecosystem.
Installing the UniFi Controller On the Raspberry Pi:
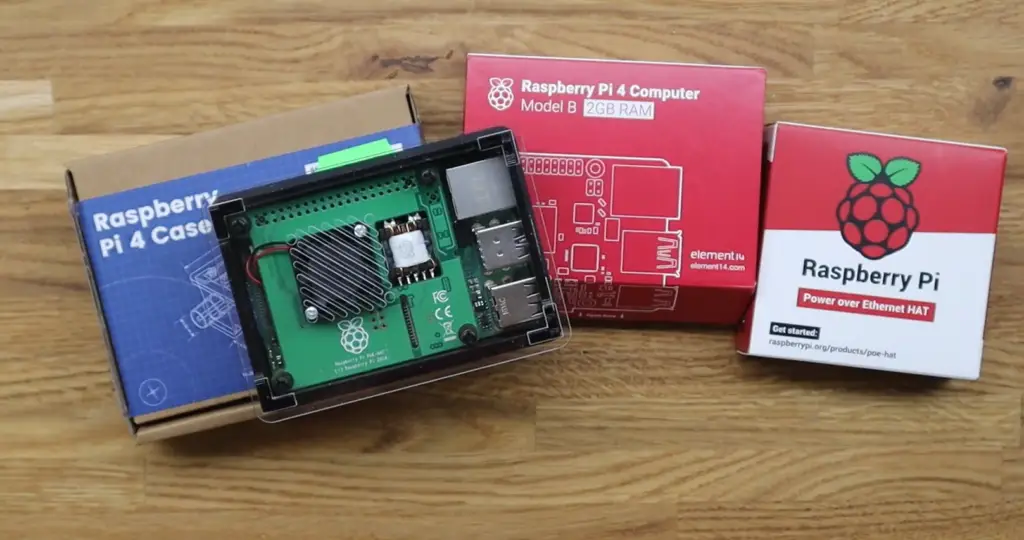
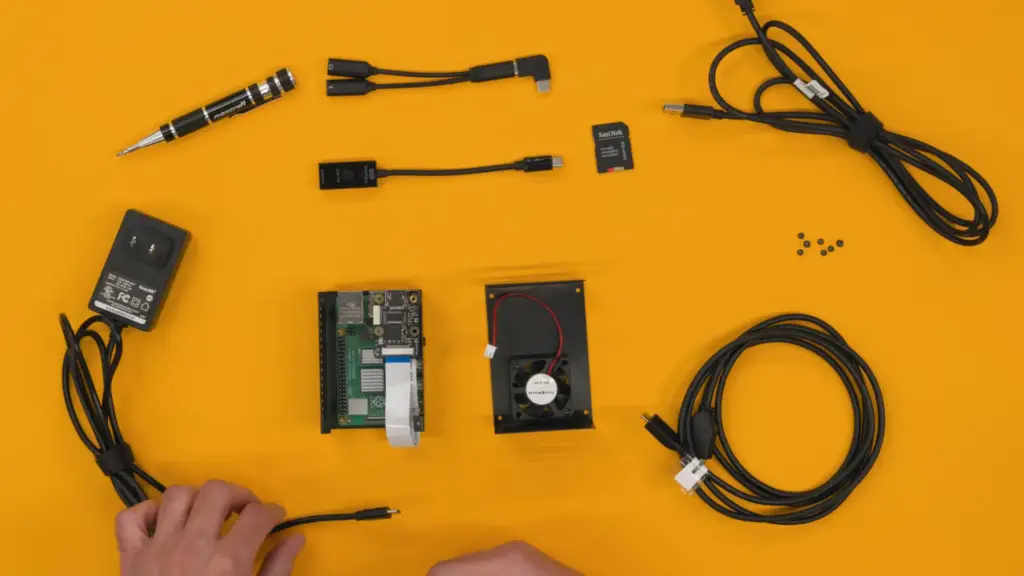
1. Required Equipment
- Raspberry Pi: Make sure you have a Raspberry Pi board, such as the Raspberry Pi 4, with sufficient resources to handle the UniFi Controller;
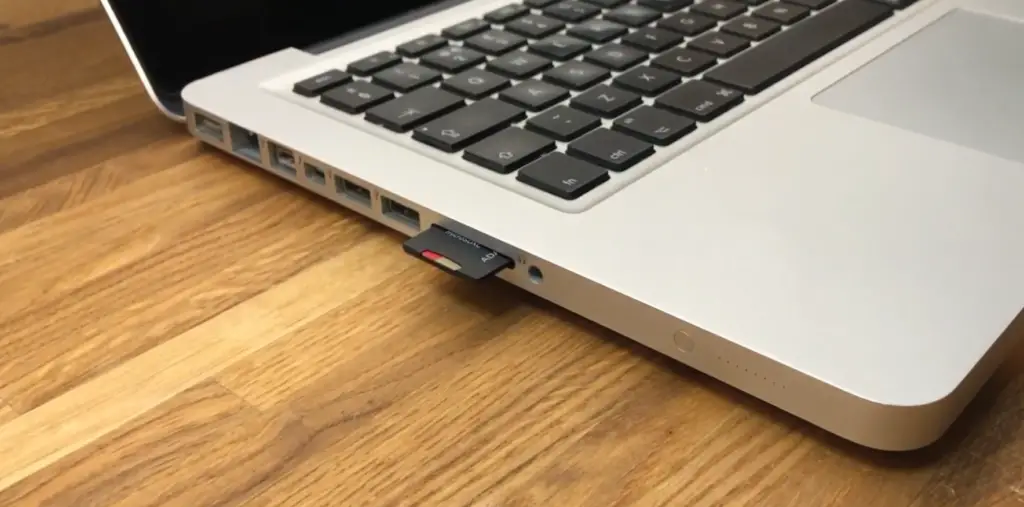
- Micro SD Card: You’ll need a micro SD card (16GB or larger) to install the Raspberry Pi operating system and the UniFi Controller software;
- Power Supply: A compatible power supply for your Raspberry Pi to keep it running reliably;
- Ethernet Cable or Wi-Fi: You can connect the Raspberry Pi to your network either through an Ethernet cable or via Wi-Fi;
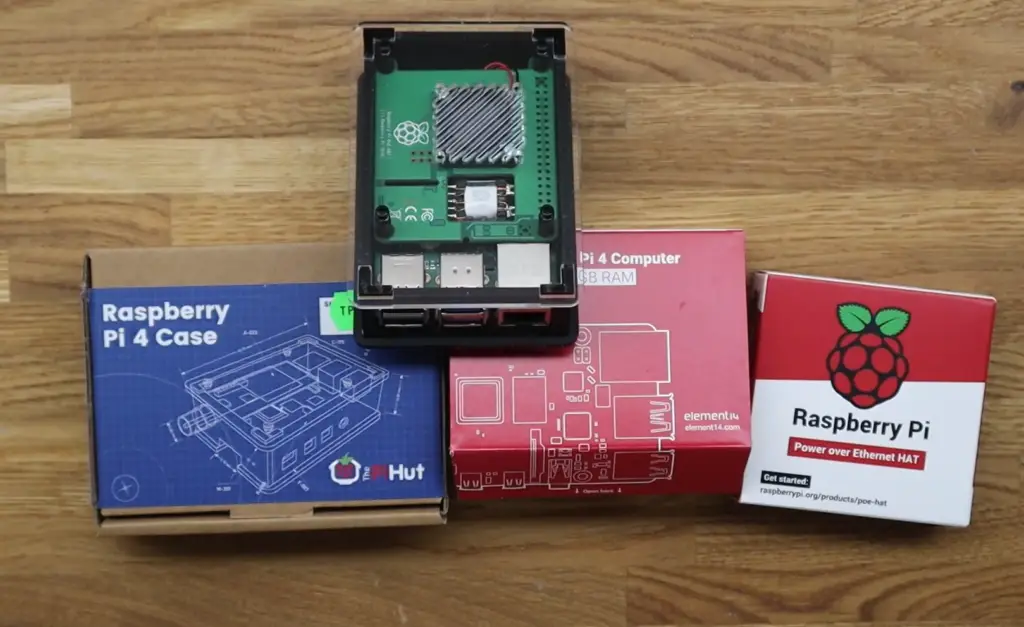
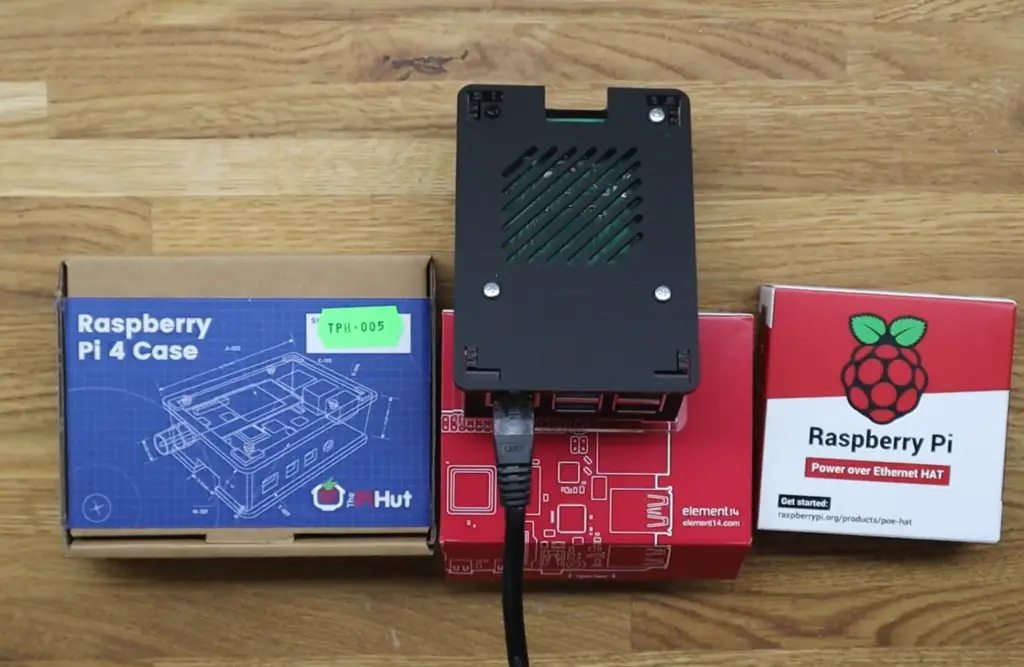
- Raspberry Pi Case: While not mandatory, a case helps protect your Raspberry Pi from dust and physical damage;
- USB Keyboard and Mouse: These peripherals are useful for initial setup and configuration;
- HDMI Cable: If you plan to connect your Raspberry Pi to a monitor during setup;
2. Preparing Your Raspberry Pi for the UniFi Controller
Before you start, it’s important to ensure your Raspberry Pi is ready for the UniFi Controller installation. Follow these steps to get everything set up:
Getting Ready
Begin by assembling your Raspberry Pi with the optional case, keyboard, mouse, and monitor if desired.
Adding Entropy Using rng-tools
To speed up the process, it’s recommended to install rng-tools, a package that helps generate random data for cryptographic processes:
sudo apt-get install rng-tools
Installing an Older Release of LibSSL
The UniFi Controller requires an older version of libssl. Install it using the following commands:
sudo apt-get update
sudo apt-get install libssl1.0.0
Installing MongoDB to Raspberry Pi for the UniFi Controller
The UniFi Controller relies on a database, and MongoDB is a suitable choice. Install MongoDB on your Raspberry Pi:
sudo apt-get install mongodb
3. Getting the Raspberry Pi Up and Running
With the initial preparations in place, it’s time to get your Raspberry Pi up and running. Follow these steps [3]:
Activate SSH
To enable SSH (Secure Shell) for remote access, execute the following:
sudo systemctl enable ssh
sudo systemctl start ssh
Alternative Way to Enable SSH
Alternatively, you can enable SSH through the Raspberry Pi Configuration menu. Open the menu by running:
sudo raspi-config
Connecting with SSH
SSH allows you to access your Raspberry Pi remotely. Follow these steps to establish an SSH connection:
Find the IP Address
Before connecting via SSH, you’ll need to know the IP address of your Raspberry Pi. You can find it by running:
hostname -I
Connecting To the PI
To connect via SSH, use the following command:
ssh pi@
Replace with the actual IP address of your Raspberry Pi.
Connecting To the PI With Putty
If you’re using a Windows computer, you can use PuTTY to establish an SSH connection. Simply enter the IP address of your Raspberry Pi and click “Open.”
4. Setting Up the Raspberry Pi
Now that you’re connected to your Raspberry Pi, it’s time to set up a few essential configurations:
Set a Static IP Address
A static IP address ensures your Raspberry Pi always has the same address on your network. Edit the dhcpcd configuration file:
sudo nano /etc/dhcpcd.conf
Add the following lines at the end of the file, adjusting the values according to your network:
interface eth0
static ip_address=/24
static routers=
static domain_name_servers=
Press Ctrl + X, then Y, and finally Enter to save the changes.
Change the Default Password
For security reasons, it’s important to change the default password for the Raspberry Pi user:
passwd
Follow the prompts to set a new password.
5. Updating Raspberry Pi
Keep your Raspberry Pi’s software up to date by running:
sudo apt-get update
sudo apt-get upgrade
Install haveged
To improve random number generation performance, install haveged:
sudo apt-get install haveged
Update Java 11
The UniFi Controller requires Java 8 or later. Update your Java installation to version 11:
sudo apt-get install openjdk-11-jre-headless
Split Memory
For optimal performance, allocate more memory to the GPU. Edit the boot configuration:
sudo nano /boot/config.txt
Add the following line to allocate 16MB of memory to the GPU:
gpu_mem=16
Press Ctrl + X, then Y, and finally Enter to save the changes [4].
6. Installing the UniFi Controller on Raspberry Pi
Now that your Raspberry Pi is configured, it’s time to install the UniFi Controller software:
Install MongoDB
Before proceeding, ensure that MongoDB is running:
sudo systemctl start mongodb
Add the Repository for the UniFi Controller
Add the UniFi repository and import the GPG keys:
echo ‘deb http://www.ui.com/downloads/unifi/debian stable ubiquiti’ | sudo tee /etc/apt/sources.list.d/100-ubnt-unifi.list
sudo wget -O /etc/apt/trusted.gpg.d/unifi-repo.gpg https://dl.ui.com/unifi/unifi-repo.gpg
Install the UniFi Controller:
sudo apt-get update
sudo apt-get install unifi
The installation process may take a few minutes. Once completed, the UniFi Controller should be up and running on your Raspberry Pi.
7. Finished Installing the UniFi Controller on the Pi
You can now access the UniFi Controller’s web interface by opening a web browser and entering the IP address of your Raspberry Pi followed by the port number 8443 (e.g., https://:8443).
From the UniFi Controller interface, you can start adopting and managing your UniFi network devices, configuring wireless networks, and monitoring network performance.
The First Boot of the UniFi Controller on your Raspberry Pi: Tips
- Accessing the Web Interface: After the UniFi Controller installation, you can access the web interface by opening a web browser and entering the IP address of your Raspberry Pi followed by port 8443 (e.g., https://:8443). This will take you to the UniFi Controller’s login page;
- Initial Login: The default username and password for the UniFi Controller are both “ubnt”. It’s crucial to change these credentials for security purposes during the initial setup;
- Setting Up a Cloud Account (Optional): During the setup process, you have the option to create a Ubiquiti cloud account. This account enables you to manage your UniFi network remotely and provides additional features. You can choose to skip this step if you prefer local management;
- Device Adoption: To start managing your UniFi network devices, you need to adopt them into the UniFi Controller. Follow the on-screen instructions to adopt and configure your access points, switches, security gateways, and other devices. Make sure the devices are powered on and connected to the same network;
- Firmware Updates: Check for firmware updates for your UniFi devices through the UniFi Controller interface. Keeping your devices up to date ensures you have access to the latest features, enhancements, and security patches;
- Network Configuration: Set up your wireless networks, SSIDs, security settings, and guest access policies through the UniFi Controller. You can create different network profiles to accommodate various needs, such as work, home, and guest networks;
- Map Your Network: The UniFi Controller allows you to create visual maps of your network layout. This feature can be helpful for planning and troubleshooting your network infrastructure;
- Monitoring and Analytics: Explore the monitoring and analytics features of the UniFi Controller. You can track network performance, client usage, traffic statistics, and other valuable insights to optimize your network;
- Guest Portal: If you plan to offer guest Wi-Fi access, consider configuring the guest portal. This allows you to create a customizable landing page where guests can authenticate and access the internet;
- Backups: Regularly back up your UniFi Controller settings to prevent data loss. You can find the backup options in the UniFi Controller settings. Storing backups on a separate device or cloud service is recommended;
- Customization: Take advantage of the customization options within the UniFi Controller. You can customize branding, login pages, and other elements to create a personalized experience;
- Community and Support: Ubiquiti has an active community forum where users share experiences, troubleshoot issues and exchange tips. If you encounter any challenges or have questions, the community can be a valuable resource;
- Secure Your Raspberry Pi: Ensure your Raspberry Pi’s security by applying best practices, such as keeping the operating system and software up to date, using strong passwords, and enabling firewalls if necessary;
- Explore Additional Features: The UniFi Controller offers a range of advanced features, such as VLAN configurations, Quality of Service (QoS) settings, and VPN capabilities. Take time to explore these features based on your network requirements [5];
The Best UniFi Controller Configuration:
First Access: Logging into the UniFi Controller
Upon successfully installing the UniFi Controller, the first step is to access the web interface. Open your preferred web browser and enter the IP address of your UniFi Controller, followed by port 8443 (e.g., https://:8443). This will take you to the UniFi Controller’s login page.
Web Interface Overview
Upon logging in, you’ll be greeted by the UniFi Controller’s intuitive web interface. This dashboard provides an overview of your network’s status, including connected devices, network activity, and important alerts. Familiarize yourself with the layout, as it will be your central hub for managing your UniFi network.
Adding the First Access Point
Before diving into the configuration, it’s crucial to add your first UniFi access point to the controller. This is a straightforward process that involves adopting the device into your network. Ensure that the access point is powered on and connected to the same network as the UniFi Controller.
Physical Preparation
Proper physical placement of your access point is essential for optimal coverage and performance. Consider the following factors:
- Placement: Choose a central location with minimal obstructions for even coverage throughout your space;
- Height: Mount the access point at an optimal height to avoid interference and maximize signal propagation;
- Avoid Interference: Keep the access point away from sources of interference, such as other electronic devices and metal objects;
Software Configuration
With the physical setup in place, let’s delve into the software configuration of your UniFi Controller:
- Adopting Devices. In the UniFi Controller, navigate to the “Devices” tab and locate your access point. Click on “Adopt” to add the device to your network. Follow the on-screen instructions to complete the adoption process;
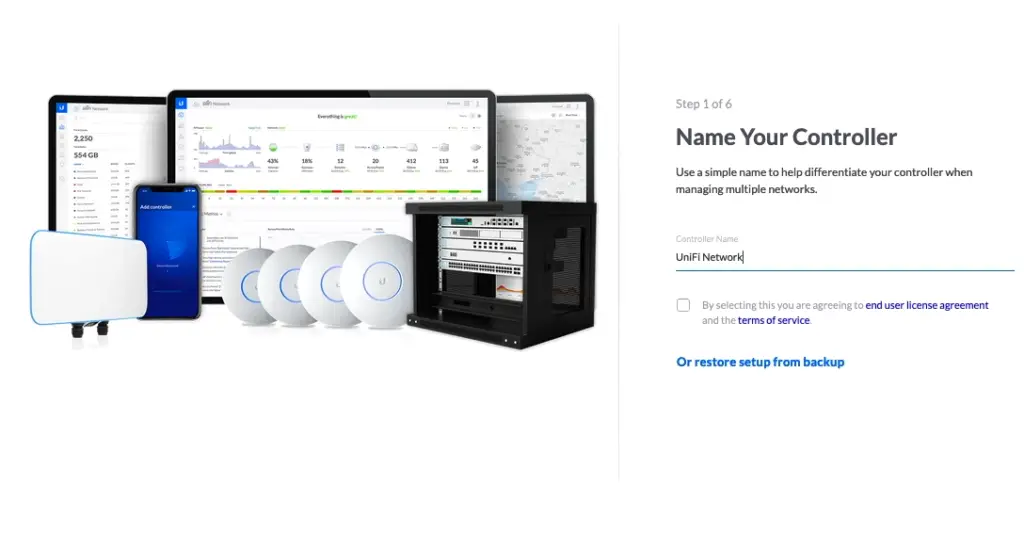
- Device Naming. Assign meaningful names to your devices for easy identification. This is particularly useful as you expand your network with additional UniFi devices;
- Wireless Uplink. If you plan to use a wireless uplink for extending your network’s reach, configure the necessary settings under the “Wireless Uplink” section. This enables access points to connect wirelessly to one another;
- Guest Control. Set up a guest network to provide internet access to visitors while maintaining network security. Customize the guest portal with your branding and authentication preferences;
VLAN Configuration
Utilize VLANs to segment your network for different purposes or user groups. Configure VLAN settings under the “Networks” section to enhance security and manage network traffic effectively.
Create Your Wireless Network
Configuring your wireless network involves defining SSIDs, security settings, and other essential parameters:
SSID Configuration
Create separate SSIDs for different network segments, such as private and guest networks. Choose meaningful names and customize settings like band and channel width.
Security Settings
Select appropriate security protocols for your SSIDs, such as WPA2 or WPA3. Create strong and unique passwords to safeguard your network against unauthorized access.
Advanced Options
FAQ:
1. How to Update Raspberry Pi UniFi Controller?
To update the UniFi Controller on your Raspberry Pi, follow these steps:
SSH into your Raspberry Pi using your preferred SSH client.
Run the following commands to update the package list and upgrade the UniFi Controller package:
sudo apt update
sudo apt upgrade unifi –y
Wait for the upgrade process to complete. The UniFi Controller will be updated to the latest version available in the repository.
2. How to Install SSH on a UniFi Controller?
If you need to enable SSH access on a UniFi Controller (typically for remote management), follow these steps:
- Log in to the UniFi Controller’s web interface;
- Go to the “Settings” tab;
- Under the “Controller” section, toggle the “Advanced Features” option to enable it;
- Scroll down and enable the “SSH Authentication” option;
- Enter the SSH username and password you want to use for SSH access;
- Click “Apply Changes” to save the settings;
3. How to Install a UniFi Controller on Debian?
To install the UniFi Controller on Debian, use the following steps:
SSH into your Debian system.
Run the following commands to add the UniFi repository and install the UniFi Controller package:
echo ‘deb http://www.ui.com/downloads/unifi/debian stable ubiquiti’ | sudo tee /etc/apt/sources.list.d/100-ubnt-unifi.list
sudo wget -O /etc/apt/trusted.gpg.d/unifi-repo.gpg https://dl.ui.com/unifi/unifi-repo.gpg
sudo apt update
sudo apt install unifi –y
Once the installation is complete, the UniFi Controller service will start automatically.
4. How to add a UniFi controller to an app?
To add a UniFi Controller to the UniFi mobile app:
- Download and install the UniFi mobile app from your device’s app store;
- Open the app and sign in to your Ubiquiti account. If you don’t have an account, you can create one.
- Tap the “+” button to add a new site;
- Enter your UniFi Controller’s IP address or hostname, along with the username and password for the controller;
- Tap “Save” to add the controller to the app;
5. How to connect UniFi with SSH?
To connect to a UniFi device using SSH:
- Open your preferred SSH client (e.g., PuTTY for Windows, Terminal for macOS/Linux);
- Enter the IP address of the UniFi device you want to connect to;
- Use the SSH username and password configured for the device or controller;
6. How to uninstall UniFi Raspberry Pi?
To uninstall the UniFi Controller from your Raspberry Pi:
SSH into your Raspberry Pi.
Run the following command to remove the UniFi Controller package:
sudo apt remove unifi -y
If desired, run the following command to remove configuration files:
sudo apt purge unifi -y
7. What Is the default IP address of the UniFi controller?
The default IP address of the UniFi Controller is typically https://localhost:8443 or https://127.0.0.1:8443 if you’re accessing it from the same machine where the controller is installed.
8. How to set the UniFi controller as default?
It’s not entirely clear what you mean by setting the UniFi Controller as “default”. If you’re referring to making it the default web interface for managing UniFi devices, it is the default interface once you access it via its IP address and port (usually 8443).
9. How much memory does the UniFi controller need?
The memory requirements for the UniFi Controller depend on the size of your network and the number of managed devices. As a general guideline, a small network with a few devices can run on systems with 1GB of RAM, but larger networks may require 2GB or more.
10. Does the UniFi controller need to be on the same network?
The UniFi Controller does not necessarily need to be on the same network as the managed UniFi devices. You can manage remote devices as long as they can reach the UniFi Controller’s IP address and the necessary ports (e.g., 8080, 8443) are open.
11. How to create a UniFi controller backup?
To create a UniFi Controller backup:
- Log in to the UniFi Controller;
- Go to the “Settings” tab;
- Click on “Backup” in the left-hand menu;
- Click the ‘Create Backup” button;
- Save the backup file to a secure location;
12. How to create a local user UniFi controller?
To create a local user in the UniFi Controller:
- Log in to the UniFi Controller;
- Go to the “Settings” tab;
- Click on “User Groups” in the left-hand menu;
- Click “Create New User Group” and define the user group settings;
- Click “Add User” within the user group and provide the user’s details;
- Assign appropriate permissions to the user;
- Save the changes;
13. How to add a device to the UniFi Network Controller?
To add a device to the UniFi network controller:
- Log in to the UniFi Controller;
- Go to the “Devices” tab;
- Click the “+” button to add a new device;
- Enter the device’s MAC address or other details to help identify it;
- Click “Apply” to add the device to the controller;
14. How to add a UniFi switch to a controller?
To add a UniFi switch to the controller:
- Log in to the UniFi Controller;
- Go to the “Devices” tab;
- Click the “+” button to add a new device;
- Select “Switch” as the device type;
- Enter the switch’s MAC address and other details;
- Click “Apply” to add the switch to the controller;
Remember, the exact steps may vary slightly based on the UniFi Controller version and firmware updates. Always refer to the official UniFi documentation for the most accurate and up-to-date instructions.
Useful Video: How to install UniFi controller on Raspberry Pi
References
- https://raspberrytips.com/unifi-controller-raspberry-pi/
- https://community.ui.com/questions/Step-By-Step-Tutorial-Guide-Raspberry-Pi-with-UniFi-Controller-and-Pi-hole-from-scratch-headless/e8a24143-bfb8-4a61-973d-0b55320101dc
- https://pimylifeup.com/rasberry-pi-unifi/
- https://lazyadmin.nl/home-network/installing-unifi-controller-on-a-raspberry-pi-in-5-min/
- https://thepiguy.altervista.org/raspberry-pi-as-a-unifi-controller/
- https://www.thegeekpub.com/269831/raspberry-pi-unifi-controller-setup/