At the heart of this mini-computing marvel lies the potential to seamlessly integrate a diverse array of components and peripherals, each adding a unique layer of functionality to your projects.
Among these, the RFID RC522 chip stands as a testament to the fusion of convenience and versatility. RFID (Radio Frequency Identification) technology has revolutionized industries ranging from logistics to security, offering contactless identification and data exchange.
The marriage of this cutting-edge technology with the Raspberry Pi platform ushers in a realm of possibilities that span from personalized access control systems and interactive installations to inventory management and beyond. This comprehensive guide is your roadmap to unlocking the potential of the RFID RC522 chip with your Raspberry Pi.
Over the course of this exploration, we will delve into the intricacies of setting up the necessary hardware, configuring software interfaces, and harnessing the power of Python programming to harness the capabilities of the RFID RC522 chip. Whether you’re a seasoned Raspberry Pi enthusiast or embarking on your very first project, this guide will equip you with the knowledge and skills needed to embark on an exciting journey into the world of RFID technology.
What Is A RC522 Chip?
Key Features and Functionality
The RC522 chip is prized for its array of features, making it a darling of hobbyists, tinkerers, and professionals alike:
- Frequency Range: The RC522 chip operates at a frequency range of 13.56 MHz, a common frequency for RFID applications, offering a good balance between reading distance and energy efficiency;
- Communication Protocols: It supports a variety of communication protocols, including SPI (Serial Peripheral Interface), which makes it compatible with microcontrollers like the Raspberry Pi and Arduino;
- Data Security: Many RC522 modules offer data encryption and authentication features, ensuring secure communication between the reader and tags. This makes it suitable for applications involving sensitive information;
- Reading Distance: The reading distance between the RC522 reader and RFID tags typically ranges from a few centimeters to around 10 centimeters, depending on factors like antenna design and power;
- Fast Reading Speed: The RC522 chip boasts impressive read speeds, enabling rapid identification and processing of RFID tags, making it suitable for applications requiring quick response times;
Applications
The versatility of the RC522 chip leads to a multitude of practical applications:
- Access Control: Whether it’s granting employees access to a secure area or allowing entry to a smart home, the RC522 chip is adept at managing access control through RFID-enabled cards or key fobs;
- Inventory Management: Businesses can streamline their inventory processes by affixing RFID tags to products. This enables efficient tracking, reducing human error and enhancing overall inventory accuracy;
- Payment Systems: Contactless payment systems, like those found in many public transportation networks or cashless payment solutions, rely on RFID technology to ensure smooth and efficient transactions;
- Smart Agriculture: In agriculture, RFID tags attached to livestock can aid in tracking individual animals, monitoring their health, and managing herds more effectively;
- Library Systems: Libraries utilize RFID technology to automate book checkouts, returns, and inventory management, enhancing the patron experience;
- Interactive Displays: Museums and exhibitions employ the RC522 chip to create interactive displays, allowing visitors to access additional information by simply tapping their RFID-enabled devices;
What Is a RFID Technology?
RFID, or Radio Frequency Identification, is a transformative technology that enables the wireless transmission of data between objects through electromagnetic fields. This technology utilizes tags and readers to facilitate communication, allowing for the automatic identification and tracking of objects without the need for direct physical contact. With its wide range of applications and diverse capabilities, RFID has revolutionized industries and processes across the globe [2].
The Components of RFID
At its core, RFID technology consists of three key components:
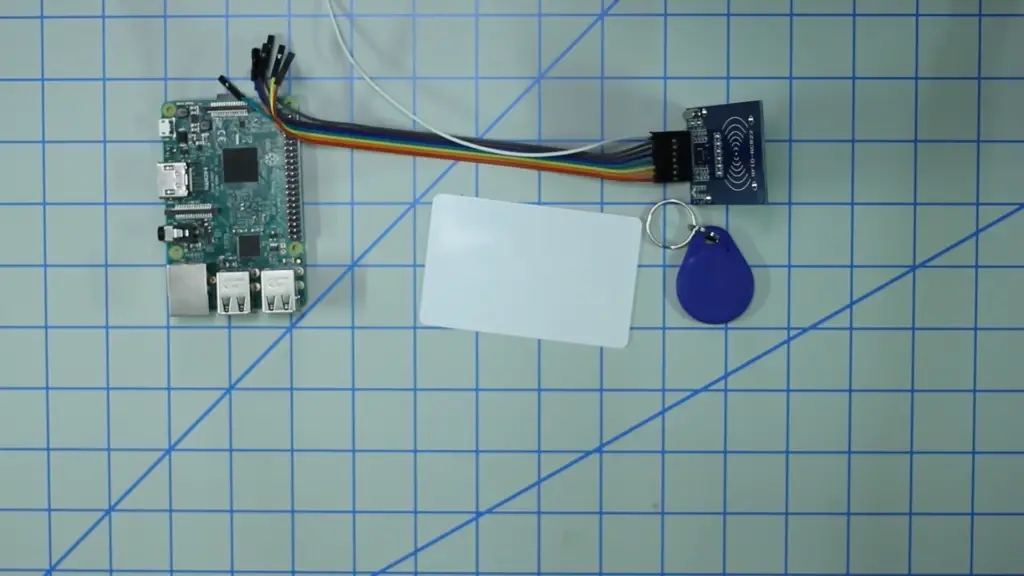
- RFID Tags: These are small electronic devices, often equipped with an antenna and a microchip, that store and transmit information. RFID tags come in various forms, from adhesive labels to durable enclosures, and they can be attached to objects, animals, or even people;
- RFID Readers: Also known as interrogators, RFID readers emit radio waves that power the RFID tags and receive the data they transmit. Readers can be fixed or handheld devices, and they play a crucial role in capturing and interpreting tag information;
- Database or Software System: The data collected by RFID readers is usually processed and managed through databases or software systems. This allows organizations to store, analyze, and utilize the information for various applications;
How RFID Works?
RFID technology operates based on the principle of electromagnetic coupling. When an RFID tag enters the range of an RFID reader’s electromagnetic field, it absorbs energy from the field, which powers the tag’s microchip. The microchip then sends back a unique identifier or other data to the reader, enabling the identification and tracking of the tagged object.
There are two main types of RFID systems:
- Passive RFID: In passive RFID systems, tags do not have an internal power source. They rely on the energy transmitted by the reader to activate and transmit data. Passive RFID tags are cost-effective and are commonly used for applications like inventory management, access control, and supply chain tracking;
- Active RFID: Active RFID tags, on the other hand, have their own power source (usually a battery). This allows them to transmit data over longer distances and in more challenging environments. Active RFID is often used for real-time location tracking, such as in vehicle tracking systems or monitoring high-value assets [3];
Diverse Applications
RFID technology’s versatility has led to its widespread adoption across numerous industries:
- Retail: RFID tags help retailers manage inventory, reduce theft, and enhance the shopping experience by providing real-time product availability information;
- Logistics and Supply Chain: RFID enables efficient tracking of goods throughout the supply chain, enhancing visibility, reducing errors, and improving overall logistics processes;
- Healthcare: RFID is used for patient identification, medication tracking, and asset management in healthcare settings, improving patient safety and operational efficiency;
- Manufacturing: Manufacturers employ RFID for quality control, work-in-process tracking, and automated production lines;
- Access Control and Security: RFID-based access control systems provide secure and convenient authentication for buildings, vehicles, and restricted areas;
- Animal Tracking: Farmers and researchers use RFID to track and manage livestock, wildlife, and even pets;
- Smart Cities: RFID is integrated into smart city initiatives for managing waste collection, parking, public transportation, and more;
RFID technology continues to evolve, with advancements in tag miniaturization, improved read ranges, and enhanced data encryption. As the Internet of Things (IoT) expands, RFID’s role in creating interconnected environments is becoming increasingly significant. From optimizing operations to enabling innovative customer experiences, RFID technology remains a powerful tool for a wide range of industries and applications.
Its ability to provide seamless and accurate data transfer without physical contact ensures that its influence will only continue to grow in our increasingly digital and interconnected world.
How These Technologies Can Be Used on Your Raspberry Pi?
Both the RC522 chip (RFID) and various other technologies can be seamlessly integrated with a Raspberry Pi, unlocking a world of possibilities for creative projects and practical applications. The Raspberry Pi’s GPIO pins, along with its software ecosystem, make it an ideal platform to harness the capabilities of these technologies.
RC522 Chip (RFID):
- Access Control System: Set up an RFID-based access control system using the RC522 chip and RFID cards or key fobs. When a valid RFID tag is presented to the reader, it can grant access to doors, gates, or secure areas;
- Attendance Tracking: Create an attendance system for schools or offices using RFID tags. The Raspberry Pi can log the presence of individuals as they scan their RFID cards;
- Smart Home Automation: Use RFID tags to trigger specific actions in your smart home setup. For example, you could tap an RFID tag to your bedside table to turn off all lights and appliances before sleeping;
- Inventory Management: Build an inventory management system to track items in a warehouse or store. Attach RFID tags to products and use the RC522 reader to update inventory status;
- Pet Tracking: Attach RFID tags to your pets’ collars and set up a system to track their movements around your home or yard;
- Interactive Art Installations: Combine RFID technology with artistic creativity. Create interactive art installations where visitors can trigger audio, visual, or other sensory experiences by interacting with RFID-enabled objects;
- Library Book Management: Develop an automated library system that allows patrons to check out and return books using RFID tags on the books and RFID readers at the library entrance;
Other Technologies on Raspberry Pi:
- Camera Module: Connect a Raspberry Pi Camera Module to capture images or videos. Use it for surveillance, wildlife monitoring, time-lapse photography, or even video streaming;
- Temperature and Humidity Sensors: Integrate sensors like the DHT22 or DS18B20 to monitor environmental conditions. This data can be used for home automation, weather stations, or plant care systems.;
- Motion Detection: Combine a PIR (Passive Infrared) sensor with your Raspberry Pi to create motion-activated lights, security alarms, or even wildlife cameras.;
- LED Matrix Displays: Interface with LED matrix displays for dynamic notifications, scrolling text, graphics, and visual feedback in projects like information displays or wearable tech;
- Ultrasonic Distance Sensors: Measure distances using ultrasonic sensors for applications such as parking assistants, object detection, or robotics;
- Voice Recognition: Utilize microphones and software libraries for speech recognition and voice commands. Develop voice-controlled home automation or voice-activated assistants;
- IoT Connectivity: Employ technologies like MQTT and Python libraries to connect your Raspberry Pi to the Internet of Things, enabling remote monitoring and control of devices and sensors;
- GPS Module: Integrate a GPS module for location tracking, geocaching, navigation, or creating location-aware applications;
To work with these technologies on your Raspberry Pi, you’ll typically follow these steps:
- Hardware Setup: Connect the components (sensors, modules, chips) to the appropriate GPIO pins on the Raspberry Pi. Refer to datasheets and guides for correct wiring;
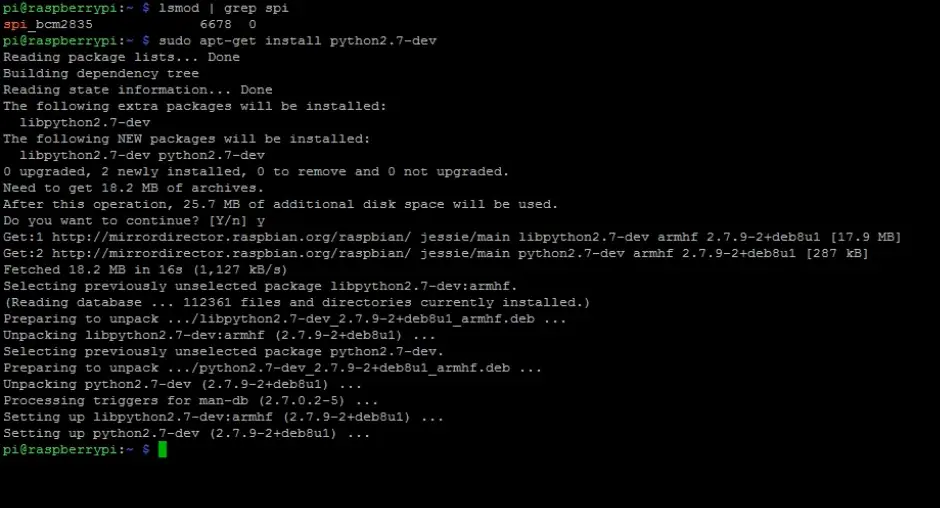
- Software Installation: Install required libraries or software packages to interface with the hardware. Many technologies have open-source libraries or code examples available online;
- Coding: Write Python or other programming language scripts to interact with the hardware. These scripts can read sensor data, control outputs, and perform desired actions;
- Testing and Iteration: Test your setup and refine your code as needed. Debug any issues that arise and iterate on your design to achieve the desired functionality;
- Integration: Integrate your technology into larger projects or systems, combining multiple sensors and functionalities to create more complex applications [4];
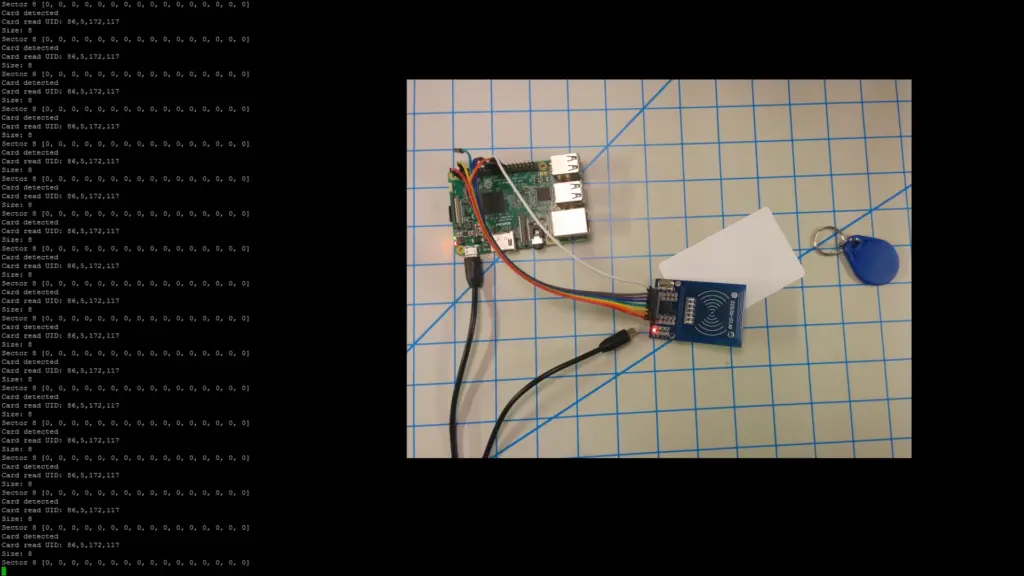
How to Setup a Raspberry Pi With a RFID-Ready RC522 Chip:
1. Required Equipment:
- Raspberry Pi (any model with GPIO pins should suffice);
- Micro SD Card (16GB or higher recommended);
- Power Supply (5V, 2.5A or higher);
- RC522 RFID reader;
- Breadboard;
- Breadboard wires;
- Raspberry Pi case;
- Ethernet Cable or Wi-Fi dongle for internet connectivity;
2. Setting Up Raspbian for the RFID RC522:
- Download Raspbian: Start by downloading the latest version of the Raspbian operating system from the official Raspberry Pi website. Choose the Lite version if you prefer a command-line interface or the Desktop version for a graphical user interface;
- Write Raspbian to the SD Card: Use software like Etcher to write the Raspbian image onto your micro SD card. This will create a bootable operating system for your Raspberry Pi;
- Initial Setup: Insert the micro SD card into your Raspberry Pi, connect it to a monitor, keyboard, and mouse, and power it up. Follow the on-screen instructions to complete the initial setup, including setting your country, language, and Wi-Fi network;
3. Getting Python Ready for the RFID RC522
Update and Upgrade: Open a terminal on your Raspberry Pi and run the following commands to ensure your system is up to date:
sudo apt update
sudo apt upgrade
Enable SPI Interface: The RC522 communicates using the SPI protocol. Enable the SPI interface on your Raspberry Pi by running:
sudo raspi-config
Navigate to “Interfacing Options” and enable SPI.
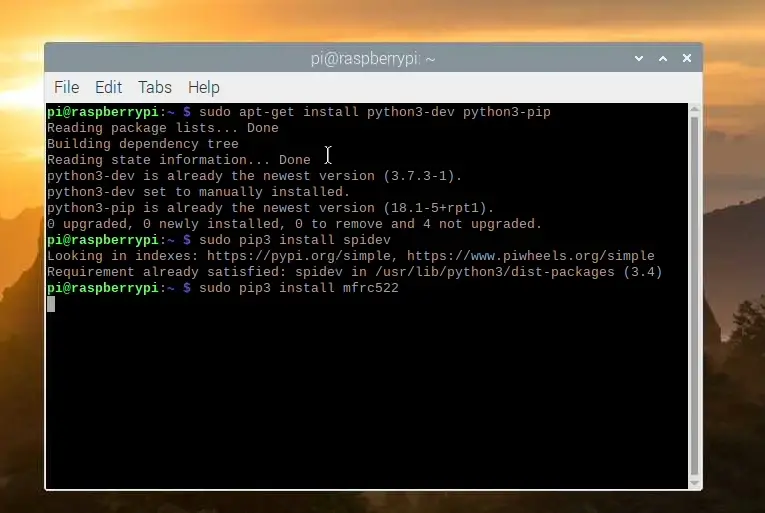
Install Required Packages: Install the SPI-Py library, which allows Python scripts to communicate with SPI devices:
sudo apt install python3-pip python3-dev
sudo pip3 install spidev
Install MFRC522 Library: The mfrc522 library provides Python functions to interact with the RFID RC522 reader. Install it using pip:
sudo pip3 install mfrc522
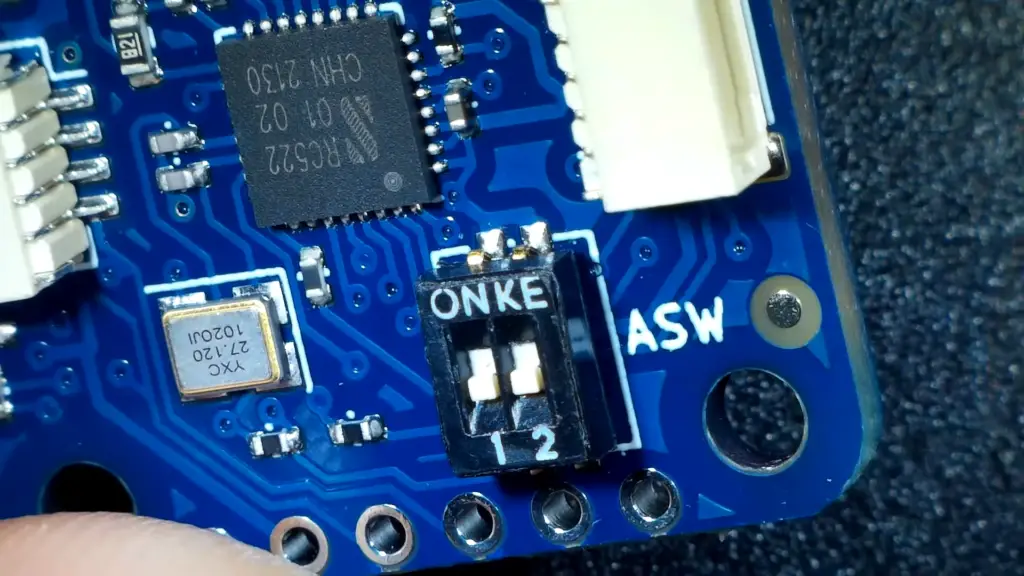
4. Writing With the RFID RC522
Now that your Raspberry Pi is prepared, let’s start writing Python code to interact with the RC522 RFID reader. This section will guide you through writing data to RFID cards or tags:
Create a New Python Script: Open your favorite text editor or IDE on the Raspberry Pi and create a new Python script, such as write_rfid.py.
Import Libraries: At the beginning of your script, import the necessary libraries:
import RPi.GPIO as GPIO
import MFRC522
Initialize the Reader: Create an object of the MFRC522 class to initialize the RFID reader:
reader = MFRC522.MFRC522()
Write Data to a Card: Use the MFRC522_Write function to write data to an RFID card. Provide the data you want to write and the sector where you want to write it [5]:
def write_data(data, sector):
status = reader.MFRC522_Auth(reader.PICC_AUTHENT1A, sector, [0xFF, 0xFF, 0xFF, 0xFF, 0xFF, 0xFF], reader.uid)
if status == reader.MI_OK:
status = reader.MFRC522_Write(sector, data)
if status == reader.MI_OK:
print(“Data written successfully”)
else:
print(“Error writing data”)
else:
print(“Authentication error”)
data_to_write = [0x01, 0x02, 0x03, 0x04, 0x05]
sector_to_write = 1
write_data(data_to_write, sector_to_write)
Run the Script: Save your script and run it using:
python3 write_rfid.py
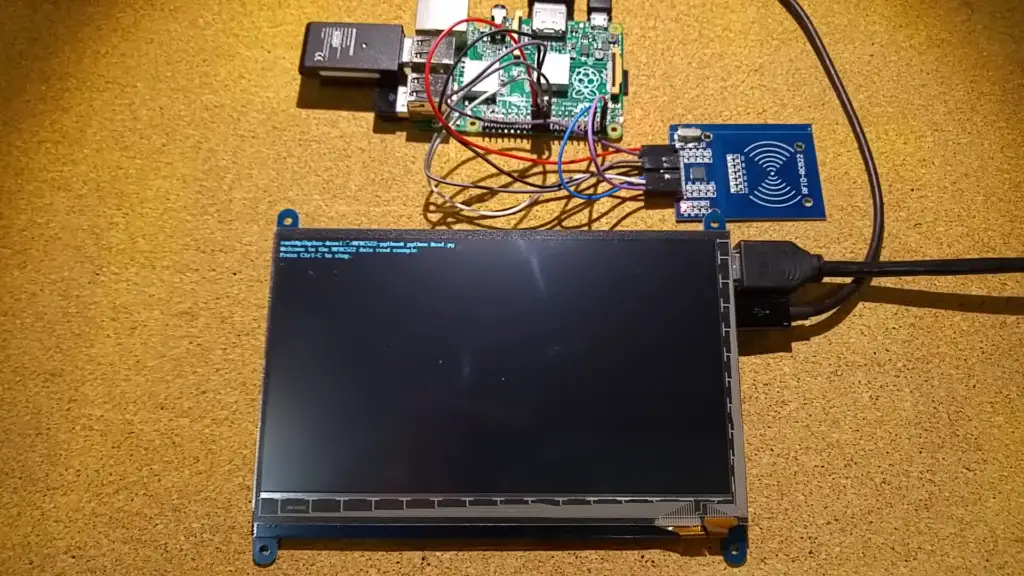
5. Reading With the RFID RC522
Now, let’s create another Python script to read data from RFID cards or tags using the RC522 reader:
Create a New Python Script: Open a new Python script, such as read_rfid.py.
Import Libraries: Import the necessary libraries as before:
import RPi.GPIO as GPIO
import MFRC522
Initialize the Reader: Initialize the RFID reader object:
reader = MFRC522.MFRC522()
Read Data from a Card: Use the MFRC522_Read function to read data from an RFID card in a specific sector:
def read_data(sector):
status = reader.MFRC522_Auth(reader.PICC_AUTHENT1A, sector, [0xFF, 0xFF, 0xFF, 0xFF, 0xFF, 0xFF], reader.uid)
if status == reader.MI_OK:
data = reader.MFRC522_Read(sector)
return data
else:
return None
sector_to_read = 1
read_data = read_data(sector_to_read)
if read_data is not None:
print(“Data read:”, read_data)
else:
print(“Error reading data”)
Run the Script: Save your script and run it using:
python3 read_rfid.py
Setting Up The Interface RFID Module RC522 with Raspberry Pi 4:
1. Components
- Raspberry Pi 4 (2GB, 4GB, or 8GB RAM variant);
- Micro SD Card (16GB or higher recommended);
- Power Supply (5V, 3A or higher);
- RC522 RFID Reader;
- Breadboard;
- Breadboard wires;
2. Assembling the RFID RC522
The RFID RC522 reader comes with a set of pins that need to be correctly positioned on the breadboard. Here’s how you can do it:
- Place the RC522 RFID module on the breadboard, aligning its pins with the breadboard’s rows;
- Make sure the long edge of the RC522 module aligns with one side of the breadboard, leaving space for connecting wires;
- Ensure that the pins of the RC522 module are securely inserted into the breadboard’s rows, providing stability to the connection;
3. Wiring the RFID RC522
Proper wiring is crucial to establishing a seamless connection between the module and the Raspberry Pi 4:
- 3.3V Power Supply (VCC): Connect the VCC pin of the RC522 module to the 3.3V power pin (Pin 1) on the Raspberry Pi;
- Ground (GND): Connect the GND pin of the RC522 module to any of the ground pins (Pin 6, 9, 14, 20, 25, or 30) on the Raspberry Pi;
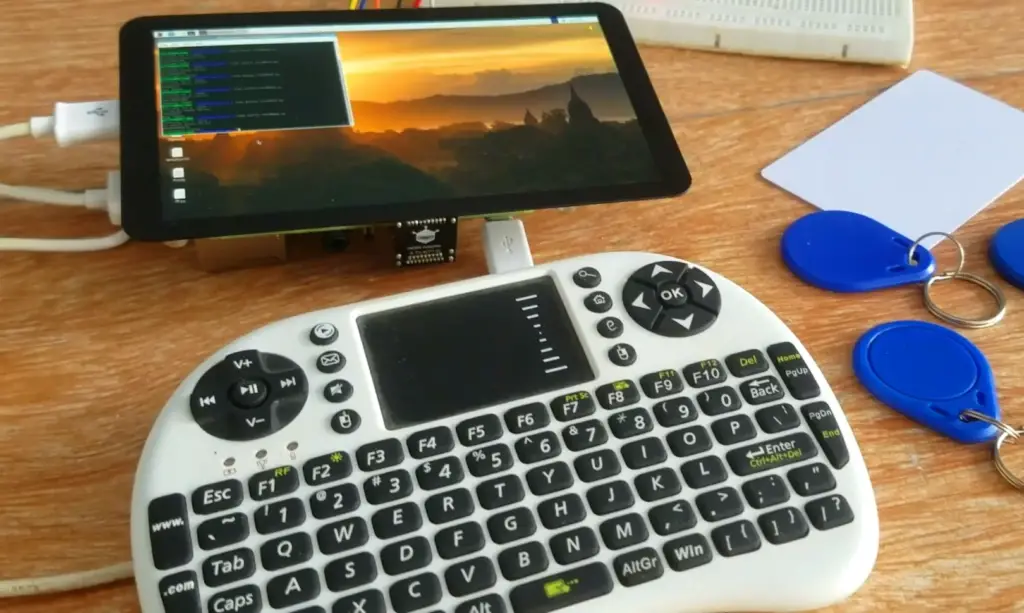
SPI Interface:
- SDA (Serial Data Input/Output): Connect the SDA pin of the RC522 module to the SDA (Pin 3) on the Raspberry Pi;
- SCK (Serial Clock): Connect the SCK pin of the RC522 module to the SCKL (Pin 5) on the Raspberry Pi
- MOSI (Master Output Slave Input): Connect the MOSI pin of the RC522 module to the MOSI (Pin 19) on the Raspberry Pi;
- MISO (Master Input Slave Output): Connect the MISO pin of the RC522 module to the MISO (Pin 21) on the Raspberry Pi;
- IRQ (Interrupt Request): This pin is optional and can be left unconnected for basic operations;
- Antenna: The RC522 module comes with an onboard antenna. No additional wiring is required for the antenna;
How to Use RFID Cards with a Raspberry Pi?
1) Required Components:
- Raspberry Pi (any model with GPIO pins should work);
- Micro SD Card (with Raspbian OS installed);
- Power supply;
- RC522 RFID reader;
- Breadboard;
- Breadboard wires;
- RFID cards or tags;
2) Hardware Setup
Connect the RC522 RFID Reader:
- Connect the 3.3V pin on the RC522 module to the 3.3V pin on the Raspberry Pi;
- Connect the GND pin on the RC522 module to any GND pin on the Raspberry Pi;
- Connect the SDA pin on the RC522 module to the SDA (GPIO 8) pin on the Raspberry Pi;
- Connect the SCK pin on the RC522 module to the SCLK (GPIO 11) pin on the Raspberry Pi;
- Connect the MOSI pin on the RC522 module to the MOSI (GPIO 10) pin on the Raspberry Pi
- Connect the MISO pin on the RC522 module to the MISO (GPIO 9) pin on the Raspberry Pi;
- The IRQ pin on the RC522 module is optional and can be connected to any available GPIO pin [6];
3) Software Setup
Enable SPI Interface:
- Open a terminal on your Raspberry Pi or connect remotely using SSH;
- Run sudo raspi-config to open the Raspberry Pi Configuration tool;
- Navigate to “Interfacing Options” and enable the SPI interface;
Install Required Packages:
- Update your package list: sudo apt update
- Install necessary packages: sudo apt install python3-pip python3-dev
- Install SPI-Py library: sudo pip3 install spidev
Install MFRC522 Library:
Install the mfrc522 library for Python to interact with the RFID module: sudo pip3 install mfrc522
4) Write Python Script
Create a Python script to read data from RFID cards using the RC522 reader:
import RPi.GPIO as GPIO
import MFRC522
def read_rfid():
reader = MFRC522.MFRC522()
try:
while True:
(status, TagType) = reader.MFRC522_Request(reader.PICC_REQIDL)
if status == reader.MI_OK:
print(“Card detected”)
(status, uid) = reader.MFRC522_Anticoll()
if status == reader.MI_OK:
card_uid = f”{uid[0]:02X}:{uid[1]:02X}:{uid[2]:02X}:{uid[3]:02X}:{uid[4]:02X}”
print(“Card UID:”, card_uid)
except KeyboardInterrupt:
GPIO.cleanup()
if __name__ == “__main__”:
read_rfid()
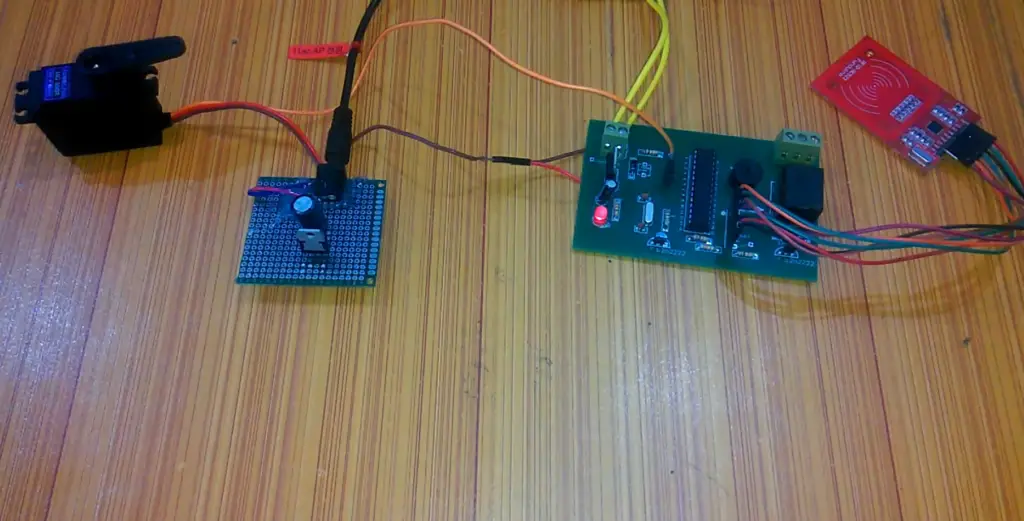
5) Run the Script
Save the Python script on your Raspberry Pi (e.g., rfid_reader.py).
Open a terminal and navigate to the directory where the script is saved.
Run the script using: python3 rfid_reader.py
6) Test with RFID Cards
Hold an RFID card or tag near the RC522 module. The script should detect the card and print its UID when detected.
How Do RFID Card Readers and Writers Work?
RFID Card Readers:
- Powering the Tag: RFID cards or tags do not have a traditional power source like batteries. Instead, they rely on the electromagnetic energy generated by the RFID reader. When an RFID card comes within the operating range of the reader, it absorbs energy from the reader’s radiofrequency (RF) signal;
- Communication: Once powered, the RFID card or tag sends back a unique identification number or other data encoded on the card’s integrated circuit. This communication is achieved through modulating the RF signal reflected back to the reader. The reader detects this modulated signal and decodes the data embedded in the signal;
- Antenna and Frequencies: The RFID reader emits RF signals through its antenna. The reader and the tag must operate at the same frequency for successful communication. Common RFID frequencies include 125 kHz (low-frequency) and 13.56 MHz (high-frequency). UHF (ultra-high frequency) RFID systems also exist, operating at frequencies around 900 MHz;
- Reading Distance: The reading distance between the RFID reader and the tag depends on factors such as the frequency used, the power of the reader, and the tag’s design. Low-frequency RFID systems generally have shorter reading distances compared to high-frequency or UHF systems;
- Data Processing: Once the reader receives the data from the RFID card or tag, it can be processed by an associated computer or controller. The data can be used for various purposes, such as access control, inventory tracking, or authentication;
RFID Card Writers:
RFID card writers, as the name suggests, are devices that allow you to write data onto RFID cards or tags. These writers enable customization and encoding of information onto the card’s integrated circuit.
Here’s how RFID card writers work:
- Writing Data: RFID card writers interact with the card’s integrated circuit to encode or modify data. This process involves altering the memory blocks or sectors on the card, depending on the RFID technology being used (e.g., HF or UHF);
- Authentication: Some RFID cards or tags have security features that require authentication before writing data. This ensures that only authorized individuals can modify the card’s information;
- Encoding: Data can be encoded in various formats, such as text, numbers, or binary values, onto the card’s memory. This encoded data can represent anything from identification numbers to access permissions;
- Writing Process: The writing process involves sending specific commands and data to the RFID card’s integrated circuit through the writer. The integrated circuit processes the instructions and stores the data accordingly;
- Applications: RFID card writers are commonly used for applications such as creating access control cards, encoding payment information onto contactless cards, or updating inventory tags with new information;
It’s important to note that not all RFID cards or tags are writable. Some cards are read-only, meaning their data cannot be modified once encoded, while others are rewritable, allowing for data updates.
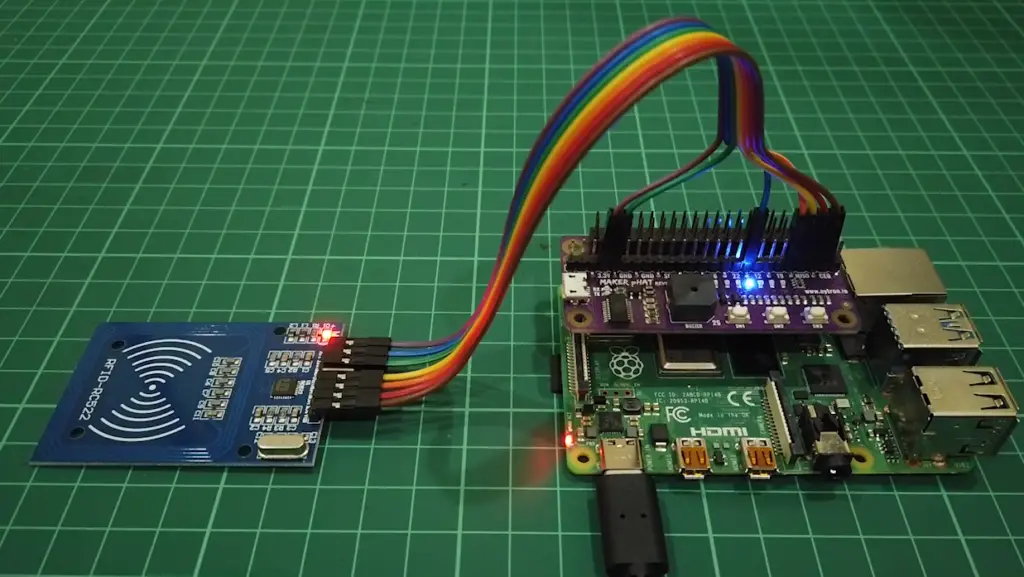
How to Connect the RFID Card Reader/Writer to the Raspberry Pi:
Required Components:
- Raspberry Pi (any model with GPIO pins should work);
- Micro SD Card (with Raspbian OS installed);
- Power Supply;
- RC522 RFID card reader/writer;
- Breadboard;
- Breadboard wires;
Step-by-Step Connection Guide:
Identify Pins
The RC522 RFID module has labeled pins that need to be connected to specific GPIO pins on the Raspberry Pi. Familiarize yourself with the pinout of both the RC522 module and the Raspberry Pi.
Power Connections:
- Connect the 3.3V pin on the RC522 module to the 3.3V pin (Pin 1) on the Raspberry Pi;
- Connect the GND pin on the RC522 module to any GND pin (Pin 6, 9, 14, 20, 25, or 30) on the Raspberry Pi;
SPI Interface Connections:
- Connect the SDA (Serial Data Input/Output) pin on the RC522 module to the SDA (GPIO 8, Pin 24) pin on the Raspberry Pi;
- Connect the SCK (Serial Clock) pin on the RC522 module to the SCLK (GPIO 11, Pin 23) pin on the Raspberry Pi;
- Connect the MOSI (Master Output Slave Input) pin on the RC522 module to the MOSI (GPIO 10, Pin 19) pin on the Raspberry Pi;
- Connect the MISO (Master Input Slave Output) pin on the RC522 module to the MISO (GPIO 9, Pin 21) pin on the Raspberry Pi;
IRQ (Interrupt Request):
The IRQ pin on the RC522 module is optional and can be left unconnected for basic operations.
Antenna:
The RC522 module has an onboard antenna. No additional wiring is required for the antenna.
Wiring Diagram:
Here’s a simplified wiring diagram illustrating the connections between the RC522 RFID module and the Raspberry Pi:
RC522 Module Raspberry Pi
———————————
3.3V (VCC) –> 3.3V (Pin 1)
GND –> GND (Any GND Pin)
SDA –> SDA (GPIO 8, Pin 24)
SCK –> SCLK (GPIO 11, Pin 23)
MOSI –> MOSI (GPIO 10, Pin 19)
MISO –> MISO (GPIO 9, Pin 21)
Software Setup:
After making the physical connections, you’ll need to enable the SPI interface on the Raspberry Pi and install the necessary libraries to communicate with the RC522 module. Refer to the previous responses in this conversation for detailed instructions on setting up the software environment.
Testing:
Once you have completed the connections and software setup, you can test the setup by running Python scripts that interact with the RC522 RFID module. These scripts can read data from RFID cards or tags, providing you with real-time feedback on the communication between the components.
FAQ:
1. How to connect the RFID RC522 chip?
To connect the RFID RC522 chip to a Raspberry Pi, follow these steps:
Power Connections:
- Connect the 3.3V pin of the RC522 to the 3.3V pin on the Raspberry Pi;
- Connect the GND pin of the RC522 to any GND pin on the Raspberry Pi;
SPI Interface Connections:
- Connect the SDA pin of the RC522 to the SDA (GPIO 8) pin on the Raspberry Pi;
- Connect the SCK pin of the RC522 to the SCLK (GPIO 11) pin on the Raspberry Pi;
- Connect the MOSI pin of the RC522 to the MOSI (GPIO 10) pin on the Raspberry Pi;
- Connect the MISO pin of the RC522 to the MISO (GPIO 9) pin on the Raspberry Pi;
2. How to program the RFID RC522 chip?
To program the RFID RC522 chip, you need to write Python scripts that use the MFRC522 library. These scripts will communicate with the RC522 reader and handle RFID card interactions. Refer to the earlier detailed response on “How to Program the RFID Card Reader with Python” for step-by-step instructions.
3. How to install MFRC522 library in Raspberry Pi?
To install the MFRC522 library on a Raspberry Pi:
Open a terminal on the Raspberry Pi.
Run the following commands:
sudo apt update
sudo apt install python3-pip python3-dev
sudo pip3 install spidev
sudo pip3 install mfrc522
4. How do you program an RFID card?
Programming an RFID card involves writing data to the card’s memory using an RFID card writer. These writers often come with software that allows you to input data and encode it onto the card’s integrated circuit. The process can vary depending on the card writer’s manufacturer and software.
5. Why is RFID RC522 not reading?
Several factors could contribute to the RC522 not reading RFID cards:
- Incorrect wiring: Double-check your connections;
- Distance: Ensure the card is within the reader’s operating range;
- Interference: Avoid metal objects that may affect the RF signal;
- Faulty hardware: Check for any physical or electrical defects;
6. How to use the RFID module with Raspberry Pi?
To use the RFID module with a Raspberry Pi, follow these steps:
- Connect the RC522 module to the Raspberry Pi;
- Install the required libraries;
- Write Python scripts to interact with the RC522 module (e.g., reading card data);
- Run the Python script to test and use the RFID module;
7. Is RC522 NFC or RFID?
The RC522 module is an RFID (Radio Frequency Identification) module. It operates at RFID frequencies, not NFC (Near Field Communication) frequencies.
8. What is the difference between RC522 and em18?
The RC522 and EM18 are both RFID reader modules, but they may differ in terms of compatibility, features, and specifications. The RC522 is commonly used with Raspberry Pi and Arduino and operates at 13.56 MHz. The EM18 operates at a lower frequency (125 kHz) and is often used in access control systems.
9. What is the use of the RC522 RFID module?
The RC522 RFID module is used to read and interact with RFID cards or tags. It finds applications in access control, attendance systems, inventory management, interactive installations, and more.
10. How to connect RFID RC522 with Arduino?
To connect an RFID RC522 module with an Arduino, you need to connect similar pins as with a Raspberry Pi, but use Arduino’s corresponding GPIO pins. Refer to the RC522 datasheet and Arduino’s pinout to ensure proper connections.
11. How to connect an IR sensor to Raspberry Pi?
To connect an IR (Infrared) sensor to a Raspberry Pi, you typically connect the sensor’s output pin to one of the GPIO pins on the Raspberry Pi. The specifics may vary depending on the IR sensor model.
12. Why is RFID not working?
RFID might not be working due to wiring issues, incorrect code, improper power supply, damaged hardware, or other technical problems. Troubleshoot step by step, check your connections, and review your code.
13. Can Raspberry Pi connect to sensors?
Yes, Raspberry Pi can connect to various sensors, including temperature sensors, motion sensors, light sensors, and more. You need to interface the sensors via GPIO pins or using communication protocols like I2C or SPI.
14. Can Raspberry Pi use sensors?
Yes, Raspberry Pi can utilize a wide range of sensors to gather data from the environment. You can write Python scripts to read data from sensors and perform actions based on the collected information.
15. What hardware is required for RFID?
For RFID, you need an RFID reader/writer module (such as RC522), RFID cards or tags, and a microcontroller (e.g., Raspberry Pi or Arduino) to interface with the module.
16. What is the frequency of RC522?
The RC522 operates at a frequency of 13.56 MHz.
17. What tags are compatible with RC522?
RC522 is compatible with ISO 14443A standard RFID tags, which includes MIFARE Classic, MIFARE Ultralight, and other compatible tags.
18. What is the cost of RFID reader RC522?
The cost of an RFID reader module like RC522 can vary, but it’s generally in the range of $5 to $20 USD.
19. What cards are supported by RFID RC522?
RFID RC522 typically supports RFID cards or tags compliant with the ISO 14443A standard. This includes various MIFARE cards, Ultralight cards, and compatible tags.
20. What is the difference between Arduino PN532 and RC522?
Both PN532 and RC522 are RFID/NFC reader modules, but they differ in terms of supported frequencies, protocols, and features. RC522 operates at 13.56 MHz and supports ISO 14443A standard, while PN532 supports multiple frequencies (13.56 MHz, 125 kHz) and various NFC protocols.
21. What frequency does EM18 read RFID?
The EM18 RFID reader operates at a frequency of 125 kHz.
22. What are the three general types of RFID tag and reader combinations?
3 general types of RFID tag and reader combinations are:
- Passive Tags with Readers: Passive RFID tags without an internal power source are activated by the reader’s radio waves;
- Active Tags with Readers: Active RFID tags have their own power source and can transmit signals over longer distances to compatible readers;
- Semi-Passive (Battery-Assisted) Tags: These tags have a battery for internal operations but rely on the reader for communication;
23. What is the RFID reader module for Raspberry Pi?
The RFID reader module for Raspberry Pi refers to devices like the RC522 RFID reader module, which allows the Raspberry Pi to communicate with RFID cards or tags. It enables the Raspberry Pi to read data from and sometimes write data to RFID cards, opening up various application possibilities.
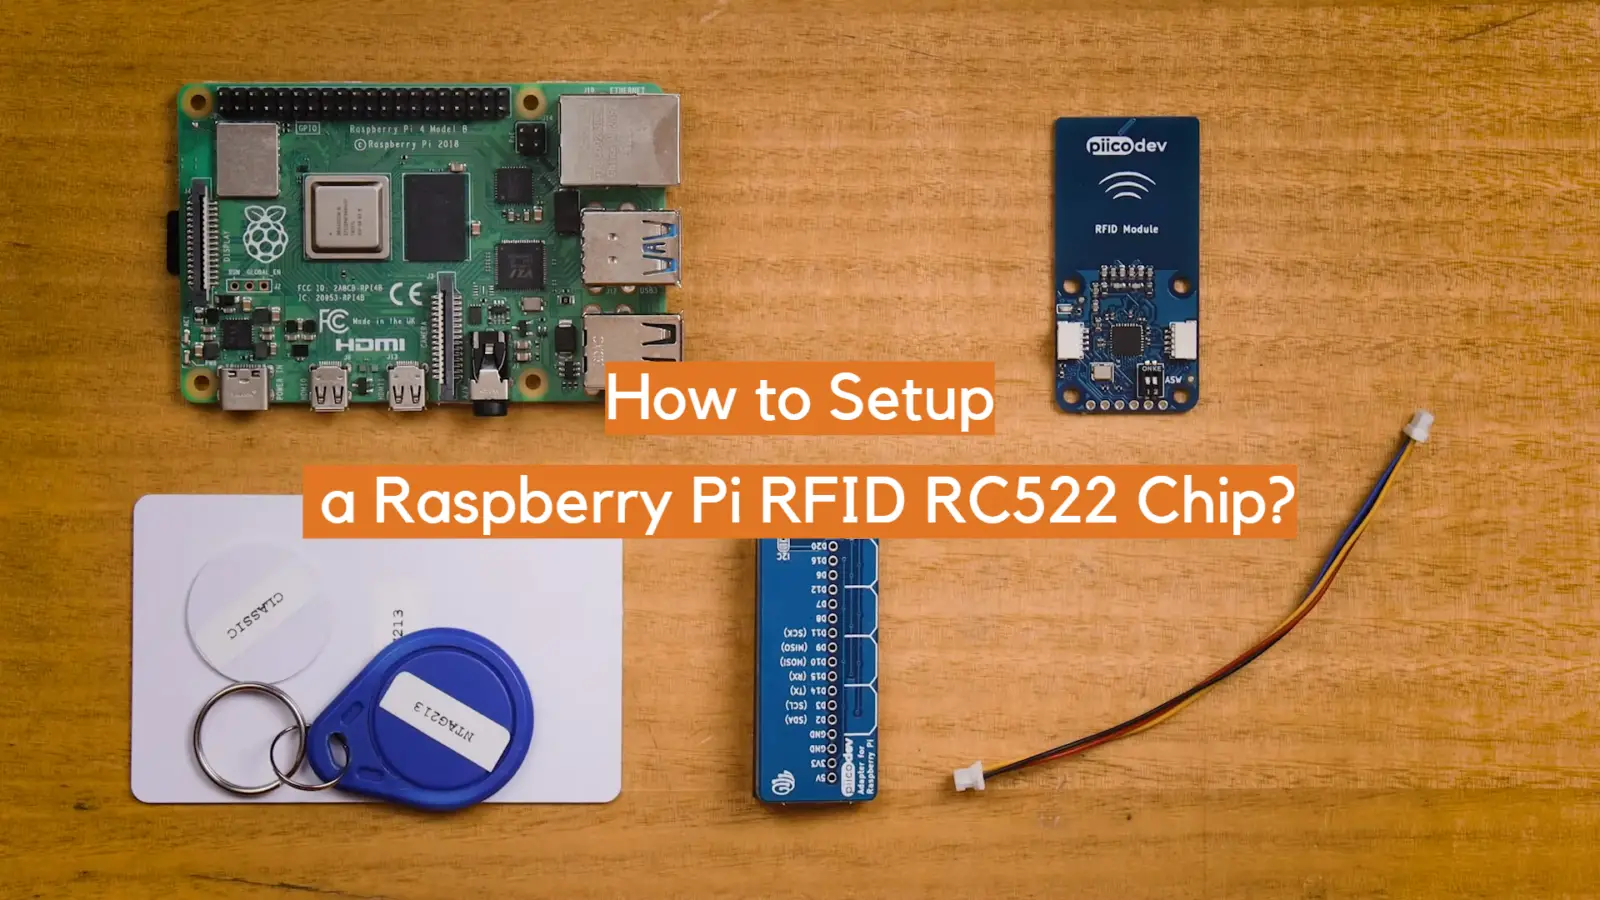
Useful Video: How to setup a Raspberry Pi RFID RC522 Chip
References
- https://pimylifeup.com/raspberry-pi-rfid-rc522/
- https://www.instructables.com/RFID-RC522-Raspberry-Pi/
- https://www.theengineeringprojects.com/2023/01/interface-rfid-module-rc522-with-raspberry-pi-4.html
- https://gist.github.com/msoghoian/c2a58ea60c38d53739c06d96ee1c3567
- https://www.circuitbasics.com/what-is-an-rfid-reader-writer/
- https://medium.com/coinmonks/for-beginners-how-to-set-up-a-raspberry-pi-rfid-rc522-reader-and-record-data-on-iota-865f67843a2d




Leave a Reply