
Testing a speaker output with a multimeter is one of the most important things you can do to ensure your audio equipment is working properly. In this comprehensive guide, we will answer some of the most common questions people have about how to test a speaker output with a multimeter. We will also provide some helpful tips that will make the process easier and more efficient. So, whether you are a beginner or an experienced audio technician, this article is for you!
Speakers, Their Purpose and How Do They Work?
There are two main types of speakers: active and passive. Active speakers have their own amplifier, whereas passive speakers rely on an external power source, such as a stereo receiver or amplifier.
Most home audio systems use passive speakers. However, active speakers are becoming more popular because they’re easier to set up and don’t require as much additional equipment.
Speakers are used for a variety of purposes. They can be used to amplify the sound of an electronic device, such as a cellphone or MP player. Speakers can also be used to create sound effects or music.
The important value to test in a speaker is its output. Speaker output is the sound that comes from a speaker. It can be measured in watts, and it determines how loud the speaker will be. The higher the wattage, the louder the speaker will be.
So, no matter what type of speaker you have, it is important to know how to test its output with a multimeter. This will ensure that the speaker is working properly and that there is no damage to the unit. [1], [2]
Tools Needed To Test Speaker Outputs
Just like any other test you would want to do on your audio system, you will need the proper tools. For this test, you will need a:
- Multimeter
- Speaker
- 9 volt battery
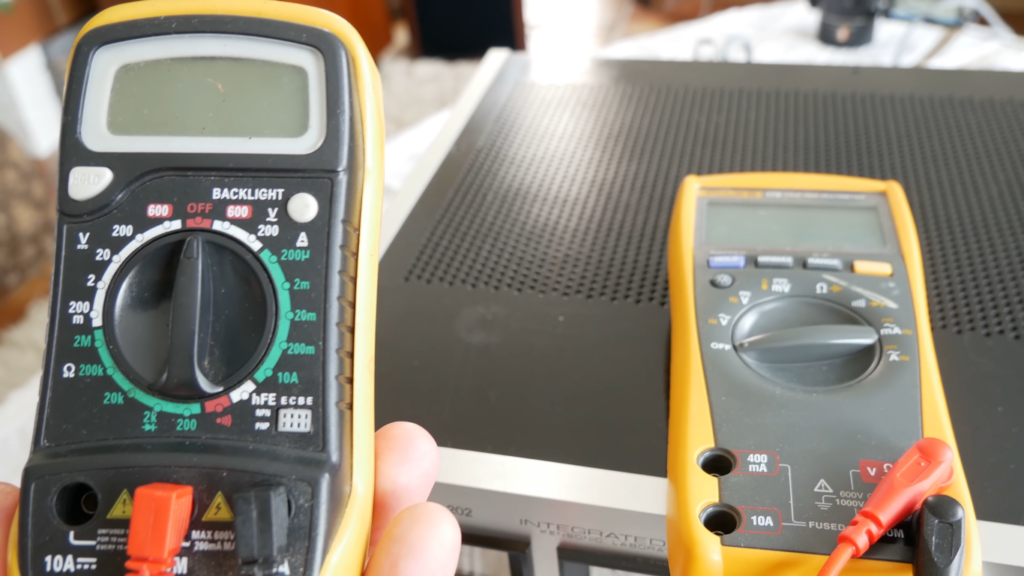
Digital multimeters are the most common type because they’re more accurate and easier to read than analog multimeters. Most digital multimeters have a large digital display that shows the readings clearly.
Analog multimeters use a needle to point to the readings on a dial. They’re not as accurate as digital multimeters, but they’re often cheaper.
No matter what type of multimeter you use, make sure it can measure Ohms and capacitance since you’ll want to test the resistance and capacitance of the speaker.
You will also need a speaker to test. It can be any type or size of speaker, as long as it works.
Finally, you will need a nine volt battery. This is used as another option in case you don’t own a multimeter. [2], [3]
Things to Consider Beforehand
To ensure the test goes smoothly and safely, there are a few things you should keep in mind.
Remove speakers from their casing
The first step is to remove the speaker from its casing. This will give you access to the wires and allow you to take readings more easily.
To do this, unscrew the screws that hold the speaker in place. Once the screws are removed, carefully pull the speaker out of its casing. Be careful not to damage any of the wires or components inside.
Physically inspect your speaker
Before you do any testing, it’s important to inspect the speaker for any physical damage. Check the cone, coil, and magnet for any cracks or breaks. Also, make sure that the wires are not frayed or broken.
If you notice any damage, stop the test and do not use the speaker. Continuing with a damaged speaker could result in further damage or even an electrical shock.
To have a better look at the speaker, you may need to use a magnifying glass or a mirror.
Next, take a look at the multimeter itself. Make sure all of the connections are secure and that there are no loose wires. Once you’ve done that, familiarize yourself with how to use the multimeter. If you’ve never used one before, read the manual or look up a tutorial online. [1]
How To Test Speaker Outputs With Multimeter
Now that you have everything you need and you’ve familiarized yourself with the process, it’s time to start testing. First we will test resistance. Resistance is the measure of how difficult it is for electricity to flow through a material.
Set the multimeter to Ohms
The first step is to set the multimeter to Ohms, which is represented by the symbol Ω. This will let us measure the resistance of the speaker.
To do this, locate the knob or switch that changes the settings on the multimeter. Once you’ve found it, turn it to the Ohms setting.
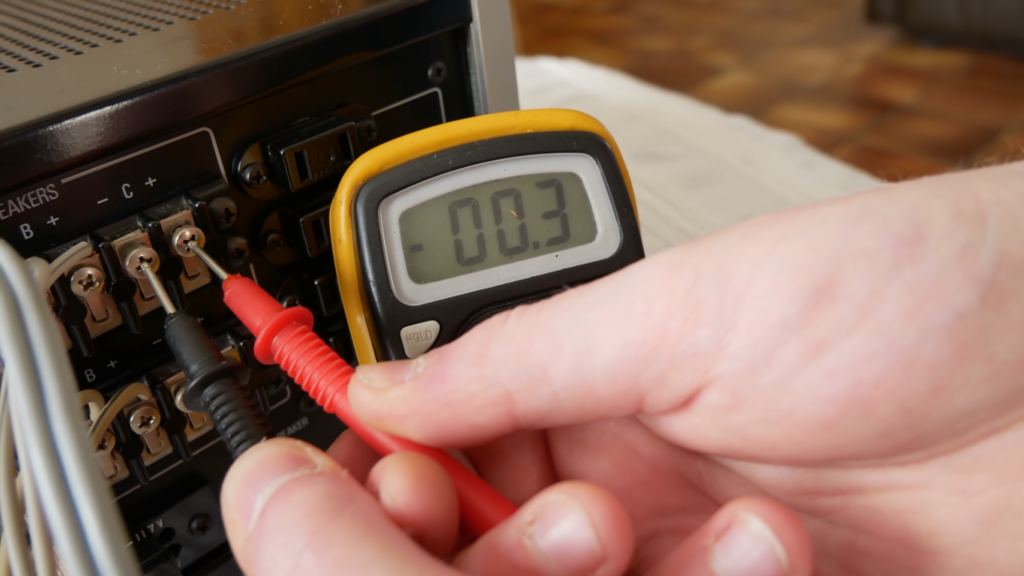
Position the probes
Now, you need to position the probes. Multimeters have two probes, one red and one black. The red probe is positive and the black probe is negative.
For this test, you will need to touch the black probe to the negative terminal of the speaker and the red probe to the positive terminal.
The terminals are usually marked with “+” and “-” symbols. If they’re not, you can usually tell which is which by looking at the wires. The negative wire is typically black, while the positive wire is red.
Once you’ve positioned the probes, make sure that they’re touching the terminals securely but not too tightly. If they’re not touching securely, you won’t get an accurate reading. But if they’re touching too tightly, you could damage the speaker.
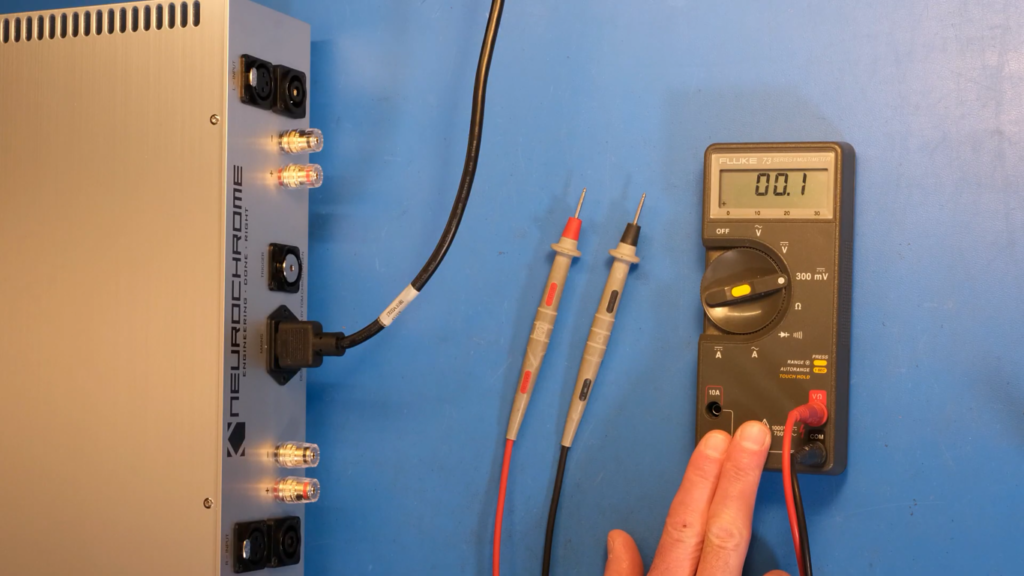
Check the results
Now, take a look at the multimeter display. It should show a reading in Ohms. This is the resistance of the speaker. The maximum acceptable resistance will depend on your speaker model. Usually, speakers will have it listed in the manual or at the back.
If the resistance is within the acceptable range, that means the speaker is working properly. If it’s not, then there may be an issue with the speaker. The lower number you see, the better signal the speaker will have.
If you get a reading that reads “1” or “OL”, then you have a problem with your speakers wiring and they will need to be repaired.
One final note – If you’re ever unsure about something or if you don’t feel comfortable doing the testing yourself, always consult an expert. That way, you can avoid any mistakes that could potentially damage your equipment. Safety should always be your top priority. [2], [3]
Testing Capacitance of Speaker Wires
Another way to test your speaker wires is by testing their capacitance.
Set your multimeter to capacitance mode.
To test capacitance, you’ll need to set your multimeter to its capacitance mode. This is usually done by rotating the dial to the symbol that looks like a capacitor.
Touch the leads to wires
Once you have your multimeter set to capacitance mode, touch the leads to the wires you want to test. The reading on the display will tell you the capacitance of the wires. Check the rating on your speaker to see if the capacitance is within the acceptable range.
If the reading is very low, it means that the wires are not able to store a charge and are likely damaged. If the reading is normal, it means that the wires are probably fine. Usually, as long as the reading is within -5% of the rating on your speaker, the wires are considered good. [3]
Testing Speaker Output Using Battery
Not everyone might have a multimeter at home. If you don’t have one or can’t borrow one, there’s another way to test your speaker output. For this method, all you need is a battery.
Connect battery to speaker wires
Again, locate the positive and negative terminals on the speaker. These are usually marked with “+” and “-” symbols.
Next, connect the positive lead of the battery to one of the speaker wires. Then, connect the negative lead of the battery to the other speaker wire. This will provide power to the speaker so that it can create sound.
Make sure that the connections are secure and that there is no chance of them coming loose. If they do come loose, you could damage the speaker or shock yourself.
To make sure the connection is secure, you might want to use alligator clips, just make sure to position them so that they don’t touch each other.
Check the results
Once you’ve made the connections, take a look at the speaker. If it’s working properly, you should see the cone moving in and out. This is how the speaker produces sound.
If you don’t see the cone moving or if you hear a distorted sound, then there may be an issue with your speaker. In this case, you’ll need to take it to a professional to have it repaired or replaced.
One thing you should keep in mind is never keep the battery connected to the speaker for too long. This can damage the speaker or cause an electrical fire. [3]
FAQ
How do ohms affect speakers?
The resistance of a speaker is measured in ohms. The lower the number, the easier it is for current to flow through the speaker. This means that a lower impedance speaker will require less power to reach the same volume as a higher impedance speaker.
However, impedance is not the only factor that determines how much power a speaker will need. The efficiency of the speaker also plays a role. A more efficient speaker will be louder with less power than a less efficient speaker.
Can I check speaker output without a multimeter?
The short answer is no. Without a multimeter, you will not be able to accurately test a speaker’s output. A multimeter is an essential tool for testing speakers because it can measure the voltage and current of the speaker signal. This information is necessary in order to determine the health of the speaker and its output capabilities.
How do I check speaker wire output?
To check the output of your speaker wire, you’ll need to use a multimeter. First, set your multimeter to the “resistance” or “ohms” setting. Then, touch one lead of the multimeter to the positive (red) terminal on your speaker wire, and touch the other lead of the multimeter to the negative (black) terminal on your speaker wire. If there is continuity between these two terminals, then you have an output signal from your speaker wire.
How do you test if a speaker is blown with a multimeter?
The most common way to test if a speaker is blown with a multimeter is by using the ohmmeter function. If there is continuity between the two terminals of the speaker, then it means that the speaker is not blown. However, if there is no continuity, then it means that the speaker is blown.
Useful Video: How to test and measure your amplifier outputs – avoid blowing up speakers
Conclusion
Testing your speaker’s output with a multimeter is a great way to ensure that your speaker is working properly. As you can see, there’s nothing hard about it – all you need is a little patience and the right tools. Make sure to properly inspect your speaker before testing it, and always consult your user manual for specific instructions.
Now that you know how to test a speaker output with a multimeter, you can easily check whether your speakers are working properly. This can save you time and money by avoiding costly repairs or replacements. So don’t wait, put this knowledge to use and start testing!
References
- https://mynewmicrophone.com/what-are-the-differences-between-passive-active-speakers/
- https://electrouniversity.com/how-to-test-speaker-output-with-multimeter/
- https://www.ifixit.com/Guide/How+to+Test+Speakers+and+Wires/74132