

Updating your Raspberry Pi remotely is a process that can seem daunting at first, but with the right tools and instructions it can be a breeze. In this guide we will walk you through the entire process of updating your Raspberry Pi remotely, from start to finish. We’ll answer some common questions and provide helpful tips along the way. So whether you’re a first-time user or an experienced Raspberry Pi enthusiast, this guide has something for everyone!
What is a Raspberry Pi
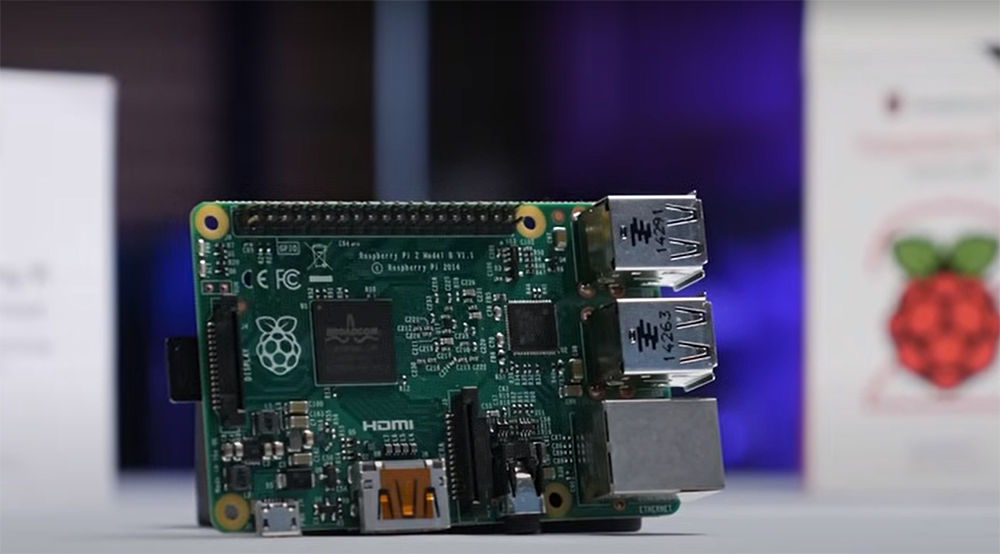
A Raspberry Pi is a credit card-sized computer that can be used for a variety of electronics projects. One of the most popular reasons to use a Raspberry Pi is because it’s an inexpensive way to get started with building your own embedded systems.
Another reason to use a Raspberry Pi is its small size and portability. You can easily take your Raspberry Pi with you wherever you go and use it to control various devices or perform other tasks.
Raspberry Pi runs on a variety of operating systems, but the most popular and recommended OS to use is Raspbian. Raspbian is a Debian-based Linux operating system that has been specially designed for the Raspberry Pi. [1]
Why Updating Raspberry Pi OS is Important
Updating Raspberry Pi Using SSH connection
The easiest way to update your Raspberry Pi is to use SSH to connect to it and then run the apt-get update and apt-get upgrade commands.
If you’re not familiar with SSH, it’s a network protocol that allows you to remotely connect to another computer. You can think of it as a way to access your Raspberry Pi from another computer. In order to use SSH, you’ll need to have an SSH client installed on your computer. If you’re using Windows, we recommend using PuTTY.
Enabling SSH
To connect to your Raspberry Pi using SSH, open the Raspberry Pi Configuration tool from the Preferences menu.
In the Interfaces tab, select Enabled next to SSH.
Once you’ve enabled SSH, click OK to close the window.
Now that SSH is enabled on your Raspberry Pi, it’s time to connect to it from your computer. To do this, open PuTTY and enter your Raspberry Pi’s IP address in the Host Name field.
Once you’ve entered your IP address, click Open to start the connection.
You’ll be prompted with a warning about the server’s host key not being cached in PuTTY’s registry. This is normal, so click Yes to continue.
You’ll now be asked to login with your username and password. The default username for Raspbian is pi, and the default password is raspberry.
Update the packages list
Now that you’re logged in, it’s time to run the update commands. To do this, open a terminal window on your computer and type the following command:
sudo apt-get update
sudo apt-get upgrade -y
This will take a few minutes to complete. This command will update the list of available packages and their versions, but it will not install or upgrade any packages.
Install the latest versions of packages
If you want to install the latest versions of packages, you’ll need to use the apt-get full-upgrade command instead. This command will upgrade all installed packages to their latest versions.
To do this, type the following command:
sudo apt full-upgrade
Clean leftover package files
After you’ve upgraded your packages, it’s a good idea to clean up the leftover files that are no longer needed. To do this, type the following command:
sudo apt clean
This will remove any packages that were automatically installed to satisfy dependencies for other packages and are no longer needed.
It will also remove any unused dependencies. This is safe to do and will free up some disk space on your Raspberry Pi.
Reboot your Raspberry Pi
In some cases, it may be necessary to reboot your Raspberry Pi after updating the operating system. This is usually only required if you’ve upgraded the kernel or installed new hardware drivers.
To reboot your Raspberry Pi, type the following command:
sudo reboot
This will shutdown your Raspberry Pi and then restart it. Once it’s finished booting up, you’ll be able to log back in and continue using it as normal. [1], [2], [3], [4]
Upgrading Raspberry Pi to the Latest Version
If a new version of the Raspberry Pi operating system is released, you can upgrade your existing installation to it.
Update the packages
Again, the first thing you’ll need to do is update the list of available packages. To do this, type the following command:
sudo apt update sudo apt dist-upgrade -y
Update the firmware
Next, you need to update the firmware of your Raspberry Pi. This is done with a single command:
sudo rpi-update

Switch repositories
When updating the firmware, the rpi-update command may give you a message saying that “This kernel is not signed.” This is because the Raspberry Pi Foundation doesn’t sign their kernels.
If you want to install unsigned kernels, you’ll need to change your repository settings. To do this, open the /etc/apt/sources.list file with a text editor:
sudo nano /etc/apt/sources.list
Then, find the line that says:
deb http://raspbian.raspberrypi.org/raspbian/ stretch main contrib non-free rpi
You will now need to change the word “stretch” to “buster”. So, the line should now say:
deb http://raspbian.raspberrypi.org/raspbian/ buster main contrib non-free rpi
After you’ve made this change, save and exit the file. Next, delete a changelog file that may cause problems:
sudo apt-get remove apt-listchanges
Perform a full package update
Now that you’ve changed your repository settings, you can perform a full package update. To do this, type the following command:
sudo apt update sudo apt dist-upgrade
Be patient, as this process can take a while to complete.
Next, enter the following command sudo apt autoremove -y
This will remove any unnecessary packages that were installed as dependencies for other packages.
To further free some space on your SD card, enter sudo apt autoclean
To finish up, reboot your Raspberry Pi with the command sudo reboot now.
If you’ve followed all of these steps correctly, your Raspberry Pi should now be up-to-date! Updating your Raspberry Pi regularly is a good habit to get into, as it can help fix any security vulnerabilities and bugs that may have been discovered since the last update. [1]
Making a Major System Update
Above, we went over how to update your Raspberry Pi’s software packages to the latest version. However, there may be times when you need to make a major update. This isn’t as simple as just running an update command, as it will completely wipe your system and install a fresh copy of the operating system.
Backup your files
There are many different ways to backup your files. One option is to use a cloud storage service like Dropbox or Google Drive.
Install a Raspberry Pi Imager tool
In order to make a major update, you’ll need to download the latest version of the Raspberry Pi operating system. The easiest way to do this is with the Raspberry Pi Imager tool.
This tool is available for Windows, macOS, and Ubuntu. To install it, head over to the official downloads page and select your operating system.
Remove the Raspberry Pi microSD card and connect it to your PC
Next, you will need to extract the microSD card from your Raspberry Pi and connect it to your computer.
Once the card is connected, open the Raspberry Pi Imager tool that you installed earlier.
In the “Select OS” drop-down menu, select the “Use custom” option and then click on the “Browse” button.
This will open a file explorer window. Navigate to the location of the downloaded Raspberry Pi operating system image file, Raspbian and select it.
Flash your microSD card with the new operating system image
After selecting the image file, you need to choose the drive letter of your microSD card in the “Select drive” drop-down menu.
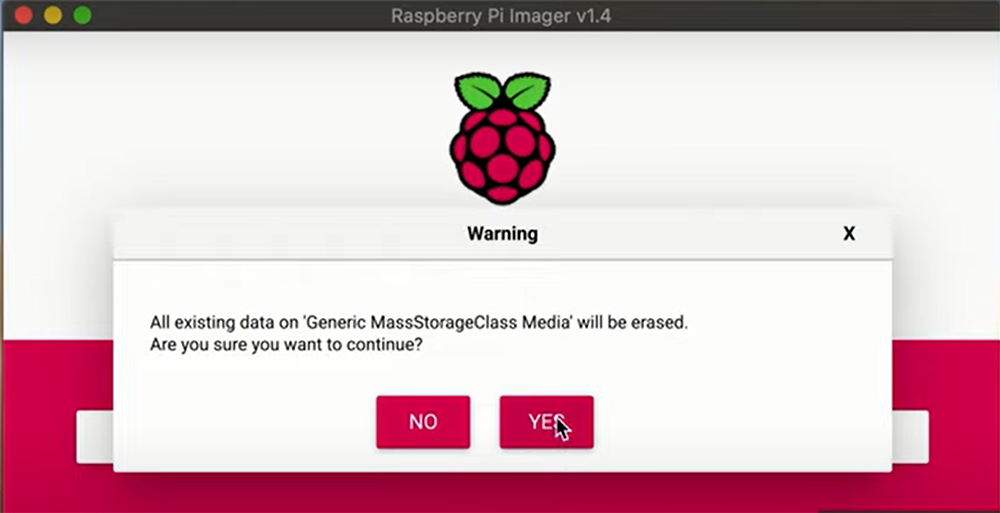
Once you’ve done that, simply click on the “Write” button to start flashing your microSD card. A warning message will appear letting you know that all data on the selected drive will be erased. If you are sure you want to continue, go ahead and click on the “Yes” or “Continue” button.
The writing process will now begin. This can take a few minutes to complete, so be patient.
Once the process is finished, click on the “Close” button and then remove the microSD card from your computer.
Power your microSD card on your Raspberry Pi
Now that you’ve flashed the microSD card with the new operating system image, you can go ahead and insert it into your Raspberry Pi.
After connecting all of the cables, go ahead and power on your device. The first boot process can take a few minutes to complete, so be patient.
Once your Raspberry Pi has booted up, you should see the new desktop environment.
And that’s it! You’ve now successfully updated your Raspberry Pi to the latest version of the operating system.
FAQ
Can you control Raspberry Pi remotely?
Yes, you can control your Raspberry Pi from another computer on your network. All you need is to use an SSH client like PuTTY to remotely access your Raspberry Pi from another computer. This is useful if you want to run commands or transfer files to and from your Raspberry Pi. To do this, you again will need to know the IP address of your Raspberry Pi and have SSH enabled on.
How do I update my Raspberry Pi 4 from the terminal?
If you’re running a headless Raspberry Pi, then you can update it remotely using SSH. The process is pretty straightforward. First, make sure your Raspberry Pi is connected to the internet. Then open up a terminal window and type in the following command:
sudo apt-get update && sudo apt-get upgrade
This will update all of the software on your Raspberry Pi to the latest versions. If there are any new versions of the kernel, then they will be downloaded and installed as well. Once the updates have been installed, reboot your Raspberry Pi.
How can I update my Raspberry Pi automatically?
You can update your Raspberry Pi automatically by running the “sudo apt-get update && sudo apt-get upgrade” command. This will update all of your installed packages to their latest versions.
You can also use the “rpi-update” command to update your firmware and kernel. Be aware that this will overwrite any changes you have made to your configuration files.
Useful Video: Raspberry Pi Remote Desktop Connection
Final words
Updating your Raspberry Pi regularly is a good habit to get into, as it can help fix any security vulnerabilities and bugs that may have been discovered since the last update. In this article, we’ve shown you several different ways to update your Raspberry Pi remotely. You can either simply update your packages through SSH or flash your SD card image remotely using one of the many tools available. Thanks for reading! I hope this guide was helpful. If you have any questions or comments, feel free to leave them below. Until next time!
References:
- https://jamesjdavis.medium.com/how-to-update-raspberry-pi-just-follow-these-easy-steps-ac507cf70238
- https://itsfoss.com/ssh-into-raspberry/
- https://libguides.nyit.edu/c.php?g=469894&p=3365470
- https://helpdeskgeek.com/how-to/how-to-update-raspberry-pi/