

Are you curious about finding a reliable and cost-effective data storage solution for your next project? If so, OpenMediaVault using a Raspberry Pi might be the perfect option. Having a robust NAS (Network Attached Storage) setup with OpenMediaVault on your Raspberry Pi provides an easy way to store large amounts of data safely and securely while allowing complete customization of how it’s used and shared. The Raspberry Pi is known for its power efficient design making it ideal for multiple applications including server or media center usage. In this guide, walk through setting up OpenMediaVault on the Raspberry Pi using just a few simple steps!
Raspberry Pi Operating Features
The main feature of Raspberry Pi is its low cost. It can be bought for around $35, making it an inexpensive option compared to other computers. Additionally, Raspberry Pi has a wide range of ports and connectors that allow users to use various devices like cameras or game controllers.
In terms of its operating system, Raspberry Pi is powered by the Raspberry Pi OS which is based on Debian Linux. This makes it easy to use and ensures that most Linux programs can be run on the system. It also provides access to a wide range of software tools, including an IDE for programming, text editors and file managers.
Raspberry Pi is also suitable for running graphical applications. By using the included graphics processor, users can easily display high-quality images or videos in their projects. This is especially useful for tasks like media streaming and video playback.
Finally, Raspberry Pi is great to create a fully functional computer system. Through the use of a monitor, keyboard and mouse, users can easily set up an entire computer system with ease. This makes it easy for anyone to start using Raspberry Pi without needing any specialized knowledge or tools. [2]
Which Raspberry Pi Models are the Most Popular?
Raspberry Pi has become popular among hobbyists, educators, and tech enthusiasts who are looking for an inexpensive way to build projects and learn basic computing skills. The Raspberry Pi models are divided into four categories: Model A, Model B, Compute Module, and Zero. Let’s take a closer look at them:
- Model A: The Model A is the most basic model and comes with lower specifications. It features just 256MB of RAM and one USB port. This model is great for light-duty tasks like programming and web browsing, but it cannot handle intensive applications or gaming. [3]
- Model B: The Model B is the most popular model and comes with more features than the A version. It has 512MB of RAM and two USB ports, which makes it better-suited for multimedia tasks and multi-tasking. Model B is recommended for everyday use, gaming, and even some light video editing.
- Compute Module: The Compute Module is designed to be used in embedded systems. It has low power consumption and comes with 64MB of RAM. This model is especially popular for use in industrial applications such as robotics and automation.
- Zero: The Zero is the smallest model in the lineup, measuring just 65mm x 30mm. It has 512MB of RAM and one USB port, making it perfect for small projects and simple tasks.
No matter which Raspberry Pi model you choose, they all feature the same software and overall user experience. In fact, they are all powered by the same Linux-based operating system called Raspbian, making it easy to transition from one model to another. Whether you’re a beginner or an experienced user, there’s bound to be a Raspberry Pi that fits your needs. [4]

Why Use Raspberry Pi?
Raspberry Pi is an incredibly powerful and versatile single board computer that can be used in a variety of applications. From home automation to media centers, the Raspberry Pi offers something for everyone. Here are some of the advantages of using Raspberry Pi:
- Cost: One of the biggest benefits of Raspberry Pi is its low cost. One of the versions — the Raspberry Pi 3 — costs just $35 USD, making it one of the most affordable mini-computers around. [5]
- Multimedia Support: It is also perfect for multimedia applications. The powerful GPU allows the user to play HD videos and stream audio without any problems.
- Portability: If you’re looking for a portable computer, then the Raspberry Pi is your best choice. It’s small enough to fit in your pocket and can be powered via an USB port or battery.
- Durability: It is surprisingly durable, thanks to its robust construction and sturdy design. It can withstand accidental drops and bumps with ease.
- Community Support: The Raspberry Pi community has grown tremendously over the past few years, with tons of resources available online for anyone looking for help or guidance when using a Raspberry Pi device. This makes the device even more attractive for new users. [6]
What is the Raspberry Pi Used for?
The Raspberry Pi can be used for many tasks such as:
- Web Server: The Raspberry Pi can be used to host web pages or even just serve as a storage device for files. It can also be used to run applications such as WordPress and other content management systems. [7]
- Media Server: With the Raspberry Pi, you can create your own media server that streams music, movies, photos and other media from your computer or networked hard drive over your home network.
- Robotics: The Raspberry Pi can be used as the brain of a robot or to control and monitor its motors. It is perfect for building basic robots, such as remote controlled cars, or even more complex autonomous projects such as autonomous boats and drones.
- Home Automation: The Raspberry Pi can be used to control lights, appliances and other automation tasks around the house. With the right software, you can create your own home automation system and be in control of all your home devices from anywhere in the world.
- Home Security: The Raspberry Pi can be used to monitor and record security footage with surveillance cameras and even detect intruders with motion detectors. It is great for keeping an eye on your home while you are away.
- Programming & Development: The Raspberry Pi is a great platform for learning to program and developing applications. It can be used as an all-in-one solution for coding, testing and deploying applications with the help of various programming languages such as Python, Ruby and Java.
- Gaming: The Raspberry Pi can be used to emulate game consoles such as the NES, SNES, Sega Genesis, Commodore 64 and even more modern hardware like PlayStation and Xbox. With the right software, you can turn your Raspberry Pi into a portable gaming device or even create your own custom video games.
- AI & Machine Learning: The Raspberry Pi can be used to build and train machine learning models with the help of various libraries such as TensorFlow, Keras and Scikit-Learn. It is perfect for anyone interested in exploring the possibilities of AI and machine learning.
- Education: The Raspberry Pi is a great way to learn about coding and computer science with its accessible hardware, software development tools, and free online resources for getting started. It can also be used as an educational tool in the classroom for teaching programming concepts and basic electronics.
- Art Projects: With the Raspberry Pi, you can create interactive art projects such as light installations or mini computer-generated art shows. It is a great way to explore new ideas and express yourself creatively.
- Internet of Things: The Raspberry Pi can be used to connect everyday objects together in the form of an internet of things (IoT) network. With this technology, you can control and monitor your home devices such as lights, fans, thermostats and more from anywhere in the world. [8]

What Data Storage Systems Does Raspberry Pi Work with?
The main storage system used by Raspberry Pi is the Secure Digital (SD) card format. SD cards are widely available in sizes up to 32GB, and they have the advantage of being both inexpensive and reusable. SD cards are inserted into the Raspberry Pi’s microSD card slot, which is located at the top edge of the board.
In addition to SD cards, Raspberry Pi also supports other types of data storage systems such as USB Flash drives and external hard disks, including those using the USB 3.0 or SATA interfaces. It’s important to note, however, that certain types of external storage may require the use of an adapter in order to be read by the Raspberry Pi.
Plus, it’s also possible to set up a network-attached storage (NAS) system for your Raspberry Pi. This requires the installation of a NAS operating system such as OpenMediaVault or FreeNAS. Once installed, users can access the Raspberry Pi’s files from a variety of devices on the same network. [9]
What is OpenMediaVault?
OpenMediaVault is an open source operating system based on Linux that provides a platform for network-attached storage (NAS) solutions. It is designed to be easy to use and provide powerful features for both home and business users. OpenMediaVault enables users to store, share, manage, backup, access, and stream media files over the internet or LAN networks. With its intuitive web interface and powerful tools, OpenMediaVault makes it easy to manage your NAS.
It comes with many features that make it ideal for both home and business users. It supports a wide range of network protocols such as NFS, SMB/CIFS, AFP, FTP, and SFTP. It also supports a variety of popular file systems such as ext4, XFS, ReiserFS, and Btrfs. OpenMediaVault also provides users with an easy-to-use web interface that allows for remote access to the NAS from any device connected to the internet or LAN networks.
OpenMediaVault is the perfect solution for anyone looking for a reliable, feature-rich NAS solution. It is easy to install and configure, making it ideal for both experienced users and those who are just getting started with network storage. With its robust features and intuitive web interface, OpenMediaVault provides an ideal platform for storing, sharing, backing up, and streaming media files over the internet or LAN networks. Whether you’re looking to store, share, manage, or access files remotely with OpenMediaVault, it can provide a secure and reliable solution for all your network storage needs. [10]
Why Do You Need OpenMediaVault?
OpenMediaVault offers a seamless experience, combining power and simplicity to meet your storage needs. It is tailored for both professional and personal users seeking an efficient, versatile, secure, and cost-effective solution to manage their data.
From home media streaming to security surveillance, OpenMediaVault provides the perfect platform to store and manage your data. It can be used to build a powerful home media system, or a secure surveillance environment.

The key benefits of this solution:
- Easy to use – it is easy to install and configure, allowing users to manage their data without any complex setup.
- Flexible – OpenMediaVault offers a range of services, including file sharing, remote access, and media streaming.
- Secure – data stored on OpenMediaVault can be securely accessed from anywhere in the world.
- Cost effective – it is free and open source, so users can save money on expensive software licenses. [11]
What are the Main Functions of OpenMediaVault?
At its core, OMV offers network storage capabilities through Samba or NFS protocols. This allows users to store files on the server and access them from any device on the network. OMV also supports RAID configurations, allowing users to create redundancy for their files and keep them safe in the event of a hard drive failure.
In addition to storage capabilities, OpenMediaVault offers a host of other features as well. For example, it can act as an FTP server that allows you to upload and download files from anywhere in the world. It also comes with built-in support for media streaming services such as Plex, DLNA and AirPlay, allowing you to stream videos, music and photos from your server to any compatible device.
OpenMediaVault also provides support for a wide range of applications such as surveillance systems, web servers and databases. This makes it an ideal choice for users who need a powerful, flexible and secure NAS solution. [12]

How to Ensure the Security of OpenMediaVault?
To ensure that your data remains safe on OpenMediaVault, there are several steps you can take:
- Enable two-factor authentication (2FA): This is a security feature that requires users to enter an additional code in order to log into the system. 2FA adds an extra layer of protection and makes it more difficult for hackers to access your data.
- Enable disk encryption: By encrypting your disks, you can prevent unauthorized access if they are stolen or lost. This ensures that your data remains secure, even if the system is breached.
- Install security patches: OpenMediaVault releases regular updates and security patches. It’s important to keep your system up to date in order to protect your data from any possible vulnerabilities.
- Use a strong password: Make sure you use a complex and unique password that cannot be easily guessed by hackers. Avoid using the same password for multiple accounts and enable a password manager to help you keep track of your credentials. [13]
Ways On Setting up OpenMediaVault on Raspberry Pi
OpenMediaVault is an excellent, comprehensive open-source software package for building your own NAS server on top of Raspberry Pi. It allows you to store media files, create backups as well as share data with other devices in the network. Setting up OpenMediaVault on your Raspberry Pi can be done quickly and easily, allowing you to gain access to all its features.

Here are the steps to set up OpenMediaVault on Raspberry Pi:
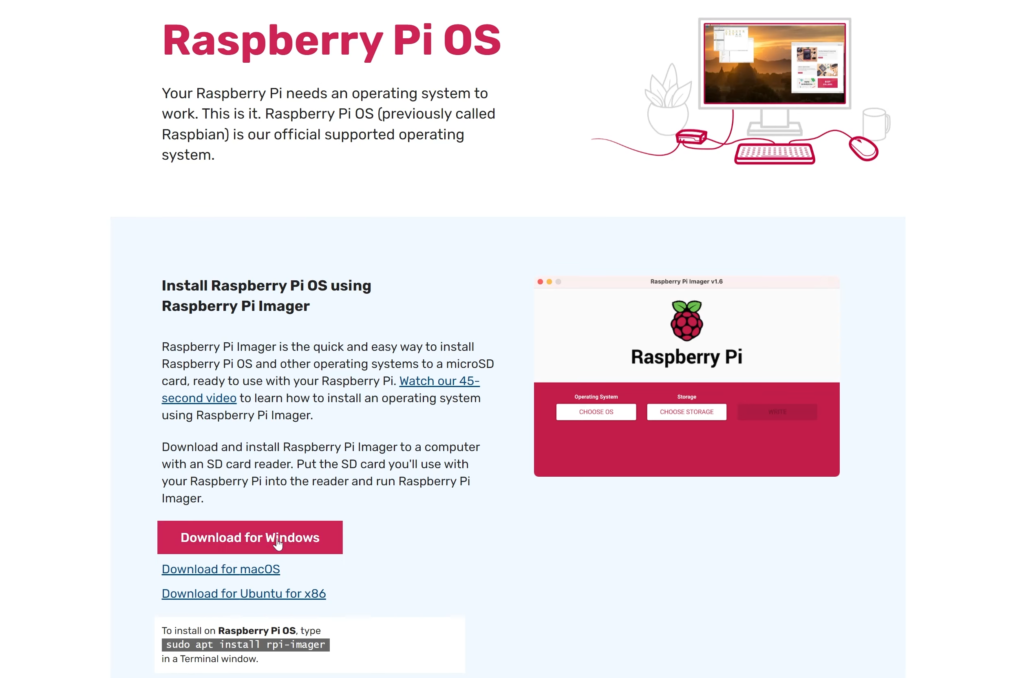
- Download and install OpenMediaVault using a disk image. This will allow you to boot it directly from your Raspberry Pi’s SD card.
- Connect the network cables to your Raspberry Pi, as well as any external storage devices you wish to use, such as USB hard drives.
- Login to OpenMediaVault using the default username and password provided in the documentation.
- Go to the Settings page and set up your system preferences, such as network settings, user accounts, etc.
- Create shared folders for different media types (e.g., music, video, pictures, etc.), and assign user-level access permissions to each folder.
- Finally, enable any services you wish to use (e.g., DLNA streaming, Bittorrent downloads, etc.).
By following these steps, you can quickly and easily set up OpenMediaVault on your Raspberry Pi so that you can start using it to store media files, create backups and share data with other devices in the network. With OpenMediaVault, you will have a powerful and reliable NAS server at your disposal. Be sure to follow the official documentation carefully for detailed instructions on setting up OpenMediaVault on your Raspberry Pi. [14]
OpenMediaVault Alternatives
OpenMediaVault (OMV) is a popular system, but sometimes, people are looking for something different, such as a less expensive option or a solution with more advanced features.
One of the most popular alternatives to OMV is FreeNAS. FreeNAS provides many of the same features as OpenMediaVault, such as support for RAID and ZFS. It also has great performance and scalability compared to OMV. The main downside of FreeNAS is that it can be a bit difficult to set up, especially for new users.
Another alternative is Amahi. It is a home server software solution that offers many of the same features as OMV, but with an emphasis on making it easy for non-technical users to set up and manage their NAS system. It also offers additional features such as media streaming and dynamic DNS support. The downside of Amahi is that it doesn’t offer the same level of performance as OpenMediaVault.
Synology’s DiskStation Manager (DSM) is one more alternative. DSM offers many of the same features as OMV, but with a more user-friendly interface and a wide range of add-on packages for additional functionality. The downside is that it isn’t open source, so you can’t customize the software to your needs.
QNAP’s Turbo NAS is an alternative to OpenMediaVault that offers some unique features such as its own App Center and support for multiple virtualization technologies. It also has great performance and scalability compared to OMV. The downside of QNAP’s Turbo NAS is that it can be a bit expensive for some users. [15]
FAQs
Can I run OpenMediaVault on Raspberry Pi?
Yes, OpenMediaVault is an open source NAS solution that can be used with Raspberry Pi. It comes with a web GUI and provides features such as automated backup, built-in firewall, storage access control and more. You will need to install the correct version of OpenMediaVault for your Raspberry Pi in order to make full use of its features.
How to install OpenMediaVault on Raspberry Pi 3?
Here are the steps to follow:
- Download and install NOOBS onto your SD card from the official Raspberry Pi site.
- Once the installation has completed, run the NOOBS program.
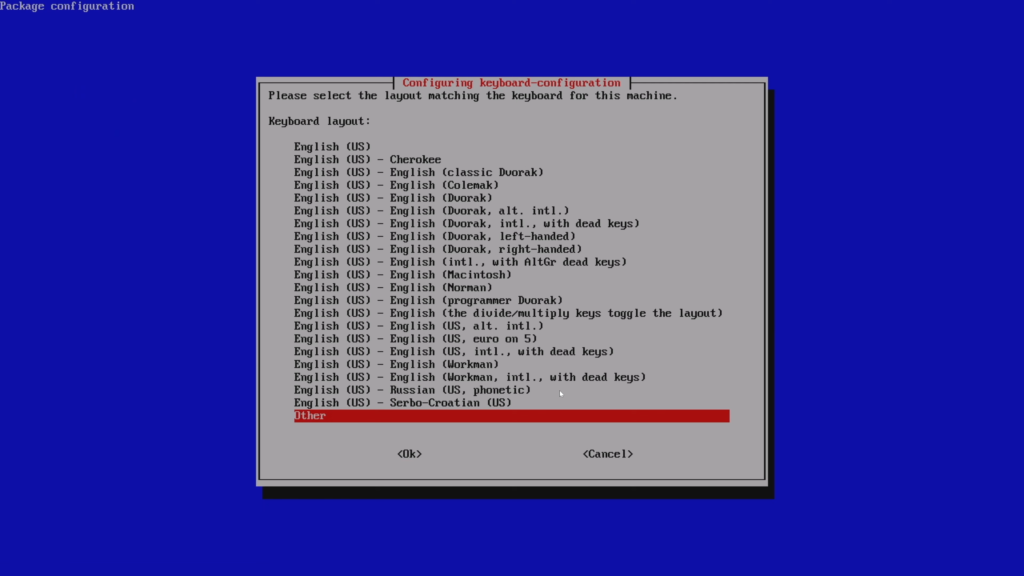
- Select OpenMediaVault from the list of available operating systems and click install.
- The installation process will take a few minutes to complete.
- Once OpenMediaVault is installed, you can configure it with your desired settings and start using it right away!
- You can also use the OpenMediaVault web interface to configure your system as well as manage and monitor your storage devices.
- The web interface is easy to use and provides an intuitive way for you to access all of the features available in OpenMediaVault.
- Additionally, OpenMediaVault includes a variety of plugins that can be installed to extend the functionality of your system even further.
- With OpenMediaVault, you have all of the tools and features necessary to create a powerful home media server with Raspberry Pi 3.
- With its wide range of options and features, you can easily customize your media server to fit your needs!
Can I make a Raspberry Pi as a NAS?
Yes, you can make a Raspberry Pi as a NAS (Network Attached Storage). OpenMediaVault is a great open source software that has all the tools and features you need to turn your Raspberry Pi into a full-fledged NAS. It also supports multiple systems like Samba, NFS, SSH, FTP, and UPnP. With OpenMediaVault, you can access your files from any device, including PCs, laptops, and mobile devices. You can even back up your data to other storage systems like Dropbox or Google Drive. OpenMediaVault also allows you to manage users and permissions so that you have control over who has access to the NAS and what they are allowed to do with it. Furthermore, OpenMediaVault makes it easy to monitor and maintain your NAS so that you can keep it running optimally. With OpenMediaVault, you can make the most out of your Raspberry Pi when it comes to building a reliable and secure NAS.
Useful Video: Raspberry Pi OMV 6 NAS
To Sum Up
Setting up OpenMediaVault on Raspberry Pi is an exciting journey in the world of home server projects. Although it may take a bit of time and effort for a first-timer, once you get going, it’s fairly easy. Not only is it an efficient way to store and access your data from anywhere in the world, but also it can make other tasks like media streaming much easier. This article should have saved you some time by helping to install, configure and secure OpenMediaVault as a centralized storage solution for all your digital content. Now go ahead and enjoy the freedom to access all of your files anytime – at work or even while taking a vacation! No matter where you are in the world, you will never have to worry that you left something important behind again!
References
- https://www.codingninjas.com/studio/library/features-of-raspberry-pi
- https://linuxhint.com/10-best-features-of-raspberry-pi/
- https://www.ign.com/articles/best-raspberry-pi-models
- https://www.tomshardware.com/how-to/raspberry-pi-buying-guide
- https://www.techtarget.com/searchitoperations/tip/What-is-a-Raspberry-Pi-used-for
- https://www.makeuseof.com/tag/different-uses-raspberry-pi/
- https://opensource.com/resources/raspberry-pi
- https://www.techtarget.com/searchitoperations/tip/What-is-a-Raspberry-Pi-used-for
- https://www.kingston.com/en/blog/personal-storage/choosing-storage-for-raspberry-pi
- https://www.howtoforge.com/tutorial/install-open-media-vault-nas/
- https://www.openmediavault.org/
- https://www.openmediavault.org/features.html
- https://careers.omv.com/default/job/Vienna-Senior-Expert-Operational-Technology-Security-Architecture-%28all-genders%29-Vien-1020/932068001/
- https://pimylifeup.com/raspberry-pi-openmediavault/
- https://www.saashub.com/openmediavault-alternatives