
Installing Java on a Raspberry Pi opens the door to a world of limitless possibilities, where the power of this versatile programming language meets the capabilities of the popular single-board computer.
Whether you’re an aspiring programmer, an enthusiast for Internet of Things (IoT) projects, or a professional looking to develop cross-platform applications, mastering the art of installing Java on the Raspberry Pi is a crucial first step.
Java’s “Write Once, Run Anywhere” philosophy harmonizes seamlessly with Raspberry Pi’s ability to serve as a dynamic platform for diverse projects. In this comprehensive guide, we will navigate through the intricacies of installing Java, empowering you to harness its full potential on your Raspberry Pi.
From understanding the necessary equipment to choosing the right Java version, configuring environment variables, and verifying successful installations, this article will equip you with the knowledge and skills to embark on your Java-powered Raspberry Pi journey with confidence.
Whether you’re aiming to create web servers, explore IoT applications, or dive into advanced software development, our step-by-step instructions will illuminate the path ahead, ensuring that Java becomes not just a programming language, but a catalyst for innovation in your Raspberry Pi projects.
The Origins of Java
Java, conceived by James Gosling and his team at Sun Microsystems in the early 1990s, emerged as a response to the complexities and limitations of existing programming languages [1]. The team aimed to create a language that could be both platform-independent and capable of running on various devices. This ambitious vision led to the birth of Java, which was officially released to the public in 1995.
The Pillars of Java
Java’s popularity and endurance can be attributed to several core features that set it apart:
1. Object-Oriented Design
Java’s foundation is rooted in object-oriented programming (OOP), a paradigm that promotes the organization of code into reusable, modular objects. This approach enhances code maintainability, flexibility, and readability, making it an ideal choice for large-scale software development.
2. Portability and Platform Independence
Thanks to the JVM, Java code can run on various platforms without modification. Developers can write code on one system and confidently deploy it on different devices, reducing compatibility concerns and streamlining development processes.
3. Strong Type System
Java enforces a strict type system that helps catch errors at compile-time rather than runtime. This approach contributes to increased reliability and stability in applications.
4. Rich Standard Library
Java boasts an extensive standard library that provides pre-built classes and APIs for a wide range of functionalities, from data structures and networking to user interfaces and cryptography. This library accelerates development by reducing the need for developers to build everything from scratch.
5. Memory Management
Java’s automatic memory management, handled by the JVM’s garbage collector, simplifies memory allocation and deallocation, helping prevent memory leaks and memory-related errors.

6. Multithreading and Concurrency
Java’s built-in support for multithreading and concurrency allows developers to create applications that efficiently utilize the processing power of modern systems. This is especially valuable for applications that require parallel execution, such as web servers and data processing [2].
Java in Action: Applications and Domains
Java’s versatility has led to its adoption in a wide array of domains:
Enterprise Software
Java has been a stalwart in enterprise software development, powering countless backend systems, web applications, and large-scale databases. Its ability to handle complex business logic and maintainable codebases has made it a favorite among businesses.
Android Development
The Android operating system, which dominates the mobile market, relies heavily on Java. Android app developers leverage Java to create user-friendly, feature-rich applications for smartphones and tablets.
Web Development
Java’s server-side capabilities have contributed to the creation of dynamic and interactive web applications. Frameworks like Spring and JavaServer Faces (JSF) empower developers to build robust web solutions.
Scientific and Research Applications
Java’s flexibility extends to scientific computing, where it is used in simulations, data analysis, and research tools. Its portability ensures that computational research can be conducted across diverse environments.
Internet of Things (IoT) and Embedded Systems
Java’s lightweight editions, such as Java ME (Micro Edition) and Java SE Embedded, are well-suited for IoT and embedded systems development. Java’s adaptability enables it to thrive in resource-constrained environments.
Game Development
Java’s graphical capabilities and libraries, such as JavaFX, have made it a viable choice for game development. While not as common as some dedicated game development languages, Java has produced successful titles across various genres.
The Java Community and Ecosystem
Java’s enduring success can be attributed in part to its vibrant and passionate community. The Java Community Process (JCP) empowers developers to participate in shaping the language’s evolution through the proposal and approval of new features and specifications.
Java’s ecosystem is enriched by a multitude of open-source libraries, frameworks, and tools. Maven and Gradle simplify project management, while popular frameworks like Spring and Hibernate streamline application development and database interaction.
Looking Ahead: Java’s Continued Relevance
Despite being over two decades old, Java’s relevance remains steadfast. The language has evolved to meet modern development needs while preserving its core principles. The release of Java 9 introduced the module system, enabling better code organization and encapsulation. Subsequent releases, such as Java 10 and beyond, have continued to refine the language and enhance its performance [3].
Additionally, the introduction of Project Loom aims to simplify concurrency in Java by introducing lightweight threads (fibers). This advancement promises to make concurrent programming more intuitive and efficient.
Why Do You Need Java On The Raspberry Pi?
Java can be useful on the Raspberry Pi for several reasons:
- Cross-Platform Compatibility: Java is a cross-platform programming language, meaning code written in Java can run on different platforms without modification. This makes it easier to develop applications on one system (like a desktop) and then run them on a Raspberry Pi without major changes;
- Rich Ecosystem: Java has a vast ecosystem of libraries, frameworks, and tools that can be utilized on the Raspberry Pi. This can expedite development and provide access to a wide range of functionalities;
- Performance: Java applications, when properly optimized, can offer good performance on the Raspberry Pi. The Java Virtual Machine (JVM) has evolved over the years to provide efficient execution of Java code;
- Availability of APIs: Many hardware peripherals and devices on the Raspberry Pi offer APIs (Application Programming Interfaces) that can be accessed using Java. This allows developers to interface with GPIO pins, sensors, cameras, and other components with ease;
- Education and Learning: Java is widely taught in schools and universities as an introductory programming language. Using Java on the Raspberry Pi can provide a practical environment for students to apply their programming skills and learn about hardware interactions;
- Networking and Server Applications: Java is well-suited for building networking and server applications. This can be advantageous on the Raspberry Pi for tasks such as running a local web server, hosting IoT applications, or creating networked projects;
- IoT and Embedded Systems: The Raspberry Pi is often used in the Internet of Things (IoT) and embedded system projects. Java’s features, such as its object-oriented nature, strong memory management, and threading capabilities, make it a good choice for such applications;
- Community and Support: Java has a large and active community, which means there are plenty of resources, forums, and tutorials available for developers who want to use Java on the Raspberry Pi;
- Existing Java Skills: Developers who are already familiar with Java can leverage their skills and knowledge to work on Raspberry Pi projects without having to learn a new programming language from scratch;
Installing Java on the Raspberry Pi
1. Necessary Equipment
- Raspberry Pi 2 or Newer: Ensure your Raspberry Pi is up-to-date to take advantage of the latest features and improvements;
- Micro SD Card: This will serve as the storage for your Raspberry Pi’s operating system and applications;
- Power Supply: Make sure you have a stable power source to keep your Raspberry Pi running smoothly;
- Ethernet Cable or Wi-Fi: Establish a network connection for updates, downloads, and online resources;
- Raspberry Pi Case: Protect your Raspberry Pi from dust and physical damage with a suitable case;
- USB Keyboard: A keyboard is useful for input during the installation process and general usage;
- USB Mouse: A mouse provides a familiar interface for navigation;
- HDMI Cable: Connect your Raspberry Pi to a display for visual feedback [4];
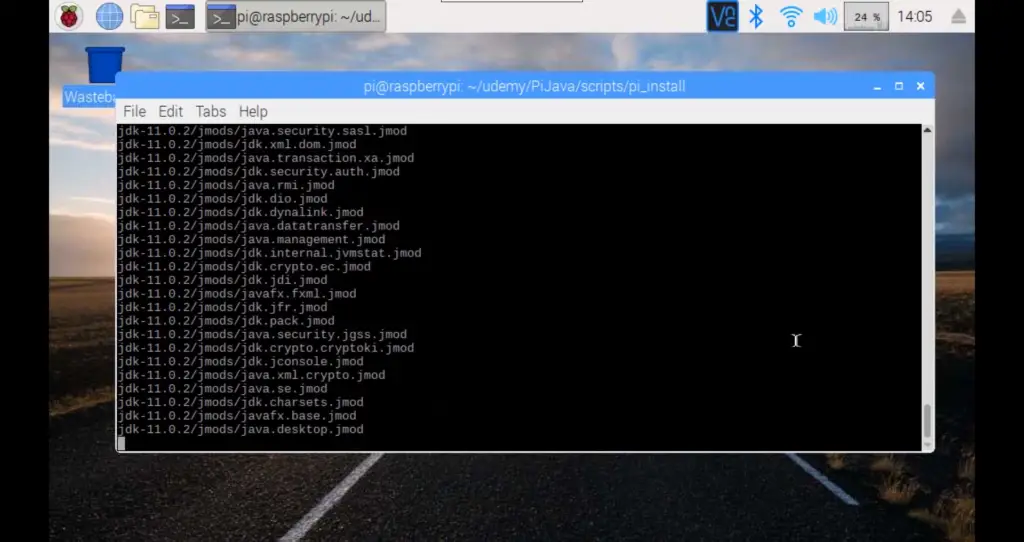
2. Install OpenJDK Java 11 on Raspberry Pi
Java 11, a long-term support (LTS) release, offers stability and security for your projects. Here’s how to install it on your Raspberry Pi:
- Open a terminal window on your Raspberry Pi;
- Update the package list: sudo apt update;
- Install OpenJDK 11: sudo apt install openjdk-11-jdk;
- Verify the installation by checking the Java version: java –version;
3. Install OpenJDK Java 8 on Raspberry Pi
While Java 11 is the recommended choice, some legacy applications may require Java 8. Here’s how to install it:
- Open a terminal window;
- Update the package list: sudo apt update;
- Install OpenJDK 8: sudo apt install openjdk-8-jdk;
- Verify the installation: java –version;
4. Set Default Java Version (Optional)
You might have multiple Java versions installed. Setting a default version ensures that your system uses the desired version for Java-related tasks.
Here’s how to do it:
- Open a terminal window;
- Use update-java-alternatives to set the default Java version. For example, to set Java 11 as the default: sudo update-java-alternatives -s java-1.11.0-openjdk-armhf;
5. Set JAVA_HOME Path Environment Variable (Optional)
Setting the JAVA_HOME environment variable can make it easier to manage Java installations and development tools.
Here’s how:
Determine the installation path of your Java version. For Java 11: sudo update-alternatives –config java
Open the .bashrc file: nano ~/.bashrc
Add the following line, replacing the path with your Java installation path: export
JAVA_HOME=/usr/lib/jvm/java-11-openjdk-armhf
Save and exit the text editor.
Update the current terminal session: source ~/.bashrc
6. Uninstall Java on Raspberry Pi
If you ever need to uninstall a Java version, follow these steps:
- Open a terminal window;
- List the installed Java versions: sudo update-java-alternatives –list;
- Use sudo update-java-alternatives –remove to remove a specific version;
Troubleshooting Java on Raspberry Pi:
1. Installation Issues
Problem: Java installation fails or encounters errors.
Solution: Ensure you follow the correct installation steps based on your Raspberry Pi model and OS version. Double-check internet connectivity and package repositories. If errors persist, search for error messages online or consult relevant forums for assistance.
2. Version Compatibility
Problem: Java version conflicts or compatibility issues.
Solution: Verify that you’re installing a Java version compatible with your Raspberry Pi’s architecture and OS. For example, ARM-based processors require ARM-compatible Java versions. Consider using OpenJDK versions optimized for the Raspberry Pi.
3. Path and Environment Variables
Problem: Incorrect configuration of PATH and JAVA_HOME environment variables.
Solution: Ensure you’ve set these variables correctly to point to the installed Java version’s directory. Edit the .bashrc or .profile file to update the variables and use the source command to apply changes.
4. Memory and Performance
Problem: Java applications crash due to memory or performance issues.
Solution: Adjust memory allocation parameters using -Xms and -Xmx flags when running Java applications. Optimize your code for memory efficiency, and consider using tools like Java Flight Recorder (JFR) for profiling and identifying bottlenecks.
5. Classpath and Libraries
Problem: Java applications are unable to find required classes or libraries.
Solution: Ensure the classpath is correctly set when compiling and running Java programs. Use relative or absolute paths to specify the location of external libraries or JAR files.
6. Updating Java
Problem: Running outdated Java versions.
Solution: Regularly check for updates and security patches for your installed Java version. Use the package manager (apt or yum) to update or upgrade Java to the latest version available for your Raspberry Pi.
7. Permissions and User Access
Problem: Permission errors preventing Java execution.
Solution: Ensure the user has the necessary permissions to access and execute Java-related files. Use chmod to modify file permissions if needed.
8. Network Connectivity
Problem: Java applications requiring network access fail.
Solution: Check the network connectivity and firewall settings. Ensure your Java code handles network-related exceptions gracefully [5].
9. Error Messages
Problem: Java applications produce cryptic error messages.
Solution: Carefully read error messages to pinpoint the issue. Search for the error message online to find potential solutions or ask for help on relevant forums.
10. GPIO and Hardware Interactions
Problem: Java programs interacting with GPIO pins or hardware components not functioning.
Solution: Make sure you’ve imported the necessary libraries for GPIO control. Check wiring and hardware connections. Verify that your Java program is accessing the correct GPIO pins and using the proper voltage levels.
11. Logs and Debugging
Problem: Difficulties diagnosing issues in Java applications.
Solution: Utilize logging frameworks like Log4j or Java’s built-in logging API to create detailed logs. Use debugging tools like jdb or integrated development environments (IDEs) with debugging capabilities to step through your code and identify problems.
Remember that troubleshooting may require patience and persistence. Document your steps, error messages, and solutions for future reference. If you encounter complex issues, don’t hesitate to seek help from online communities, forums, or experienced developers who may have encountered similar problems.
What Can Replace Java Functional On Raspberry Pi:
- Python: Python is a versatile and popular programming language that supports functional programming features, such as lambda functions, map, reduce, and filter. It has a clear and readable syntax, making it a good choice for functional programming on the Raspberry Pi. Python also has a strong community and extensive libraries that can be utilized for various projects;
- Haskell: Haskell is a purely functional programming language known for its strong type system and elegant approach to functional programming. It’s well-suited for mathematically-oriented tasks and is designed to ensure safe and correct code. While it might have a steeper learning curve than some other languages, it can be a powerful choice for functional programming enthusiasts;
- Scheme or Racket: Scheme and its modern variant Racket are Lisp-based languages that have a strong emphasis on functional programming. They are known for their simplicity and expressiveness, making them suitable for educational purposes and small to medium-sized projects;
- Clojure: Clojure is a dialect of Lisp that runs on the Java Virtual Machine (JVM) and emphasizes functional programming. It provides easy integration with Java libraries, which can be beneficial for Raspberry Pi projects that require interfacing with hardware components;
- Elixir: Elixir is a functional programming language built on top of the Erlang Virtual Machine (BEAM), which is known for its robustness and concurrency capabilities. Elixir is a good choice if you’re interested in building highly concurrent and fault-tolerant applications on the Raspberry Pi;
- F#: F# is a functional-first programming language that runs on the .NET platform. While it may not be as commonly used on the Raspberry Pi as some other languages, it offers functional programming features and can be a suitable choice if you’re familiar with the .NET ecosystem;
- Scala: Scala is a hybrid programming language that blends object-oriented and functional programming paradigms. It runs on the JVM and can be used for functional programming on the Raspberry Pi while also leveraging Java libraries;
FAQ:
1. How to Install Java-17 on Raspberry Pi?
As of my knowledge cutoff date in September 2021, Java 17 was not released. The latest Long-Term Support (LTS) version of Java at that time was Java 11. However, the process for installing newer versions of Java on a Raspberry Pi typically involves downloading and configuring the appropriate package from the OpenJDK project.
For future reference, here’s a general outline of how you might install a newer version of Java on a Raspberry Pi:
Open a Terminal: Access the terminal on your Raspberry Pi.
Update Package List: Run the following command to ensure your package list is up to date:
sudo apt update
Install Java: Download and install the desired version of Java. For Java 17 (or a future version), you might need to replace openjdk-11-jdk with the appropriate package name.
sudo apt install openjdk-17-jdk
Verify Installation: Confirm that Java has been successfully installed by checking the version:
java –version
Please note that the actual package names and installation steps may differ based on the availability of Java 17 or any newer versions beyond my knowledge cutoff date. Always refer to the latest documentation and resources for accurate installation instructions.
2. How to Install Java 8 on a Raspberry Pi?
To install Java 8 on a Raspberry Pi, follow these steps:
Open a Terminal: Access the terminal on your Raspberry Pi.
Update Package List: Run the following command to ensure your package list is up to date:
sudo apt update
Install Java 8: Install OpenJDK 8 using the package manager:
sudo apt install openjdk-8-jdk
Verify Installation: Confirm that Java 8 has been successfully installed by checking the version:
java -version
3. Can You Run Java on a Raspberry Pi?
Yes, you can run Java on a Raspberry Pi. The Raspberry Pi supports Java through the OpenJDK (Open Java Development Kit) implementation. You can develop and run Java applications on Raspberry Pi, making it a versatile platform for various projects.
4. Where Is Java Installed on Raspberry Pi?
Java is typically installed in the /usr/lib/jvm/ directory on the Raspberry Pi. The specific subdirectory within /usr/lib/jvm/ will correspond to the installed version of Java (e.g., java-8-openjdk-armhf for Java 8). You can use this path to set environment variables or access Java-related files.
5. Does Raspberry Pi Use Python or Java?
The Raspberry Pi supports multiple programming languages, but Python is often recommended and commonly used for beginners and quick prototyping due to its simplicity and ease of use. However, you can also use Java on a Raspberry Pi for more complex applications, especially those that require cross-platform compatibility or integration with existing Java-based systems.
6. What Language Does Raspberry Pi Use?
The Raspberry Pi is not limited to any specific programming language. It supports a wide range of programming languages, including but not limited to Python, Java, C/C++, Ruby, JavaScript, and more. The choice of programming language depends on your project’s requirements, your familiarity with the language, and the libraries and tools available for it.
7. What Is the Fastest Raspberry Pi?
The fastest Raspberry Pi model available is the Raspberry Pi 4. It features a quad-core ARM Cortex-A72 CPU, up to 8 GB of RAM, USB 3.0 ports, and improved graphics capabilities compared to previous models. Keep in mind that new models may have been released since then, so I recommend checking the official Raspberry Pi website for the latest information.
8. Is JDK 1.8 the Same as Java 8?
Yes, JDK 1.8 is equivalent to Java 8. The naming convention used by Oracle for Java versions prior to Java 9 involved referring to the major version number as “JDK 1.x”. However, starting from Java 9, the versioning scheme was simplified to just the major version number.
9. How to Install JDK and JRE?
To install both the JDK (Java Development Kit) and JRE (Java Runtime Environment) on a Raspberry Pi, you can use the appropriate package names. For example:
Install JDK:
sudo apt install openjdk-8-jdk
Install JRE:
sudo apt install openjdk-8-jre
Simply replace openjdk-8-jdk and openjdk-8-jre with the desired version numbers (e.g., openjdk-11-jdk and openjdk-11-jre for Java 11).
10. How to Install JDK from the Terminal?
To install the Java Development Kit (JDK) from the terminal on a Raspberry Pi, follow these steps:
Open a Terminal: Access the terminal on your Raspberry Pi.
Update Package List: Run the following command to ensure your package list is up to date:
sudo apt update
Install JDK: Use the package manager to install the desired version of the JDK. For example, to install Java 8:
sudo apt install openjdk-8-jdk
Verify Installation: Confirm that the JDK has been successfully installed by checking the version:
java -version
11. How to install Java step-by-step?
Here’s a step-by-step guide to installing Java on a Raspberry Pi:
Open a Terminal: Access the terminal on your Raspberry Pi.
Update Package List: Run the following command to ensure your package list is up to date:
sudo apt update
Install Java: Use the package manager to install the desired version of Java. For example, to install Java 8:
sudo apt install openjdk-8-jdk
Verify Installation: Confirm that Java has been successfully installed by checking the version:
java -version
12. How to Install JDK 11?
To install JDK 11 on a Raspberry Pi, follow these steps:
Open a Terminal: Access the terminal on your Raspberry Pi.
Update Package List: Run the following command to ensure your package list is up to date:
sudo apt update
Install JDK 11: Use the package manager to install OpenJDK 11:
sudo apt install openjdk-11-jdk
Verify Installation: Confirm that JDK 11 has been successfully installed by checking the version:
java -version
Please note that the specific package names and installation steps may vary based on the availability of Java versions and any updates that have occurred since my knowledge cutoff date. Always refer to the latest documentation and resources for accurate installation instructions.
Useful Video: How to install Java 8 on the Raspberry Pi 4
References
- https://linuxize.com/post/install-java-on-raspberry-pi/
- https://phoenixnap.com/kb/install-java-raspberry-pi
- https://pimylifeup.com/raspberry-pi-java/
- https://linuxhint.com/install-java-17-raspberry-pi/
- https://www.hackster.io/kamaluddinkhan/install-java-on-raspberry-pi-c218c0