
Amp tuning can seem difficult, but with the help of a multimeter, it can be a breeze.
The importance of having a properly adjusted amplifier cannot be overstated, since tuning an amp might eliminate annoying background noise and unpleasant frequency response.
The speakers may not be able to generate the desired volume at times [1].
In this blog post, we will show you how to use a multimeter to tune your amp for optimal sound quality. We’ll also provide some tips on how to troubleshoot any issues you may encounter while tuning your amp. So don’t fret – with this guide, you’ll be able to get your amp sounding great in no time!
How To Tune An Amp With A Multimeter:
1) Disconnect every accessory from the amp
Disconnect the car’s battery and carefully remove the amplifier, which is usually located under the hood near the windshield.
If there is enough space to work, it may be sufficient to simply remove the amp rather than remove it in its entirety [2]:
- Disconnect all of the amplifier’s attachments, including the speakers and subs.
- Before removing any cables, double-check that they’re all in the right places;
- Remove the positive terminal carefully to avoid damaging the amp, then remove the negative;
2) Switch the equalizer to zero and check the distortion again
If it’s still too high, turn the master volume down and try again. If you’re using a digital multimeter, you’ll want to set it to its highest range. With an analog multimeter, you can just leave it on 20V. Now, touch the black lead to one of the ground lugs on the amplifier chassis and touch the red lead to one of the power tube’s grids.
You should see a reading of about 0.45V. If you don’t, increase or decrease the range until you do. Now, move the red lead to another power tube grid and take another reading.
Try swapping the tubes to see if that fixes the issue. If not, you may need to replace the tube.
3) Tune the gain to zero:
- First, make sure all the EQ controls are set to zero;
- Next, turn the gain up until you start hearing distortion, then back it off until the distortion disappears. If you’re using a digital multimeter, you’ll want to set it to its highest range. With an analog multimeter, you can just leave it on 20V;
- Touch the black lead to one of the ground lugs on the amplifier chassis and touch the red lead to one of the power tube’s grids. You should see a reading of about 0.45V. If you don’t, increase or decrease the range until you do;
4) Increase or reduce the volume to 75% of its maximum
Check the volume control as well, and make sure the amplifier is at 75% of its maximum volume. The sound of distorted sounds isn’t able to reach the amp if the volume is lowered. However, the speaker must still be disconnected.
5) Play a test sound through your amp
You should hear a clean, clear sound. If you don’t, then your amplifier may be clipping and you’ll need to adjust the volume accordingly.
6) Determine the speaker’s resistance with a multimeter
Set the multimeter to Ohms resistance mode. Touch one lead of the meter to one of the speaker’s terminals, and touch the other lead of the meter to the other speaker terminal. The multimeter will display reading in ohms. This is the resistance of your speaker.
7) Take note of the amplifier’s certified wattage output
The amplifier’s certified wattage output is required in this process. Most often, this figure may be found in the amp’s user manual. With respect to the speaker’s resistance (Ohms), check the manual to ensure and judge the wattage output.
8) Evaluate the ideal voltage for the amp
The next step is to evaluate the ideal voltage for your amp. You can do this by using a multimeter to measure the voltage at the input and output of your amplifier.
If the voltage at the input is higher than the voltage at the output, then you need to increase the gain on your amplifier.
If the voltage at the input is lower than the voltage at the output, then you need to decrease the gain on your amplifier.
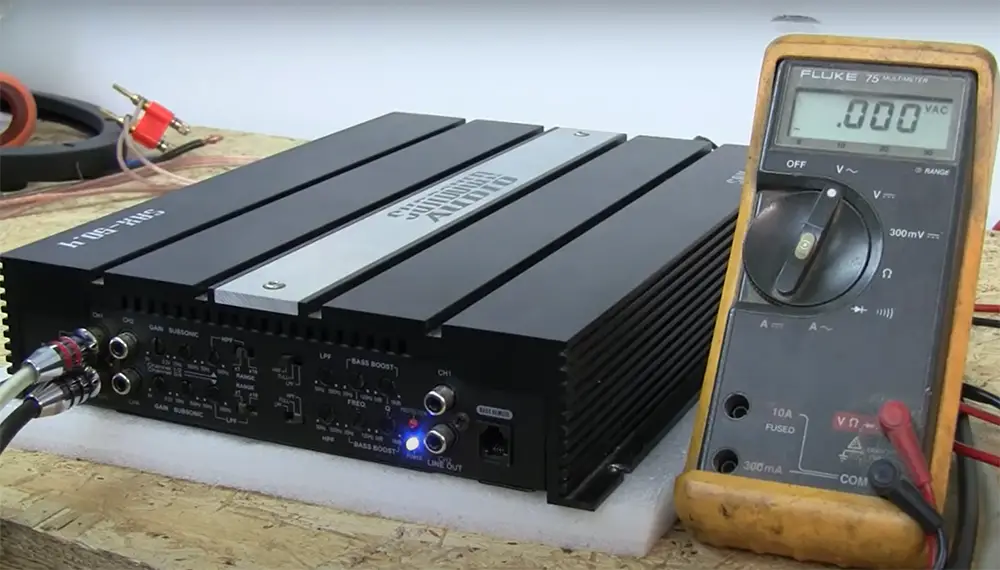
9) Connect the multimeter with the amp
It’s time to adjust the amplifier. Connect the multimeter’s test leads to the probes and set the dial to AC voltage. As required, connect your amplifier’s speaker output to the multimeter’s test leads.
10) Modify the gain
The sensitivity of an amplifier is the gain. The output of the amplifier is suitable for the speakers at this level. Once the voltage has stabilized, the amp has been tuned.
11) Replicate for other amps
If there are other amplifiers in the car’s sound system, this process should function well. Follow all of the steps to improve your vehicle’s audio performance. These steps are essential for getting the most out of your car audio system.
12) Set the amp’s volume to zero
After the amplifier is on and all of the speakers are connected, you will want to set its volume output to zero. This can be done by turning the amp’s knob until it reaches the “0” position.
13) Find an unused input on the multimeter
Now that everything is ready, it’s time to start testing. To do this, you will need to find an unused input on your multimeter. Once you have found one, touch the probes of the multimeter together.
With the probes of the multimeter touching each other, you should see a reading of “0”. If not, check that your multimeter is properly calibrated.
14) Plug all the accessories back in
Another Method To Tune An Amplifier
If you have a multimeter, you can use it to help tune your amplifier.
This is a more accurate method than using the built-in tuner, and it only takes a few minutes [3]:
- First, set your multimeter to read DC volts;
- Next, connect the black lead to one of the amp’s ground terminals;
- Then, touch the red lead to each of the amp’s power terminals in turn. You should see a reading of around 0.75 volts on the multimeter for each terminal;
How to Tune an Amp with a Multimeter: Comparison Table
Tuning an amplifier is crucial for achieving optimal performance and sound quality. One effective way to do this is by using a multimeter to measure various indicators. In this table, we compare different indicators and their recommended values for tuning an amp with a multimeter.
| Indicator | Description | Optimal Value |
|---|---|---|
| DC Voltage | Measures the amplifier’s power supply voltage. | ±12V to ±14V |
| AC Voltage | Measures the output signal voltage (RMS). | Varies (depending on the amplifier and application) |
| DC Offset | Indicates the amplifier’s output bias voltage. | Close to 0V (Ideally <50mV) |
| Gain | Measures the amplification of the input signal. | Varies (depending on the desired amplification) |
| Speaker Impedance | Measures the load impedance of the connected speaker. | Matches the amplifier’s rated impedance |
| Frequency Response | Measures the range of frequencies the amplifier can reproduce. | Flat and consistent across the desired frequency range |
| THD (Total Harmonic Distortion) | Measures the distortion added to the signal by the amplifier. | Lowest possible percentage (<1% is good) |
Explanation:
- DC Voltage: This indicator is essential to ensure that the amplifier’s power supply is within the acceptable range to prevent potential damage. The optimal values typically fall between ±12V to ±14V.
- AC Voltage: Measuring the output signal voltage helps ensure that the amplifier is providing the desired level of amplification. The optimal value varies depending on the specific amplifier and its intended application.
- DC Offset: A significant DC offset can cause speaker damage and affect sound quality. The goal is to have the DC offset close to 0V, ideally below 50mV.
- Gain: This measures the amplification applied to the input signal. The optimal gain value depends on the desired amplification level for a particular application.
- Speaker Impedance: Matching the speaker impedance with the amplifier’s rated impedance ensures efficient power transfer and prevents potential damage to the amplifier.
- Frequency Response: A flat and consistent frequency response across the desired range ensures accurate and faithful sound reproduction.
- THD (Total Harmonic Distortion): Lower THD indicates less distortion added to the signal by the amplifier, resulting in cleaner sound output. Aim for the lowest possible percentage, preferably below 1%.
By using a multimeter to measure and adjust these indicators, you can fine-tune your amplifier for optimal performance, sound quality, and speaker protection. Always refer to the amplifier’s manual and follow safety precautions when making adjustments.
Check more articles to improve your multimeter understanding:
- How to Test an ECU With a Multimeter?
- How to Use a Multimeter to Test Voltage of Live Wires?
- What Does “OL” Mean on a Multimeter?
FAQ
How do you adjust a car amp with a multimeter?
There are a few ways to adjust a car amplifier with a multimeter [4]:
- The most common way is to use the amp’s input sensitivity adjustment. This can be done by adjusting the gain on the amp, or by using a resistor in line with the signal wire;
- Another way to adjust an amplifier is by using its output voltage level control. This can be done by adjusting the voltage at the power supply, or by using a Zener diode in line with the speaker wire;
- A third way to adjust an amplifier is by using its output power control. This can be done by adjusting the current at the power supply, or by using a transistor in line with the speaker wire;
How do I adjust LPF amps with a multimeter?
First, it’s important to understand what LPF is and how it works. LPF, or a low-pass filter, is a frequency control that allows only low frequencies to pass through the amplifier. By adjusting the LPF, you can control how much bass is produced by your amp [5].
To adjust the LPF on your amp, you’ll need a multimeter. First, set the multimeter to Ohms mode and turn the knob until it reads “20k”.
Next, locate the two wires that go to your amp’s speaker output terminals. These are usually labeled “+” and “-“.
Now, touch one lead of the multimeter to the “+” terminal and the other lead to the “-“ terminal. You should see a reading on the multimeter.
If the reading is less than “20k”, turn the LPF knob clockwise until the reading on the multimeter reaches “20k”.
If you want more bass, you can turn the LPF knob to the left of the “20k” setting. This will allow more low frequencies to pass through the amp, resulting in more bass. Just be careful not to turn it too far left, as this can cause distortion.
What Hz should I set my amp to?
There’s no definitive answer to this question, as it depends on the type of music you’re playing and your personal preferences.
However, a good starting point is to set your amp’s low-frequency knob to 60 Hz and its high-frequency knob to 12 kHz. If you find that your amp sounds too muddy, try turning the low-frequency knob up to 80 Hz [6].
Conversely, if your amp sounds too harsh, try turning the high-frequency knob down to around 11 kHz.
How do you set the gain and LPF on an amp?
The gain setting on an amp determines how much amplification is applied to the input signal. In general, you’ll want to set the gain so that the output signal is just barely clipping.
To do this, slowly turn up the gain until you hear slight distortion in the sound. At this point, back off the gain slightly until the distortion disappears.
The low-pass filter (LPF) controls how much of the high-frequency content in the input signal is passed through to the output.
Again, there’s no definitive answer as to where to set the LPF, but a good starting point is around 80 Hz. If you find that your amp sounds too harsh, try turning the LPF up to around 100 Hz [12].
If you’re still having trouble getting your amp to sound just right, don’t hesitate to take it to a professional for help. A qualified technician will be able to quickly identify and solve any problems you’re having.
How can you tell if an amp is blown?
The most frequent aural symptom of a blown speaker is an unpleasant buzzing or scraping noise, alone or approximately at the pitch of the note being attempted to be played. Alternatively, there may be no sound at all.
In either case, the sound produced by the amplifier will be distorted and will not resemble the clean, undistorted sound it made when it was working properly.
If you suspect that your amp is blown, take it to a qualified technician for repair or replacement [7].
What Hz is best for bass?
Clean bass frequencies are all that is required to provide incredible bass through any home audio system.
The low-frequency range extends from 20Hz to 160Hz. For a song, the ideal bass-boosting frequencies are around 50 and 80Hz. These frequencies ensure that the bass sounds full and forceful [8].
Does lower Hz mean more bass?
No. A lowpass filter (LPF) is used to remove high frequencies and allow only low frequencies through.
The cutoff frequency is the point at which the LPF starts to take effect. For example, if you set the LPF on your amp to 80 Hz, any frequencies above 80 Hz will be filtered out.
How do you test an amp to see if it works?
Here is what you should do:
- The first step is to check the fuse. If it’s blown, then the amp isn’t working and you’ll need to replace it. Next, you’ll want to test the power supply by measuring the voltage at the positive and negative terminals. If the voltage is low, then the power supply may be faulty and will need to be replaced;
- Next, you’ll need to test the speakers. You can do this by measuring the resistance across the terminals. If the resistance is high, then there may be a problem with the speaker itself or with the wiring connecting it to the amplifier;
- Finally, you’ll want to test for any shorts in the system by measuring continuity between all of the terminals. If there is a short, then you’ll need to replace the amplifier;
What tools do I need to tune an amp with a multimeter?
To tune an amp with a multimeter, you will need a few essential tools: a multimeter (preferably a digital one), a set of RCA cables, a test tone CD or audio source with test tones, and a small screwdriver or trim tool to adjust the amp’s settings.
How do I set the input sensitivity using a multimeter?
To set the input sensitivity of your amp using a multimeter, follow these steps:
1. Disconnect any speakers from the amp’s output to avoid potential damage.
2. Set your multimeter to AC voltage and the range to around 2 or 5 volts.
3. Connect the multimeter’s positive (red) probe to the amp’s RCA input’s center pin.
4. Ground the multimeter’s negative (black) probe to the amp’s ground or a nearby bare metal surface.
5. Play a 1 kHz test tone at about three-quarters volume from your audio source.
6. Adjust the gain knob on your amp until the multimeter reads the desired voltage according to your amp’s specifications.
How can I set the crossover frequency with a multimeter?
To set the crossover frequency of your amp with a multimeter, proceed as follows:
1. Ensure your amp’s LPF (Low-Pass Filter) is set to the maximum frequency.
2. Connect the multimeter’s positive probe to the speaker output terminals of the amp.
3. Ground the multimeter’s negative probe to the amp’s ground or a nearby metal surface.
4. Play a sine wave test tone through the amp.
5. Slowly adjust the crossover frequency control until the multimeter reads the desired frequency for your speaker configuration.
What’s the process for adjusting the bass boost using a multimeter?
To adjust the bass boost of your amp using a multimeter, follow these steps:
1. Set your amp’s bass boost to the minimum or flat position.
2. Connect the multimeter’s positive probe to the speaker output terminals of the amp.
3. Ground the multimeter’s negative probe to the amp’s ground or a nearby metal surface.
4. Play a test tone with the desired bass frequency.
5. Gradually increase the bass boost on your amp while monitoring the multimeter’s voltage until you reach the desired bass level without exceeding the recommended voltage for your speakers.
How do I check the output voltage of my amp with a multimeter?
To check the output voltage of your amp with a multimeter, do the following:
1. Disconnect all speakers from the amp’s output to prevent any accidental damage.
2. Set your multimeter to AC voltage and an appropriate range (usually 20 volts or higher).
3. Connect the multimeter’s positive probe to the positive speaker output terminal of the amp.
4. Ground the multimeter’s negative probe to the amp’s ground or a nearby metal surface.
5. Play a test tone at a moderate volume.
6. Observe the multimeter’s reading to ensure the amp’s output voltage is within its rated specifications.
How can I test if my amp’s RCA outputs are working correctly using a multimeter?
To test your amp’s RCA outputs with a multimeter, follow these steps:
1. Disconnect all speakers and other audio connections from the amp.
2. Set your multimeter to AC voltage and an appropriate range (around 2 or 5 volts).
3. Connect the multimeter’s positive probe to the RCA output jacks on the amp.
4. Ground the multimeter’s negative probe to the amp’s ground or a nearby metal surface.
5. Play a test tone through the amp.
6. Check the multimeter’s reading; it should display the audio signal voltage coming out of the RCA jacks.
Please note that when tuning an amp with a multimeter, it’s essential to follow safety precautions and refer to your specific amp’s manual for detailed instructions.
Useful Video: How To: Tune Car Amplifier with Digital Multimeter
References:
- https://handtoolsforfun.com/how-to-tune-an-amp-with-a-multimeter/
- https://gmundcars.com/how-to-tune-an-amp-with-a-multimeter/
- https://roxionow.com/how-to-tune-an-amp-using-a-multimeter/
- https://multimetertools.com/how-to-tune-an-amp-with-a-multimeter/
- https://digestcars.com/how-to-tune-a-car-amp-for-mids-and-highs/
- https://itstillruns.com/set-gain-hz-amp-8774081.html
- https://www.fender.com/articles/tech-talk/breaking-down-blown-speakers
- https://www.rampfesthudson.com/what-hz-is-best-for-bass-boost/