The Raspberry Pi, a diminutive yet powerful single-board computer, has captivated tech enthusiasts, hobbyists, and educators worldwide with its boundless potential. From crafting home automation systems to exploring artificial intelligence, the Raspberry Pi’s versatility knows no bounds.
Imagine a scenario where your Raspberry Pi springs to life more swiftly, operates more efficiently, and embraces a broader capacity for data storage – all from the simple act of booting from a USB drive. This transformative capability is not merely a luxury for the tech-savvy; it’s a practical enhancement that elevates the Raspberry Pi’s capabilities, making it an even more potent tool for diverse projects and applications.
In this comprehensive guide, we embark on a journey into the realm of booting Raspberry Pi from USB. We will unravel the intricacies of this process, step by step, demystifying the setup for newcomers and empowering seasoned users with in-depth insights. We’ll delve into the various benefits of USB booting, such as improved speed, extended storage, and simplified maintenance, while also addressing potential challenges and sharing expert tips for optimal performance.
Understanding Raspberry Pi Booting:
The Raspberry Pi’s booting entails multiple stages, including bootloader, firmware, and OS loading. While traditional booting employed microSD cards, the advent of firmware advancements has ushered in USB booting as a more robust and flexible option.
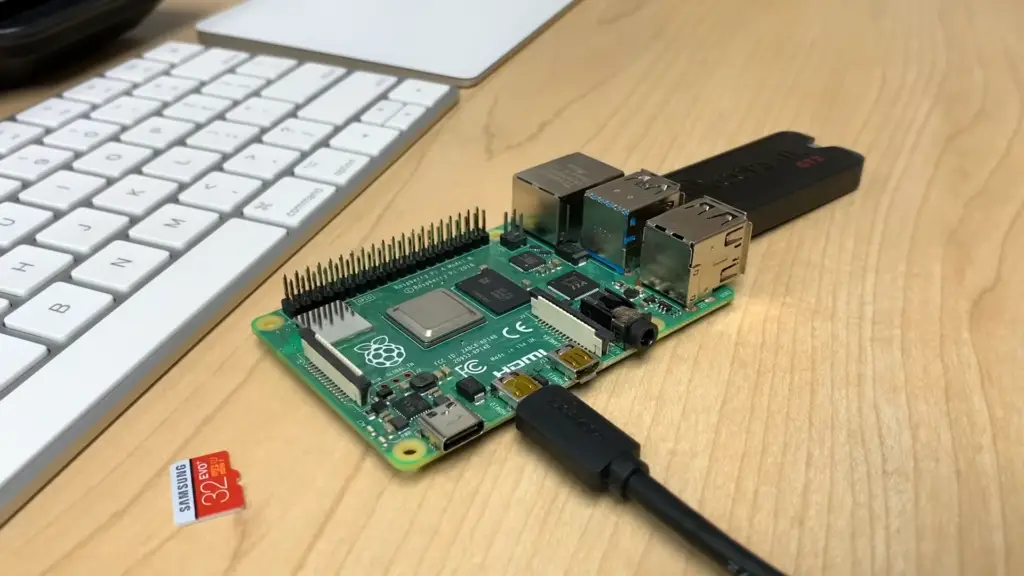
Preparing Your USB Drive
For USB booting, choose a compatible USB storage device, format it correctly, and create a bootable partition. Ensure the partition’s format aligns with your chosen OS requirements.
Updating Firmware for USB Booting
Ensure your Raspberry Pi’s firmware is up to date and supports USB booting. This ensures seamless compatibility and optimal performance [1].
Installing an Operating System via USB
Select an OS that suits your needs, and write its image to the USB drive using tools like Raspberry Pi Imager or Etcher. This step mirrors the process of installing an OS on a microSD card.
Configuring the Raspberry Pi for USB Boot
Activate USB boot mode in the firmware settings and adjust the boot order to prioritize USB devices. Make necessary tweaks to configuration files for a smooth boot experience.
Booting Your Raspberry Pi From USB
With proper USB drive preparation and Raspberry Pi configuration, power on the device and witness the boot process initiate from the USB drive. Keep an eye out for any errors or anomalies.
Benefits of USB Booting on Raspberry Pi
USB booting offers several merits, such as speedier performance compared to microSD cards, and prolonging the lifespan of microSD cards. It also simplifies diskless system setups.
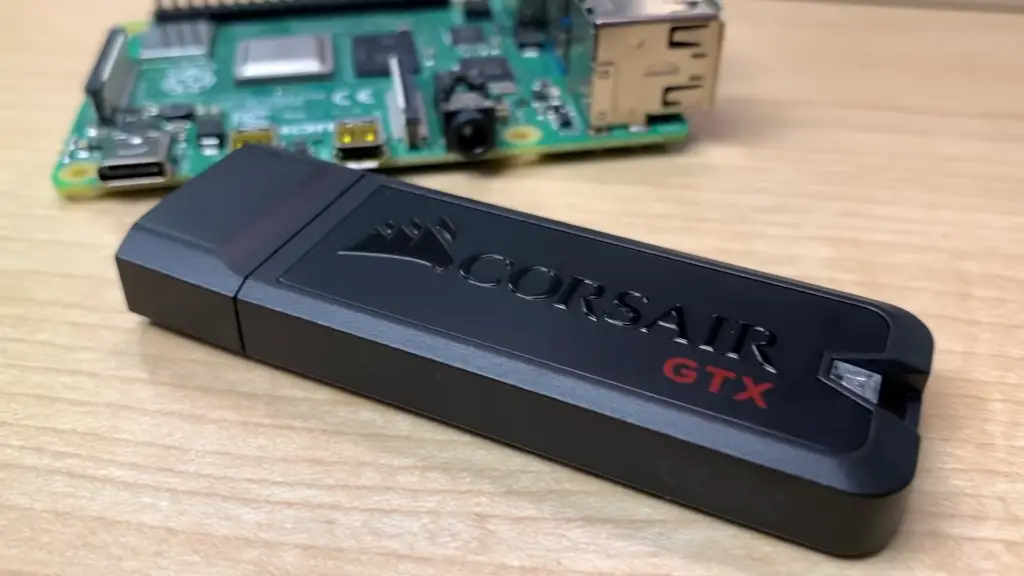
One of the foremost advantages of USB booting is the enhanced speed and performance it brings to the Raspberry Pi. Traditional microSD cards, while convenient for storage, can sometimes bottleneck data transfer speeds and cause sluggishness in operations. USB booting eliminates this limitation by utilizing the faster read and write speeds of USB 3.0 or 3.1 devices, resulting in quicker application launches, reduced loading times, and smoother multitasking.
Reliability takes center stage as another compelling benefit of USB booting. MicroSD cards are susceptible to wear and tear due to their physical nature. Frequent read and write operations can degrade their performance over time, leading to potential data corruption or even failure. By booting from a USB device, you can safeguard your critical data and prolong the life of your Raspberry Pi setup.
Customization and experimentation are the lifeblood of Raspberry Pi projects, and USB booting fosters these endeavors. With a USB device as the boot medium, users can easily switch between different operating systems, experiment with various configurations, and create dedicated backup copies of their setups. This flexibility empowers users to explore new software, adapt their projects to changing requirements, and recover from any unforeseen mishaps quickly.
Scaling up projects becomes a breeze with USB booting. When embarking on larger-scale deployments, such as setting up a cluster of Raspberry Pi nodes for a computing-intensive task, USB booting streamlines the process. Imagine configuring a single USB device and replicating it across multiple Raspberry Pis – no more painstakingly setting up each microSD card individually. This not only saves time but also ensures consistency and reduces the chances of human error.
Security-conscious users also stand to benefit from USB booting. MicroSD cards can be vulnerable to unauthorized access, potentially compromising sensitive data. By utilizing a USB device for booting, you can implement stronger encryption measures, enhance access controls, and fortify your Raspberry Pi against potential security breaches.
Is Booting From USB Drive Right for Your Raspberry Pi?
Advantages:
- First and foremost, they offer portability and convenience. Imagine carrying your entire operating system and essential files in your pocket, ready to plug into any compatible device and boot up your personalized environment. This is particularly valuable for travelers, IT professionals, or anyone who frequently switches between computers;
- USB booting can also significantly improve system speed and performance. Traditional hard drives can be slow to start up, while USB drives with modern flash memory technology offer quicker access times. This is particularly noticeable on older machines, where a USB boot can breathe new life into a sluggish system;
- Furthermore, booting from a USB drive can serve as a useful tool for troubleshooting and system recovery. If your main operating system encounters issues, having a bootable USB drive with diagnostic tools or a backup OS can be a lifesaver, allowing you to access your files and attempt repairs;
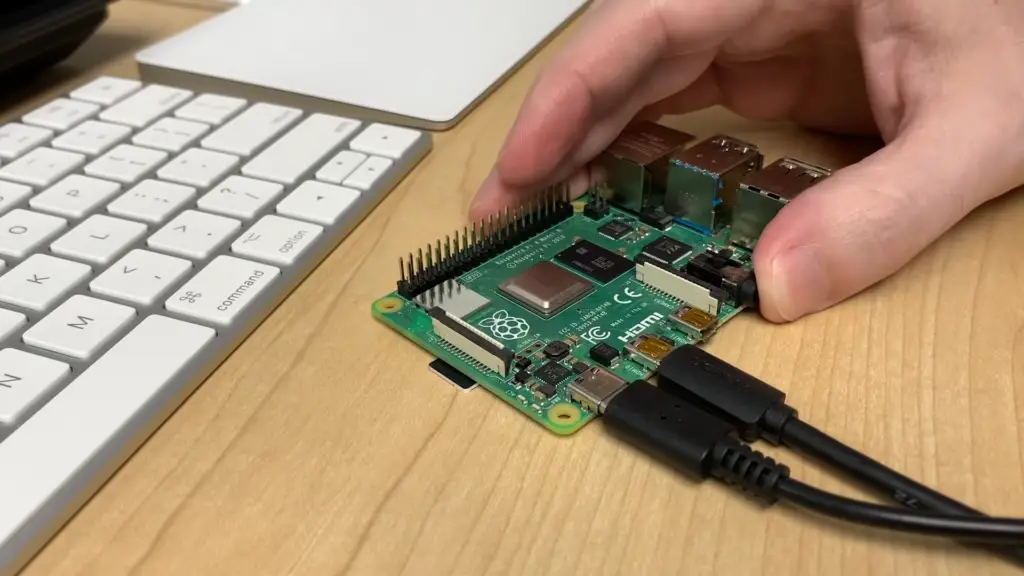
Considerations:
- USB drives may have limited storage compared to internal hard drives or SSDs, which could impact your ability to store large files or run resource-intensive applications;
- Compatibility is another factor to consider. Not all systems support USB booting, so it’s important to ensure your target devices can accommodate this method. Additionally, the speed of your USB drive can affect performance. Older or slower USB drives might not provide the desired speed boost;
- Moreover, the process of creating a bootable USB drive and configuring your system to boot from it requires some technical know-how. While numerous guides are available, those less familiar with computer setup and configuration might find this process challenging [2];
Which Method to Use to Boot From USB:
Raspberry Pi Imager: Streamlining the Process
The Raspberry Pi Imager is an official tool provided by the Raspberry Pi Foundation, designed to simplify the process of setting up an operating system on a microSD card or a USB drive. It provides an intuitive interface that guides users through the steps required to write an operating system image onto a USB drive.
Here’s how you can use the Raspberry Pi Imager to boot from a USB drive:
- Download and Install Raspberry Pi Imager: Start by downloading and installing the Raspberry Pi Imager on your computer. It is available for Windows, macOS, and Linux;
- Select the Operating System: Launch the Raspberry Pi Imager and choose the operating system you want to install on the USB drive. The Imager offers a variety of options, including official Raspberry Pi OS releases and third-party distributions;
- Choose the USB Drive: Insert the USB drive into your computer and select it as the target storage medium within the Imager;
- Write the Image: Click the “Write” button to begin writing the selected operating system image onto the USB drive;
- Configure the Raspberry Pi: Once the image is written, insert the USB drive into the Raspberry Pi and power it on. During the initial setup, configure the system preferences according to your needs;
Using Raspberry Pi Imager is a user-friendly way to set up a Raspberry Pi to boot from a USB drive. It streamlines the process and is particularly useful for those who are new to Raspberry Pi or prefer a graphical interface [3].
Moving the Root File System: Customizing Your Setup
Another method to boot from a USB drive involves moving the root file system, which holds the core components of the operating system. This method offers more control over the setup and allows for customization. Here’s how you can do it:
- Install and Configure the Operating System: Start by installing the operating system on a microSD card as usual. Configure it according to your preferences and ensure everything is set up the way you want;
- Prepare the USB Drive: Connect a USB drive to your Raspberry Pi and format it with a file system compatible with Linux, such as ext4;
- Copy the Root File System: Use the “rsync” command or other file copying methods to transfer the entire root file system from the microSD card to the USB drive;
- Modify the Boot Configuration: Edit the boot configuration files to point to the new location of the root file system on the USB drive. This typically involves modifying the “cmdline.txt” file;
- Test the Setup: Reboot the Raspberry Pi and ensure that it successfully boots from the USB drive. Verify that all your customizations and settings are intact;
Moving the root file system provides greater flexibility and control, making it a suitable option for users who want a tailored setup or need to fine-tune their Raspberry Pi environment.
Updating the Bootloader EEPROM: Embracing the Latest Features
The Raspberry Pi bootloader is responsible for initializing the hardware and loading the operating system. The bootloader EEPROM (Electrically Erasable Programmable Read-Only Memory) contains the firmware that manages this process. By updating the bootloader EEPROM, you can enable USB booting and take advantage of the latest features and improvements.
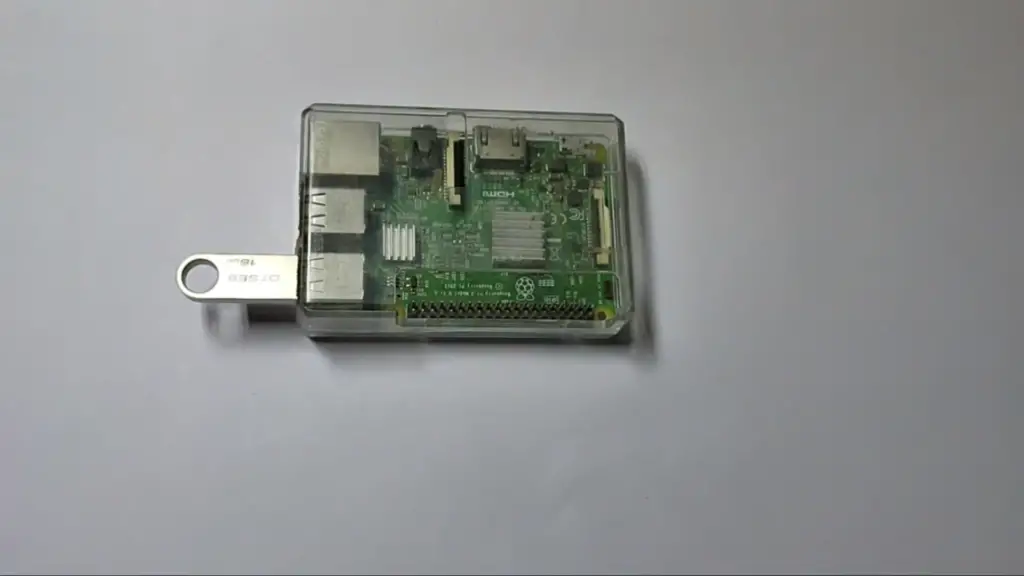
Here’s how you can update the bootloader EEPROM:
- Check the Current Bootloader Version: Determine the version of the bootloader EEPROM currently installed on your Raspberry Pi. You can do this using the “vcgencmd” command;
- Download the Latest Bootloader: Visit the official Raspberry Pi website to download the latest bootloader EEPROM release;
- Update the Bootloader: Use the “rpi-eeprom-update” tool to install the updated bootloader EEPROM. This can typically be done using the terminal;
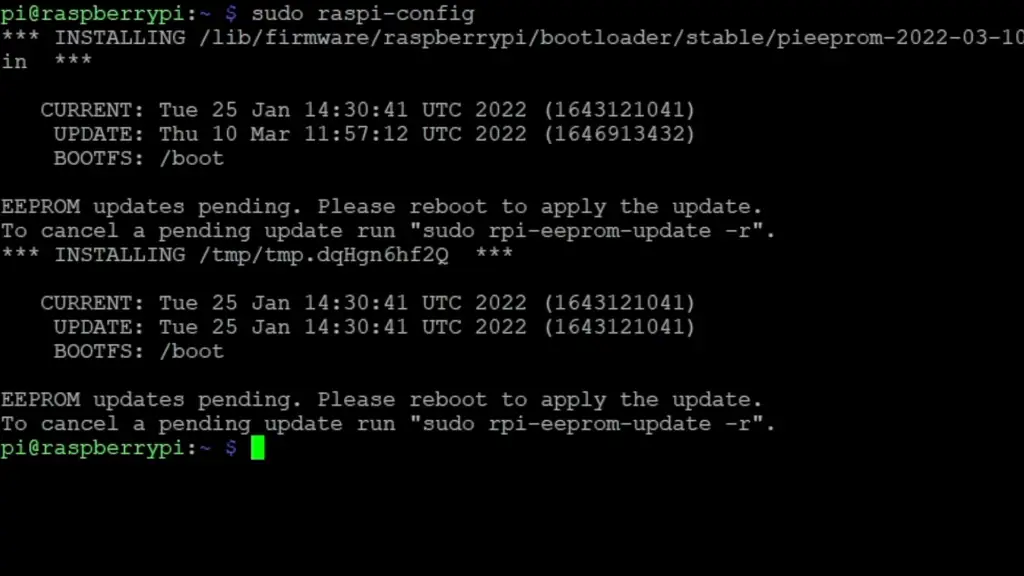
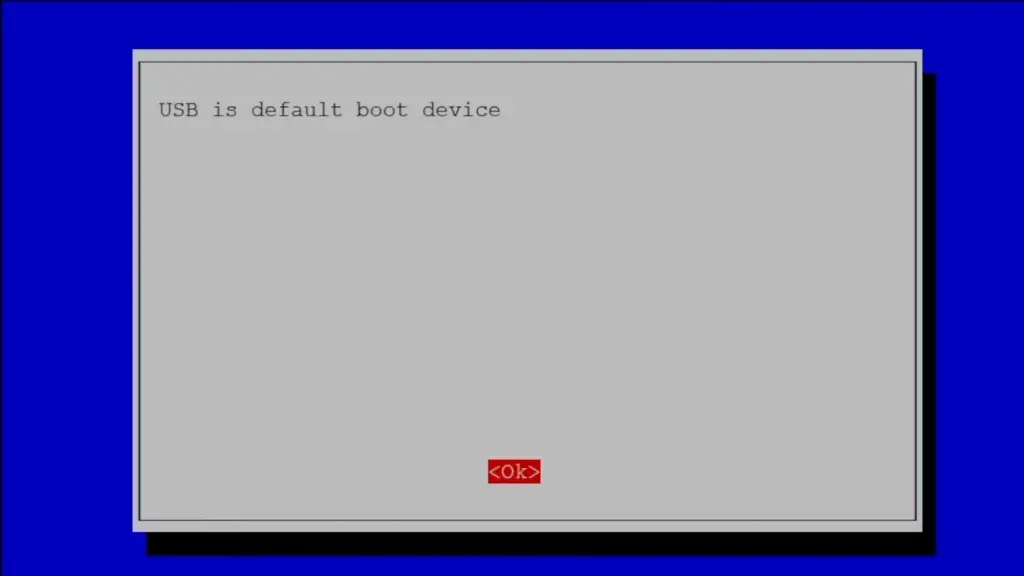
- Enable USB Boot Mode: Once the updated bootloader is installed, you can enable USB boot mode using the “raspi-config” tool. This step is crucial for allowing the Raspberry Pi to boot from a USB drive;
- Reboot and Verify: Reboot the Raspberry Pi and ensure that it successfully boots from the USB drive. Confirm that the new features or improvements are working as expected [4];
Updating the bootloader EEPROM ensures that your Raspberry Pi is running the latest firmware, which can bring performance enhancements, bug fixes, and new capabilities.
Raspberry Pi Boot from USB: Tutorial
Necessary Equipment
Before we dive into the tutorial, let’s gather the necessary equipment to ensure a smooth booting process. You’ll need:
- Raspberry Pi 2B to 3B+;
- Micro SD Card;
- Power Supply;
- Ethernet Cable (Recommended) or Wi-Fi;
- USB Drive;
- Raspberry Pi Case;
- USB Keyboard;
- USB Mouse;
- Micro SD Card Reader;
Step 1: Install And Update Raspbian
To begin, you’ll need an operating system. Raspbian, the official Raspberry Pi OS, is a great choice. Here’s how to set it up:
- Download the latest version of Raspbian from the official Raspberry Pi website;
- Use a micro SD card reader to write the Raspbian image to your micro SD card. You can use tools like Etcher for this process;
- Insert the micro SD card into your Raspberry Pi and power it on;
Once Raspbian is up and running, make sure to update it to the latest version:
Open a terminal window.
Run the following commands:
sudo apt update
sudo apt upgrade
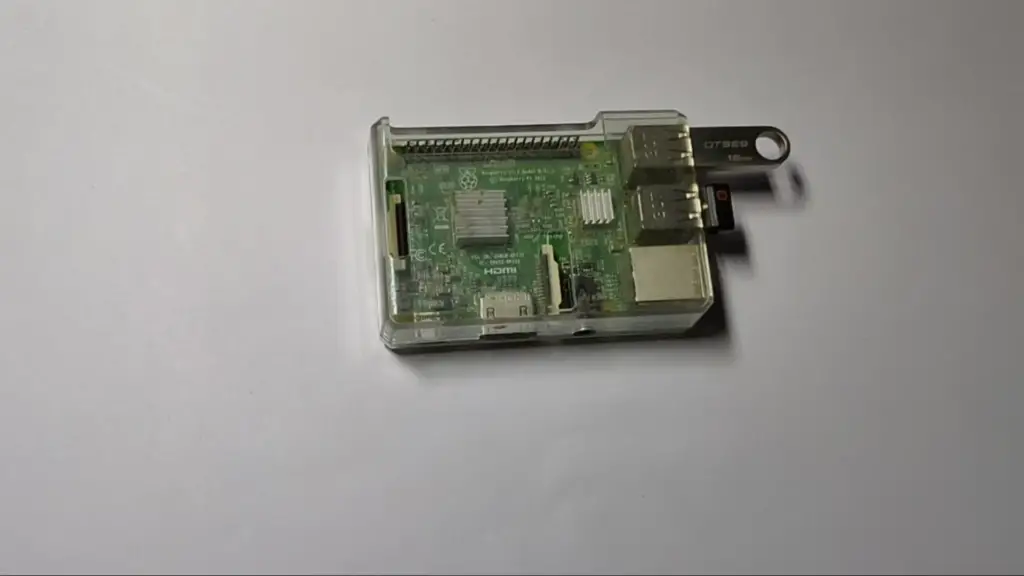
Step 2: Enable USB Boot Mode
The next step involves enabling USB boot mode in your Raspberry Pi’s firmware. Follow these steps.
Open a terminal window.
Run the following command to launch the Raspberry Pi Configuration tool:
sudo raspi-config
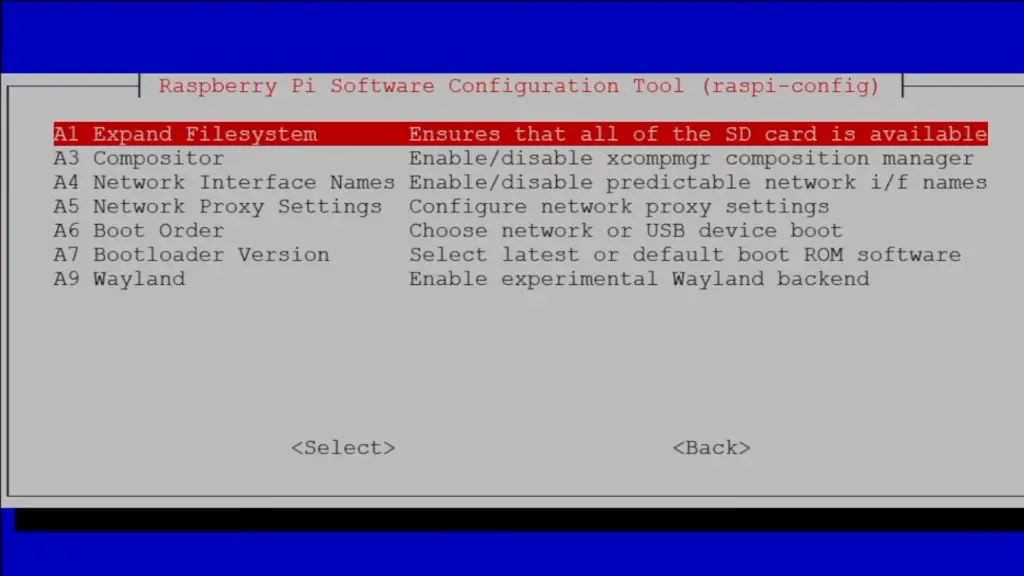
- Navigate to “Advanced Options” and select “Boot Order”;
- Choose “USB Boot” and confirm your selection;
- Reboot your Raspberry Pi;
- Enabling USB boot mode allows your Raspberry Pi to prioritize booting from USB devices [5];
Step 3: Prepare USB Mass Storage Device
Now it’s time to prepare your USB drive for booting. Here’s how:
Insert the USB drive into an available USB port on your Raspberry Pi.
Open a terminal window and run the following command to list connected devices:
lsblk
Identify your USB drive based on its size and name, such as /dev/sda.
Format the USB drive using the fdisk or parted command. Create a partition table and a primary partition.
Format the partition with the ext4 filesystem:
sudo mkfs.ext4 /dev/sda1
Step 4: Boot Raspberry Pi From The Prepared USB Mass Storage Device
With the USB drive prepared, it’s time to boot your Raspberry Pi from it:
- Safely eject the USB drive from your computer and insert it into an available USB port on your Raspberry Pi;
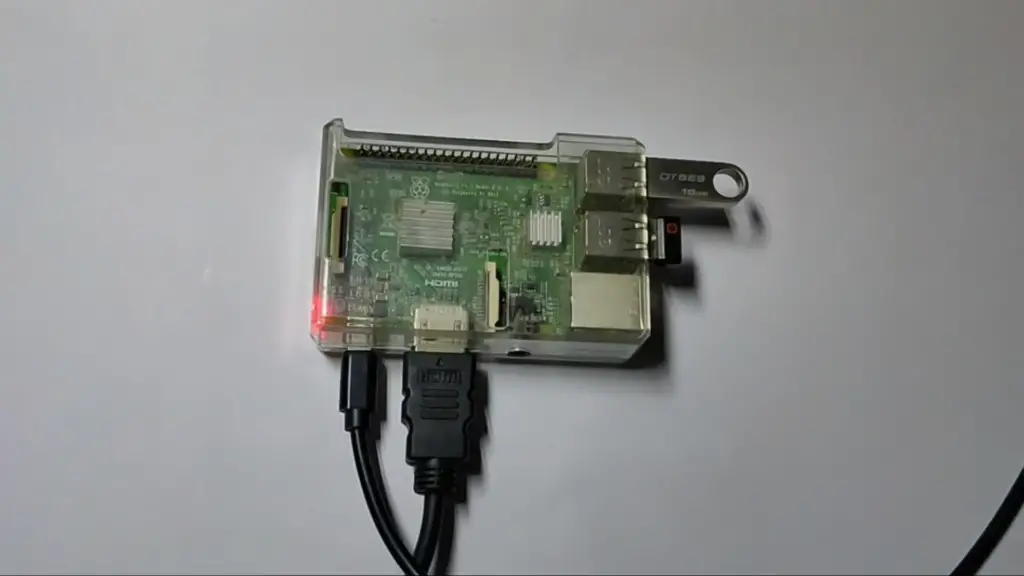
- Power on your Raspberry Pi;
Troubleshooting USB Boot Issues
Navigate common problems like unrecognized USB drives, boot failures, or compatibility issues using troubleshooting strategies.
Solutions may involve checking connections, updating firmware, or validating configuration settings:
- Incompatible USB Device: Not all USB devices are created equal. Make sure you’re using a compatible USB drive or SSD. Some devices might have compatibility issues due to the USB controller or firmware. It’s recommended to use a USB 3.0 or higher device for optimal performance;
- Boot Order: The Raspberry Pi might still try to boot from the microSD card even if a USB device is attached. To ensure the USB device is prioritized for booting, you need to change the boot order in Raspberry Pi’s firmware settings. To access these settings, boot the Pi from the microSD card, then use the raspi-config tool to set USB Boot as the default;
- Boot Partition: The boot partition on the USB device might not be properly formatted or set up. Ensure that you have copied the necessary bootloader files to the boot partition of the USB device. These files include bootcode.bin, start.elf, and fixup.dat;
- Power Supply: Inadequate power supply can cause booting issues. USB booting might require more power than booting from a microSD card. Make sure you’re using a power supply that can provide sufficient current for both the Raspberry Pi and the USB device;
- Corrupted Bootloader Files: If the bootloader files on the USB device are corrupted, the Raspberry Pi won’t be able to boot. Double-check that you’ve properly copied the files, and if needed, try copying them again from a known working source;
- USB Device Format: The USB device should be formatted with a compatible file system. Raspberry Pi typically supports FAT32 and exFAT. Ensure that the file system is supported and correctly formatted;
- BIOS/UEFI Settings: If you’re using a USB SSD, some UEFI settings might cause compatibility issues. Check your SSD’s documentation for any required settings or firmware updates;
- Faulty USB Port or Cable: Sometimes, the issue might not be with the USB device itself, but with the port or cable. Try using a different USB port or cable to rule out any physical problems;
- Software Configuration: Ensure that your software configuration, such as the cmdline.txt and config.txt files, is correctly set up for USB booting. Incorrect configurations can prevent successful booting;
- Firmware Update: Keeping your Raspberry Pi’s firmware up to date can resolve compatibility issues and improve overall stability. Check for firmware updates and apply them if necessary;
- Check Logs: If the Raspberry Pi doesn’t boot, connect it to a monitor and look for error messages during boot. These messages can provide valuable insights into the cause of the issue;
- Test with Different USB Devices: If all else fails, try using a different USB device to boot. This can help determine whether the issue is with the specific USB device or a more general configuration problem [6];
Optimizing USB Boot Performance: Pro Tips
Here are some pro tips to help you get the most out of your USB boot setup:
- Choose a High-Quality USB Device: Selecting a high-quality USB drive or SSD with good read and write speeds is crucial. Opt for a USB 3.0 or 3.1 device for the best performance. Look for reputable brands known for producing reliable storage solutions;
- Use a USB 3.0 Hub: If your Raspberry Pi model has USB 2.0 ports, consider using a powered USB 3.0 hub. This can boost performance by leveraging the faster USB 3.0 speeds, even if your Pi itself only supports USB 2.0;
- Optimal File System: Choose the right file system for your USB device. While FAT32 and exFAT are generally well-supported, consider using ext4 for Linux-based distributions. Ext4 can offer better performance, reliability, and support for larger file sizes;
- Partition Alignment: Ensure that the partitions on your USB device are correctly aligned. Proper alignment can improve read and write performance. Many modern partitioning tools automatically handle this, but it’s still worth checking;
- Overclocking: Depending on your Raspberry Pi model, you might be able to overclock the CPU and memory for improved performance. However, overclocking should be done cautiously, as it can potentially lead to stability issues or increased power consumption;
- Minimize Background Services: Disable any unnecessary background services or applications that might consume system resources. This can free up CPU and memory, leading to better overall performance;
- Reduce Swapping: Swapping data between RAM and storage can slow down your system. Adjust the swap settings to minimize swapping or consider disabling it altogether if you have sufficient RAM;
- Optimize Boot Configuration: Fine-tune your boot configuration files (cmdline.txt and config.txt) for optimal performance. Adjust settings like CPU and GPU memory allocation based on your usage requirements;
- Regularly Update Firmware and Software: Keep your Raspberry Pi’s firmware, operating system, and applications up to date. Updates often include performance improvements and bug fixes that can positively impact USB boot performance;
- Use a High-Quality Power Supply: A stable and sufficient power supply is crucial for optimal performance. Ensure that your power supply provides the recommended voltage and current for your Raspberry Pi model;
- Monitor System Resources: Use monitoring tools to keep an eye on system resources such as CPU usage, memory usage, and disk I/O. This can help you identify potential performance bottlenecks and address them accordingly;
- Cooling Solutions: Overheating can lead to performance throttling. Consider using heat sinks or active cooling solutions to keep your Raspberry Pi’s temperature in check, especially if you’re pushing its limits;
- Trim Unused Services: Disable any unnecessary background services, daemons, or startup applications that you don’t need. This can free up resources and improve overall responsiveness;
- Custom Kernel Configuration: For advanced users, compiling a custom kernel with specific optimizations tailored to your Raspberry Pi model and use case can result in improved performance. However, this requires a good understanding of kernel configuration and compiling;
FAQ:
1. How to force Raspberry Pi 4 to boot from USB?
By default, the Raspberry Pi 4 is configured to boot from a microSD card. To force it to boot from a USB drive, you need to update the EEPROM. Here’s how:
Make sure your Raspberry Pi 4 is connected to the internet.
Open a terminal window and run the following command to update the bootloader EEPROM:
sudo rpi-eeprom-update -d -a
Reboot your Raspberry Pi for the changes to take effect.
2. How to boot Raspberry Pi 3 with USB?
Raspberry Pi 3 also requires an EEPROM update to enable USB booting. Here’s what you need to do:
Connect your Raspberry Pi 3 to the internet.
Open a terminal window and run the following command to update the bootloader EEPROM:
sudo rpi-eeprom-update -d –a
Reboot your Raspberry Pi 3.
3. How to boot Raspberry Pi from USB Ubuntu?
To boot a Raspberry Pi from a USB drive with Ubuntu, you need to follow these general steps:
Flash the Ubuntu image to the USB drive using a tool like Raspberry Pi Imager or Etcher.
Make sure your Raspberry Pi is configured to boot from USB (update the EEPROM as necessary).
Insert the USB drive into your Raspberry Pi and power it on.
4. How to boot my Raspberry Pi from a laptop?
It’s not possible to directly boot a Raspberry Pi from a laptop. However, you can use your laptop to configure the Raspberry Pi’s microSD card or USB drive, and then insert the prepared card/drive into the Raspberry Pi for booting.
5. Does Raspberry Pi have a BIOS?
The Raspberry Pi uses a different system called the “bootloader” rather than a traditional BIOS. The bootloader is responsible for initializing the hardware and loading the operating system.
6. What format USB boot disk for Raspberry Pi?
The USB boot disk for Raspberry Pi should be formatted with the FAT32 or exFAT filesystem. FAT32 is recommended for better compatibility.
7. Can Raspberry Pi Zero boot from USB?
Yes, Raspberry Pi Zero can boot from a USB drive. You need to update its EEPROM to enable USB booting, similar to other models.
8. How to boot Raspberry Pi from USB on Windows?
To boot Raspberry Pi from USB on Windows:
- Flash the desired OS image onto the USB drive using tools like Raspberry Pi Imager or Etcher;
- Configure your Raspberry Pi to boot from USB (update the EEPROM if necessary);
- Insert the USB drive into the Raspberry Pi and power it on;
9. Why won’t Raspberry Pi boot?
Several factors could prevent a Raspberry Pi from booting, such as an incorrect power supply, a corrupted SD card or USB drive, incorrect wiring, or hardware issues. Troubleshoot by checking connections, using a known-good power supply, and ensuring the correct boot media is used.
10. Can you power Raspberry Pi from USB?
Yes, you can power a Raspberry Pi using a micro USB cable connected to a USB power source, such as a computer or a USB wall adapter.
11. How to check the USB boot in Raspberry Pi 4?
To check if USB boot is enabled on Raspberry Pi 4:
- Open a terminal window;
- Run the following command: vcgencmd otp_dump | grep 17: If the output shows “17:3020000a”, USB boot is enabled. Otherwise, you need to update the EEPROM;
12. How to boot from USB on Raspberry Pi 2?
To boot Raspberry Pi 2 from USB:
- Flash the desired OS image onto the USB drive;
- Update the EEPROM to enable USB booting;
- Insert the USB drive into the Raspberry Pi 2 and power it on;
13. How do I force Ubuntu 20.04 to boot from USB?
To force Ubuntu 20.04 to boot from USB, follow these steps:
- Configure your computer’s BIOS or UEFI settings to prioritize booting from USB
- Insert the USB drive with Ubuntu 20.04;
- Restart your computer, and it should boot from the USB drive;
Remember that specific steps may vary depending on the version of Raspberry Pi, Ubuntu, or the tools you are using. Always refer to official documentation or trusted sources for accurate instructions.
14. Which Raspberry Pi models support USB booting?
Most modern Raspberry Pi models support USB booting, including Raspberry Pi 2, 3, 3+, 4, and 400. However, earlier models may not have this capability.
15. How do I enable USB boot mode on my Raspberry Pi?
You can enable USB boot mode by updating the bootloader EEPROM. Use tools like rpi-eeprom-update to ensure your Raspberry Pi is configured for USB booting.
16. Can I use any USB drive for booting?
While many USB drives are compatible, it’s recommended to use high-quality USB 3.0 drives for optimal performance. Ensure the drive is formatted as FAT32 or exFAT.
17. How do I prepare a USB drive for Raspberry Pi booting?
Format the USB drive using FAT32 or exFAT filesystems. Copy the boot files and operating system image to the drive using tools like Raspberry Pi Imager or Etcher.
18. Can I still use a microSD card for storage after USB booting?
Yes, you can use a microSD card for storage even after USB booting. However, the microSD card no longer needs to serve as the boot drive.
19. What are the benefits of USB booting?
USB booting offers faster startup times, improved read/write speeds, extended microSD card lifespan, and the potential for larger storage capacity.
20. How do I troubleshoot USB booting issues?
If you encounter problems, ensure your Raspberry Pi’s firmware is up to date, your USB drive is properly formatted, and the boot order is correctly configured.
21. Can I use any operating system for USB booting?
Most Raspberry Pi-compatible operating systems can be used for USB booting. Popular choices include Raspberry Pi OS, Ubuntu, and various Linux distributions.
22. Can I switch back to microSD card booting after enabling USB booting?
Yes, you can switch between USB booting and microSD card booting by updating the boot order in Raspberry Pi’s firmware settings.
23. Is USB booting reversible?
Yes, you can revert to microSD card booting at any time by adjusting the boot settings in the firmware.
24. Can I use an external SSD for USB booting?
Yes, you can use external SSDs for USB booting with proper connectors or adapters. This can provide even better performance compared to USB drives.
25. Will USB booting void my warranty?
Enabling USB booting using official methods should not void your warranty. However, always follow official guidelines and avoid hardware modifications.
26. Are there limitations to USB booting?
While USB booting offers numerous advantages, compatibility issues with certain USB drives, power requirements, and specific use cases may pose limitations.
27. How do I verify if my Raspberry Pi is booting from USB?
You can verify USB booting by checking the EEPROM settings, observing faster startup times, or physically disconnecting the microSD card to see if the Raspberry Pi still boots.
28. Can I use a USB hub for multiple USB-booting devices?
Yes, you can use a powered USB hub to connect multiple USB-booting devices, such as drives or SSDs, to a single Raspberry Pi.
29. Is USB booting recommended for all projects?
USB booting is recommended for projects that require improved performance, faster boot times, and expanded storage. Evaluate your project’s needs before deciding.
30. Where can I find more information and support for USB booting Raspberry Pi?
You can find official documentation, community forums, and tutorials on the official Raspberry Pi website and forums, as well as various online resources and communities dedicated to Raspberry Pi enthusiasts.
Useful Video: Raspberry Pi 4 USB Boot is official! How-to
References
- https://linuxhint.com/boot-raspberry-pi-from-usb
- https://www.tomshardware.com/how-to/boot-raspberry-pi-4-usb
- https://thepi.io/how-to-boot-your-raspberry-pi-from-a-usb-mass-storage-device/
- https://thesecmaster.com/three-different-ways-to-boot-a-raspberry-pi-from-a-usb-drive/
- https://projects.raspberrypi.org/en/projects/install-raspberry-pi-desktop/3
- https://pimylifeup.com/raspberry-pi-boot-from-usb/





Leave a Reply