
In an era where data has become the lifeblood of our digital existence, the quest for efficient storage solutions has grown paramount. Enter the Raspberry Pi NAS (Network Attached Storage) server, a powerful yet cost-effective answer to the ever-expanding need for centralized data management.
Whether you’re a tech enthusiast, a digital creative, or a home user seeking control over your files, this comprehensive guide will walk you through the process of creating your very own NAS server using the versatile Raspberry Pi.
Throughout this guide, we will unravel the intricate layers of setting up your Raspberry Pi NAS server, demystifying technical jargon and streamlining the process into easily digestible steps. We will explore the essential hardware components required for your NAS setup, delve into selecting the appropriate storage options, and navigate the intricacies of software installation and configuration.
What Is Network Attached Storage (NAS)?
In the ever-evolving landscape of data management and storage solutions, Network Attached Storage (NAS) has emerged as a versatile and powerful tool. NAS refers to a specialized device or server that is connected to a network and provides centralized data storage and file sharing capabilities to a variety of devices, such as computers, laptops, smartphones, and even other servers. Unlike traditional storage solutions that are directly connected to a single computer, NAS enables multiple users and devices to access and share data seamlessly over a network [1].
At its core, NAS serves as a dedicated repository for storing and organizing data, ranging from documents and media files to backups and important archives. It operates independently with its own operating system and typically houses multiple hard drives, which can be configured in various RAID (Redundant Array of Independent Disks) configurations for enhanced data redundancy and performance.
One of the key advantages of NAS is its accessibility. Users can access their stored data from anywhere within the network, making it an ideal solution for homes, small businesses, and even larger enterprises. This remote accessibility is often facilitated through user-friendly interfaces or applications provided by the NAS manufacturer, allowing users to manage their files, set up permissions, and even stream media effortlessly.
Security and data protection are paramount in today’s digital age, and NAS systems address these concerns with built-in features such as data encryption, user authentication, and regular backup options. Some advanced NAS devices even offer the capability to sync data with cloud storage services for an extra layer of redundancy and disaster recovery.
In addition to storage and data sharing, NAS can also serve various other functions, thanks to its expandability and compatibility with various applications. These functions might include acting as a media server for streaming content to smart TVs or other devices, hosting websites or blogs, running virtual machines, or even functioning as a surveillance system by connecting IP cameras.
When considering a NAS solution, it’s important to evaluate factors such as storage capacity, the number of drive bays, processing power, RAM, and connectivity options. NAS devices range from simple single-bay solutions designed for personal use to powerful multi-bay units tailored for enterprise-level requirements.
What is Raspberry Pi?
The Raspberry Pi is a compact and affordable single-board computer developed with the intention of promoting computer science education and enabling DIY electronics projects. Since its introduction in 2012 by the Raspberry Pi Foundation, it has become a revolutionary platform that empowers enthusiasts, students, and professionals to explore programming, electronics, and creative technology projects.
At its core, a Raspberry Pi is a credit-card-sized computer that includes all the essential components of a typical desktop computer, such as a CPU (Central Processing Unit), RAM (Random Access Memory), USB ports, HDMI output, and more. Its unique combination of small size, low cost, and flexibility has made it immensely popular across various domains.
The Raspberry Pi runs on various versions of the Linux operating system, such as Raspberry Pi OS (formerly known as Raspbian) and other compatible distributions. Users can install a range of software and programming languages, making it a versatile platform for learning and development. Its accessible GPIO (General-Purpose Input/Output) pins allow users to interface with external electronic components like sensors, motors, LEDs, and more, making it a fantastic tool for electronics experimentation and prototyping [2].
The diverse applications of Raspberry Pi span several areas:
- Education: Raspberry Pi has been a game-changer in computer science education. It provides an affordable platform for students to learn programming languages like Python, explore hardware concepts, and develop problem-solving skills;
- Projects and Prototyping: The Raspberry Pi’s compact size, low power consumption, and GPIO pins make it ideal for building and prototyping various electronics projects, ranging from home automation systems and weather stations to robotics and IoT (Internet of Things) devices;
- Media Center: With the right software, a Raspberry Pi can be turned into a media center, capable of streaming videos, music, and other media content to a TV or other display;
- Server and Networking: Some enthusiasts use Raspberry Pi as a lightweight server for hosting websites, email servers, or other network services;
- Gaming: Retro gaming enthusiasts have turned Raspberry Pi into emulation machines that can run classic video games from platforms like NES, SNES, and more;
- Art and Creativity: The combination of programming and hardware interaction opens the door to creative projects like interactive art installations, LED displays, and more;
- Learning and Skill Development: Raspberry Pi encourages hands-on learning and experimentation, helping individuals develop practical skills in coding, electronics, and system administration;
The Raspberry Pi community is vibrant and supportive, with a wealth of online resources, tutorials, forums, and projects shared by enthusiasts worldwide. With each new iteration and model, the Raspberry Pi continues to push the boundaries of what’s possible in the world of DIY computing and electronics. Whether you’re a beginner or an experienced hobbyist, the Raspberry Pi offers an accessible and exciting platform for innovation and exploration.
Raspberry Pi As An NAS Server – Is It A Good?
Pros:
- Affordability: The Raspberry Pi’s cost-effectiveness is one of its most attractive features. Setting up a Raspberry Pi as a NAS server is significantly cheaper than purchasing a dedicated NAS device;
- Flexibility and Customization: Raspberry Pi’s inherent adaptability allows you to tailor your NAS setup to your specific needs. You can choose the storage capacity, configure RAID levels, and customize the software according to your requirements;
- Learning Opportunity: If you’re keen on honing your technical skills, using a Raspberry Pi for NAS is an excellent educational experience. It offers a chance to learn about networking, server management, and Linux administration;
- Low Power Consumption: Raspberry Pi’s energy efficiency ensures that your NAS server won’t lead to a substantial increase in your electricity bill. This makes it an eco-friendly option for home use;
Cons:
- Performance Limitations: While the Raspberry Pi is impressively versatile, it’s still a compact single-board computer with limitations. Its processing power and RAM might lead to reduced performance, especially when handling multiple data streams or serving multiple users simultaneously;
- Limited Storage Expansion: Raspberry Pi models have a finite number of USB ports, restricting the number of external hard drives or storage devices you can connect. This could potentially limit your overall storage capacity;
- Network Speed Bottlenecks: Gigabit Ethernet might be available on some Raspberry Pi models, but network speed could still be a bottleneck compared to more powerful NAS solutions designed with faster data transfer capabilities;
- Reliability Concerns: Commercial NAS devices often come with dedicated hardware and better cooling solutions, ensuring prolonged operational reliability. Raspberry Pi setups might require extra precautions to prevent overheating or unexpected shutdowns;
- Technical Complexity: While setting up a Raspberry Pi as a NAS can be a valuable learning experience, it might also pose challenges for beginners. Proper configuration, security measures, and troubleshooting might require some technical expertise [3];
Using a Raspberry Pi as a NAS server is a mixed bag, offering affordability, customization, and learning opportunities alongside potential performance and reliability trade-offs. It’s an excellent choice for small-scale and budget-conscious projects, especially if you’re willing to invest time in optimizing and fine-tuning your setup.
However, for more demanding tasks, extensive data storage, or commercial use, a purpose-built NAS device might be a more reliable option. The decision ultimately hinges on your specific needs, technical skills, and willingness to experiment.
How To Build a Raspberry Pi NAS Server:
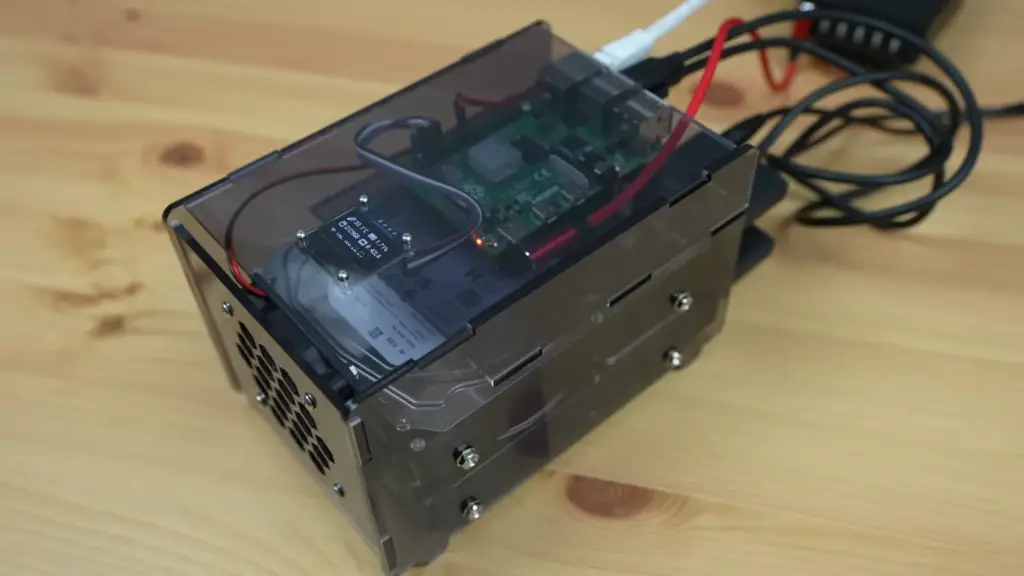
1) Required Hardware:
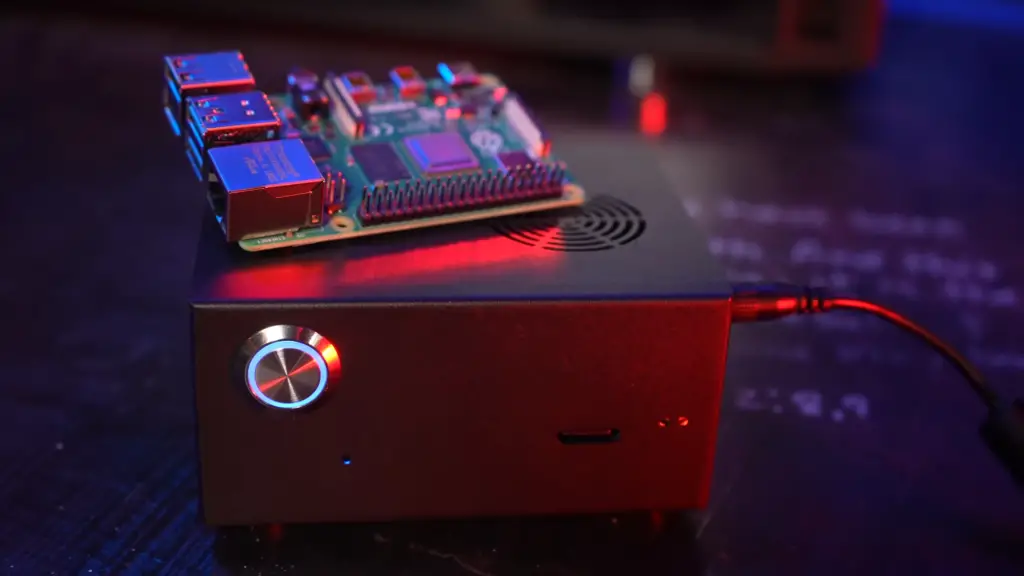
- Raspberry Pi Motherboard: The heart of your NAS server, responsible for processing and managing data;
- USB SATA/M.2 Drive: The primary storage device for your NAS, where your data will be stored;
- USB Flash Drive: This will be used to boot the Raspberry Pi and install the operating system;
- Raspberry Pi Case: Provides protection and helps keep your components organized;
2) Initial Setup:
- Update & Install OpenMediaVault: OpenMediaVault (OMV) is a free network-attached storage server based on Debian. Begin by updating your Raspberry Pi’s software and then install OpenMediaVault;
- Login and Initial Set Up: Connect your Raspberry Pi to a monitor, keyboard, and mouse. Log in with the default credentials and complete the initial setup process, including setting a new password;
- Configure Disk: Connect your USB SATA/M.2 drive to the Raspberry Pi. In the OMV web interface, navigate to “Disks” and add the new drive. Then, format and mount the disk;
- Create and Mount File System: After configuring the disk, create a file system (such as ext4) and mount it to a designated folder;
- Configure Shared Folder: Set up a shared folder on the mounted drive where your data will be stored. Configure user access and permissions for the shared folder;
- Configure SAMBA/CIFS: SAMBA allows Windows devices to access the shared folder on your NAS. Configure SAMBA settings to enable seamless file sharing between different operating systems;
- Create User Password: For security, create a password for the default user account (admin) in the OMV web interface;
- Configure Windows Network Discovery: Enable network discovery on your Windows devices to easily locate and access the shared folder on your NAS;
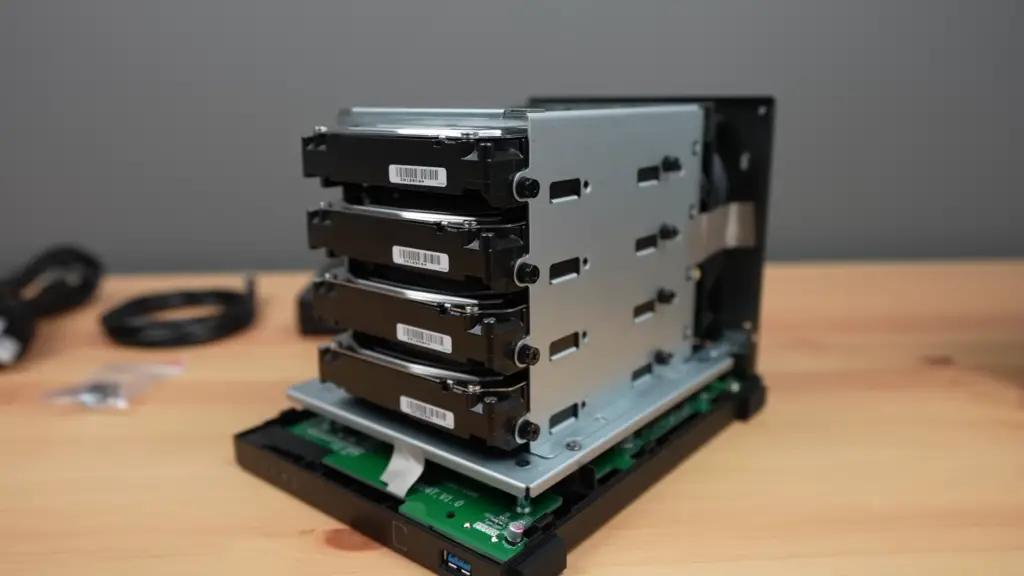
- Add Storage: If you have multiple drives, you can add them to your NAS for increased storage capacity. Configure these additional drives following the same process as the initial drive;
- Adding Users: In the OMV web interface, create additional users with specific permissions to access the shared folder;
- Shares and Permissions: Fine-tune share permissions to control which users have read and write access to specific folders;
- Fine-tune Permissions: Adjust folder and file permissions to ensure data security and access control;
- Test Transfer Speed: Before completing the setup, test the transfer speed by copying files to and from the NAS server. This will help you gauge the performance and ensure everything is working as expected;
How To Build NAS on Raspberry Pi Lite:
1. Install Raspberry Pi OS Lite
Open The Imager Application And Connect a MicroSD Card To the Computer
The journey begins with obtaining the necessary software. Download and install the Raspberry Pi Imager application on your computer. To physically prepare your Raspberry Pi, insert a microSD card into your computer’s card reader.
Install Raspberry Pi OS To a Microsd Card
Launch the Raspberry Pi Imager and select “Raspberry Pi OS (32-bit)” – opt for the Lite version to conserve resources. Designate your microSD card as the destination and initiate the installation process.
Storage Options
Before proceeding, consider your storage needs. Depending on your requirements, you can choose to employ a microSD card for smaller projects or utilize an external USB hard drive or SSD for more extensive storage capabilities.

2. Setting Up Raspberry Pi
Retrieving IP address
As your Raspberry Pi boots up, it’s essential to ascertain its IP address on the network. Execute the ip command to uncover this vital piece of information [4].
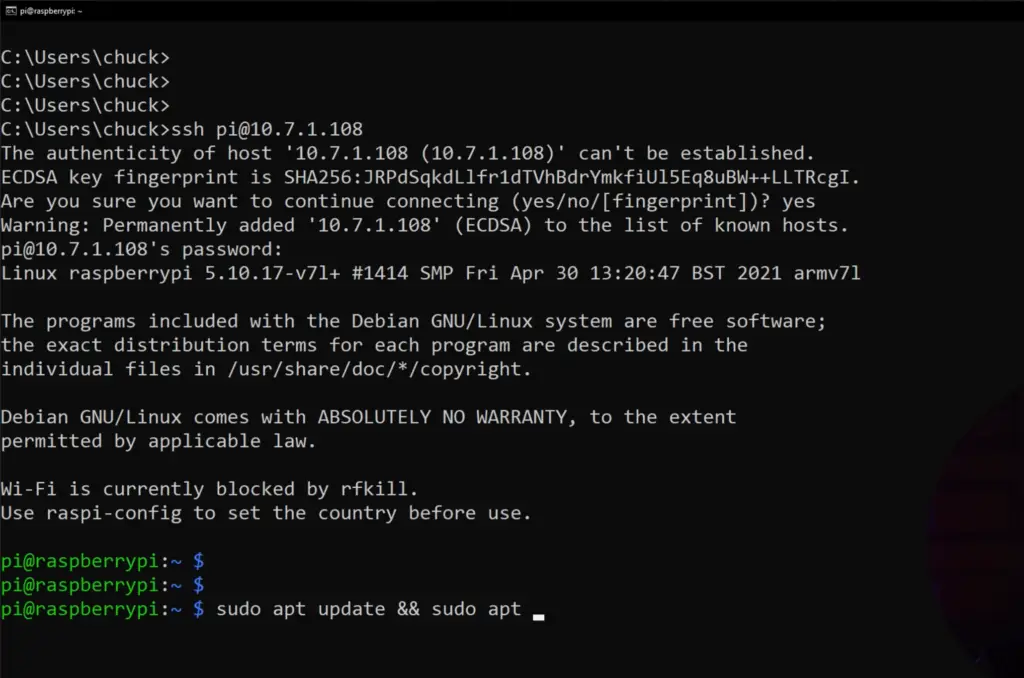
Connect Via SSH
To interact with your Raspberry Pi Lite, SSH (Secure Shell) provides a secure method of communication. Utilize the command ssh pi@RASPBERRY_PI_IP (replace RASPBERRY_PI_IP with the obtained IP address) to initiate a connection. Enter the default password (raspberry) when prompted.
3. OpenMediaVault
Installing OpenMediaVault
OpenMediaVault (OMV) is an open-source NAS solution that simplifies data management and sharing. Execute the following commands:
sudo apt-get update
sudo apt-get upgrade
wget -O – https://github.com/OpenMediaVault-Plugin-Developers/installScript/raw/master/install | sudo
Setting up OpenMediaVault
Change your OpenMediaVault Admin Password
Security is paramount, and altering the default admin password is a crucial step. Access the System tab within the OMV web interface and modify the password under the General Settings section.
Set Up Network Access
OMV provides a user-friendly platform to configure network settings. Navigate to the Network section and specify your preferred settings, including hostname, domain, and DNS servers.
How To Access NAS:
Accessing NAS from macOS
1. Connect to Your Network
Ensure that your macOS device is connected to the same network as your NAS. You can check your network connection in the System Preferences > Network.
2. Open Finder
Launch Finder by clicking on the Finder icon in your dock or by pressing Command + Space and typing “Finder”.
3. Connect to the Server
In the Finder menu, select “Go” and then choose “Connect to Server.” Alternatively, you can press Command + K.
4. Enter the Server Address
Type the address of your NAS in the following format: smb://NAS_IP_ADDRESS/shared_folder (replace NAS_IP_ADDRESS with your NAS’s IP address and shared_folder with the name of your shared folder).
5. Authenticate
If prompted, enter your NAS username and password to access your shared folder. You can choose to save your credentials in your macOS Keychain for future access.
6. Access Your Files
Once connected, you’ll see your NAS shared folder in Finder. You can now browse, open, and manage your files as if they were on your local machine [5].
Accessing NAS from Windows:
1. Connect to Your Network
Ensure that your Windows computer is connected to the same network as your NAS.
2. Open File Explorer
Launch File Explorer by clicking on the File Explorer icon in your taskbar or by pressing Windows + E.
3. Map Network Drive
Click on “Computer” in the top menu and select “Map network drive”.
4. Choose Drive Letter
Assign a drive letter for your NAS connection. This will act as a shortcut to your NAS.
5. Enter Folder Path
In the “Folder” field, enter the path to your NAS shared folder in the format \\NAS_IP_ADDRESS\shared_folder (replace NAS_IP_ADDRESS with your NAS’s IP address and shared_folder with the name of your shared folder).
6. Authenticate
If prompted, enter your NAS username and password to access your shared folder. You can choose to remember your credentials for future access.
7. Access Your Files
The mapped network drive will now appear in File Explorer, allowing you to access your NAS files just like any other drive on your computer [6].
Accessing NAS from iPhone/iPad:
1. Download a File Management App
Visit the App Store and download a file management app that supports NAS connections. Some popular options include FileExplorer, Documents by Readdle, and FileBrowser.
2. Open the App
Launch the file management app on your iPhone/iPad.
3. Add a Connection
Tap on the option to add a new connection or server. Choose the type of connection (SMB or FTP) based on your NAS configuration.
4. Enter Connection Details
Enter the IP address or hostname of your NAS, along with your NAS username and password.

5. Access Your Files
Once connected, you’ll be able to navigate through your NAS folders and access your files on your iPhone/iPad.
Alternatives For NAS Server On Raspberry
1. Raspberry Pi with OpenMediaVault
Before delving into alternatives, let’s briefly touch on the traditional route of using a Raspberry Pi with OpenMediaVault (OMV). This approach provides an excellent balance between cost-effectiveness and functionality. OMV simplifies the setup process, offers robust management tools, and supports various storage configurations.
2. Single-Board Computers (SBCs) Alternatives:
- Odroid HC4. The Odroid HC4 is a compact single-board computer that’s specifically designed for network-attached storage. It features a built-in 3.5″ SATA drive bay, making it an ideal choice for a dedicated NAS server. With its powerful performance and focus on storage capabilities, the Odroid HC4 provides an enticing alternative to the Raspberry Pi;
- RockPro64. The RockPro64 is a versatile SBC that supports USB 3.0 and PCIe expansion. With its increased processing power and support for SATA and NVMe drives, it offers enhanced performance for NAS tasks. Paired with a suitable NAS-oriented operating system, the RockPro64 can be a solid choice for your file storage needs [7];
3. Dedicated NAS Devices:
- Synology DiskStation. Synology is a renowned name in the NAS market, offering a range of DiskStation devices that provide intuitive setup, extensive features, and reliable performance. While these devices might be pricier than a DIY solution, they often come with advanced software, hardware redundancy, and extensive app ecosystems;
- QNAP NAS. QNAP is another established player in the NAS industry, offering a diverse lineup of NAS devices catering to various use cases. QNAP NAS systems boast robust hardware, comprehensive software, and support for RAID configurations, making them a viable alternative for those seeking a user-friendly and feature-rich NAS solution;
4. Cloud Services:
- Dropbox, Google Drive, OneDrive. Cloud storage services like Dropbox, Google Drive, and OneDrive provide a hassle-free way to store and access your files across devices. While they might not offer the same level of control as a local NAS, their convenience and seamless integration with various platforms make them attractive alternatives;
- Nextcloud. Nextcloud is a self-hosted cloud storage solution that gives you control over your data while offering features similar to popular cloud services. By hosting Nextcloud on your server or a VPS, you can create your own private cloud environment with file syncing, sharing, and collaboration capabilities;
5. DIY Server Builds:
- Mini-ITX or Micro-ATX Builds. For those seeking more power and flexibility, building a compact server using Mini-ITX or Micro-ATX components is a viable option. These builds allow you to install a full-fledged operating system like Linux or Windows Server and customize your storage configuration to suit your needs;
- FreeNAS. FreeNAS is an open-source NAS operating system that can be installed on a dedicated server hardware. It offers advanced features like ZFS filesystem, data integrity checks, and snapshot capabilities. If you’re comfortable with more technical setup and maintenance, FreeNAS provides a robust DIY NAS solution;
FAQ:
1. How to setup Raspberry Pi as a NAS server:
- Install Raspberry Pi OS: Download Raspberry Pi OS and use the Raspberry Pi Imager to write it to a microSD card;
- Connect Hardware: Insert the microSD card, connect the Raspberry Pi to power, monitor, keyboard, and network via Ethernet;
- Update System: Open the terminal and run sudo apt-get update followed by sudo apt-get upgrade;
- Install Required Software: Install SAMBA for file sharing using sudo apt-get install samba;
- Configure SAMBA: Edit the SAMBA configuration file using sudo nano /etc/samba/smb.conf. Create a shared folder, specify access permissions, and save the changes;
- Restart SAMBA: Restart the SAMBA service with sudo service smbd restart;
- Access the NAS: On other devices (Windows, macOS, or Linux), navigate to the file explorer and enter \\RASPBERRY_PI_IP\shared_folder (replace RASPBERRY_PI_IP and shared_folder with your Pi’s IP and shared folder name) [8];
2. How to set up a homemade NAS server:
- Select Hardware: Choose a suitable hardware platform, such as a Raspberry Pi, single-board computer, or spare PC;
- Install Operating System: Install a lightweight operating system like Ubuntu Server or Debian. You can use the Raspberry Pi Imager for Raspberry Pi;
- Set Up File Sharing: Install SAMBA or NFS to enable file sharing between devices;
- Configure Storage: Connect your storage devices (HDDs or SSDs) and set up RAID or other configurations for redundancy and performance;
- Network Configuration: Assign a static IP address to your NAS for consistent access;
- Security Measures: Implement security practices like user authentication, firewalls, and encryption;
- Test and Access: Verify access from various devices on the network;
3. Can a Raspberry Pi run TrueNAS?
TrueNAS requires x86-64 architecture, while Raspberry Pi uses ARM architecture. As of my knowledge cutoff in September 2021, TrueNAS is not officially supported on Raspberry Pi due to the architecture mismatch.
4. Is Raspberry Pi powerful enough for a server?
Raspberry Pi can function as a lightweight server for specific tasks like file sharing, media streaming, or lightweight web hosting. However, for more resource-intensive applications, a more powerful server might be necessary.
5. What Raspberry Pi is recommended for NAS?
The Raspberry Pi 4 is recommended for NAS due to its increased processing power, USB 3.0 ports for faster external storage, and options for higher RAM (up to 8GB).
6. How much RAM does a NAS need?
The amount of RAM needed depends on the tasks the NAS will perform. For basic file sharing and media streaming, 2GB should suffice. For more complex operations and virtualization, 4GB or more is recommended.
7. Does TrueNAS cost money?
TrueNAS Core is open-source and free to use. TrueNAS Enterprise includes additional features and support, which requires a subscription.
8. How to set up NAS on Raspberry Pi 4?
Refer to the detailed steps mentioned earlier for setting up a Raspberry Pi NAS server.
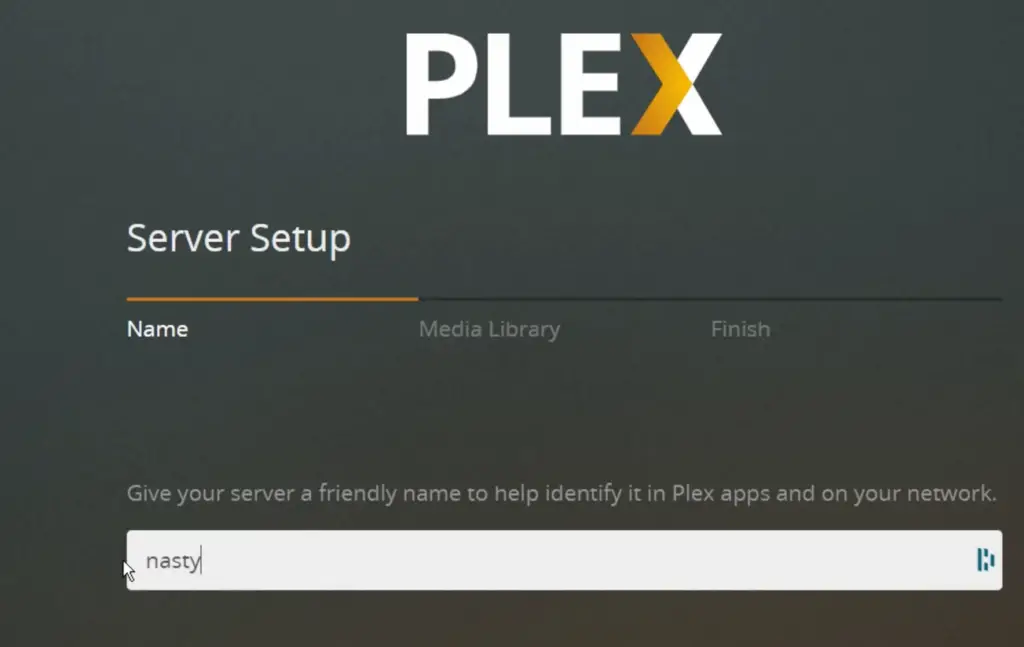
9. Can I use a Raspberry Pi as a media server?
Yes, Raspberry Pi can be used as a media server using software like Plex, Emby, or Kodi.
10. What OS does NAS use?
NAS devices often run specialized operating systems like FreeNAS, TrueNAS, OpenMediaVault, or custom Linux distributions [9].
11. Can a NAS run Docker?
Yes, many modern NAS systems support Docker, allowing you to run containerized applications.
12. Does a NAS need a firewall?
Yes, a firewall helps protect your NAS from unauthorized access and potential security threats.
13. Can a NAS replace a file server?
Yes, a NAS can replace a traditional file server for many small to medium-sized businesses or home users.
14. Do professionals use Raspberry Pi?
Yes, professionals use Raspberry Pi for various tasks such as prototyping, automation, server hosting, and more.
15. Can you use Pi Zero for NAS?
While possible, the limited processing power and connectivity options of the Pi Zero make it less suitable for a NAS compared to the more capable Pi 4.
16. Can an Android phone be used as a NAS?
Yes, you can use apps like Plex, Nextcloud, or BitTorrent Sync to turn your Android phone into a personal NAS-like server.
17. Does NAS use HDD or SSD?
NAS devices can use both HDDs and SSDs, depending on the desired performance, capacity, and budget.
18. Does CPU matter in NAS?
Yes, the CPU matters in NAS, especially for tasks like transcoding media or running applications.
19. Is 1Gbps enough for NAS?
For most home and small business users, a 1Gbps network connection is sufficient for NAS tasks like file sharing and media streaming.
20. What is a good NAS speed?
A good NAS speed depends on your specific use case. For media streaming, a few hundred Mbps might be sufficient, while tasks like large file transfers or virtualization might require higher speeds.
21. Which CPU is the best for NAS?
A capable multi-core CPU, preferably from Intel or AMD, is suitable for most NAS setups. The exact choice depends on your NAS’s intended tasks.
22. How fast is the Raspberry Pi USB NAS?
The speed of a Raspberry Pi USB NAS depends on factors like the USB port version, connected storage devices, and network speed. USB 3.0 ports on the Raspberry Pi 4 can provide faster data transfer rates compared to previous models.
23. How much power does a Raspberry Pi 4 NAS use?
A Raspberry Pi 4 NAS typically consumes around 2.7 to 7.6 watts of power, depending on usage and connected peripherals. This makes it energy-efficient for 24/7 operation.
Useful Video: how to build a Raspberry Pi NAS (it’s AWESOME!!)
References
- https://www.raspberrypi.com/tutorials/nas-box-raspberry-pi-tutorial/
- https://www.pcmag.com/how-to/how-to-turn-a-raspberry-pi-into-a-nas-for-whole-home-file-sharing
- https://www.ionos.com/digitalguide/server/configuration/raspberry-pi-nas/
- https://pimylifeup.com/raspberry-pi-nas/
- https://medium.com/@software_news/how-to-build-your-own-raspberry-pi-nas-6b86bc11b0b0
- https://www.techradar.com/how-to/computing/how-to-build-your-own-raspberry-pi-nas-1315968
- https://linuxhint.com/setup_nas_server_rasperberry_pi/
- https://www.ricmedia.com/tutorials/build-a-raspberry-pi-nas-server
- https://www.instructables.com/Raspberry-Pi-As-a-NAS-Network-Attached-Storage/