
Are you looking for a comprehensive guide on Arduino 3D printer projects? You’ve come to the right place. In this article, we will answer some of the most common questions about Arduino 3D printing, and provide you with some useful tips to get started. We will cover everything from choosing the right Arduino board for your project, to calibrating your printer and troubleshooting common issues. So whether you’re a beginner or a seasoned pro, this guide has something for everyone!
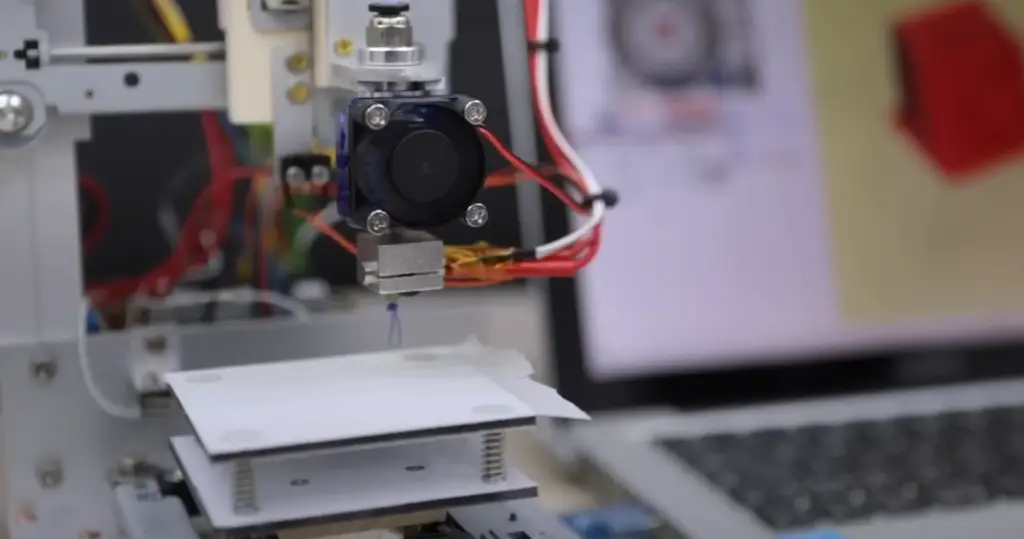
3D Printing in General
It offers advantages over traditional subtractive processes such as machining, including increased design freedom and cost savings.
The technology has been used to fabricate components for aircraft and cars as well as toys, prosthetics, medical models, and other objects. 3D printing can produce complex structures that could not be made with traditional methods like injection molding or CNC machining.
3D printers use a variety of materials, from plastics to metals and even food products. The most common type of 3D printer uses a plastic filament that’s melted by the machine’s print head and then deposited on a build plate layer by layer. Other materials, such as ceramics and metals, require specialized equipment for printing.
3D printing is a rapidly advancing technology and can be used in a variety of applications. From prototyping to end-use parts production, 3D printing offers businesses an efficient and cost-effective way to produce complex components without the need for expensive tooling or lengthy lead times. Its flexibility also allows companies to quickly test multiple iterations of a design in order to get the best possible product before going into full scale production. The use of 3D printing technology is growing exponentially with no signs of slowing down anytime soon. With more accessible machines available on the market today and new materials being developed, it’s clear that 3D printing is here to stay.
And of course 3D printing is incredibly popular among hobbyists, who use 3D printers to create objects ranging from functional parts and prototypes to intricate art pieces. Arduino-based 3D printers offer a great way for hobbyists to get into the world of 3D printing and start creating with ease. [1]
What is an Arduino?
It consists of both hardware and software components that provide a simple yet powerful platform for users to control electronics with code.
The Arduino board contains a microcontroller which acts as a bridge between the computer and physical components like motors, LEDs, sensors, servos, etc. By using commands in its programming language (ARDUINO C/C++), the user can control these components and create projects that interact with their environment.
Arduino is easy to use, inexpensive and provides a great introduction for anyone who wants to learn about programming and electronics. It’s also become popular with hobbyists who want to build 3D printer projects. With an Arduino board, they are able to easily control stepper motors, heaters, sensors, switches and more which makes it a perfect tool for DIY 3D printing.
There are many different types of Arduino boards on the market to suit different needs – from the low-cost entry level boards such as the Uno or Nano to more advanced models like the Mega or Due. Each board has its own set of features so it is important to choose the right one for your project. [2]
What to Consider Before Starting an Arduino 3D Printer Project
If you’re looking to create an Arduino project involving 3D printers, there are several things you need to consider before getting started.
Pick the right board for the task
The selection of the appropriate Arduino board is essential to ensure success with your project. Generally speaking, the more powerful boards are suitable for larger projects and will have higher memory capacities; however, it’s important to remember that there are also specific features of each board that may be useful for certain types of 3D printer projects.
For example, Arduino Pro Mini has a small form factor and is great for portable 3D printer projects, whereas the Arduino Mega has higher memory capabilities that make it suitable for larger projects.
Understand Your 3D Printer
Before you can effectively work on an Arduino project involving a 3D printer, it’s important to understand how your specific model works. This means understanding all of its features, components, and settings in order to be able to accurately program your Arduino device.
By doing so, you can better optimize the performance of your 3D printer and ensure it produces quality results. Additionally, understanding the fundamentals of 3D printing technology will go a long way in helping you create successful projects with Arduino.
Consider the scope of the project
Before you even begin your project, it’s important to consider the scope of the project. What do you want to create with your 3D printer and Arduino? Are you creating a one-off project, or do you want to create something more complex like a recurring design? Do you want to build an object with multiple parts that need to fit together perfectly, or are you just looking for something simple and straightforward?
Knowing the scope of your project will help determine how much time and resources are needed. It’s important to consider this before starting your project so that you can plan accordingly.
It’s also important to choose a project that will match your skill level. If you’re a beginner, start with something simple and straightforward that won’t overwhelm you. As your skills grow, you can then move onto more complex projects.
Set your budget
Once you’ve decided on the scope of your project, it’s important to set a budget. 3D printers and Arduino components can be expensive, so it’s important to factor in the cost of materials before starting.
If you’re looking for more affordable options, consider buying used or refurbished materials that are still in good condition. Additionally, many online stores offer discounts for bulk orders and other special deals that can help cut down costs.
It’s also important to account for any potential delays or additional expenses that might arise during the course of your project. If something unexpected happens and you need to purchase more supplies or hire additional help, make sure you have a plan in place for how you’ll cover the costs.
Choose the right materials
Next, it’s time to choose the right materials for your 3D printer and Arduino project. Depending on the scope of your project, you’ll need different types of filament, electronics components, and other supplies.
For example, if your project involves creating a complex object out of plastic or metal, your filament needs to be strong enough to withstand any force applied to it during printing. In addition, if your project requires electronic components, you’ll need to select ones that will be compatible with your Arduino.
It’s important to do the research and read reviews before selecting any materials for your project. Make sure they are of good quality, so they will last and work properly when you need them.
Document every steps
Once you’ve chosen the right materials and set a budget, it’s time to start your project.
This includes taking photos and notes of any special techniques or tools used during printing or assembly.
Documenting each step will help you remember how everything was done if problems arise later on in the project. Additionally, it can be useful when creating similar projects in the future as a reference point for techniques and materials that worked well.
Be creative
Finally, don’t forget to have fun with your project! Arduino 3D printer projects offer an exciting opportunity to get creative and explore different ideas. Don’t be afraid to think outside the box and try something new.
For example, if you are creating a plastic object with multiple parts, consider using different colored filaments or designing the parts in unique shapes and sizes. These will help make your project stand out from others. Additionally, you could use Arduino components to add features such as lights or custom movements to your project.
By getting creative and thinking of ideas that stretch beyond traditional 3D printing projects, you can maximize your potential for success and create something truly unique. [3]
Best Arduino 3D Printer Projects
Now that you know the basics of how to plan, budget and create your own Arduino 3D printer projects, here are some ideas to get you started. In this section, we’ll explore some of the best projects you can try with your 3D printer and Arduino.
Pip-Boy from Fallout
If you’re a fan of Fallout, then one of the most iconic 3D printing projects is the Pip-Boy from the game. This project requires both Arduino Pro Mini and 3D printing expertise to get right. However if you manage to tackle it, you’ll have a life-sized (or scaled down depending on your preference) version of the most iconic wearable computer from the series.
First of all, we need to collect all the necessary items for the project. You’ll need an Arduino Pro Mini 328p 5v 16MHz microcontroller, along with some wire and tools to solder everything together (optional). Next, get yourself a 4d Systems 4.3″ capacitive touch display, Adafruit 66 channel GPS, Sparkfun WTV020SD audio player, Adafruit LSM303 3-axis compass, Adafruit LSM303 3-axis accelerometer, Adafruit BMP180 barometric pressure/temperature sensor and Adafruit PowerBoost 1000 power and charging system.
A 4400mAh LiPo power pack is also recommended for longer lasting power. A 9 LED Flashlight is also recommended for the build. Additionally, make sure you find a frickin laser to engrave the Pip-Boy’s buttons. A TV-B-Gone circuit will work as a power off button.
Of course you will need the 3D printed PLA and laser cut acrylic body for the Pip Boy. There are a few different versions to choose from. All the necessary files and instructions can be found online. The more detailed version with more features is available here.
Now, to make a RAD sensor, we will need a methane gas sensor. This is easy to find online and will attach easily to the Arduino board. Finally, a photon light detector will be necessary for the light detection.
Lastly, you will need a custom IO board that will be connected to the Arduino Pro Mini in order to control the various components.
Now that you have all your materials, it’s time to get started on building your very own Pip-Boy!
First, let’s make the battery. Take a 4400mAH LiPo battery and connect it to the PowerBoost 1000. This will ensure that the battery can be used to power the Arduino board.
Next, connect the GPS to the Arduino board to pins D2 and D3. Then establish the serial connection by downloading the following libraries in the Arduino IDE. The Adafruit GFX and TFT libraries will provide a graphical user interface for displaying an interactive map.
if (GPS.fix)
{
genie.WriteObject(GENIE_OBJ_USER_LED, 0x00, 1); //LIGHT FIX LED
genie.WriteStr(12, GPS.latitudeDegrees, 4); //LAT
genie.WriteStr(13, GPS.longitudeDegrees, 4); //LONG
genie.WriteStr(14, GPS.speed); //SPEED IN KNOTS
genie.WriteObject(GENIE_OBJ_CUSTOM_DIGITS, 0x08, GPS.angle);
genie.WriteObject(GENIE_OBJ_CUSTOM_DIGITS, 0x09, (int)GPS.satellites);
}
}
Write the following code in order to acquire the GPS coordinates and display them on the screen.
Now, let’s move onto the PowerBoost 1000 board. Connect this component with the LiPo pin, which is attached directly to your battery. The low battery pin is linked to Pin 19 of the display, so when your device needs charging you’ll be notified through a message from your screen.
Next, let’s add the speakers. The audio player WTV020SD-P24 can be connected to the speaker pins of Arduino Mini. We suggest you use a 1k resistor for the reset pin, as the Arduino is a 5v device.
To make the audio to work, you will need to write another program code. Here is what you should include in your program:
void playTrack2()
{
audioReset();
delay (150);
genie.WriteObject(GENIE_OBJ_PINOUTPUT, 0x02, 0); //0
delay (10);
genie.WriteObject(GENIE_OBJ_PINOUTPUT, 0x02, 1);
delay (250);
genie.WriteObject(GENIE_OBJ_PINOUTPUT, 0x02, 0); //1
delay (10);
genie.WriteObject(GENIE_OBJ_PINOUTPUT, 0x02, 1);
delay (250);
genie.WriteObject(GENIE_OBJ_PINOUTPUT, 0x02, 0); //2
delay (10);
genie.WriteObject(GENIE_OBJ_PINOUTPUT, 0x02, 1);
Next, connect the Adafruit 10 DOF board to the Arduino via its I2C function on pins A4 and A5. This board has a 3-axis accelerometer, 3-axis gyroscope, and 3-axis digital magnetometer. It also has an atmospheric pressure sensor that can be used to measure temperature, humidity, altitude and other environmental conditions.
Then, write a code that will write the output of the Adafruit 10 DOF board to the Arduino board. The following functions should be included:
/* write gyro data to sensor screen */
void Gyro()
{
sensors_event_t event;
gyro.getEvent(&event); //gyro
genie.WriteStr(6, event.gyro.x); //x
genie.WriteStr(7, event.gyro.y); //y
genie.WriteStr(8, event.gyro.z); //z
}
Now set-up the display. In order to configure the 4D family of processors, you will need a 4D IDE or 4D Workshop. This will allow you to write the display code for your project.
Program the IO pins according to the 4d Systems 4.3″ capacitive touch display datasheet. All the pins correspond to the relevant components driven by the Arduino board.
Now we will need to create something that will simulate the RAD counter from the original Pip-Boy. To do this, we will use the gas sensor MQ-4. This is a methane gas sensor designed for detecting levels of combustible natural gas, such as in a coal mine or oil refinery. Connect the sensor directly to the A7 analog input of the Arduino and attach the ground of the gas sensor to the IO board.
And of course write the code that will transfer the data from the MQ-4 sensor to the display.
void AirGauge() //write to gas (rad) gauge
{
air = analogRead(AirGaugePinA7);
genie.WriteObject(GENIE_OBJ_GAUGE, 0x01, air);
}
Do the same for the light sensor, except this time you need to connect it to the Arduino pin A6. Enter the following code to acquire the data from the light sensor and display it on the Arduino board.
/* read light sensor and write to display */
void RadGauge() //write to photon gauge
{
rad = analogRead(RadGaugePinA6);
genie.WriteObject(GENIE_OBJ_GAUGE, 0x02, rad);
}
Now we will need to program the flashlight. This can be done by using any LED flashlight. Connect one of the wires to 3v on the IO board and another wire to J2 on the IO Board, letting the Arduino to turn it on and off with a 2N2222 transistor.
fOn = digitalRead(5); //flashlight ON
if (fOn == LOW)
{
digitalWrite(12, HIGH);
playTrack2();
}
fOff = digitalRead(4); //flashlight OFF
if (fOff == LOW)
{
digitalWrite(12, LOW);
}
Now let’s work on the laser, which is just a different flashlight. Connect the wire to 3v and another wire to J1 on the IO board. Then, program it using this code:
lOn = digitalRead(6); //laser ON
if (lOn == LOW)
{
digitalWrite(11, HIGH);
playTrack3();
}
lOff = digitalRead(7); //laser OFF
if (lOff == LOW)
{
digitalWrite(11, LOW);
}
Next, add a power inlet to the project. Use a USB power outlet and connect it to the Arduino board via its 5V pin. Add a push button switch to turn on/off the whole system as well as programming mode.
Now, let’s focus on the TV-B-Gone Assembly. It is imperative that you connect both the positive and negative wires from your TV-B-Gone board to your LED. To do so, be sure to remove the original LED from the TV-B-Gone board or not install it at all as this is a kit which requires assembly.
To fire the TV-B-Gone, use the following code:
tvOn = digitalRead(13); //fire tv b gone
if (tvOn == LOW)
{
digitalWrite(16 , HIGH);
playTrack4();
digitalWrite(16 , LOW);
}
Now finally, assemble the whole thing and you’re ready to rock and roll!
If you did everything correctly, you should have a fully functional Pip-Boy project. Congratulations for taking on such an ambitious 3D printing project! You should be proud of what you have created and learned in the process.
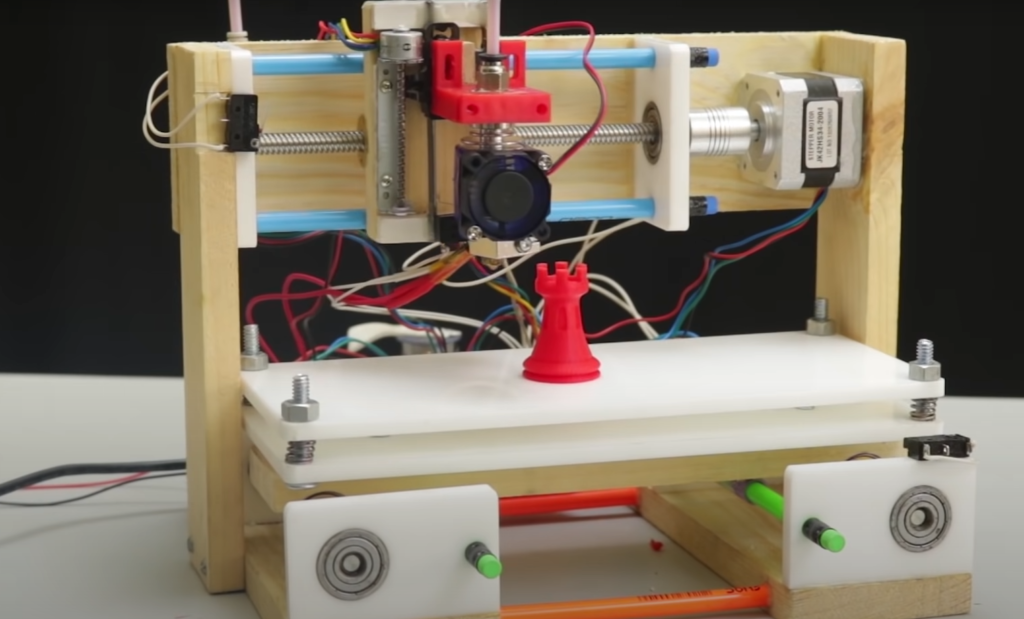
A Maze 3D Printer Project
If you just want to familiarize yourself with Arduino and 3D printers, building an Arduino-controlled maze is a great place to start. You can make use of both the Arduino and 3D printing technology in this project.
For this project you will need:
- Arduino (Any board type)
- Jumper wires
- 2X servo motor 9g
- Joystick module
First of all, you will need to cut the shape of a maze into the 3D printer bed. You can do this by creating an STL file and then slicing it in your 3D printing software. Once you have your STL file ready, you can print it on the bed of your 3D printer and let the Arduino control the movement of the servo motors to navigate through the maze.
To make this project work, you need to install the components on the front case of the maze. You can use glue or a hot glue gun to fasten the components. Once all the components are installed, you need to properly close the back case to prevent the servo motors from getting stuck.
Next, you will need to write and upload code on your Arduino board. You can use the Arduino IDE for this purpose. The code should be written in such a way that it is able to take inputs from the joystick and then convert them into commands which can be sent to the servo motor. This will enable you to control the robot’s movement through the maze.
#include
Servo servo1;
Servo servo2;
int joyX = 0;
int joyY = 1;
int servoVal;
void setup()
{
servo1.attach(4);
servo2.attach(3);
}
void loop()
{
servoVal = analogRead(joyX);
servoVal = map(servoVal, 0, 1023, 0, 20);
servo1.write(servoVal);
servoVal = analogRead(joyY);
servoVal = map(servoVal,0, 1023, 0 , 20);
servo2.write(servoVal);
}
Now it’s time to wire everything up. Connect the joystick module to the Arduino board and then connect the servo motors with the appropriate pins.
Connect the y-axis of the 1st servo to pin 3 of Arduino and the y-axis of the second servo to pin 4. Next, attach red & brown wires to Arduino 5V and GND. For the joystick, connect the VRx to pin A0 and VRy to A1. Finally, connect the VCC and GND of the joystick to VCC and GND of Arduino.
Once your code is uploaded and tested, you are ready to test your project.
Once everything is ready, switch on the power supply and watch your robot traverse through the maze! You will surely enjoy watching it move with precision as it navigates the curves and turns of the 3D printed maze. [4], [5]
FAQ
What can I print on a 3D printer?
A 3D printer can be used to print a wide variety of items, including everyday objects such as tools and kitchenware, toys and models, jewelry, prosthetics, architectural components, fashion accessories and much more. The possibilities are endless!
The range of materials that can be printed depends on the type of 3D printer you have. For example, many consumer-grade 3D printers use plastic filament for printing objects. This allows for great versatility when printing items in different colors and textures. However, some higher-end 3D printers also support other materials like metals or resins which allow for even more creative applications.
Why is Arduino not professional?
Arduino is a powerful and versatile tool, but it should not be confused with professional grade 3D printer controllers. Arduino does not have the same robust programming environment or extensive library of commands as more expensive 3D printer controllers. It also lacks features such as multiple extruders, heated beds, and other advanced capabilities that are common in professional-grade machines. Furthermore, support for some firmware upgrades may be limited due to the size and complexity of the codebase.
Therefore, while Arduino provides an excellent platform for hobbyists to experiment with 3D printing projects, those who require a fully-fledged industrial controller should look elsewhere. For most small business and home users, however, Arduino can provide an excellent entry point into 3D printing with minimal financial and time investment.
Is Arduino good for 3D printers?
Yes, Arduino can be used for 3D printing projects. It has a high level of integration with 3D printer electronics and components such as stepper drivers, temperature sensors, LCD displays, and more. With its open-source nature, Arduino allows users to customize the controller boards and software used in their 3D printer setup to meet their individual needs. Additionally, Arduino provides an ideal platform for prototyping custom features or accessories that may not be available in commercial products.
Some popular applications of Arduino in 3D printing include making automated calibration routines; controlling dual extruder setups; adding wireless networking capabilities; programming LED lighting effects; creating custom user interfaces (UI); incorporating smooth acceleration/deceleration algorithms; integrating stepper motor drivers; and designing custom end-effector configurations. Arduino also provides a convenient platform to develop custom solutions for automated tool-changing, multi-material/color printing, part monitoring and more. By leveraging the power of Arduino, users can turn their 3D printer into a powerful yet cost-effective production machine.
Is 3D printing profitable?
3D printing can be profitable, but it depends on the individual project and the level of expertise behind it. The potential for making money through 3D printing lies in creating marketable products that people are willing to pay for. A few examples include: designing and manufacturing parts or accessories, creating art pieces, replicating objects from a scanned image, and producing customized items based on customer specifications.
However, there is also a great deal of trial and error involved with 3D printing projects – especially when using an Arduino controller – so those looking to make money through this method must invest time into learning how to use the machine effectively. Additionally, not all 3D printers are created equal; some may have higher quality than others, which could affect the overall profitability of a project. It is important to do research and understand the capabilities of your machine before attempting any major projects.
Finally, depending on the nature of the project, it may be necessary to acquire additional tools or materials that could increase costs. This could include anything from 3D printing filament to sandpaper and other finishing products. Taking these costs into consideration when pricing out a product will ensure that your efforts are worth the effort financially.
Is 3D printing a cheap hobby?
Unfortunately no, 3D printing is not a particularly cheap hobby. Depending on the type of printer you need and the materials used, costs can range from several hundred to several thousand dollars. However, for those who are able to invest in a printer, there are tremendous rewards – the ability to create custom objects in any shape or size puts 3D printers at the forefront of creativity and innovation.
There are a few ways that one can make 3D printing cheaper. The simplest method is to look for second-hand equipment or machines that have been used but remain in good condition – this can dramatically reduce startup costs. Additionally, certain types of plastic filament can be purchased in bulk at discount prices.
Useful Video: How To Make 3D Printer at Home | Arduino Project
Conclusion
3D printing is one of the most incredible technologies of the modern age. With a few simple components and some creative engineering, you can create amazing 3D projects using Arduino and 3D printing. Projects such as robotic arms, mechanical animals, tools, art pieces, and more are all within your reach with this combination of technologies.
In this article we’ve answered some of the most commonly asked questions about Arduino 3D printer projects and provided useful tips to get you started. We also covered two interesting projects: A 3D maze and a Fallout Pip-Boy. So, what are you waiting for? Get creative and start bringing your 3D printing projects to life!
We hope this guide has inspired you to explore the possibilities offered by 3D printing with Arduino, and that it will help you in creating some amazing projects. Whether you’re just starting out or already experienced in both fields, there’s plenty of potential for experimentation and exploration with these two unique disciplines. So get your hands on an Arduino board and some filament-loaded spools; it’s time to start building something awesome! Good luck!
References
- https://www.twi-global.com/technical-knowledge/faqs/what-is-3d-printing
- https://learn.sparkfun.com/tutorials/what-is-an-arduino/all
- https://mycuriositybot.wordpress.com/2019/02/22/points-to-keep-in-mind-before-starting-with-an-arduino-project/
- https://www.hackster.io/diyprojectslab/how-to-build-diy-maze-game-using-arduino-c9a099
- https://www.instructables.com/Pip-boy-3000-Mark-II/