Arduino robotics projects can be a lot of fun, but they can also be a little daunting for beginners. In this article, we will answer some common questions about Arduino robotics projects and provide some tips to help you get started. We will cover topics such as selecting the right components, programming your robot, and troubleshooting common problems. We hope that after reading this guide, you will feel confident enough to start building your own Arduino-powered robots!
Microcontroller Boards in General
These versatile devices typically contain a CPU (central processing unit), RAM (random access memory), and some form of I/O (input/output) interface. Microcontrollers are used in a wide variety of applications including consumer electronics, robotics, medical devices, industrial automation and more. They offer a wide range of features including analog-to-digital conversion (ADC), serial communication, pulse width modulation (PWM) and digital input/outputs.
It allows users to easily interface with various electronics components such as sensors, motors, LEDs, switches and more. Arduino boards have become popular among hobbyists and professionals worldwide due to their affordability, ease of use, programming language support and expandability.
The most common type of Arduino board is the Uno, which is based on the Atmel ATmega328 chip. This board features 14 digital I/O pins, 6 analog inputs and one serial port. It supports a wide range of programming languages and comes with an extensive library of sample projects and tutorials.
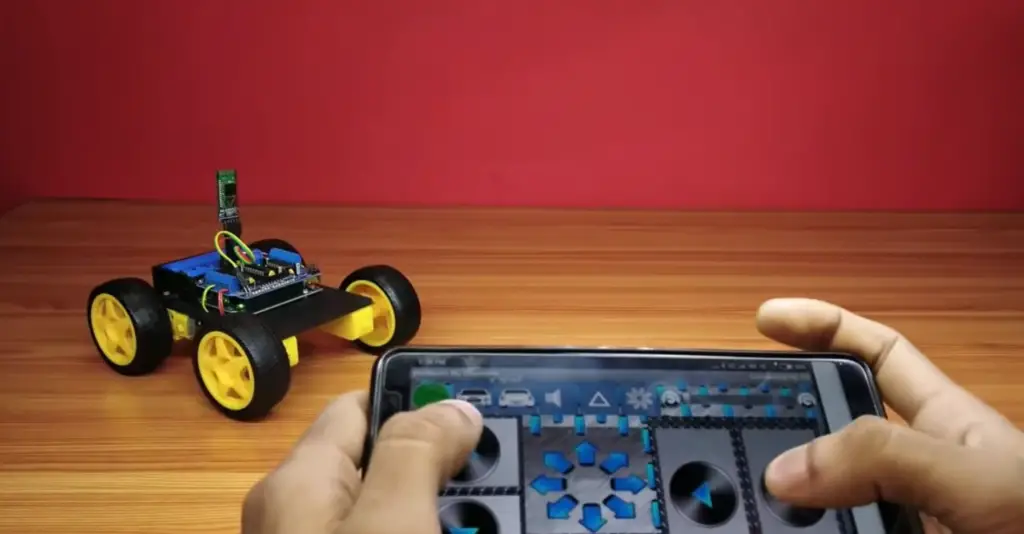
The Arduino Mega is a more powerful version of the Uno that offers 54 digital I/O pins, 16 analog inputs and four serial ports. The Mega 2560 is another popular variant that utilizes the ATmega2560 microcontroller. This board has 54 digital I/O pins, 16 analog inputs and four serial ports like the Mega but also includes 4 UARTS (UARTs are used for serial communication). [1], [2]
Why is Arduino so Popular?
Still, what makes Arduino so attractive among hobbyists and professionals alike? It’s a combination of the hardware, software, and support that make it a top choice for robotics projects.
Arduino boards can be used to control a variety of devices and create interactive projects such as robotic arms, motion tracking systems, home automation systems, weather monitoring stations and more. With the right hardware and software setup, you can use an Arduino board to build a wide range of projects.
A variety of shields are available for different tasks such as connecting to Wi-Fi or Bluetooth devices. The board utilizes USB ports which can be plugged into any computer or laptop with no additional drivers required.
In addition to the hardware side of things, the Arduino IDE (Integrated Development Environment) provides a simple way to write and debug code. This gives users the ability to modify existing pre-programmed functions or create entirely new ones from scratch. It’s also possible to connect an Arduino board with other programming languages such as Python or C++, allowing for more complex robotic projects.
The wide variety of tutorials and support forums available online make it easy for beginners and experienced hobbyists alike to find answers or advice when they need help with their projects. The open source community behind Arduino is incredibly active, ensuring that all kinds of questions get answered quickly by knowledgeable people.
In addition, there are hundreds of freely-available libraries written specifically for Arduino boards that can be used in robotics projects. These libraries can simplify complex tasks and save time on development. [2]
What to Consider Before Starting an Arduino Robotic Project
So you decided to take up robotics as a hobby and you want to use Arduino to do it. You’ve come to the right place! In this section, we’ll discuss some important factors to consider before getting started with your project.
Choose the board for your project
The Arduino platform consists of several different boards, each with its own features and functionality. So when you’re selecting the board for your robot project, it’s important to consider what kind of robotics applications you plan to use it for.
For example, if your goal is to build a simple line-following robot, then an Arduino Uno should suffice. On the other hand, if you want to create more complex robots with multiple servos and sensors, then an Arduino Mega might be more suitable.
Consider your experience
Before starting a robotics project, it’s important to consider your experience with Arduino and robotics. If you’re new to both fields, then you should take some time to learn the basics of Arduino programming and building robots before taking on a full-fledged project.
If you have some experience in robotics but not much in Arduino programming, then there are plenty of tutorials out there that can help you get up to speed. It’s also helpful to familiarize yourself with any libraries or frameworks that your project will use.
On the other hand, if you already have some experience with both Arduino and robotics, then this section may be less relevant for you; however, there are still some considerations worth thinking about.
Consider your budget
Another important factor to consider before starting a robotics project is your budget. Depending on the complexity of your project, you may need to purchase additional hardware and components.
For starters, it’s always good to have a general idea of how much money you are willing to spend on your robot. Additionally, you should take into account any other costs such as building materials, tools, and shipping charges.
When it comes to buying the necessary parts for a robotics project using Arduino, there are plenty of affordable options available. If possible, try to stick with products from reliable sources like Adafruit or SparkFun.
Don’t forget about the memory limit
The Arduino memory limit refers to the amount of RAM (Random Access Memory) available for use on an Arduino board.
Yes, Arduino boards have a limited amount of RAM and flash memory, so keep this in mind when designing your project. If you’re using complex libraries or writing code that consumes a lot of memory, it might be better to upgrade to an Arduino board with more memory.
This is especially important with robotic projects as they require a lot of processing power and data storage. Before starting your project, make sure you have a good understanding of what RAM and flash memory are and how they affect the performance of an Arduino board.
Document every step
Finally, it’s important to document every step of the process. As you work on your project, take notes and create sketches that show how everything is connected. This will make debugging and troubleshooting much easier in the future.
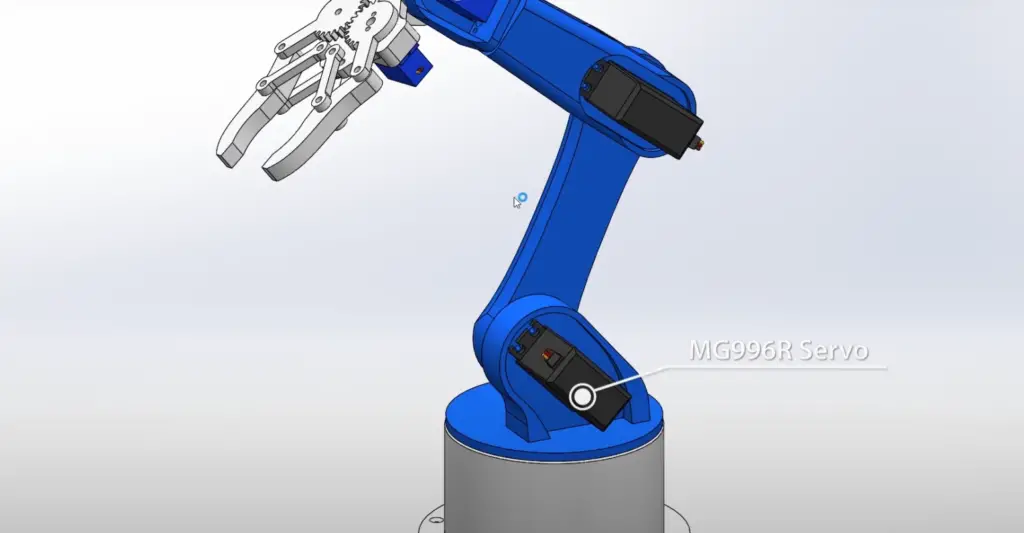
Additionally, creating documentation of your process may also help other people who are interested in replicating or adapting your robot for their own projects. By documenting all the steps taken to build your robot, other people can benefit from all the time and effort you put into creating it! [3]
Best Arduino Robotic Project Ideas
Now that you know what to consider before starting an Arduino robotic project, it’s time to come up with some ideas for projects. In this section, we’ll provide some of the best Arduino robotic project ideas to get you started.
Arduino Robotic Arm Project
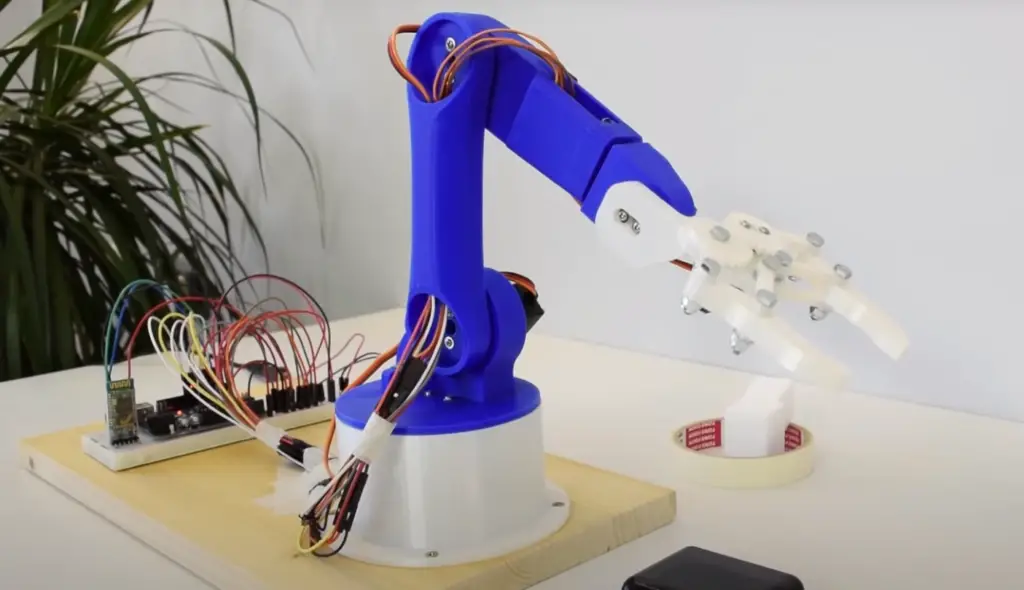
Arduino robotic arm projects can be quite complex, but also quite rewarding. The robotic arm is a multi-functional machine that can be programmed to do various tasks such as picking up, sorting and placing objects from one place to another. It can also be used for more intricate tasks such as assembling smartphone parts or other delicate operations.
To start building an Arduino robotic arm project, you will need some basic materials including an Arduino board, servos, cables, 4 pieces of 1000uF capacitor, 4 pieces of 100nf capacitor and 4 pieces of 10k pot variable resistor. Finally, don’t forget to get at least two 5v power supplies.
You’ll also need a few tools like soldering iron and wire strippers. Once you have all the required materials ready, you will then need to create your robot design.
You can either go all out and print out a design on a 3D printer or use cardboard or other materials to build the body. It’s best to start with a basic design and then refine it as you go along. We will follow the second option to show you the basics of building an Arduino robotic arm.
Take a solid flat plastic or wooden board and draw a rectangular pattern for the base of the robot. Make sure to measure it properly so that it can fit all your components. Now, you’ll need to glue a servo motor right in the middle of it, at a 180-degree angle.
Then, place another piece of cardboard on top of the first servo motor and glue the second servo motor in the middle on its side at a 180-degree angle.
Take smaller pieces of cardboard (3cm x 11cm pieces) and cut a small hole at one end for a third servo motor. On the other end, attach a servo gear wheel.
Next, take a T-shaped piece of cardboard and glue another servo gear at its bottom. Then attach a fourth servo at the edge of the piece, on its back side facing upwards.
Finally, attach all the pieces together. Once done, you should be left with a construction that resembles an arm. To make an arm that can grab things, cut two more pieces of cardboard at 1cmx7cm & 4cmx5cm dimensions.
Now it’s time to connect everything. Connect all the servos to their respective pins on the Arduino board and connect the power supply in parallel. Brown wire is (-) and red wire is (+). To connect the Arduino to its control wires, you’ll need pins 3, 5, 6, 9, 10 and 11–these will be your PWM (pulse-width modulation) pins. The wires themselves are typically colored orange or yellow.
To avoid voltage spikes caused by intense motor movements that counter the weight of objects, place a capacitor between the 5V and negative lines of your Arduino.
We’ll feed the voltage created by these variable resistors, which represents position control, into the ADC channels of Arduino. We specifically require four ADC channels from A0 to A3 for this purpose. After we’ve initialized our ADC setup, a digital value that corresponds to what the user has chosen will be available – and then it’s time to match that value with a servo position! With those simple steps taken care of, you’re ready to experience automation at its finest.
Now, we will need to convert an analog signal into a digital signal. This involves writing a program in Arduino language and uploading it to the board.
- analogRead(pin);
- analogReference();
- analogReadResolution(bits);
To control the robot’s movements, you will need to set-up the servo motors’ position and write-up a code that helps the robot move in specific directions. Arduino allows us to control servo motors based on their degree range, so you can define each servo’s degree range within the code.
This may look complicated but in reality, it is quite simple. All you need to do is set the degree range for each servo motor and write a code that controls them with every given command. It’s also worth noting that Arduino supports motion control through PID, which helps make your robot smoother and more precise in its movements.
#include
Servo servo0;
Servo servo1;
Servo servo2;
Servo servo3;
int sensorvalue0;
int sensorvalue1;
int sensorvalue2;
int sensorvalue3;
void setup()
{
pinMode(A0,INPUT);
pinMode(3,OUTPUT);
servo0.attach(3);
pinMode(A1,INPUT);
pinMode(5,OUTPUT);
servo1.attach(5);
pinMode(A2,INPUT);
pinMode(6,OUTPUT);
servo2.attach(6);
pinMode(A3,INPUT);
pinMode(9,OUTPUT);
servo3.attach(9);
}
void loop()
{
sensorvalue0 = analogRead(A0);
sensorvalue0 = map(sensorvalue0, 0, 1023, 0, 180);
servo0.write(sensorvalue0);
sensorvalue1 = analogRead(A1);
sensorvalue1 = map(sensorvalue1, 0, 1023, 0, 180);
servo1.write(sensorvalue1);
sensorvalue2 = analogRead(A2);
sensorvalue2 = map(sensorvalue2, 0, 1023, 0, 180);
servo2.write(sensorvalue2);
sensorvalue3 = analogRead(A3);
sensorvalue3 = map(sensorvalue3, 0, 1023, 0, 180);
servo3.write(sensorvalue3);
}
As you can see, first we are setting up the servo motors and pins in “void setup”. In “void loop”, we are reading in values from each of the analog pins (A0-A3) and then mapping them to a degree range that corresponds to the position of our arm. After all this is done, we move on to the final step – powering it up.
With an Arduino robotic arm project, you will gain a great insight into robotics engineering as well as learn how to use Arduino boards and microcontrollers for building projects. So don’t hesitate to jump in and start building your own robot!
Line Follower Robot Project
Another great project to undertake is a line follower robot. This type of robot follows a black line on white or light-colored surface and can be used in competitions as well. There are many ways to build this type of robot, but the most common setup involves an Arduino board, L293D motor driver, two IR sensor modules, 9V battery, BO motor, two motor wheels, one castor wheel, one hobby robot chassis and of course wires & screws.
How this robot will work is simple, it utilizes a LDR or light dependent resistor to detect the black line on white surface. The LDR is placed in front of the robot and when it senses a dark line (black) it will send a signal either high or low depending on the threshold voltage set by the user, this signal is then used to control motors through a motor driver.
Now that you are aware about the main principle, let’s get into the details. We start by building a circuit. This circuit is composed of several essential components: two IR sensors, one motor drive, two motors, an Arduino board, a battery and some connecting wires.
First, let’s connect a motor driver to the Arduino board by connecting pins 1 and 9 is the key to enabling this motor. For that, you need to provide a 5V input source between these two pins. Pins number 1A, 2A, 3A, and 4A are the control pins and these need to be connected to the digital pins of Arduino. The motor also has 1Y, 2Y, 3Y, and 4Y connection pins that are used to connect motors.
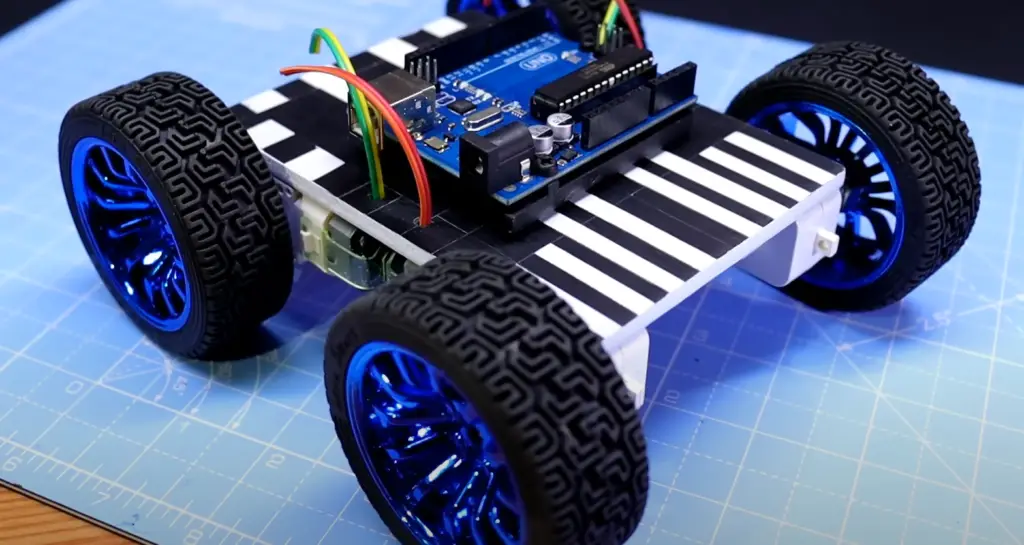
Now it’s time to assemble the line follower robot. First thing you need to find is a robot body. This can be anything solid like a rectangular box, toy car chassis etc. We will be using a car chassis for this project.
Once you have the chassis, you can start by attaching the BO motors on top of it. Use glue to ensure it won’t move or fall off the chassis. After this, affix the motor driver onto the chassis and join up the motor wires to its outputs.
Then, delicately bend the IR LED and sensor in place on the underside of your robot. To ensure optimal accuracy, be sure to adjust the sensors in accordance with the track width and robot width.
Subsequently, secure the Arduino Uno in place and attach the sensor output pins to digital pin 2 and 4 of the Arduino. Connect the VCC pins to 5volt and the ground pins to ground.
Now, connect the enable pins of your motor driver to Arduino pins 5 and 8. Subsequently, link up the motor driver input pins to Arduino pin numbers 6, 7, 9 and 10 correspondingly.
To complete the setup, simply attach the battery to the circuit and secure it in place with jumper wires. To make a more permanent connection you could solder each component together instead of using jumpers.
Next, install the castor wheels on the bottom of your robot. It is advised to use plastic wheels as these provide less friction and make controlling the robot easier.
Finally it’s time to code the Arduino and upload it to the robot. The code includes several steps and we will explain each of them as we proceed. First, we need to define the Arduino pins involved in this project.
#define enA 5 //Enable1 L293 Pin enA
#define in1 6 //Motor1 L293 Pin in1
#define in2 7 //Motor1 L293 Pin in1
#define in3 9 //Motor2 L293Pin in1
#define in4 10 //Motor2 L293 Pin in1
#define enB 8 //Enable2 L298 Pin enB
#define R_S 4 // Right sensor
#define L_S 2 // Left sensor
Next we initialize the loop, declare the pin modes of each pin in order to read the output of IR sensors, and judge the value of their output.
void setup(){
pinMode(R_S, INPUT);
pinMode(L_S, INPUT);
pinMode(enA, OUTPUT);
pinMode(in1, OUTPUT);
pinMode(in2, OUTPUT);
pinMode(in3, OUTPUT);
pinMode(in4, OUTPUT);
pinMode(enB, OUTPUT);
digitalWrite(enA, HIGH);
digitalWrite(enB, HIGH);
delay(1000);
}
Now we need to set-up movement conditions for the robot. This is done by determining the value obtained from IR sensors. If for example, both sensors receive a signal, then we can program the robot to move straight ahead – this is achieved by controlling the motor direction.
void loop(){
if((digitalRead(R_S) == 0)&&(digitalRead(L_S) == 0)){forward();} //if Right Sensor and Left Sensor are at White color then it will call forward function
if((digitalRead(R_S) == 1)&&(digitalRead(L_S) == 0)){turnRight();} //if Right Sensor is Black and Left Sensor is White then it will call turn Right function
if((digitalRead(R_S) == 0)&&(digitalRead(L_S) == 1)){turnLeft();} //if Right Sensor is White and Left Sensor is Black then it will call turn Left function
if((digitalRead(R_S) == 1)&&(digitalRead(L_S) == 1)){Stop();} //if Right Sensor and Left Sensor are at Black color then it will call Stop function
}
void forward(){ //forward
digitalWrite(in1, HIGH); //Right Motor forward Pin
digitalWrite(in2, LOW); //Right Motor backward Pin
digitalWrite(in3, LOW); //Left Motor backward Pin
digitalWrite(in4, HIGH); //Left Motor forward Pin
}
void turnRight(){ //turnRight
digitalWrite(in1, LOW); //Right Motor forward Pin
digitalWrite(in2, HIGH); //Right Motor backward Pin
digitalWrite(in3, LOW); //Left Motor backward Pin
digitalWrite(in4, HIGH); //Left Motor forward Pin
}
void turnLeft(){ //turnLeft
digitalWrite(in1, HIGH); //Right Motor forward Pin
digitalWrite(in2, LOW); //Right Motor backward Pin
digitalWrite(in3, HIGH); //Left Motor backward Pin
digitalWrite(in4, LOW); //Left Motor forward Pin
}
void Stop(){ //stop
digitalWrite(in1, LOW); //Right Motor forward Pin
digitalWrite(in2, LOW); //Right Motor backward Pin
digitalWrite(in3, LOW); //Left Motor backward Pin
digitalWrite(in4, LOW); //Left Motor forward Pin
}
As you can see, in this code we defined the conditions for the robot to turn left, turn right and move forward. The last function – the Stop() function – makes sure that when both sensors detect anything other than a black line, the robot will come to a halt. Once you have uploaded this code onto your Arduino board, it is time to test your robot!
First off you need to calibrate the robot to make sure it reacts accurately to the commands given. To do this, place a robot on a black surface and adjust the variable resistor of the IR Module until the LED stops blinking. Once the LED stops, place the robot on a white surface and check if the LED starts blinking again. Now, run the robot along a black line on a white surface and see if it reacts as expected (e.g. follows the black line precisely). If it doesn’t, adjust the IR module again until it responds correctly. With this Arduino robotics project guide, your robot should be able to move in the direction you want without any issues. [4], [5], [6]
FAQ
Is Arduino good for 3D printers?
Yes, Arduino is a great platform for 3D printing projects. The open source nature of the board makes it easy to customize and build upon existing designs, while advanced features allow experienced users to create complex machines with ease. With the addition of add-ons such as stepper drivers and motion controllers, you can get high performance robotics applications out of your 3D printer.
Arduino also has a robust library of ready-made code that you can use as the foundation for your project – allowing you to rapidly prototype ideas without having to write code from scratch. Finally, the wide range of shields available makes integrating sensors and actuators into your project easy. All in all, Arduino is an excellent choice for building 3D printers!
Which Arduino is best for robotics?
When it comes to choosing the best Arduino for robotics, there are a few things to consider. First and foremost, you need to decide which model is right for your project. The Arduino Uno is the most popular model due to its ease of use and wide range of compatible components. It has digital input/output pins, analog inputs, and two serial ports that can be used for communication with other devices.
For more complex projects or those involving sensors or motors, an Arduino Mega may be a better choice. The Mega offers 54 I/O pins – enough to connect almost any type of sensor or motor you might want. It also supports multiple types of serial communication protocols such as SPI and I2C, making it easier to connect various components.
For projects involving wireless communication, the Arduino Nano 33 IoT might be a good option. This model is equipped with onboard Wi-Fi and Bluetooth, making it perfect for connecting to other devices or sending data over the internet. It also has built-in security features like AES 128-bit encryption, making it a secure choice for projects that involve sensitive data.
What are some cool Arduino projects?
One of the most exciting and rewarding ways to use an Arduino board is in a robotics project. Robotics projects provide plenty of opportunities for hands-on learning, creativity, and problem solving. There are numerous possibilities when it comes to designing and building your own robot using an Arduino board as the main controller.
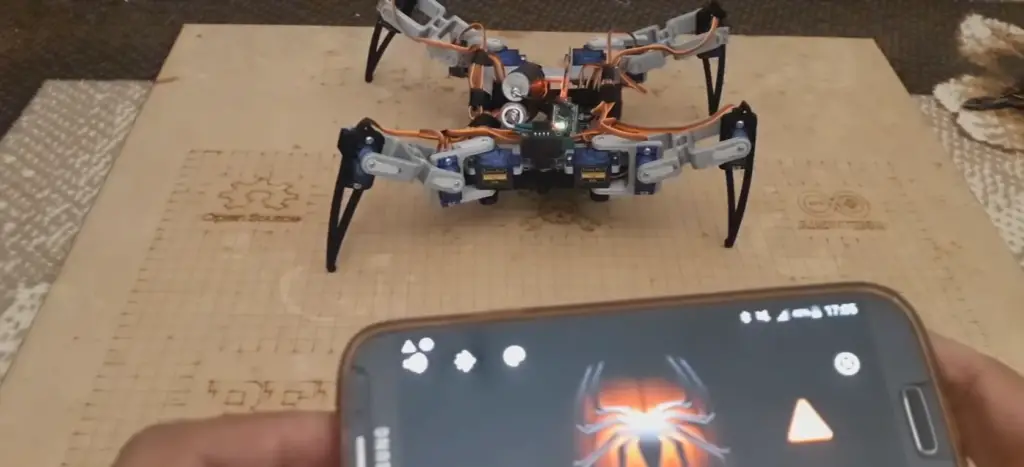
Some great examples of cool Arduino robotics projects include: self-balancing robots, line following robots, robotic arms, obstacle avoidance robots, robot cars, hexapods (six-legged walking robots), and snakebots (robots resembling snakes). Each type of robot has its own unique set of challenges that need to be solved in order to build a functional machine.
Can I make AI with Arduino?
Yes, AI can be created with Arduino. However, building a fully featured Artificial Intelligence (AI) system on an Arduino board is very difficult due to the limited resources available. An AI system requires much more RAM and processing power than what is typically available on an Arduino board.
However, there are some possible strategies for implementing basic AI functions using an Arduino-compatible microcontroller platform. One way is to use pre-built libraries such as TensorFlow Lite for Microcontrollers or the OpenMV Machine Vision Library that allow you to create simple AI systems without having to write complex code from scratch. These libraries provide basic functions like object recognition, voice recognition, and image classification which can be used in robotics projects.
Useful Video: How To Make Arduino Human Following Robot
Conclusion
Arduino is one of the most popular platforms for robotic projects and provides a great starting point for anyone wanting to explore the world of robotics. Arduino is open-source, so it’s easy to find libraries and tutorials online that can help you get started quickly. With Arduino, you can build robots with basic components like servos, sensors, and motors. You can also use more advanced components such as Raspberry Pi or other microcontrollers to add intelligence to your projects.
In this article we have covered the process of making two projects: a robotic hand and a line following robot. Both of these projects are excellent starting points for users who want to explore the world of robotics. We have also discussed common questions related to Arduino robotics and provided useful tips that should help you get started with your own project.
With a few simple tools and some creativity, you can create amazing robotic projects using Arduino. Whether you want to build an autonomous vehicle or just play around with LED lights, Arduino makes it all possible! We hope this guide gave you the information necessary to begin your own Arduino robotic project journey. Happy building!
References
- https://www.elprocus.com/different-types-of-microcontroller-boards/
- https://learn.sparkfun.com/tutorials/what-is-an-arduino/all
- https://mycuriositybot.wordpress.com/2019/02/22/points-to-keep-in-mind-before-starting-with-an-arduino-project/
- https://circuitdigest.com/microcontroller-projects/diy-arduino-robotic-arm-tutorial
- https://roboticsandenergy.com/projects/arduino-projects/robotic-arm/
- https://circuitdigest.com/microcontroller-projects/arduino-uno-line-follower-robot




Leave a Reply