If you’re looking to get more power out of your Raspberry Pi 4, then overclocking might be the perfect solution. Overclocking is a process by which you can speed up your computer’s clock speed along with its performance capabilities. This can lead to not only faster speeds, but also better performance when running certain programs and tasks. But before we delve into making any changes, it’s important that we understand what we are doing as well as why and how to do it safely! In this blog post, we’ll provide some helpful tips and information for those who want to explore overlocking their Raspberry Pi 4 so that you understand the process and feel confident in your decision-making ability.
What is Raspberry Pi and What are the Features?
The Pi, a single-board computer, was developed by the Raspberry Pi Foundation in the United Kingdom back in 2012. This compact yet powerful device has revolutionized the world of computing. It is specifically crafted to foster the teaching of fundamental computer science in educational institutions and developing nations. Remarkably, it has emerged as one of the most sought-after computing devices worldwide, with an impressive sales record of over 30 million units. [1]
- It features an ARM processor running at 700Mhz, 256MB of RAM, one USB port, an Ethernet connection, HDMI and RCA video outputs, on-board audio out and a 40 GPIO header. It also has a variety of input/output (I/O) ports such as general purpose I/O pins for controlling external hardware.
- It is capable of running multiple Linux distributions, including Raspbian OS. It’s also capable of running applications such as the Python programming language, Scratch (a children’s programming language) and a range of graphical user interfaces.
- It can be used for a variety of projects ranging from robotics and electronics to web development and gaming. It is also popular among hobbyists for its low cost and its ability to be used for a variety of applications.
- It is an incredibly powerful and versatile tool that has revolutionized the way people think about computers. From a low-cost educational computer to a high-performance workstation, the Raspberry Pi can do it all.
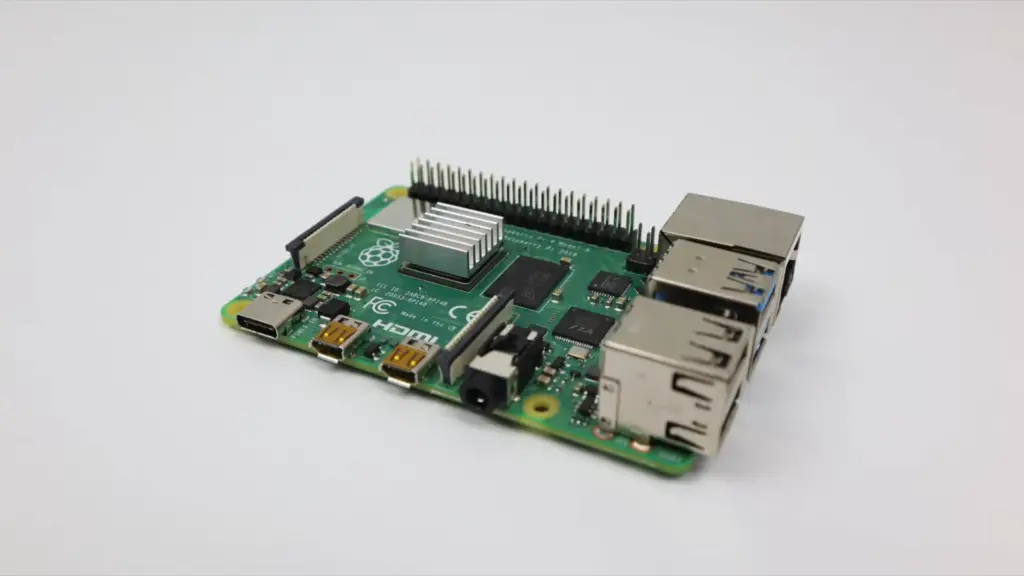 Whether you’re just starting out with learning how to code or you’re an experienced programmer looking for a new challenge, the Raspberry Pi has something to offer everyone. With its endless potential and expansive library of software, it’s no wonder that the Raspberry Pi is one of the most popular computers in the world. Try it out today and see what all the hype is about! [2]
Which Raspberry Pi Models are the Most Popular?
There are several different models of the Raspberry Pi available in the market today which include:
Raspberry Pi 4 Model B
The latest model released in 2019, this is the most powerful and feature-rich of all the models. It comes with a Broadcom BCM2711 quad-core Cortex-A72 processor clocked at 2.4 GHz, up to 8GB LPDDR4 RAM, 2 USB 3.0 ports, 2 USB 2.0 ports, Wireless connectivity and Bluetooth 5.0. It supports 4K resolution at 60 frames per second which makes it ideal for media streaming applications or gaming.
Raspberry Pi 3 Model B+
Released in 2018, this model is an upgrade on the previous generation Raspberry PI 3 Model B. This has a slightly faster processor clocked at 1.4GHz and comes with a dual-band 802.11ac wireless LAN, Bluetooth 4.2/BLE and Power-over-Ethernet support (with separate PoE HAT). It’s also worth noting that this model has a slightly higher power draw than the Raspberry Pi 4.
Raspberry Pi Zero W
This is the smallest and cheapest of all the models released in 2017. Coming in at only $5, it’s an incredibly versatile and affordable board for less intensive applications such as motion sensors, robots and home automation. It has a single-core processor clocked at 1GHz, 512MB RAM, Wireless connectivity and Bluetooth 4.1/BLE.
Raspberry Pi 3 Model A+
Released in 2018, this model is an upgrade on the previous generation Raspberry PI 3 Model A with improved performance features such as a slightly faster processor clocked at 1.4GHz and improved wireless connectivity with dual-band 802.11ac wireless LAN, Bluetooth 4.2/BLE. This board is great for applications that don’t require a lot of power but need better performance than the Raspberry Pi Zero W.
Raspberry Pi 4 Model A
Released alongside the Raspberry Pi 4 Model B in 2019, this model offers most of the same features but with a lower power draw and support for 1080p60 video output. It has a Broadcom BCM2711 quad-core Cortex-A72 processor clocked at 1.5GHz, up to 2GB LPDDR4 RAM, 2 USB 3.0 ports, wireless connectivity and Bluetooth 5.0.
All of them offer great value for money and a wide range of possibilities. With support for many different operating systems and free software libraries and tools, the Raspberry Pi is a great way to dive into the world of computer programming and electronics. Plus, with the fast-growing community around it, you’ll never run out of resources and help while you’re learning. [4]
What is the Raspberry Pi 4 for?
The Raspberry Pi 4 is an incredibly powerful and versatile single-board computer that offers users a great opportunity to learn, explore, and create exciting projects in the world of computing. With its Quad Core ARM Cortex A72 processor, 1 GB RAM, 4K capable HDMI port, USB 3.0 ports, Gigabit Ethernet connection and powerful GPU, the Raspberry Pi 4 is capable of powering a range of applications including gaming, coding, home automation and more.
It can be used for a variety of tasks such as making your own computer or robot, building automated systems, tracking objects using machine vision, creating digital art with electronic components and more. The possibilities are endless!
One of the most exciting things about the Raspberry Pi 4 is its ability to be customized and tailored to your specific needs. With a range of operating systems and software packages available, you can easily create projects that suit your individual requirements. The Raspberry Pi 4 also offers users an opportunity to connect with other makers, coders and creators around the world – whether it’s through forums, groups or online communities.
The Raspberry Pi 4 is an amazing tool for getting started in the world of computing, and it has plenty of potential to explore and unlock. With its combination of power, versatility and affordability, it’s no surprise that so many people are turning to the Raspberry Pi 4 as their go-to computing platform! [5]
What Projects Can Be Created on Raspberry Pi 4?
Some of the most popular projects created on the Raspberry Pi 4 include the following:
- Home Automation: You can use the Raspberry Pi 4 to automate your home by controlling lights, appliances, security systems and more. It is possible to quickly create a user interface for this automation with minimal coding knowledge.
- Media Center: The Raspberry Pi 4 makes an excellent media center, allowing you to stream movies and TV shows from a variety of sources. You can also play music, view pictures and access a range of other media formats.
- Robotics: The Raspberry Pi 4 is powerful enough to be used in robotics projects. It can be connected to servo motors for remote control of robotic arms or even whole robots.
- Smart Home Hub: Connecting the Raspberry Pi 4 to your home’s internet connection can turn it into a smart home hub. With this, you can control all of your connected devices from one central location.
- Smart Mirror: A smart mirror is essentially what it sounds like – an ordinary looking mirror with built-in technology inside. The Raspberry Pi 4 can be used as the brains behind such a smart mirror.
- Wearable Electronics: The Raspberry Pi 4 can be used to power a range of wearable electronics, such as fitness trackers and virtual reality headsets. You could also create your own custom wearable device with the help of this mini-computer.
- Surveillance System: Connecting the Raspberry Pi 4 to various cameras can create an effective home surveillance system. It can be used to monitor activity in your home or property and even alert you when there is movement detected.
- Gaming Console: With the help of an emulator, you could turn the Raspberry Pi 4 into a gaming console. It would be capable of playing a range of classic video game titles from various platforms.
- Custom Projects: Let your imagination run wild. The Raspberry Pi 4 can be used to create almost any type of project you can think of. With the right knowledge and tools, it is possible to build something truly unique. [6]
Why Use Overclocking?
Overclocking is a useful technique for squeezing extra performance out of your computer or laptop. The process involves pushing the hardware components like the processor, graphics card and RAM beyond their default specifications to get additional speed and power from them. This means that you can end up with a much faster system, allowing you to work more efficiently or game more smoothly.
Of course, there are risks associated with overclocking that need to be taken into account.
They include:
- Heat build-up – when components are pushed beyond their default specs, they generate more heat. This can cause system instability or even permanent damage if not adequately cooled.
- Power consumption – when overclocking, you will need to increase power delivery to the hardware components. This causes a noticeable spike in your electricity bill and can also put a strain on your PSU.
- System instability – if you don’t set the overclocking settings correctly, your system could become unstable and crash on a regular basis.
However, there are several benefits to overclocking that can outweigh these risks.
For example, you can expect:
- Improved performance – when components are pushed beyond their default specs, they tend to perform better and faster. This can give you an edge when gaming or improve your productivity when working.
- Longer component life – as components are pushed to their limits, they tend to last longer than if they were running at their normal specs.
- Greater control over system settings – overclocking allows you to tweak the settings of your system in order to get the best performance out of it.
- Cost savings – when done correctly, overclocking can save you money as you don’t need to upgrade your hardware as often.
The key to successful overclocking is to do plenty of research before attempting it. Make sure that all the components are compatible and within the safety guidelines set by the manufacturer. [7]
What are the Benefits of Overclocking Raspberry Pi 4?
Overclocking a Raspberry Pi 4 can offer a range of benefits, from improved performance to better power efficiency. Overclocking is an effective way to get more out of your Raspberry Pi, and it’s relatively easy to do with the right tools and knowledge. Keep reading to learn more about the advantages of overclocking a Raspberry Pi 4.
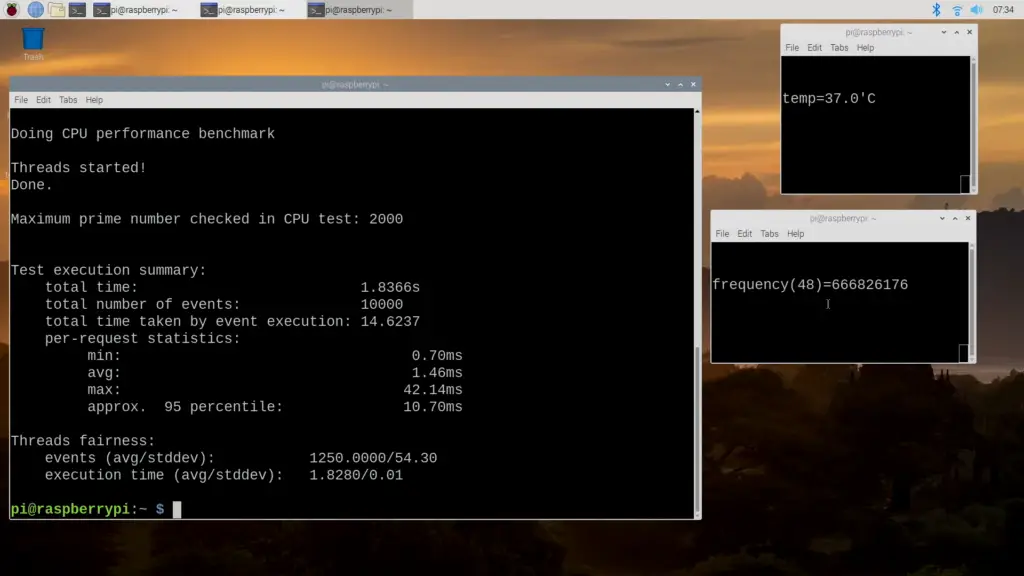
One of the primary advantages of overclocking your Raspberry Pi 4 is improved performance. When you overclock your Raspberry Pi, it runs faster than it would normally. This means that demanding tasks will be completed quicker and more efficiently than if the device was running at its normal speed. For example, a Raspberry Pi 4 overclocked to 2GHz can process data up to 50% faster than it would at its normal speed of 1.5GHz. This makes overclocking a great option for applications that require faster performance, such as gaming, HD video streaming, and photo editing.
Another benefit to overclocking your Raspberry Pi 4 is better power efficiency. Overclocking the device allows it to run faster while consuming the same amount of power. This means that the Raspberry Pi 4 can complete tasks more quickly while reducing its energy consumption, saving you money in electricity costs over time.
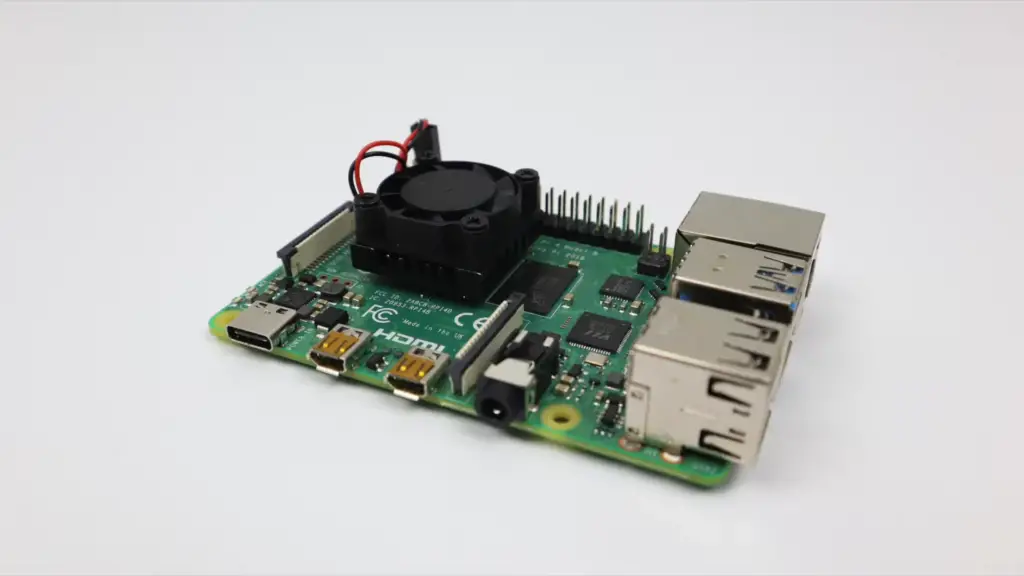
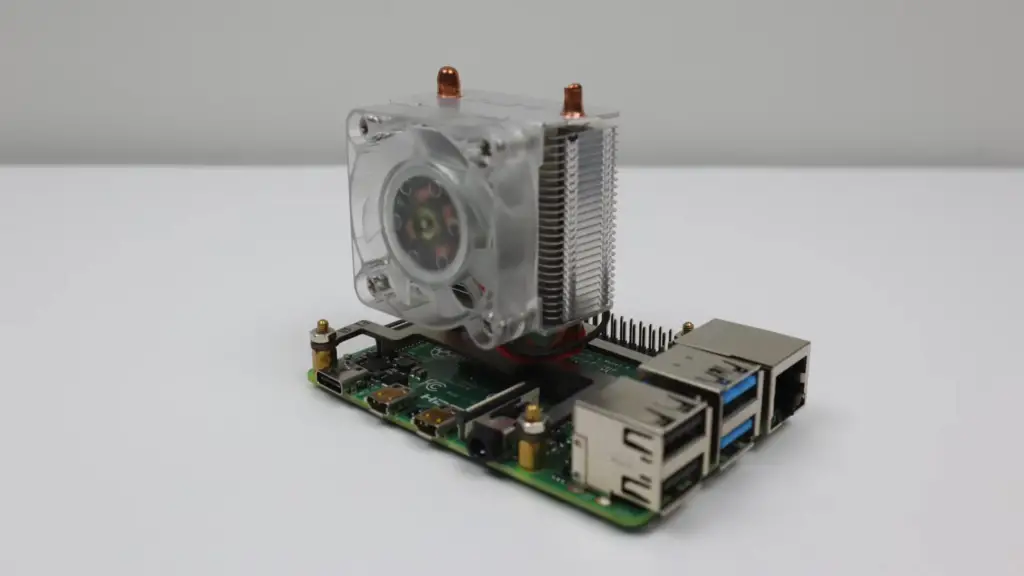
Overclocking your Raspberry Pi 4 is relatively easy and inexpensive to do. The process requires a special cooling device or fan to keep the system from overheating during operation. With the right tools and knowledge, you can overclock your Raspberry Pi 4 yourself, without the need for a professional. [8]
Warnings Before Overclocking a Raspberry Pi 4
Overclocking your Raspberry Pi 4 can be a great way to get more out of it, but there are some potential risks that you should be aware of before doing so.
The biggest risk is that overclocking may cause damage to the hardware itself. Overclocking places increased strain on components like the processor and RAM, which could lead to overheating or even permanent damage.
It’s also important to note that overclocking may void the warranty on your Raspberry Pi 4, meaning if something goes wrong you won’t be able to get it fixed or replaced by the manufacturer.
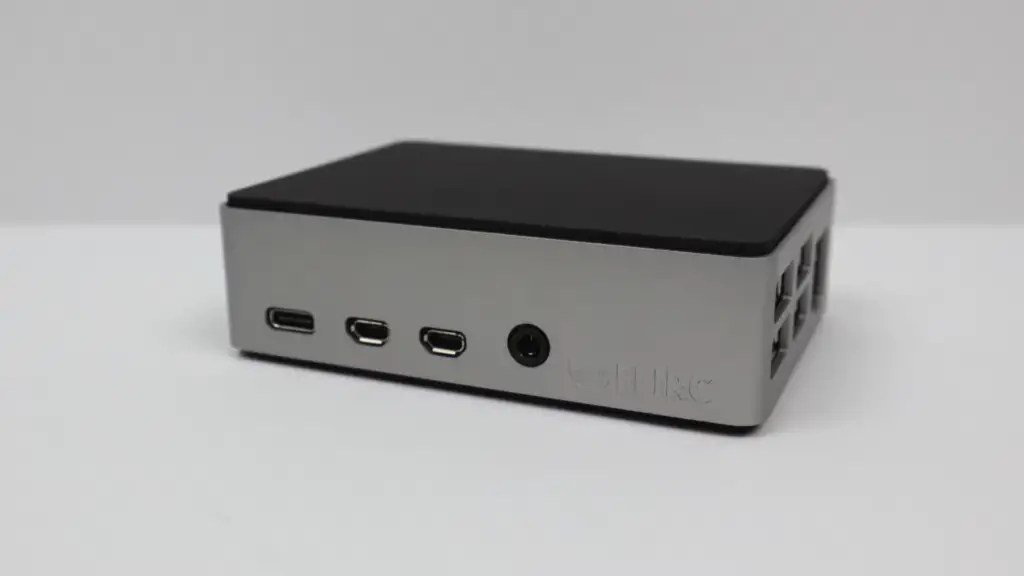
Another thing to consider before overclocking is whether or not you have adequate cooling for your Raspberry Pi 4. Overclocking increases power consumption and generates additional heat, which can be difficult for the built-in heatsinks to manage. If you don’t have adequate cooling, your Raspberry Pi 4 may overheat and suffer permanent damage as a result.

How to Safely Overclock Raspberry Pi 4?
Step 1: Choose Your Overclocking Profile
The first step in safely overclocking your Raspberry Pi 4 is to choose the correct overclocking profile. The most common profiles are known as “Turbo,” “Medium,” and “High.” Each of these profiles has different settings for core voltage, CPU frequency, memory speed, GPU frequency, and other parameters. You will need to experiment to find the profile that best suits your needs.
Step 2: Establish a Baseline Temperature
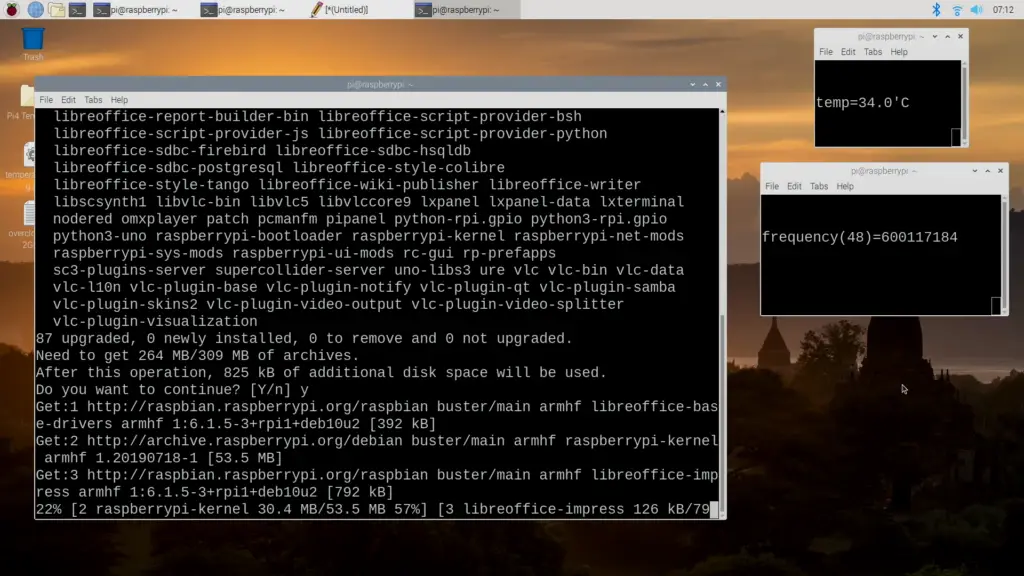
Once you have chosen an overclocking profile, it is crucial to establish a baseline temperature for your Raspberry Pi 4 before you start overclocking. To do this, you will need to install a temperature monitoring tool on your Pi and measure its temperature over time. This will provide you with an understanding of the Pi’s normal operating temperature range, which can be useful when monitoring temperatures during overclocking.
Step 3: Measure and Monitor Temperatures
Now, it is essential to periodically measure and monitor temperatures throughout the overclocking process. The best way to do this is to use a temperature monitoring tool that can measure the temperature of your Raspberry Pi 4 in real-time. This will allow you to quickly identify any areas on your Pi that are becoming too hot and make appropriate adjustments before permanent damage is caused.
Step 4: Make Adjustments as Needed
If you find that certain components on your Raspberry Pi 4 are running too hot, you will need to make adjustments to your overclocking profile. This could mean lowering the CPU frequency or memory speed, or increasing the core voltage. Be sure to adjust only one parameter at a time, and observe how it affects temperatures before making additional changes.
Step 5: Re-establish Baseline Temperatures
Once you have made all of the necessary adjustments to your overclocking profile, it is important to re-establish the baseline temperatures on your Raspberry Pi 4. This will give you a better understanding of how the overclocking process has affected its performance and reliability over time. With this information, you can make further adjustments to ensure that your Pi’s temperatures remain within safe ranges. [10]
FAQs
Is it safe to overclock my Raspberry Pi?
Yes, it is safe to overclock your Raspberry Pi. However, you should always take extra caution and understand the risks before you proceed. Overclocking will cause higher temperatures in your system, so make sure that you have adequate cooling and ventilation, as well as a reliable power source. Additionally, overclocking may reduce the lifespan of components in your Raspberry Pi.
How far can you overclock a Raspberry Pi 4?
The Raspberry Pi 4 is the latest version, and it comes with a range of features that make it ideal for overclocking. That said, there are some important factors to consider when deciding how far you can overclock your device.
First, you’ll need to decide which model of the Raspberry Pi 4 you are using. The original model has a maximum clock speed of 1.5 GHz, while the later models have a maximum clock speed of 2GHz. This means that if you are using an original model Raspberry Pi 4, it is not recommended to try to overclock it beyond its maximum rated frequency.
Also, consider how much power your device can handle when deciding how far you can overclock. Generally speaking, the more power your Raspberry Pi 4 can handle, the better it will be able to handle overclocking. You should also consider whether or not you are using a heatsink when overclocking; if so, this will help dissipate heat generated by the higher clock speeds and reduce stress on your processor.
It’s crucial to understand the risks associated with overclocking. Overclocking can cause your Raspberry Pi 4 to become unstable or even damage it, so it is important to understand the risks before attempting to overclock your device.
Will overclocking CPU damage it?
The short answer is, possibly yes. Overclocking the Raspberry Pi 4 can increase its performance, but it may also damage the CPU and other hardware components in the long run. Before attempting to overclock your device, make sure you are aware of the potential risks involved.
It’s important to know that overclocking beyond what is recommended by the manufacturer may result in a permanent decrease in performance. Additionally, it could lead to frequent crashes or instability when running programs and other tasks. Furthermore, the higher temperature generated by overclocking can cause physical damage to your Raspberry Pi’s hardware components like the memory chips and processor cores.
What is the safest overclock?
Ensure that the device remains stable and reliable. For this reason, many users opt for a conservative overclock that sets safe limits on clock speed and voltage.
This approach can provide good performance gains while still ensuring the stability of the system. To safely overclock your Raspberry Pi 4, start by adjusting the core clock to 1000 MHz and the memory clock to 1500 MHz. You may be able to increase these values over time as your system gets more stable.
In addition, you should also adjust the voltage settings for the CPU and RAM. Careful monitoring of your system’s temperature and performance can help you fine-tune these settings as well.
Useful Video: How to Overclock Raspberry Pi 4 To 2.0Ghz! All 4 Cores – With Benchmarks
Conclusion
Overclocking any Raspberry Pi 4 is an excellent way to achieve higher performance. Not only can overclocking help make your Pi more capable, but it can also extend its life overall. With a few simple steps and proper precautions, it’s incredibly easy to safely overclock any Raspberry Pi 4 model you have on hand. Be sure to read the documentation thoroughly before attempting any overclocking tasks, as even the slightest miscalculation or misstep can greatly reduce performance or cause permanent damage. Once all safety measures are taken, you should be rewarded with excellent boosts in speed without any ill-effects. Enjoy your faster Raspberry Pi 4!
References
- https://www.raspberrypi.org/help/what-%20is-a-raspberry-pi/
- https://www.spiceworks.com/tech/networking/articles/what-is-raspberry-pi/
- https://www.ign.com/articles/best-raspberry-pi-models
- https://www.tomshardware.com/how-to/raspberry-pi-buying-guide
- https://opensource.com/resources/raspberry-pi
- https://www.makeuseof.com/top-raspberry-pi-4-projects-to-start-today/
- https://www.intel.com/content/www/us/en/gaming/resources/5-reasons-to-overclock-your-next-pc.html
- https://www.makeuseof.com/how-to-overclock-raspberry-pi-4/
- https://appuals.com/overclock-raspberry-pi-4-safely/
- https://beebom.com/how-overclock-raspberry-pi-4/




Leave a Reply