
In this comprehensive guide, we will walk you through the steps of connecting your Arduino to a WiFi network. This is a great way to control your Arduino from anywhere in the world, without having to be near it.
We will answer some common questions about connecting Arduinos to WiFi, and provide some useful tips that will make the process easier for you. Let’s get started!
How to Connect an Arduino to WiFi?
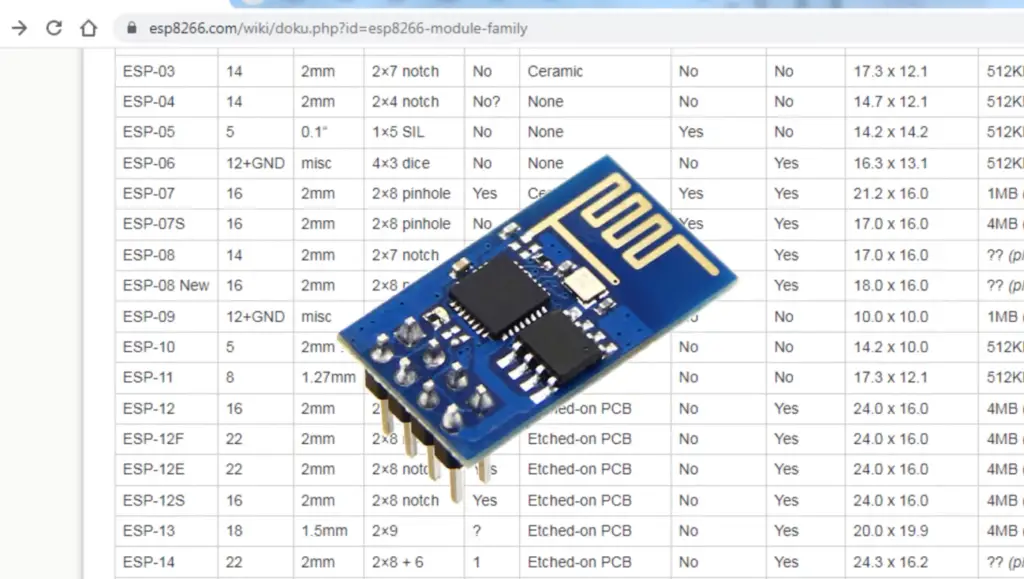
An ESP8266 module includes both a processor and a WiFi chip, allowing you to program it and access its WiFi capabilities from the same device.
The process for connecting your Arduino to the Internet with an ESP8266 is relatively straightforward:
- Install the ESP8266 library in your Arduino IDE.
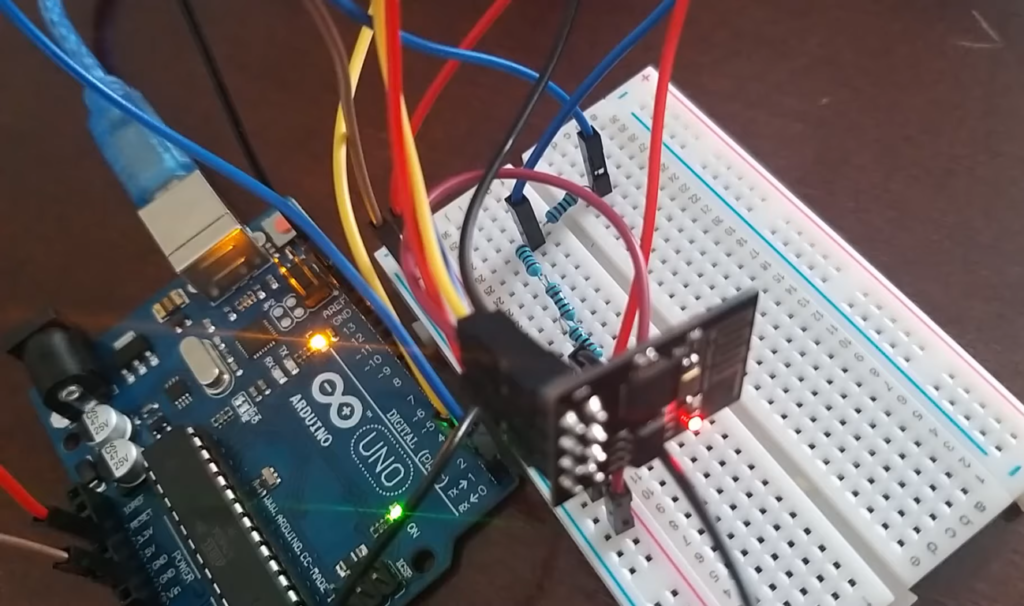
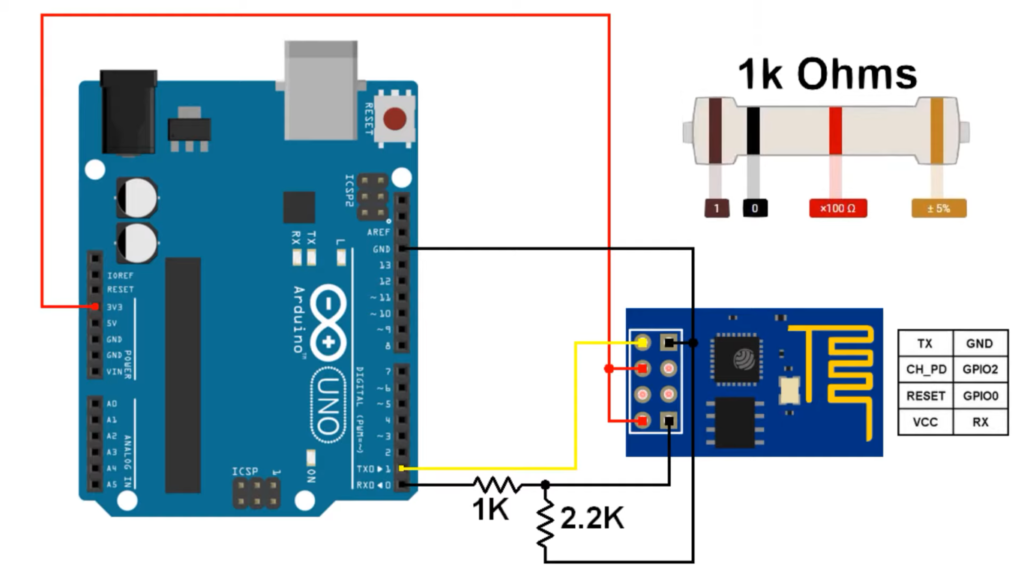
- Connect the ESP8266 to your Arduino with a USB cable or jumper wires.
- Set up the ESP8266 WiFi connection and connect it to the Internet.
- Program your code into the ESP8266 and upload it to your Arduino.
- Run the code and connect to your WiFi!
Once you have connected your Arduino to a WiFi network, there are many things you can do. You can control it remotely from any computer or smartphone with an Internet connection. You can also use it to send data back and forth between services, download data from the web, and more.
Components and Supplies Needed
The supplies you need to connect an Arduino to a WiFi network depend on the method you choose. Generally, you will need:
- An Arduino board (e.g. Uno, Mega, etc.)
- An ESP8266 module (e.g. NodeMCU)
- A USB cable or jumper wires
- An Internet connection
- An Arduino IDE installed on your computer
- Your code written in the Arduino IDE
The components and supplies you need may vary depending on the project. For example, if you are using a Bluetooth module instead of an ESP8266, then you will need to purchase a compatible Bluetooth module. [1]
What is the Process?
Upload Sketch to Arduino
Once you have connected your ESP8266 to the Arduino, you can upload code to it using the Arduino IDE. The code that you upload will depend on your project and what you want to do with the WiFi connection.
Generally, though, it will involve setting up the ESP8266 WiFi connection and connecting it to the Internet. Once you have written your code in the Arduino IDE, you can click a button to upload it to your Arduino board.
Test Your Code
Once you have uploaded your code to the Arduino board, you can test it out. This can be done by using a serial monitor or sensing device to check that the Arduino is connected to your WiFi network and that it is sending and receiving data correctly. [1]
Built Circuit
After your code has been tested and is working correctly, you can build a circuit to permanently install the ESP8266. This involves connecting the power supply and other components necessary for your project.
Set up Connection
Once you have built the circuit and it is powered up, you can set up your WiFi network connection. This involves entering the network name and password into the ESP8266 so that it can connect to your router. After that, you should be able to access the Arduino from any computer or smartphone with an Internet connection.
Talk to you Arduino Uno via Smart Phone
The last step is to test the connection. You can do this by downloading an app that allows you to talk to your Arduino Uno using a smartphone or tablet. This will allow you to easily access, control and monitor your Arduino from anywhere in the world.
About the Circuit
There are a few different ways to connect your Arduino to a WiFi network. The method you choose will depend on your project. In general, you will need to connect the ESP8266 module to the power supply and other components. Make sure that all of your connections are correct before powering up the circuit.
By following these steps, you will be able to easily connect your Arduino to a WiFi network. With this connection, you can access and control your Arduino remotely from any computer or smartphone with an Internet connection.
You can also use it to send data back and forth between services, download data from the web and much more!
About the Code
There are a few ways to code your Arduino project. If you don’t have any coding experience, you can use an existing code you find online or in a book. But if you do have some programming experience, you can write your own code.
It is important to write your Arduino code correctly. This includes making sure all of the connections are correct and that there are no typos or other errors. Once you have tested and debugged the code, you can upload it to your Arduino board using the Arduino IDE.
FAQ
Can you connect Arduino to WiFi?
Yes, you can connect Arduino to WiFi by using an ESP8266 module. You will need to write code in the Arduino IDE and upload it to the board before connecting your device to a wireless network.
How do I use my smartphone with Arduino?
You can use your smartphone with Arduino by downloading an app that allows you to communicate with the board. This will allow you to access, control and monitor your Arduino from anywhere in the world.
What kind of power supply do I need to connect Arduino to WiFi?
The power supply you will need depends on your project and how much power your circuit requires. Generally speaking, most projects require a 5V source.
This could be either a USB cable or an external battery. Make sure to check the power requirements of your project before powering up your circuit!
Can I connect Arduino Uno to the Internet?
Yes, you can connect Arduino Uno to the Internet by using an ESP8266 module. This module will allow you to connect your board to a wireless network and access data from the web or other services. However, it’s important to make sure that your code is written correctly before uploading it to the board. If your code is incorrect, it could damage your Arduino board or the ESP8266 module.
How do I connect to UNO WiFi?
To connect your UNO WiFi, you will need to write code in the Arduino IDE and upload it to the board. This code will tell the ESP8266 module which network to join and how to communicate with other devices. Once this is done, you can access the board from any computer or smartphone that has an Internet connection.
How to connect Arduino Uno with ESP8266 WiFi?
To connect your Arduino Uno with ESP8266 WiFi, you will need to write code in the Arduino IDE and upload it to the board. This code will tell the ESP8266 module which network to join and how to communicate with other devices.
Once this is done, you can access the board from any computer or smartphone that has an Internet connection. Additionally, you will need to connect the ESP8266 module to your Arduino Uno with the appropriate cables and make sure all of your connections are correct before powering up the circuit.
By following these steps, you will be able to successfully connect your Arduino Uno to a WiFi network for remote access and control from any computer or smartphone.
With this connection, you can access and control your Arduino remotely from any computer or smartphone with an Internet connection. You can also use it to send data back and forth between services, download data from the web and much more!
Can an Arduino run without a computer?
Yes, Arduino can run without a computer. You can use an external power supply to upload code to your board with a USB cable. Additionally, you can use an ESP8266 module to connect your Arduino to WiFi and access it remotely from any computer or smartphone with an Internet connection.
What is the range of Arduino WiFi?
The range of Arduino WiFi will depend on the strength of your antenna and the environment you are working in.
How does Arduino WiFi work?
Arduino WiFi lets your Arduino board connect to a wireless network. This way, you can use the internet to send and receive data from other devices. Additionally, you can control and monitor your project remotely from any computer or smartphone with an internet connection.
Can Arduino send video over WiFi?
Yes, Arduino can send video over WiFi. This is done by using the ESP8266 module and an IP Camera. The ESP8266 module lets your Arduino connect to a wireless network so that you can access it from anywhere in the world with an internet connection. Then, the camera sends video data over this connection, which you can view on your connected device.
Can you upload code to Arduino wirelessly?
Yes, you can upload code to Arduino wirelessly. This is done by using an ESP8266 module and connecting it to your Arduino board. The ESP8266 module will allow your Arduino to connect to a wireless network, which means you can access it from anywhere in the world as long as you have an internet connection.
Once connected, make sure to double-check your code for errors before uploading it to the board.
Can we wirelessly connect an Arduino with a laptop?
Yes, you can wirelessly connect an Arduino with a laptop. This is done by using an ESP8266 module and connecting it to your Arduino board. The ESP8266 module will allow your Arduino to connect to a wireless network, which means you can access it from anywhere in the world as long as you have an internet connection.
Once connected, you can use the Arduino IDE to upload your code from your laptop and control the board remotely.
Which is better: Raspberry Pi or Arduino?
It depends on the project. Raspberry Pi is better for projects that need a lot of computing power, like running a web server or video streaming. Arduino is better for simple tasks, like controlling motors and light sensors. It all comes down to what your project needs.
Is Arduino used in mobile?
Yes, Arduino is used in mobile devices. It is often used to control sensors and other hardware components, such as accelerometers or gyroscopes. Additionally, it can be used to connect the device to the internet and send data back and forth between services. This makes it a great tool for home automation projects, IoT applications, and more.
Which Arduino model is the best?
Arduino Mega and Arduino Yún are different types of Arduinos. They have different features that might be better for your project. It all depends on what you need for your project and what you want it to do.
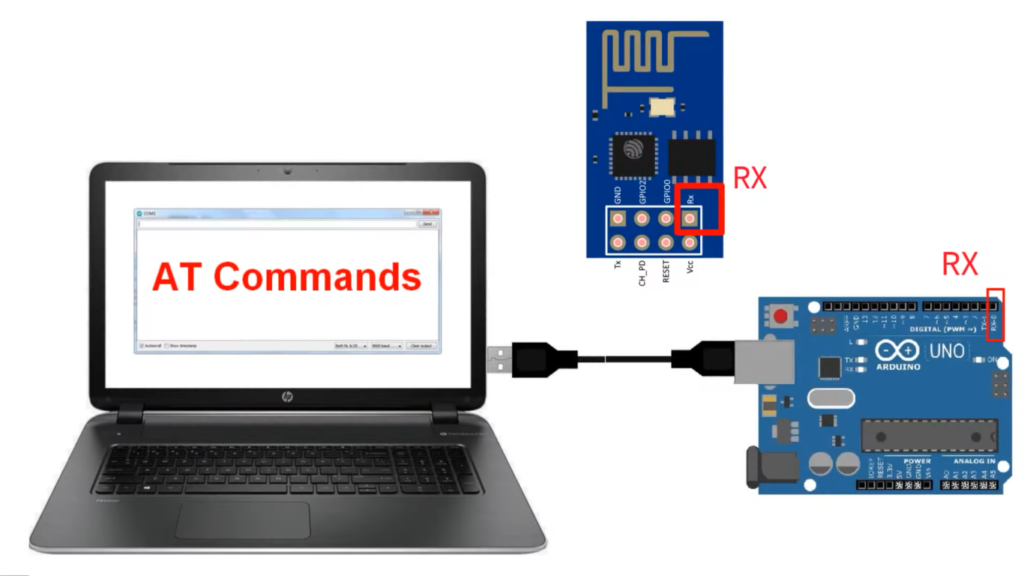
Useful Video: How to connect Arduino UNO to a WIFI Network: ESP8266 – AT Commands
Conclusion
In this tutorial, we’ve shown you how to connect your Arduino board to a WiFi network. This will allow you to control your Arduino using a web browser or smartphone app, without having to be connected to the same network as your Arduino.
Additionally, you can use the ESP8266 module to upload code wirelessly and even send video over WiFi. Finally, we’ve discussed the different types of Arduinos and which one might be best for your project.
We hope this guide has been helpful in helping you get started with Arduino WiFi! Thanks for reading!
References
- https://create.arduino.cc/projecthub/imjeffparedes/add-wifi-to-arduino-uno-663b9e