
The Raspberry Pi has established itself as a force to be reckoned with in the world of single-board computers, offering a remarkable range of possibilities for enthusiasts and professionals alike. While the Raspberry Pi’s default operating system is capable and functional, there comes a time when users yearn for more power and performance. That’s where running a 64-bit operating system on the Raspberry Pi enters the scene.
In this comprehensive guide, we will delve into the intricacies of running a 64-bit OS on the Raspberry Pi, enlightening you about the benefits, challenges, and step-by-step process to unlock the true potential of your device. Whether you’re an avid DIY hobbyist, a developer working on resource-intensive projects, or simply curious to explore the untapped possibilities, this guide will equip you with the knowledge and tools to embark on this exciting journey.
What Is a 64-bit Raspberry Pi OS?
The Raspberry Pi was initially introduced with a 32-bit ARM architecture, which governed its processing capabilities and memory utilization. This architecture served the device well for many years, allowing it to perform a wide array of tasks ranging from basic programming exercises to more complex applications like media centers and web servers. However, as technology continued to progress, the limitations of the 32-bit architecture became increasingly apparent [1].
The shift towards 64-bit computing was driven by the need for improved performance, memory management, and compatibility with modern software. A 64-bit operating system is capable of addressing larger amounts of RAM and can harness the power of 64-bit processors more efficiently, leading to enhanced multitasking and overall system responsiveness. The transition to a 64-bit Raspberry Pi OS marked a significant milestone in the platform’s evolution, enabling it to tackle more demanding tasks and handle larger datasets with ease.
Benefits of a 64-bit Raspberry Pi OS
Increased Memory Handling
One of the primary advantages of a 64-bit OS is its ability to access and utilize larger amounts of RAM. While a 32-bit OS is typically limited to addressing around 4 GB of RAM, a 64-bit OS can theoretically support several terabytes. This expanded memory capacity is particularly beneficial for applications that require extensive data processing, such as machine learning and scientific computing.
Enhanced Performance
64-bit computing allows for more efficient use of the CPU’s registers and instructions, resulting in improved performance for both computational and graphical tasks. This boost in performance is especially noticeable when running resource-intensive applications or multitasking, making a 64-bit Raspberry Pi OS an attractive choice for power users and developers.
Compatibility with Modern Software
As software development trends move towards 64-bit support, a 64-bit Raspberry Pi OS ensures compatibility with a broader range of applications and libraries. This compatibility is crucial for staying up-to-date with the latest software advancements and taking full advantage of Raspberry Pi’s capabilities.
Security Enhancements
64-bit operating systems often benefit from more robust security features, including improved data protection mechanisms and address space layout randomization (ASLR). These security enhancements contribute to a safer computing environment, which is especially important for IoT (Internet of Things) projects and other applications involving sensitive data.
Applications of a 64-bit Raspberry Pi OS:
- Data Analysis and Scientific Computing: Researchers and data scientists can harness the increased memory and computational capabilities of a 64-bit OS for complex simulations, data analysis, and scientific research;
- Media Centers and Gaming: With enhanced performance and memory handling, a 64-bit Raspberry Pi OS can serve as a more capable media center, supporting higher-quality video streaming and gaming experiences;
- Server and Web Hosting: The increased multitasking abilities of a 64-bit OS make it well-suited for hosting web servers, databases, and other network-related services;
- Machine Learning and AI: AI and machine learning enthusiasts can leverage the processing power of a 64-bit Raspberry Pi OS for training and deploying models, opening up new possibilities for edge computing applications;
- IoT and Automation: 64-bit OS capabilities are invaluable for managing complex IoT networks and automation tasks, where efficient data processing and secure communication are essential [2];
How To Distinguish If Raspberry Pi OS Is 32-bit Or 64-bit?
Distinguishing between a 32-bit and a 64-bit Raspberry Pi OS is an important step, as it determines the capabilities and software compatibility of your system.
Here’s how you can easily identify whether your Raspberry Pi OS is running on a 32-bit or a 64-bit architecture:
1) Command Line Method
Open a terminal window on your Raspberry Pi. You can do this by clicking on the terminal icon in the taskbar or using the keyboard shortcut Ctrl + Alt + T.
To check the kernel version and architecture, enter the following command and press Enter:
- uname –m
If the output is armv7l or armv8, it means you are running a 32-bit OS (armv7l) or a 64-bit OS (armv8), respectively.
2) Graphical User Interface (GUI) Method
If you prefer a graphical approach, you can use the System Information tool:
- Click on the Raspberry Pi icon in the top-left corner of your screen (this is the main menu);
- Navigate to “Preferences” and then “System Information”;
- Look for the “Operating System” field. It will indicate whether the OS is 32-bit or 64-bit;
3) File System Method
Another way to determine the architecture is by examining the file system.
Open a terminal window.
Enter the following command to navigate to the directory containing the kernel files:
- cd /usr/lib
List the contents of the directory and look for the folder named arm-linux-gnueabihf (32-bit) or aarch64-linux-gnu (64-bit):
- ls
If you see the arm-linux-gnueabihf folder, you’re using a 32-bit OS. If you see the aarch64-linux-gnu folder, it’s a 64-bit OS [3].
4) /proc/cpuinfo Method:
The /proc/cpuinfo file contains information about your CPU and can be used to determine the architecture.
Open a terminal window.
Enter the following command to view the contents of the /proc/cpuinfo file:
- cat /proc/cpuinfo
Look for the line that mentions model name. If it contains ARMv7 or Cortex-A7, you’re running a 32-bit OS. If it contains ARMv8 or Cortex-A53, it’s a 64-bit OS.
Remember that if you have a Raspberry Pi model 3 or earlier, it can only run a 32-bit OS due to its hardware limitations. Raspberry Pi 4 models and later support both 32-bit and 64-bit operating systems [4].
What Is The Comparison Of 64-bit vs 32-bit Raspberry Pi OS?
Performance and Memory Handling
One of the most notable differences between the two architectures lies in their performance and memory-handling capabilities. A 64-bit OS can access larger amounts of memory, surpassing the 4 GB limit imposed by the 32-bit architecture. This increased memory capacity is particularly beneficial for memory-intensive tasks such as data analysis, scientific computing, and machine learning. Additionally, the 64-bit architecture enables more efficient utilization of the CPU’s registers and instructions, resulting in enhanced overall performance and responsiveness.
Software Compatibility
When it comes to software compatibility, the landscape has been gradually shifting towards 64-bit support. Many modern applications, libraries, and development tools are optimized for 64-bit architectures, making a 64-bit Raspberry Pi OS a more future-proof choice. While a 32-bit OS can still run on Raspberry Pi models 3 and earlier, the 64-bit OS is better equipped to handle the demands of newer software trends and updates.
Use Cases and Applications
The choice between a 64-bit and a 32-bit OS should be guided by your specific use cases and project requirements. If you’re planning to use your Raspberry Pi for basic tasks like web browsing, word processing, and light programming, a 32-bit OS might suffice. However, if your projects involve media centers, gaming, data analytics, artificial intelligence, or other resource-intensive applications, a 64-bit OS is the more suitable option due to its enhanced capabilities.
Hardware Compatibility
It’s important to note that while a 64-bit OS offers numerous benefits, it may not be compatible with all software and hardware peripherals designed for 32-bit systems. Before making your decision, ensure that the software and hardware components you intend to use are supported by the architecture you choose.
In the grand comparison of 64-bit vs. 32-bit Raspberry Pi OS, the choice boils down to your specific needs and aspirations. If you seek improved performance, larger memory access, and compatibility with the latest software trends, a 64-bit OS is the logical choice, especially for Raspberry Pi 4 and newer models. On the other hand, if your projects lean towards more basic and traditional computing tasks, a 32-bit OS may still serve you well.
How To Download the 64-bit Raspberry Pi OS?
Step 1: Check Compatibility
Before diving into the download process, ensure that your Raspberry Pi model supports a 64-bit operating system. The Raspberry Pi 4 and later models are compatible with 64-bit OS versions, while earlier models, such as the Raspberry Pi 3 and below, are limited to 32-bit OS. Verify your Raspberry Pi model to proceed.
Step 2: Visit the Raspberry Pi Website
Navigate to the official Raspberry Pi website at www.raspberrypi.org. This is the hub for all things Raspberry Pi, including the latest OS releases and downloads.
Step 3: Go to the Downloads Section
On the Raspberry Pi website, locate and click on the “Downloads” tab. Here, you’ll find a list of available operating systems for your Raspberry Pi.
Step 4: Choose Your OS
Scroll through the list of available OS options until you find the 64-bit version that suits your needs. Typically, the 64-bit OS will be labeled as such in the name.
Step 5: Download the OS Image
Click on the download link for the 64-bit OS image. This will initiate the download process, and the image file will be saved to your computer’s designated download folder.
Step 6: Flash the OS Image to an SD Card
To install the 64-bit Raspberry Pi OS on your Raspberry Pi, you’ll need to flash the downloaded image onto an SD card. For this, you can use software like “Raspberry Pi Imager”, which is available for Windows, macOS, and Linux [5].
Download and install the Raspberry Pi Imager from the official website.
Launch the Imager and select “Choose OS”. Scroll down and select the “Raspberry Pi OS (64-bit)” option.
Insert your microSD card into your computer’s card reader and select it in the Imager.
Click “Write” to begin the flashing process. This will copy the 64-bit OS image onto the SD card.
Step 7: Insert the SD Card and Power On
Once the flashing process is complete, safely eject the SD card from your computer and insert it into the microSD card slot on your Raspberry Pi. Connect the necessary peripherals, such as a keyboard, mouse, and monitor, and then power on the Raspberry Pi.
Step 8: Follow On-Screen Setup
Follow the on-screen setup instructions to configure your 64-bit Raspberry Pi OS. This may include setting up language preferences, Wi-Fi connections, and creating a user account.
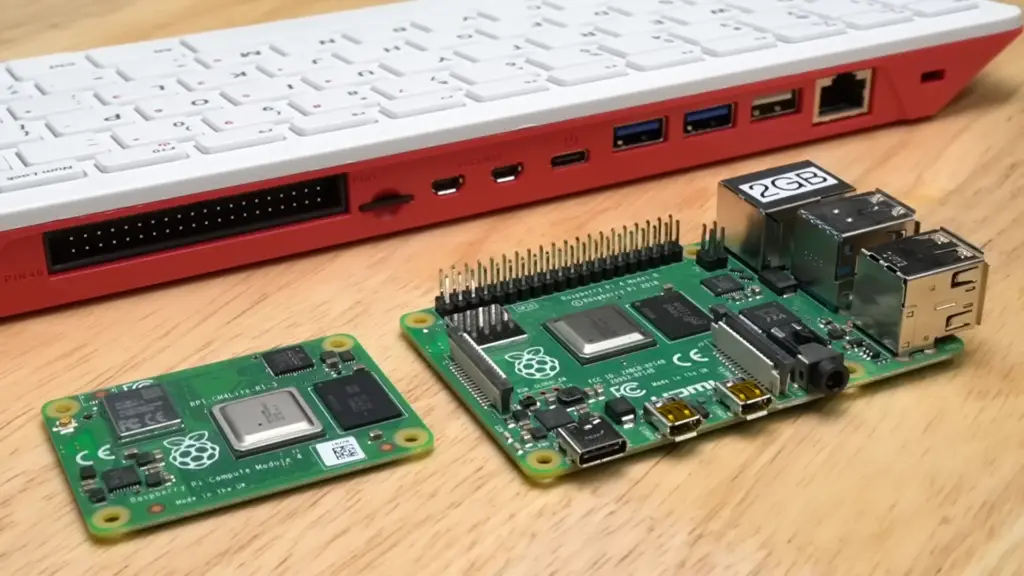
Install 64-bit OS On Raspberry Pi 4:
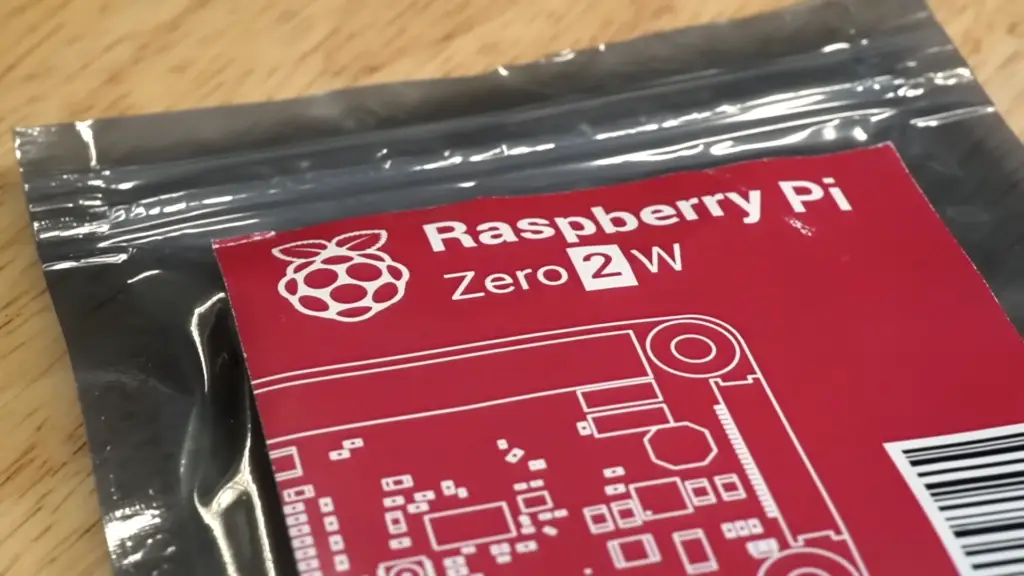
Raspberry Pi Zero 2
Before diving into the installation process, let’s take a moment to acknowledge the latest addition to the Raspberry Pi family – the Raspberry Pi Zero 2. This compact yet powerful device brings enhanced performance and connectivity options, making it an excellent choice for various projects. Although this article focuses on the Raspberry Pi 4, many of the concepts discussed here are applicable to the Raspberry Pi Zero 2 as well.
Bullseye
The latest release of the Raspberry Pi OS is named “Bullseye”, signifying the center of attention and precision. This release brings a wealth of enhancements and optimizations, and one of its key features is the support for 64-bit architecture. This means that both Raspberry Pi 4 and Raspberry Pi Zero 2 can harness the power of a 64-bit OS, enabling better multitasking, memory utilization, and performance.
To harness the true power of a 64-bit OS, we recommend using the latest release of the Raspberry Pi OS, known as “Bullseye”. This version is optimized for the Raspberry Pi 4 and offers improved performance and stability. You can download the Bullseye image from the official Raspberry Pi website or other trusted sources.
Flashing the Image
Once you have downloaded the Bullseye image, the next step is to flash it onto your Raspberry Pi 4’s microSD card. You can use tools like Etcher or Raspberry Pi Imager to accomplish this task. Connect your microSD card to your computer, select the Bullseye image file, and follow the instructions provided by the flashing tool. After the flashing process is complete, insert the microSD card back into your Raspberry Pi 4.
Memory Swapping
With a 64-bit OS, the Raspberry Pi gains the ability to access larger amounts of memory. However, optimizing memory usage is still crucial for peak performance. You can enable memory swapping to efficiently manage RAM and prevent slowdowns when memory usage is high. Swapping allows the system to use a portion of the microSD card as virtual memory, ensuring smooth operation even during resource-intensive tasks.
To optimize memory usage on your Raspberry Pi 4, enabling memory swapping can greatly enhance performance. Memory swapping allows the system to use the microSD card as virtual memory when the physical RAM is full.
To enable memory swapping, open the terminal on your Raspberry Pi 4 and enter the following command:
- sudo nano /etc/dphys-swapfile
Within the file, locate the line that starts with “CONF_SWAPSIZE” and change the value to an appropriate size, such as 2GB. Save the file and exit the editor. Finally, restart your Raspberry Pi 4 for the changes to take effect.
Overclocking
For those seeking an extra boost in performance, overclocking your Raspberry Pi 4 can provide significant gains. Overclocking involves increasing the clock speed of the CPU and GPU, allowing them to run at higher frequencies. However, please note that overclocking may generate more heat and potentially void your warranty, so proceed with caution [6].
To overclock your Raspberry Pi 4, open the terminal and enter the following command:
- sudo nano /boot/config.txt
Within the file, locate the section related to overclocking and modify the values accordingly. It is crucial to research the optimal settings for your specific Raspberry Pi 4 model to ensure stability and avoid overheating. Save the file and reboot your Raspberry Pi 4 to apply the overclocking settings.
USB Boot On Raspberry Pi 4: Tutorial
Step 1: Prepare the USB Device
Before you begin, ensure you have a compatible USB device. USB 3.0 drives or SSDs are recommended for better performance. Format the USB drive as FAT32 and create a bootable partition.
Step 2: Update Firmware
Make sure you have the latest firmware installed on your Raspberry Pi 4. Open a terminal and execute:
- sudo apt update
- sudo apt full-upgrade
Step 3: Enable USB Boot
Run the Raspberry Pi Configuration tool by typing:
- sudo raspi-config
Navigate to “Advanced Options” and select “Boot Order”.
Choose “USB Boot” and reboot your Raspberry Pi.
Step 4: Install Operating System
Install your preferred operating system onto the USB drive. Use the Raspberry Pi Imager or other imaging tools to write the OS image to the USB device.
Step 5: Boot from USB
Insert the USB drive into your Raspberry Pi and power it on. Your Raspberry Pi should now boot from the USB device.
Troubleshooting USB Boot Issues
Issue 1: Raspberry Pi Won’t Boot
Check if your USB device is properly formatted and contains a bootable partition. Ensure that you have enabled USB boot in the firmware settings.
Issue 2: Slow Boot Times
If boot times are slower than expected, ensure you use a USB 3.0 device. Some USB drives may have slower write speeds, affecting boot performance.
Issue 3: Incompatibility with OS
Make sure you are using a compatible operating system for USB boot. Certain OS versions may not fully support this feature.
Benchmarking USB Boot Performance
Benchmarking your Raspberry Pi’s USB boot performance can help you understand its capabilities and identify potential areas for optimization.
1) Using sysbench:
Install sysbench by running:
- sudo apt install sysbench
Run the CPU benchmark:
- sysbench cpu –time=10 –threads=4 run
2) Using dd:
Measure write speeds:
- sudo dd if=/dev/zero of=/tmp/testfile bs=1M count=1024 conv=fdatasync
Measure read speeds:
- sudo dd if=/tmp/testfile of=/dev/null bs=1M count=1024

The Significance of Boot Order
Run x64 Software On a Raspberry Pi Using Box64:
1) Recommended Equipment
Before diving into the technical steps, ensure you have the following equipment ready:
- Raspberry Pi (Raspberry Pi 3 or newer is recommended);
- MicroSD card (16 GB or higher is recommended);
- Keyboard and mouse;
- Display (HDMI-compatible);
- USB drive or external storage for compiling and storage space;
2) Preparing Raspberry Pi For Box64
Start by installing a fresh copy of Raspberry Pi OS (previously known as Raspbian) on your microSD card. You can use the Raspberry Pi Imager tool for this purpose.
Boot up your Raspberry Pi, connect it to the internet, and update the system using the following commands:
- sudo apt update
- sudo apt upgrade
3) Compiling Box64 On Raspberry Pi
Open a terminal window on your Raspberry Pi.
Install the necessary dependencies for compiling Box64:
- sudo apt install build-essential git cmake libsdl2-dev libasound2-dev libpulse-dev libudev-dev
Clone the Box64 repository from GitHub:
- git clone https://github.com/ptitSeb/box64.git
Navigate to the Box64 directory:
- cd box64
Create a build directory and enter it:
- mkdir build
- cd build
Generate the makefiles and compile Box64:
- cmake ..
- make
4) Running an x64 Application Using Box64 on Raspberry Pi
After successfully compiling Box64, you can now run x64 software on your Raspberry Pi.
Download an x64 Linux application in a .tar.gz or .tar.bz2 archive. For instance, you might choose a game or utility software.
Extract the contents of the archive to a directory of your choice. Navigate to that directory using the terminal.
Use Box64 to run the x64 application by invoking it with the Box64 interpreter. Replace “your_application” with the actual name of the executable:
- ~/path/to/box64 ./your_application

FAQ:
1. How to write the image file of a 64-bit Raspberry Pi OS?
To write the image file of a 64-bit Raspberry Pi OS, you can use software like “Raspberry Pi Imager” or “balenaEtcher”. Follow these steps:
- Download and install the chosen imaging software;
- Insert your microSD card into your computer’s card reader;
- Open the imaging software and select the 64-bit Raspberry Pi OS image file you downloaded;
- Choose the microSD card as the target drive;
- Click “Write” or “Flash” to start the process. Once done, safely eject the microSD card and insert it into your Raspberry Pi;
2. Can you run a 64-bit OS on Raspberry Pi?
You can run a 64-bit OS on Raspberry Pi, but it depends on the model. Raspberry Pi 3 and earlier models are limited to 32-bit OS due to their hardware. Raspberry Pi 4 models and newer support both 32-bit and 64-bit operating systems.
3. How do you change your OS from Raspberry Pi to 64-bit?
To change your OS from a 32-bit to a 64-bit version, you need to perform a fresh installation of the 64-bit OS. Back up your data, download the 64-bit OS image, write it to a microSD card, and then boot your Raspberry Pi from the new image.
4. What do you need for a 64-bit Raspberry Pi?
To use a 64-bit Raspberry Pi, you need a Raspberry Pi 4 model or newer, a microSD card (usually 16 GB or more), and a compatible power supply. Additionally, you’ll need the 64-bit version of the desired operating system.
5. Can Raspberry Pi 3 run 64-bit?
No, Raspberry Pi 3 and earlier models are not capable of running a 64-bit OS due to their hardware limitations.
6. How much RAM does Raspberry Pi OS 64-bit use?
The RAM usage of a 64-bit Raspberry Pi OS can vary based on factors such as running applications and services. However, it generally uses around 400-600 MB of RAM at idle.
7. Can you install any OS on Raspberry Pi?
Raspberry Pi supports a variety of operating systems, but not all OSes are compatible with its ARM architecture. You need to choose an OS specifically compiled for Raspberry Pi’s hardware.
8. Can Raspberry Pi run 64-bit Ubuntu?
Yes, Raspberry Pi can run a 64-bit version of Ubuntu. There are official Ubuntu images available for Raspberry Pi 4 models and newer.
9. Is Raspberry Pi 4 64-bit?
Yes, Raspberry Pi 4 models are equipped with a 64-bit ARM Cortex-A72 processor and can run both 32-bit and 64-bit operating systems.
10. Can Raspberry Pi run Android?
Yes, Raspberry Pi can run Android. There are community-supported Android versions available for Raspberry Pi, though they might have limitations compared to other operating systems.
11. Does 32-bit run slower than 64-bit?
Generally, 64-bit operating systems can offer better performance and access to more memory, but the difference in speed might not always be significant for all tasks.
12. Is 32-bit x86?
Yes, 32-bit architecture is often referred to as x86 architecture, while 64-bit is referred to as x86-64 or AMD64.
13. Is Raspberry Pi ARM64 or x64?
Raspberry Pi uses ARM architecture. While ARM64 is a 64-bit version of the ARM architecture, x64 (also known as x86-64 or AMD64) refers to the 64-bit x86 architecture.
14. Is Raspberry Pi 4 ARMv7 or ARMv8?
Raspberry Pi 4 uses ARMv8 architecture, which includes support for both 32-bit and 64-bit instruction sets.
15. Is it possible to run a 64-bit OS on all Raspberry Pi models?
No, it is not possible to run a 64-bit OS on all Raspberry Pi models. Only Raspberry Pi 4 models and newer are capable of running a 64-bit OS due to their hardware architecture.
16. What are the benefits of running a 64-bit OS on Raspberry Pi?
Running a 64-bit OS on Raspberry Pi provides access to larger amounts of RAM, improved performance for certain applications, better compatibility with modern software, and enhanced multitasking capabilities.
17. Can I upgrade my existing 32-bit OS installation to a 64-bit OS on Raspberry Pi?
No, upgrading from a 32-bit OS to a 64-bit OS requires a fresh installation. You will need to back up your data, write the 64-bit OS image to a microSD card, and perform a clean installation.
18. Where can I find 64-bit OS images for Raspberry Pi?
Official 64-bit OS images for Raspberry Pi can be found on the Raspberry Pi website or on the official repositories of specific OS distributions that support the Raspberry Pi.
19. Are there any compatibility issues when running 32-bit software on a 64-bit Raspberry Pi OS?
Generally, 32-bit software can run on a 64-bit OS through compatibility layers. However, certain software or drivers may not work seamlessly, so it’s advisable to check compatibility before installation.
20. How do I know if a software package is available for both 32-bit and 64-bit on Raspberry Pi OS?
You can check the software repositories for both versions. Many distributions provide packages for both architectures, and you can choose the appropriate one based on your OS.
21. Are there any performance drawbacks to running a 64-bit OS on Raspberry Pi?
While a 64-bit OS can offer improved performance in many scenarios, it might not always be noticeable for lightweight tasks. In some cases, 32-bit software might perform slightly better due to reduced memory overhead.
22. What are some popular 64-bit OS options available for Raspberry Pi?
Some popular 64-bit OS options for Raspberry Pi include Raspberry Pi OS 64-bit (formerly Raspbian), Ubuntu Server, Fedora, and openSUSE.
23. Can I run a 64-bit OS alongside a 32-bit OS on the same Raspberry Pi?
It is not possible to run both 32-bit and 64-bit OSes simultaneously on the same Raspberry Pi. You need to choose one OS version to install.
24. Do I need to make any changes to my code to run it on a 64-bit OS on Raspberry Pi?
Generally, most software should work seamlessly on both 32-bit and 64-bit OSes. However, if your software is hardware-dependent or interacts with low-level components, you might need to make some adjustments.
25. Are there any limitations to running a 64-bit OS on Raspberry Pi compared to a standard desktop PC?
While a 64-bit OS on Raspberry Pi offers increased capabilities, it’s important to note that the Raspberry Pi’s hardware is still limited compared to a standard desktop PC. This includes factors such as CPU power, memory, and graphical performance.
26. Is there a specific setup required for running 64-bit applications on a 64-bit Raspberry Pi OS?
In most cases, running 64-bit applications on a 64-bit Raspberry Pi OS is straightforward and does not require any additional setup. The operating system handles the compatibility and execution of the applications.
27. How often should I expect updates and improvements for 64-bit Raspberry Pi OS?
Updates and improvements for the 64-bit Raspberry Pi OS are typically released alongside regular updates for the Raspberry Pi ecosystem. The frequency of updates may vary depending on the distribution you choose to use.
28. Is there any way to revert to a 32-bit OS if I encounter compatibility issues on a 64-bit OS?
Yes, you can revert to a 32-bit OS by performing a clean installation of the 32-bit image. Remember to back up your data before making any changes to your operating system.
29. Do popular programming languages and development tools support 64-bit architecture on Raspberry Pi?
Yes, many popular programming languages and development tools support 64-bit architecture on Raspberry Pi, including Python, C++, Java, and more. Always check the official documentation for compatibility details.
30. What resources are available for troubleshooting compatibility issues when running 64-bit applications on Raspberry Pi?
If you encounter compatibility issues when running 64-bit applications, you can refer to community forums, online resources, and official documentation for guidance. Other users may have experienced similar issues and found solutions to address them.
Useful Video: It’s official: Raspberry Pi goes 64-bit
References
- https://linuxhint.com/install-64-bit-version-raspberry-pi-os/
- https://www.makeuseof.com/install-64-bit-version-of-raspberry-pi-os/
- https://qengineering.eu/install-raspberry-64-os.html
- https://pimylifeup.com/raspberry-pi-x64/
- https://www.raspberrypi.com/news/raspberry-pi-os-64-bit/
- https://www.zdnet.com/article/raspberry-pi-new-glorious-64-bit-operating-system-is-available-to-install/