
In this era of interconnectedness, the ability to build your own Raspberry Pi web server brings forth a wealth of possibilities, from hosting personal websites and applications to learning the intricacies of server management. With its affordability, versatility, and vibrant community driving its development, the Raspberry Pi has emerged as a favorite among tech enthusiasts and DIY aficionados seeking to embark on the rewarding journey of crafting their own web hosting solution.
This comprehensive guide will delve into the intricate steps of setting up a Raspberry Pi web server, navigating through essential configurations, choosing appropriate software stacks, and optimizing performance. By the end of this tutorial, you’ll be equipped with the knowledge and skills to not only establish your own web presence but also gain a deeper understanding of the fundamental workings of web servers.
So, whether you’re a curious beginner or a seasoned tinkerer, join us as we embark on a voyage of discovery, unleashing the potential of the Raspberry Pi to create your very own web hosting powerhouse.
Should You Set Up Your Raspberry Pi as a Web Server?
Benefits:
- Cost-Efficiency: One of the primary advantages of using a Raspberry Pi as a web server is its affordability. The initial investment is significantly lower compared to renting a traditional web hosting service. This makes it an attractive option for hobbyists, small businesses, or individuals looking to host a personal website without breaking the bank;
- Learning Opportunity: Setting up a web server on a Raspberry Pi provides a valuable learning experience. It allows you to delve into the intricacies of web hosting, server management, and networking. This hands-on approach can enhance your technical skills and deepen your understanding of how the Internet works;
- Customization and Control: When you manage your own web server, you have complete control over its configuration. You can install the software and services you need, tailor security measures to your requirements, and have the flexibility to experiment with different setups [1];
Considerations:
- Performance Limitations: While the Raspberry Pi is capable of running a web server, it does have limitations in terms of processing power, memory, and storage. This can impact the performance and responsiveness of your website, particularly if you expect high-traffic or resource-intensive applications;
- Reliability and Uptime: Raspberry Pi hardware may not be as reliable as commercial hosting solutions. Factors like power outages or SD card failures could lead to downtime. If hosting a mission-critical website or service, you’ll need to implement robust backup and redundancy strategies;
- Technical Expertise: Setting up and maintaining a web server on a Raspberry Pi requires technical knowledge. You’ll need to be comfortable with Linux, server administration, and troubleshooting. If you’re a beginner, there might be a learning curve, and you’ll likely encounter challenges along the way;
- Security Considerations: Security is a critical aspect of web hosting. Running a server on a Raspberry Pi exposes it to potential vulnerabilities if not properly secured. Regular updates, strong passwords, firewall configuration, and other security practices are essential to safeguard your server and data;
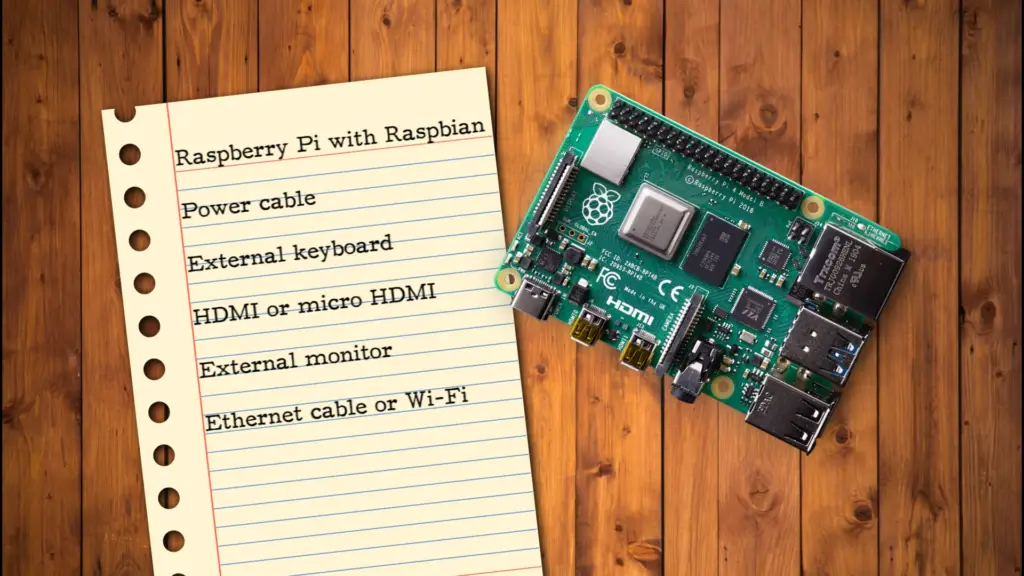
What You Need to Set Up Your Raspberry Pi As a Server:
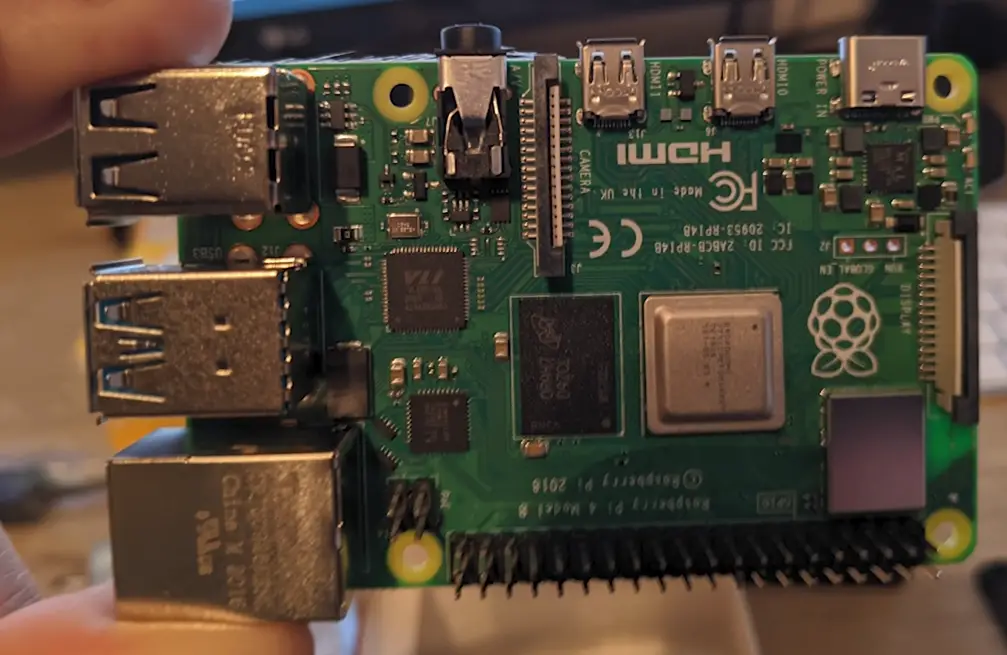
Raspberry Pi: The Heart of Your Server
At the heart of your server lies the Raspberry Pi itself. This credit-card-sized computer is the foundation upon which you’ll build your server setup. Choose a Raspberry Pi model that suits your requirements, considering factors like processing power, memory, and connectivity options. The newer models tend to offer improved performance and capabilities, making them ideal candidates for server setups.
SD Card or SSD: Storage Matters
Storage is a vital component of any server setup. For the Raspberry Pi, you have two main options: SD cards or SSDs (Solid State Drives). An SD card is the more traditional choice, providing an affordable and convenient way to store your server’s operating system and data. On the other hand, an SSD offers faster read and write speeds, potentially enhancing the performance of your server. Whichever option you choose, ensure you have sufficient storage capacity to accommodate your server’s needs.
Ethernet Cable: Wired Connectivity for Stability
While the Raspberry Pi supports wireless connections, using an Ethernet cable for your server setup is highly recommended. A wired connection offers more stability and reliability, which is crucial for a server that needs to be accessible at all times. Plug in an Ethernet cable to your Raspberry Pi and your network router to establish a strong and consistent internet connection.

Static IP Address: A Fixed Point of Access
A static IP address is essential for your Raspberry Pi server. Unlike a dynamic IP address that changes periodically, a static IP provides a fixed point of access, making it easier to connect to your server consistently. You can configure a static IP address within your router’s settings or directly on your Raspberry Pi. This ensures that your server remains reachable even if your network configuration changes.
Domain Name: Adding a Human Touch
While optional, associating a domain name with your Raspberry Pi server adds a professional and user-friendly touch to your setup. A domain name makes it easier for users to access your server without remembering complex IP addresses. You can register a domain name through various domain registrars and configure it to point to your Raspberry Pi’s static IP address. This step is particularly valuable if you plan to host a website or other online services.
Another PC: Initial Setup and Configuration
To kick-start your Raspberry Pi server setup, you’ll need another PC or laptop. This computer will be used to configure your Raspberry Pi, install the necessary software, and perform initial setup steps. You’ll create a bootable microSD card or SSD with the appropriate operating system and connect to your Raspberry Pi using terminal software. This initial setup is critical for preparing your Raspberry Pi for its role as a server [2].
How to Install Raspberry Pi OS for a Server?
1) Power Up the Raspberry Pi and Find It on Your Local Network:
- Assemble Your Raspberry Pi: Start by connecting your Raspberry Pi to a monitor, keyboard, and mouse. Insert the microSD card or SSD with the Raspberry Pi OS image into the appropriate slot;
- Power On: Connect the power supply to your Raspberry Pi. It will boot up, and you’ll see the Raspberry Pi OS desktop on the monitor;
- Find the IP Address: To connect to your Raspberry Pi over the network, you’ll need to find its IP address. Open the terminal on your Raspberry Pi or access your router’s admin panel to locate the IP address assigned to your Raspberry Pi;
2) Connect to Your Raspberry Pi Over SSH:
- Enable SSH: By default, SSH (Secure Shell) might be disabled on your Raspberry Pi OS. To enable it, go to the terminal and type sudo raspi-config. Navigate to “Interfacing Options” and enable SSH;
- SSH from Another PC: On your PC, open the terminal or command prompt. Use the command ssh pi@ (replace with your Raspberry Pi’s IP address). You’ll be prompted to enter the password (default is ‘raspberry’);
3) Port Forwarding to Expose Your Raspberry Pi to the Internet”:
- Access Your Router Settings: To make your Raspberry Pi accessible from the internet, you’ll need to configure port forwarding on your router. Log in to your router’s admin panel using a web browser and locate the port forwarding settings;
- Configure Port Forwarding: Forward external port 80 (HTTP) or 443 (HTTPS) to the internal IP address of your Raspberry Pi. This allows incoming requests to reach your server;
4) Installing Essential Server Software for Your Raspberry Pi
Update and Upgrade. Run the following commands to ensure your system is up to date.
sudo apt update
sudo apt upgrade
5) Web Server (Apache or Nginx)
Choose between Apache or Nginx as your web server. Install your chosen server using one of the following commands.
For Apache:
- sudo apt install apache2
For Nginx:
- sudo apt install nginx
6) Database Server (MySQL or PostgreSQL): Install a database server for your applications
For MySQL:
- sudo apt install mysql-server
For PostgreSQL:
- sudo apt install postgresql
7) Raspberry Pi Is Ready to Act as a Server
Your Raspberry Pi is now set up to function as a server. You’ve installed the necessary software, configured remote access, and exposed your server to the internet through port forwarding [3].
Here are some additional steps you might want to consider:
- Security Measures: Secure your server by changing default passwords, setting up a firewall, and implementing security best practices;
- Install SSL Certificate: To secure your server’s communications, consider installing an SSL certificate using Let’s Encrypt;
- Upload Website or Application: Transfer your website or application files to the appropriate directory on your Raspberry Pi. For Apache, the default web root is /var/www/html, and for Nginx, it’s /var/www/html;
- Domain Configuration: If you have a domain name, configure it to point to your Raspberry Pi’s IP address. This will make it easier to access your server using a human-readable URL;
How to Set Up a Raspberry Pi Web Server: Tips
1. Choose the Right Raspberry Pi Model
The Raspberry Pi comes in various models, each with different specifications. Before embarking on your web server project, consider the requirements of your intended use. If you anticipate high traffic or resource-intensive tasks, opt for a more powerful model with additional RAM and processing capabilities. For basic web hosting, a less powerful model might suffice.
2. Select the Ideal Operating System
While Raspberry Pi OS (formerly Raspbian) is the default choice, other Linux distributions like Ubuntu Server and Debian can also be used. Research and choose an operating system that aligns with your familiarity and server needs. Additionally, explore lightweight server-focused distributions like NixOS or DietPi for optimized performance.
3. Opt for SSD Storage
While microSD cards are commonly used for Raspberry Pi storage, consider upgrading to a Solid State Drive (SSD) for improved performance and reliability. SSDs offer faster read/write speeds and are less prone to corruption over time, making them a suitable choice for hosting.
4. Static IP Address and Dynamic DNS
Assign a static IP address to your Raspberry Pi on your local network. This ensures consistent access, especially if you’re planning to connect to your server remotely. Additionally, consider using Dynamic DNS (DDNS) services to associate a domain name with your dynamic public IP address, allowing you to access your server with a user-friendly URL.
5. Secure Your Server
Security should be a top priority. Change the default passwords for both the Raspberry Pi user and the root account. Disable unnecessary services and ports, and regularly update your software to patch security vulnerabilities. Consider configuring a firewall and implementing intrusion detection systems (IDS) to monitor and prevent unauthorized access attempts.
6. Implement Regular Backups
Data loss can be devastating. Set up automated backups of your server’s data and configurations. This can be achieved using tools like rsync or cloud-based backup services. Having a reliable backup strategy ensures that your hard work and valuable data are protected.
7. Install a Web Server Software
Choose between Apache or Nginx as your web server software. Apache is known for its user-friendliness and flexibility, while Nginx is renowned for its efficient resource handling. Research each option to determine which best suits your needs and technical expertise [4].
8. Database Management
If your web server relies on a database, consider using lightweight databases like SQLite for simple applications or MySQL/PostgreSQL for more complex setups. Properly configure user access and permissions to ensure the security of your data.
9. Monitor and Optimize Performance
Keep an eye on your server’s performance using monitoring tools like Prometheus or Grafana. These tools allow you to track resource usage, identify bottlenecks, and optimize your server for better efficiency.
10. Regular Maintenance
Maintain your Raspberry Pi web server by routinely updating software, monitoring logs for errors or anomalies, and performing periodic security audits. Staying proactive with maintenance ensures the longevity and reliability of your server.
Changing Your Server’s Host Name
Why Change the Host Name?
Changing the hostname of your server serves both functional and aesthetic purposes. It can make it easier to identify your server on the network, especially if you have multiple devices. Additionally, if you’re hosting websites or services, a custom hostname can provide a more professional and user-friendly experience for your visitors.

Steps to Change the Host Name:
- Log In to Your Server: Start by logging in to your server via SSH or directly if you have physical access;
- Edit the Host Name File: Open the terminal and enter the following command to edit the hostname file: sudo nano /etc/hostname. Replace “nano” with your preferred text editor if you’re using something else;
- Update the Host Name: In the text editor, you’ll see your current hostname. Replace it with your desired new hostname. Make sure the new name adheres to naming conventions and doesn’t contain spaces or special characters;
- Save and Exit: After updating the hostname, save the file and exit the text editor;
- Update the Hosts File: Now, you need to update the hosts’ file. Enter the following command to edit the file: sudo nano /etc/hosts. Find the line that includes your old hostname and update it with the new hostname. It should look like this: 127.0.1.1 your-new-host-name;
- Apply the Changes: Restart your server or enter the following command to apply the changes without a restart: sudo hostnamectl set-hostname your-new-host-name;
- Reconnect to the Server: If you’re using SSH, disconnect and reconnect to your server using the new hostname. You should now see the updated hostname in your terminal prompt;
- Note: Keep in mind that changing the hostname might affect services and applications that rely on the hostname to function correctly. After changing the hostname, you may need to update the configuration files for these services to ensure they continue working as expected [5].
How to Set Up FTP on Your Pi Web Server?
Step 1: Update and Upgrade
Before you begin, make sure your Raspberry Pi is up to date. Open the terminal and enter the following commands:
- sudo apt update
- sudo apt upgrade
Step 2: Install vsftpd
Vsftpd (Very Secure FTP Daemon) is a popular and secure FTP server software for Linux. Install it by entering the following command:
- sudo apt install vsftpd
Step 3: Configure vsftpd
Once vsftpd is installed, you need to configure it. Open the configuration file using a text editor:
- sudo nano /etc/vsftpd.conf
Inside the configuration file:
Uncomment or add the following lines to enable anonymous FTP access:
- anonymous_enable=YES
- local_enable=YES
- write_enable=YES
If you want to allow local users to access FTP, add the following line:
- local_enable=YES
Save the file and exit the text editor.
Step 4: Restart vsftpd
After making changes to the configuration, restart the vsftpd service:
- sudo systemctl restart vsftpd
Step 5: Create a Directory for FTP
Create a directory where you’ll store the FTP files. For example, let’s create a directory named “ftp”:
- sudo mkdir /var/ftp
- sudo chmod 777 /var/ftp
Step 6: Set Up User Accounts
To allow users to access the FTP server, you can either use existing users on your Raspberry Pi or create dedicated FTP users. Here’s how to create a dedicated FTP user:
- sudo adduser ftpuser
Follow the prompts to set up a password and other user details.
Step 7: Assign the User to the FTP Directory
Assign the user you created (e.g., “ftpuser”) to the FTP directory:
- sudo usermod -d /var/ftp ftpuser
Step 8: Test the FTP Connection
You can now test the FTP connection using an FTP client like FileZilla or the command line. Use the IP address or hostname of your Raspberry Pi as the server, and enter the FTP user credentials you created.
Step 9: Configure Firewall
If you’re using a firewall, you need to allow FTP traffic. Run the following commands to allow FTP connections:
- sudo ufw allow 20/tcp
- sudo ufw allow 21/tcp
Step 10: Secure FTP (Optional)
Consider securing your FTP server by configuring it to use encryption. This involves setting up FTP over TLS/SSL. While this step is optional, it’s highly recommended for better security [6].

Turning Your Raspberry Pi Into a Personal Web Server:
Initial Configuration: Getting Started
Before diving into the web server setup, it’s crucial to perform some initial configuration steps:
- Choose the Right Raspberry Pi Model: Depending on your server’s intended use and traffic, select an appropriate Raspberry Pi model with sufficient processing power and memory;
- Install Raspberry Pi OS: Download and install the latest version of Raspberry Pi OS onto a microSD card or SSD. Follow the official documentation for detailed instructions;
SSH Set Up: Remote Access for Management
Setting up Secure Shell (SSH) allows you to remotely manage your Raspberry Pi:
- Boot Up Your Raspberry Pi: Insert the microSD card or connect the SSD to your Raspberry Pi and power it on;
- Enable SSH: Access the Raspberry Pi configuration menu by entering sudo raspi-config in the terminal. Navigate to “Interfacing Options” and enable SSH;
- Retrieve IP Address: Find the IP address of your Raspberry Pi on your local network using the terminal command hostname –I;
- SSH Connection: From another device on the same network, open a terminal and use ssh pi@ to establish an SSH connection to your Raspberry Pi. Enter the password when prompted (default is ‘raspberry’);
Installing Apache: Setting Up the Web Server
Apache is a popular and robust web server software that will allow you to host your websites. Install Apache with the following commands:
- Update and Upgrade: Before installing any software, update your package list with sudo apt update and upgrade installed packages with sudo apt upgrade;
- Install Apache: Install Apache with the command sudo apt install apache2;
- Start and Enable Apache: After installation, start Apache with sudo systemctl start apache2, and enable it to start on boot with sudo systemctl enable apache2;
- Verify Installation: Open a web browser and enter your Raspberry Pi’s IP address. You should see the default Apache welcome page, confirming that Apache is successfully installed;
Install MySQL: Setting Up the Database
MySQL is a popular relational database management system. Install and configure MySQL with the following steps:
- Install MySQL Server: Use the command sudo apt install mysql-server to install MySQL;
- Secure MySQL Installation: Run the security script with sudo mysql_secure_installation to set a root password and perform other security-related configurations;
Install FTP: Enabling File Transfer
Install an FTP server with the following steps:
- Install vsftpd: Use the command sudo apt install vsftpd to install the Very Secure FTP Daemon (vsftpd);
- Configure vsftpd: Open the configuration file with sudo nano /etc/vsftpd.conf. Adjust settings according to your preferences, such as enabling anonymous access or limiting user permissions;
- Restart vsftpd: After configuration, restart the vsftpd service with sudo systemctl restart vsftpd;
Finalization: Putting It All Together
With Apache, MySQL, and FTP installed, it’s time to finalize your Raspberry Pi web server setup:
- Create Website Directories: Create directories to host your website files. By default, Apache’s web root is located at /var/www/html;
- Secure Your Server: Regularly update your Raspberry Pi OS, Apache, MySQL, and other software to ensure security patches are applied. Configure firewalls and consider using SSL certificates for encrypted connections;
- Backup and Monitoring: Implement regular backups of your server’s data and configurations. Set up monitoring tools to keep an eye on server performance and resource usage;
- Test Your Server: Upload a simple HTML file to your web root directory to test if your server is hosting properly. You can access it through a web browser using your Raspberry Pi’s IP address;
FAQ:
1. What is the easiest web server for Raspberry Pi?
The easiest web server for Raspberry Pi is Apache (also known as Apache HTTP Server). It is well-documented, widely used, and has extensive community support. The installation process is straightforward, making it a good choice for beginners.
2. How to make a Raspberry Pi data server?
To create a data server on your Raspberry Pi, you can use software like Samba or Nextcloud. Samba allows you to set up a network file server for sharing files with Windows systems. Nextcloud is a self-hosted cloud platform that provides file storage, synchronization, and collaboration features.
3. What is the best web server for Raspberry?
The “best” web server for Raspberry Pi depends on your specific requirements. Apache and Nginx are popular choices due to their performance and feature sets. Lighttpd is known for its low resource usage, making it suitable for lightweight setups. Each server has its strengths, so the best choice depends on your needs.
4. How much traffic can a Raspberry Pi web server handle?
The traffic a Raspberry Pi web server can handle depends on factors like the web server software, the complexity of the website/application, available resources (CPU, RAM), and network speed. While Raspberry Pi can handle moderate traffic, for high-traffic websites, a more powerful server might be necessary.
5. Is Raspberry Pi a good DNS server?
Yes, Raspberry Pi can function as a DNS server using software like BIND or Pi-hole. It can resolve domain names for local network devices and block ads and trackers if configured as a Pi-hole server.
6. Can you run SQL Server on Raspberry Pi?
Yes, you can run Microsoft SQL Server on Raspberry Pi using SQL Server on Linux. However, due to resource constraints, it might be more suitable for lightweight or development use rather than production.
7. Can a Raspberry Pi Zero host a website?
Yes, a Raspberry Pi Zero can host a basic website or web page, but its limited resources may affect performance, especially for high-traffic sites.
8. Can a Raspberry Pi Pico run a web server?
Raspberry Pi Pico is a microcontroller, not a full-fledged computer, so it’s not designed to run a traditional web server. However, it can communicate with a web server to exchange data.
9. Can you use a Raspberry Pi as a Plex server?
Yes, you can use a Raspberry Pi as a Plex server, but its performance might be limited, especially for transcoding high-definition videos.
10. Can Raspberry Pi Pico run Python?
Yes, Raspberry Pi Pico can run Python and is programmed using MicroPython or CircuitPython.
11. Can Raspberry Pi run Chrome?
The official Chrome browser is not available for Raspberry Pi due to compatibility issues. However, Chromium, an open-source version of Chrome, can be installed and used on Raspberry Pi.
12. Can Raspberry Pi run any Linux?
Raspberry Pi is compatible with various Linux distributions, including Raspberry Pi OS (formerly Raspbian), Ubuntu, Debian, Fedora, and more.
13. Can I own my own web server?
Yes, you can set up and own your own web server using Raspberry Pi or other hardware. This gives you control over hosting websites, applications, and services.
14. Can you host WordPress on Raspberry Pi?
Yes, you can host a WordPress website on Raspberry Pi using software like Apache or Nginx, PHP, and MySQL. However, it’s best suited for small-scale or personal use.
15. Which database is best for Raspberry Pi?
For Raspberry Pi, lightweight databases like SQLite or MySQL (MariaDB) are commonly used. SQLite is file-based, while MySQL offers more advanced features.
16. Can you install MySQL on Raspberry Pi?
Yes, you can install MySQL (or its open-source variant, MariaDB) on Raspberry Pi to create databases for various applications.
17. Can I install the Oracle database on Raspberry Pi?
Installing Oracle Database on a Raspberry Pi is complex and resource-intensive. It’s not a typical use case due to Oracle Database’s hardware and memory requirements.
18. Can a Raspberry Pi be a proxy server?
Yes, Raspberry Pi can be used as a proxy server using software like Squid. It can route and manage internet traffic for devices on your network.
19. How fast is a Raspberry Pi server?
The speed of a Raspberry Pi server depends on the model, its resources (CPU, RAM), and the tasks it’s performing. Raspberry Pi servers are suitable for lightweight to moderate workloads but might be slower than dedicated server hardware for demanding applications.
Remember that while Raspberry Pi is a versatile and affordable option for various server tasks, its performance might have limitations compared to dedicated server hardware. It’s important to choose the right software, optimize configurations, and consider your specific needs and use cases when setting up your Raspberry Pi server.
Useful Video: Turn your Raspberry Pi into a Web Server
References
- https://www.makeuseof.com/set-up-raspberry-pi-as-server/
- https://www.tomshardware.com/news/raspberry-pi-web-server,40174.html
- https://www.section.io/engineering-education/hosting-a-webserver-using-a-raspberry-pi/
- https://www.instructables.com/Turning-your-Raspberry-Pi-into-a-personal-web-serv/
- https://pimylifeup.com/raspberry-pi-web-server/
- https://linuxhint.com/make-raspberry-pi-web-server/