In the rapidly evolving landscape of modern technology, where software development and deployment have become increasingly dynamic and versatile, Docker has emerged as a transformative force. Docker’s ingenious containerization technology has revolutionized the way applications are packaged, shipped, and executed across diverse environments.
In this comprehensive guide, we embark on a journey to unlock the full potential of the Raspberry Pi by delving into the art of installing Docker. Whether you’re a curious tinkerer, an aspiring developer, or a seasoned IT enthusiast, this step-by-step exploration will equip you with the essential knowledge and skills to seamlessly set up Docker on your Raspberry Pi.
By the end of this article, you’ll not only grasp the fundamental concepts behind Docker but also wield the ability to harness its transformative capabilities to create, deploy, and manage applications like never before. So, let’s dive into the world of containerization, empower our Raspberry Pi, and embark on a voyage of innovation and efficiency through the installation of Docker.
What Is Docker?
At its essence, Docker is an open-source platform that employs containerization technology to streamline the process of developing, packaging, and distributing applications. Containerization, a lightweight form of virtualization, allows you to package an application and its dependencies into a single unit called a “container”. These containers are isolated from one another and from the underlying host system, ensuring consistency and reliability across various environments [1].

In a traditional software development workflow, developers often grapple with the notorious “it works on my machine” problem. Docker eliminates this issue by providing a consistent environment for developers, testers, and operations teams. With Docker, you can encapsulate an application, its runtime, libraries, and dependencies, ensuring that it runs consistently across different machines, from a developer’s laptop to a production server.
Key Benefits of Docker:
Portability and Consistency
Docker’s containerization allows applications to run reliably across diverse environments, from local development setups to cloud servers. This portability ensures that what you develop will behave the same way in production, reducing the chances of unexpected issues.
Efficiency and Resource Optimization
Containers share the host system’s OS kernel, making them lightweight and efficient. This efficiency leads to better resource utilization, enabling you to run more containers on the same hardware compared to traditional virtual machines.
Rapid Deployment
Docker enables rapid application deployment by packaging all required components into a container. This eliminates manual setup steps and reduces deployment times from hours to minutes.
Isolation and Security
Containers are isolated from each other and the host system, enhancing security by preventing potential conflicts between applications. Even if one container becomes compromised, it’s contained within its own environment.
Scalability
Docker simplifies scaling applications horizontally by creating and managing multiple containers. This elasticity is especially valuable for applications with varying demands.
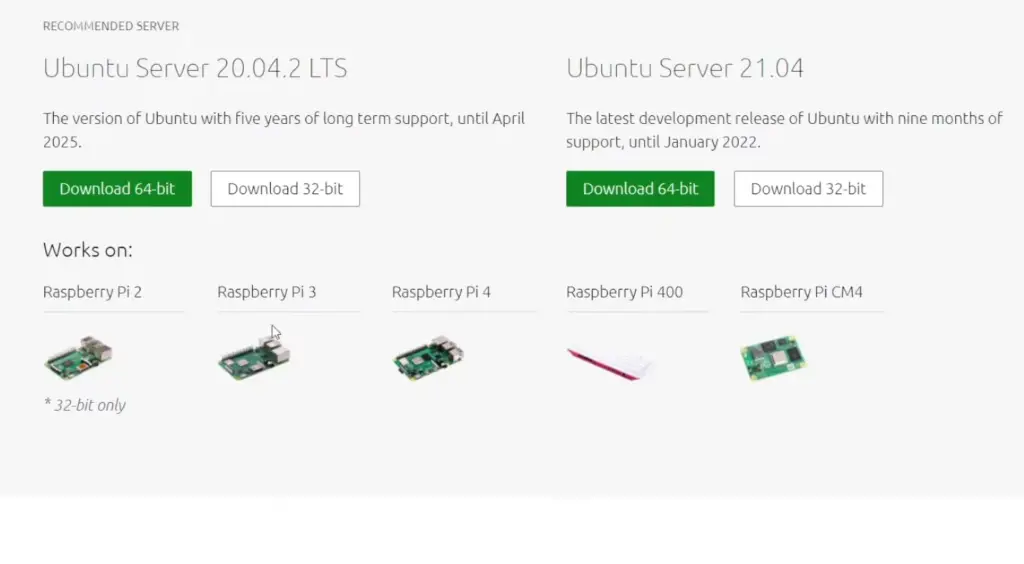
Why Docker on Raspberry Pi?
Using Docker on a Raspberry Pi offers several advantages and benefits, especially when it comes to managing and deploying applications on a small, resource-constrained device like the Raspberry Pi.
Here are some reasons why you might want to use Docker on a Raspberry Pi:
- Isolation and Dependency Management: Docker allows you to isolate applications and their dependencies in separate containers. This helps prevent conflicts between different software components and makes it easier to manage dependencies, reducing the risk of software conflicts or version mismatches;
- Portability: Docker containers encapsulate an application and its dependencies into a single package. This makes it easy to develop and test an application on one system and then deploy it to another, without worrying about differences in underlying system configurations;
- Resource Efficiency: Raspberry Pi devices have limited resources (CPU, RAM, storage), and Docker’s lightweight containerization allows you to run multiple isolated applications on a single Pi without a significant overhead;
- Easy Deployment and Updates: Docker simplifies the process of deploying and updating applications. You can easily package your application and its dependencies into a Docker image, which can be quickly deployed or updated on your Raspberry Pi without affecting other applications;
- Version Control: Docker images can be versioned, allowing you to roll back to a previous version if necessary. This can be especially useful for maintaining consistent behavior and diagnosing issues;
- Development and Testing: Docker containers provide a consistent environment for development and testing. Developers can work on their projects using the same environment that will be used in production, reducing the likelihood of “it works on my machine” issues;
- Service Isolation: If you’re running multiple services or applications on your Raspberry Pi, Docker containers can help isolate these services from one another. This enhances security and reduces the potential impact of a failure in one application on others;
- Community and Ecosystem: Docker has a large and active community, which means you can find a wide range of pre-built Docker images for various applications and services. This makes it easier to set up popular software on your Raspberry Pi;
- Scalability: While Raspberry Pi devices are not typically used for large-scale applications, Docker’s containerization principles can still be valuable for building scalable architectures. You can learn and apply containerization concepts that can later be useful in larger projects;
- Learning Opportunity: Using Docker on a Raspberry Pi can be a valuable learning experience. It exposes you to containerization concepts and practices that are widely used in modern software development and deployment [2];
The Raspberry Pi, a credit-card-sized computer, is a favorite among hobbyists, educators, and DIY enthusiasts due to its affordability and versatility. By installing Docker on your Raspberry Pi, you can harness its potential as a micro-server for hosting web applications, experimenting with databases, running IoT projects, and much more – all while maintaining a lightweight and resource-efficient setup.
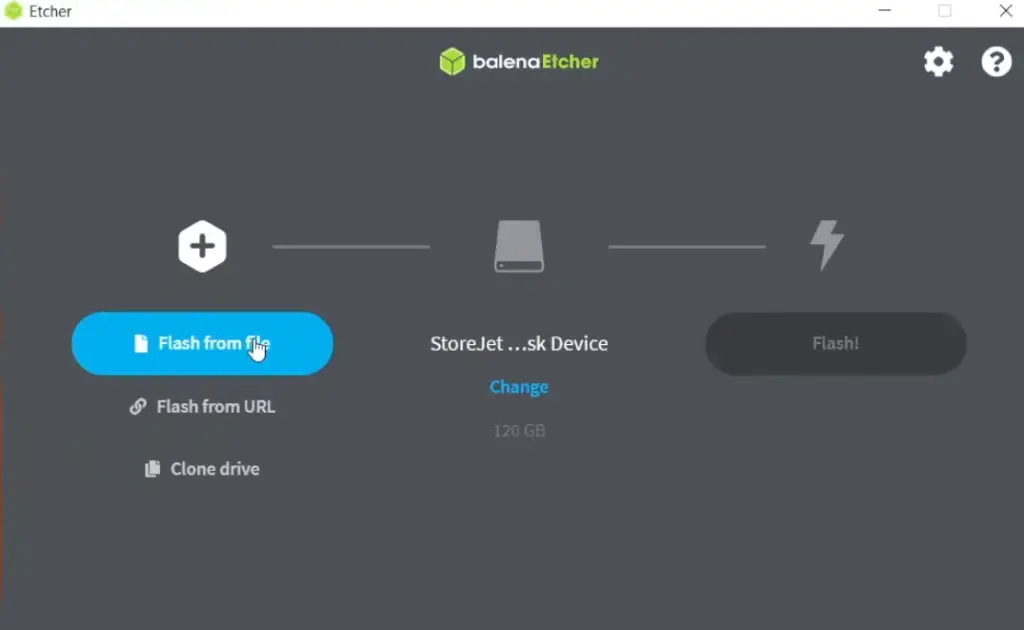
How To Install Docker On Raspberry Pi?
Prerequisites
Before diving into the installation process, ensure you have the following prerequisites:
- A Raspberry Pi (any model should work, but newer models are recommended for better performance);
- A microSD card (8GB or larger) with an operating system installed;
- A stable internet connection;
- Basic knowledge of the Linux command line;
Step 1: Install an Operating System
If you haven’t already, install an operating system on your Raspberry Pi. Raspberry Pi OS (formerly Raspbian) is a popular choice and can be downloaded from the official Raspberry Pi website. Follow the installation instructions provided for your chosen operating system.
Step 2: Do the System Updates
Once your Raspberry Pi is up and running, open a terminal and update the package lists and installed packages to ensure you have the latest versions:
- sudo apt update
- sudo apt upgrade -y
Step 3: Install Docker on Raspberry Pi
To install Docker on your Raspberry Pi, use the following command:
- curl -fsSL https://get.docker.com -o get-docker.sh
- sudo sh get-docker.sh
This script will download and install Docker on your system.
Step 4: Allow Docker to Be Used Without Being a Root
By default, Docker commands require root privileges. To run Docker commands as a regular user, add your user to the “docker” group:
- sudo usermod -aG docker $USER
Remember to log out and log back in for the group changes to take effect.
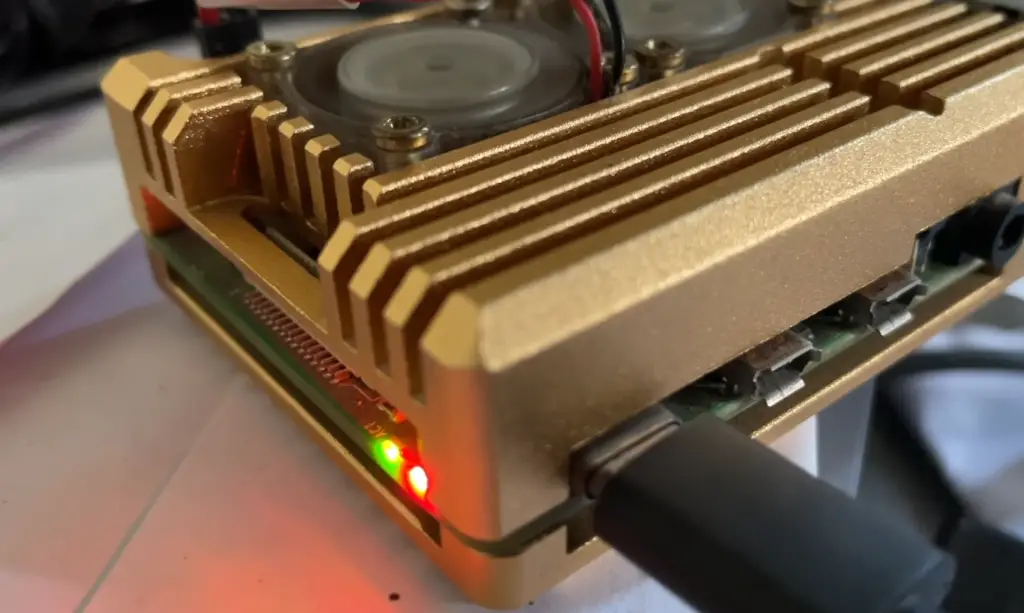
Step 5: Test Your Docker Setup
To verify that Docker is installed correctly, run a simple test by pulling and running the “hello-world” Docker image:
- docker run hello-world
If everything is set up correctly, you’ll see a message indicating that Docker is working.
Step 6: Install Docker Compose
Docker Compose is a tool for defining and running multi-container Docker applications. To install Docker Compose on your Raspberry Pi, follow these steps:
- sudo apt install -y python3-pip
- sudo pip3 install docker-compose
Step 7: Adding a Pi User Account to the Docker Group
To manage Docker containers without using “sudo”, add your user to the “docker” group [3]:
- sudo usermod -aG docker $USER
Step 8: Running a Web Server in a Docker Container
Let’s put your Docker knowledge to the test by running a basic web server using a Docker container. Create a directory for your web server project:
- mkdir web-server
- cd web-server
Inside this directory, create a file named “Dockerfile” (with no file extension) and add the following content:
- FROM nginx:alpine
- COPY index.html /usr/share/nginx/html
Create a file named “index.html” in the same directory and add some basic HTML content:
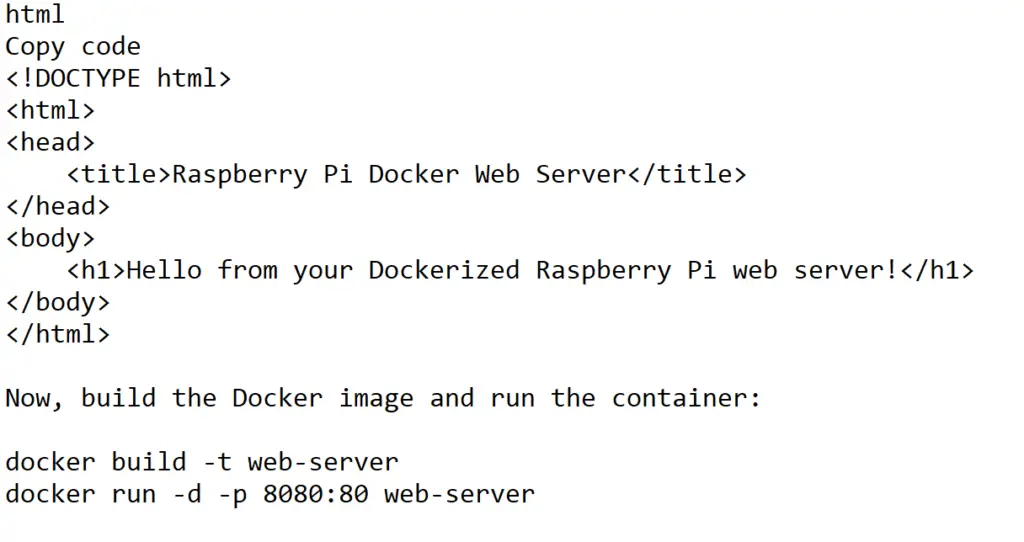
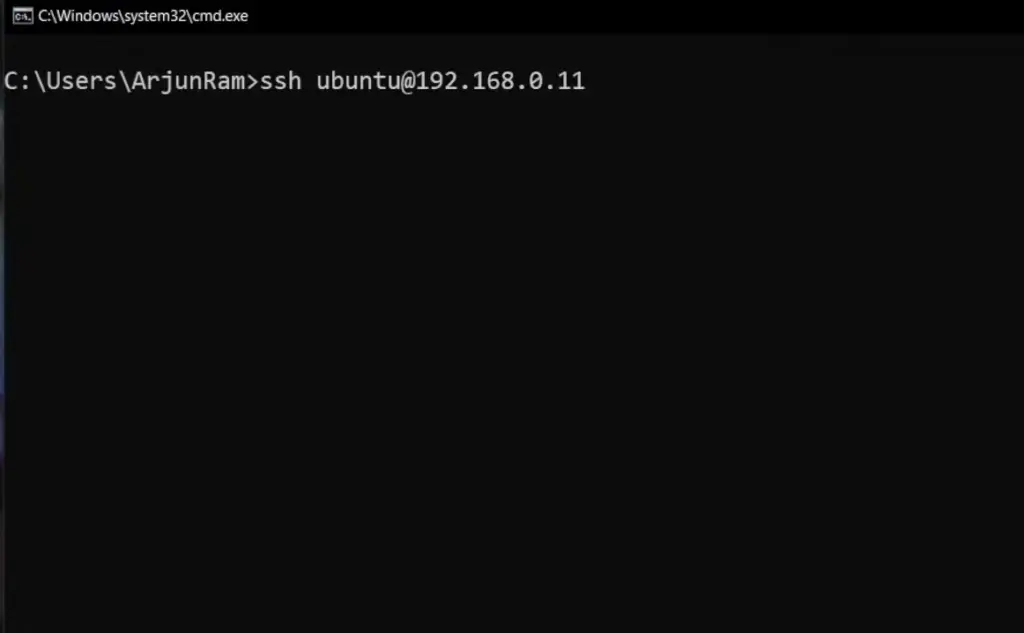
You’ve just created a Docker image that contains a basic web server and deployed it in a container. Access the web server by opening a web browser and navigating to http://raspberry-pi-ip:8080, replacing “raspberry-pi-ip” with your Raspberry Pi’s IP address.
How To Use Docker On Raspberry Pi?
Explore the Docker Hub
The Docker Hub is a treasure trove of pre-built container images that can significantly expedite your project development. To search for images, use the docker search command [4].
For example, to find an image for a popular web server like Nginx:
- docker search nginx
Pull and Run Containers
Once you find a suitable image, pull it from the Docker Hub and run it in a container. For instance, to run an Nginx web server:
- docker run -d -p 80:80 nginx
This command pulls the Nginx image, starts a container in the background, and maps port 80 from the container to port 80 on your Raspberry Pi.
Manage Containers
You can view the list of running containers with:
- docker ps
To stop a container, use:
- docker stop
And to start a stopped container:
- docker start
Create Your Docker Images
Crafting your custom Docker images gives you full control over your application’s environment. To build an image from a Dockerfile in your project directory:
- docker build -t my-custom-image
Deploy Multi-Container Applications with Docker Compose
For more complex setups involving multiple containers, Docker Compose comes to the rescue. Create a docker-compose.yml file describing your services and their configurations, then deploy the entire stack with a single command:
- docker-compose up -d
Persist Data with Volumes
Containers are ephemeral, meaning data within them could be lost when they stop. To ensure data persistence, employ Docker volumes. For example, to create a named volume for a database [5]:
- docker volume create my-db-volume
Then, when running a container, mount the volume:
- docker run -v my-db-volume:/data/db my-database-image
Monitor and Manage Resources
Docker provides built-in tools for monitoring and managing resources. For instance, use the docker stats command to observe container resource usage:
- docker stats
Keep Up-to-Date
Regularly update your Docker images and containers to benefit from the latest security patches and features:
- docker pull
- docker stop
- docker rm
- docker run …
Docker Commands You Need To Know
Prerequisites:
Before we dive into the Docker command jungle, ensure you have Docker installed and running on your system. If not, refer to our previous guides on installing Docker for your specific environment.
1. docker run – Spinning Up Containers
The docker run command is your gateway to creating and starting containers from Docker images. It’s the most fundamental command and serves as the cornerstone of your containerization journey.
To run a basic container:
- docker run
To specify a container name:
- docker run –name
2. docker ps – Managing Containers
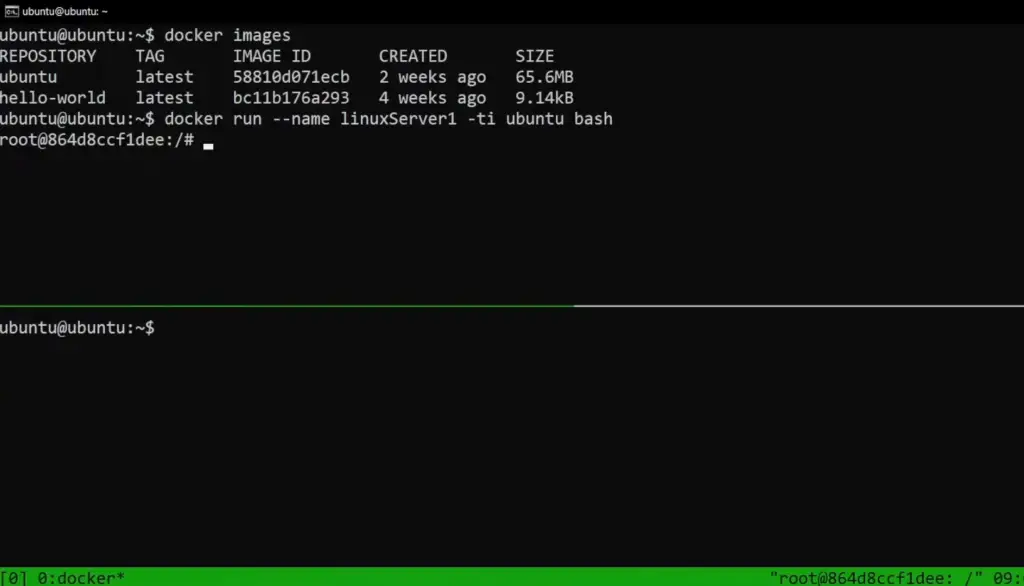
Use docker ps to list all running containers. By default, it displays the active containers, along with essential information like container ID, name, image used, and uptime [6].
To list all containers (including stopped ones):
- docker ps -a
3. docker stop and docker start – Controlling Containers
To stop a running container, use:
- docker stop
And to start a stopped container:
- docker start
4. docker images – Handling Images
The docker images command provides an overview of all the images available on your system. This includes the image name, version (tag), image ID, creation date, and size.
5. docker pull – Fetching Images
Before running a container, you might need to fetch its associated image from a repository like Docker Hub. The docker pull command achieves this:
- docker pull
6. docker build – Creating Custom Images
The docker build command is pivotal for crafting custom Docker images. It’s used in conjunction with a Dockerfile that contains instructions for building the image.
docker build -t
7. docker exec – Interacting with Containers
For executing commands inside a running container, docker exec comes to the rescue. This is immensely useful for debugging or administering a container.
docker exec -it
8. docker rm – Removing Containers
To clean up your system and remove stopped containers, use the docker rm command:
- docker rm
9. docker rmi – Removing Images
Similarly, to remove an image that you no longer need, use:
- docker rmi
10. docker-compose – Orchestrating Multi-Container Applications
docker-compose is a powerful tool for managing multi-container applications. It uses a YAML file (docker-compose.yml) to define and run multiple services, automating the creation and management of interconnected containers.
To start a multi-container application defined in a docker-compose.yml file:
- docker-compose up -d
11. docker logs – Viewing Container Logs
For troubleshooting and monitoring, the docker logs command lets you view the logs generated by a running container:
- docker logs
12. docker inspect – Digging Deeper
To obtain detailed information about a container or image, including configuration, networking, and volumes, use:
- docker inspect
13. docker network – Managing Networks
Docker provides networking capabilities to connect containers and services. The docker network command helps manage networks for your containers.
To create a new bridge network:
- docker network create
14. docker volume – Handling Volumes
Volumes are essential for persisting data generated by containers. The docker volume command enables the creation, management, and deletion of volumes.
To create a new volume:
- docker volume create
15. docker commit – Creating Images from Containers
In some cases, you might want to create a new image from a modified container. docker commit allows you to do just that [7]:
- docker commit
How To Upgrade Docker Engine:
Install From a Package:
One way to upgrade Docker Engine is by installing it from a package. This method is suitable for systems that support package managers like apt, yum, or dnf. Start by removing the existing Docker Engine installation using the appropriate package manager command. Then, update the package repository and install the latest version of Docker Engine using the package manager. Detailed instructions for different operating systems can be found in the official Docker documentation.
Upgrade Docker Engine
If you already have Docker Engine installed, upgrading to the latest version is straightforward:
- Begin by checking the currently installed version using the docker version command;
- Next, visit the Docker website or the official Docker documentation to find the latest release version;
- Once you have the version number, use the appropriate package manager command to upgrade Docker Engine;
- After the upgrade is complete, verify the installation by running the docker version again;
Install Using the Convenience Script
Install Pre-Releases
If you want to try out upcoming features or test the latest Docker Engine version, Docker provides pre-release versions that can be installed. Pre-releases might contain experimental features and should be used with caution in production environments. To install a pre-release version, follow the instructions provided in the official Docker documentation.
Remember to review the release notes to understand the changes and potential impacts before installing a pre-release version.
Upgrade Docker After Using the Convenience Script
If you initially installed Docker Engine using the convenience script, upgrading to a newer version is equally straightforward. Download the updated convenience script from the Docker GitHub repository, make it executable, and execute it with the necessary parameters. The script will handle the upgrade process, ensuring that your Docker Engine is up to date.
How To Uninstall Docker Engine From the Raspberry Pi?
Prerequisites:
Before you proceed with uninstalling Docker Engine, make sure you have access to your Raspberry Pi’s terminal and have administrative privileges.
Step 1: Stop and Remove Running Containers
Before uninstalling Docker Engine, it’s important to stop and remove any running containers to avoid data loss or conflicts. To list all running containers:
- docker ps
For each running container, use the docker stop command followed by the container’s name or ID:
- docker stop
Step 2: Remove Docker Images
Next, remove any Docker images that you no longer need. List all images using the command:
- docker images
To remove an image, use the docker rmi command followed by the image’s name or ID:
- docker rmi
Step 3: Uninstall Docker Engine
To uninstall Docker Engine from your Raspberry Pi, you can use the following commands:
- sudo apt-get purge docker-ce docker-ce-cli containerd.io
- sudo apt-get autoremove –purge docker-ce docker-ce-cli containerd.io
- sudo rm -rf /var/lib/docker
The first command will remove the Docker packages, while the second command will remove any residual dependencies. The third command deletes the Docker data directory, which includes images, containers, and volumes. Be cautious while using this command, as it irreversibly deletes your Docker data.
Step 4: Verify Uninstallation (Optional)
To confirm that Docker Engine has been successfully uninstalled, you can try running a Docker command. If Docker is uninstalled, you’ll receive an error message indicating that the command is not found [8].
FAQ:
1. How to install Docker and Docker Compose on Raspberry Pi?
To install Docker and Docker Compose on a Raspberry Pi, follow these steps:
Install Docker:
Open a terminal on your Raspberry Pi and run the following commands:
- curl -fsSL https://get.docker.com -o get-docker.sh
- sudo sh get-docker.sh
Install Docker Compose:
Run the following commands to install Docker Compose:
- sudo apt-get install libffi-dev libssl-dev
- sudo apt-get install -y python3 python3-pip
- sudo pip3 install docker-compose
2. Does Raspberry Pi have Docker?
Yes, Docker can be installed and used on Raspberry Pi devices. It allows you to create and manage containers for various applications and services.
3. How to install Docker install?
The installation process for Docker on Raspberry Pi involves using the terminal to download and install the Docker engine. Detailed steps are provided in the earlier response.
4. How to install Docker by command?
The command to install Docker on a Raspberry Pi is:
- curl -fsSL https://get.docker.com -o get-docker.sh
- sudo sh get-docker.sh
5. How to install Dockerfile in Linux?
A Dockerfile is a text file used to define the configuration of a Docker image. To create and use a Dockerfile on Linux, follow these steps:
- Create a new text file named Dockerfile;
- Open the Dockerfile in a text editor;
- Write the instructions to configure the image, such as installing packages, setting environment variables, and copying files;
- Save the Dockerfile;
- Use the docker build command to build an image from the Dockerfile: docker build -t image-name;
6. How to install Docker on Raspberry Pi 4?
Installing Docker on a Raspberry Pi 4 follows the same steps as for other Raspberry Pi models. Refer to the earlier response for detailed instructions.
7. Where is Docker stored on Raspberry Pi?
Docker stores its data, including images, containers, and volumes, in the /var/lib/docker directory on the Raspberry Pi.
8. Does Raspberry Pi use Python or C++?
Raspberry Pi can run both Python and C++ programming languages. Python is often used for its simplicity, while C++ is used for more performance-intensive applications.
9. How to use Docker step-by-step?
Using Docker involves creating and managing containers. A step-by-step guide for using Docker would be extensive, but you can refer to guides and tutorials available online to learn how to run containers, create Dockerfiles, and manage images.
10. How to add Docker to the Sudo group?
To add your user to the Docker group and allow Docker commands without using sudo, use this command:
- sudo usermod -aG docker $USER
11. Which OS can run Docker?
Docker can run on various operating systems, including Linux (Ubuntu, CentOS, etc.), macOS, and Windows.
12. What programming language is Docker?
Docker is not a programming language; it’s a platform for containerization and packaging applications. It primarily uses the Go programming language for its core components.
13. Is Docker better on Windows or Linux?
Docker is natively supported on Linux and integrates seamlessly with its ecosystem. While Docker can run on Windows through Docker Desktop, Linux is often considered the preferred platform due to its performance and compatibility.
14. Can you run Docker on a Raspberry Pi 3b?
Yes, you can run Docker on a Raspberry Pi 3B. Docker allows you to containerize applications and services on the Raspberry Pi platform.
15. How do I start Docker?
To start Docker, use the following command:
- sudo systemctl start docker
16. What is the fastest Raspberry Pi?
As of my knowledge cutoff date in September 2021, the Raspberry Pi 4 Model B is considered one of the fastest Raspberry Pi models available, featuring a quad-core ARM Cortex-A72 CPU and up to 8 GB of RAM.
17. Is Raspberry Pi good for programming?
Yes, Raspberry Pi is an excellent platform for programming. It supports various programming languages and can be used for learning, experimenting, and developing software projects.
18. Can I run Java on Raspberry Pi?
Yes, you can run Java on Raspberry Pi. Java applications and services can be developed and executed on the Raspberry Pi platform.
19. What is the difference between Docker image and container?
A Docker image is a lightweight, standalone, and executable software package that contains everything needed to run a piece of software, including the code, runtime, libraries, and system tools. A container is an instance of a Docker image that runs in isolation from the host system.
20. How to build the Docker image?
To build a Docker image, you need a Dockerfile that specifies the configuration of the image. Use the docker build command and specify the location of the Dockerfile:
- docker build -t image-name
21. How do I know if Docker is running?
To check if Docker is running, use the following command:
- sudo systemctl status docker
22. Which Linux to install for Docker?
Various Linux distributions are suitable for running Docker, including Ubuntu, CentOS, Debian, and more. Choose a distribution that aligns with your preferences and requirements.
23. How to install Docker via pip?
Docker is not typically installed using pip (Python package manager). It is usually installed using the appropriate package manager for your operating system, such as apt on Ubuntu or yum on CentOS.
24. How to install Docker libraries?
Docker itself doesn’t require additional libraries to be installed separately. Docker images can include any necessary libraries or dependencies needed for the software you intend to containerize.
25. How to install Docker in Linux offline?
To install Docker on a Linux system offline, you’ll need to download the Docker package and its dependencies on a connected machine, transfer them to the offline machine, and then install using the package manager (dpkg or rpm) along with the local package files.
26. How to enter Docker in Linux?
Docker is used through the command line interface. You can enter Docker commands in the terminal to manage containers, images, networks, and other Docker-related tasks.
27. How to install Docker in Linux manually?
To install Docker on Linux manually, you generally need to download the Docker package for your distribution, install its dependencies, and configure Docker to start on boot. Refer to the official Docker documentation for detailed manual installation instructions.
28. How to install Docker image in Ubuntu?
To install a Docker image in Ubuntu, you use the docker run command followed by the image name. For example, to run an Nginx web server:
- docker run -d -p 80:80 nginx
This command pulls the Nginx image if not already present and starts a container from it.
Useful Video: How to install Docker (and Portainer) on a RaspberryPi and run millions of apps on your RaspberryPi!
References
- https://www.simplilearn.com/tutorials/docker-tutorial/raspberry-pi-docker
- https://docs.docker.com/engine/install/raspbian/
- https://pimylifeup.com/raspberry-pi-docker/
- https://adamtheautomator.com/docker-on-raspberry-pi/
- https://codex.so/how-to-install-docker-to-raspberry-pi
- https://raspberrytips.com/docker-on-raspberry-pi/
- https://linuxhint.com/install_docker_raspberry_pi-2/
- https://jfrog.com/connect/post/install-docker-compose-on-raspberry-pi/





Leave a Reply