Understanding electrical circuits can be a challenging task for anyone, particularly when it comes to 3-way switches. But with the right information and an understanding of how they work, you can get them up and running with confidence in no time! In this blog post we’ll take a deep dive into the function of 3-Way Switches – exploring their inner workings, why they’re popularly used in home lighting systems and providing step-by-step instructions on how to install one correctly. We’ll also explore some safety tips when dealing with electricity so you can be certain that everything is safe before turning your power back on. So let’s dive in and really understand what goes into using a 3-way switch!
What Is a 3-Way Switch?
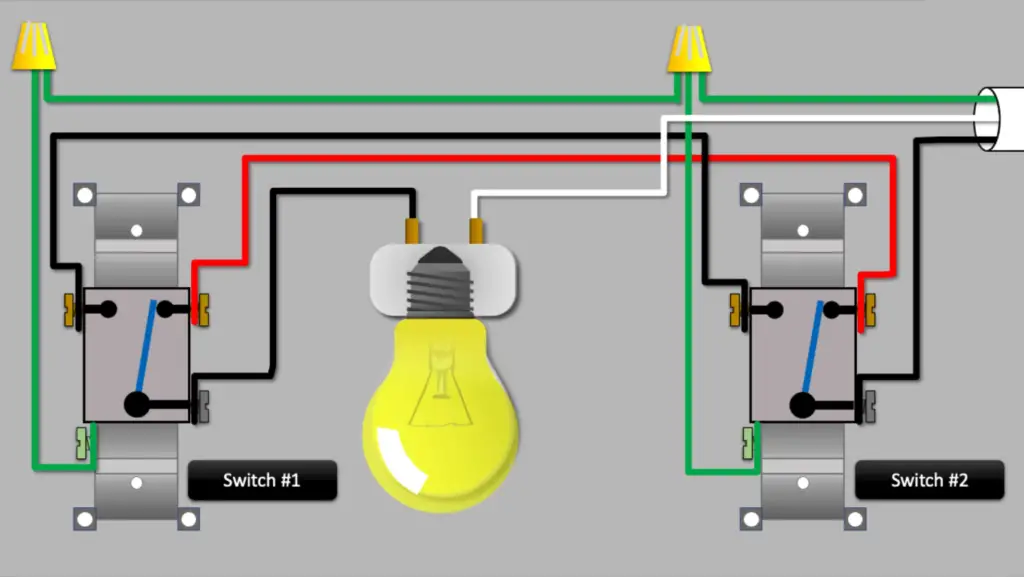
How Does a 3-Way Switch Work?
A 3-way switch is a type of light switch that enables you to operate a single light or device from two different locations. The 3-way switch is different from a typical single pole switch as it has three settings instead of two. These settings include On, Off, and Traveler. The traveler setting is used to connect two switches together so they both can turn the same fixture on and off.
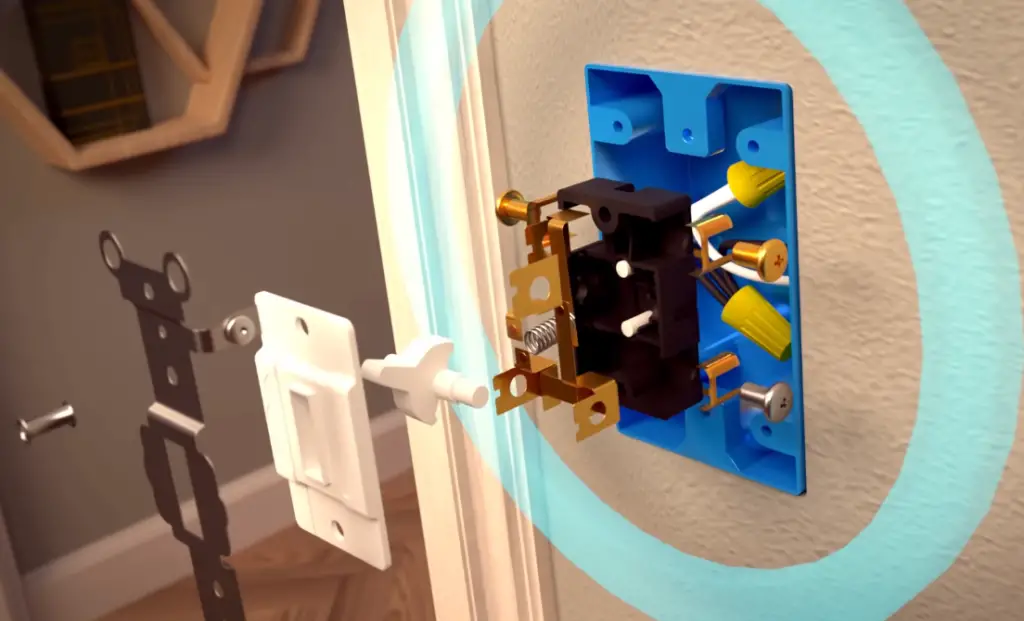
The power for the 3-way light switch is fed through one of the screws at each end of the switch – usually black. It then runs into the center screw (usually brass) which serves as the common terminal connecting both travelers. Each side of the switch also has two additional screws – one brass and one black – which act as the traveler terminals. When one switch is turned on, the power goes through the common terminal and up to the travelers. When both switches are connected, they can control the same circuit simultaneously.
A 3-way switch allows you to control the lights or other devices from multiple locations in your home, providing a convenient way to ensure proper lighting in your space. It’s also great for controlling multiple outlets that need to be activated at specific times. With two switches working together, you can ensure that all of your outlets are being used efficiently and safely.
Understanding how a 3-way switch works is essential if you want to install it correctly and get the most out of your lighting system. If done properly, you can enjoy the convenience and functionality of a 3-way switch in your home. [2]
Advantages of Using Three-Way Switches in Home Lighting Systems
There are several benefits of using three-way switches in home lighting systems. The most obvious benefit is the ability to turn lights on or off from two different locations. This makes it extremely convenient for people who are often in different places at once, such as those living in larger homes who may want to control lighting from both upstairs and downstairs.
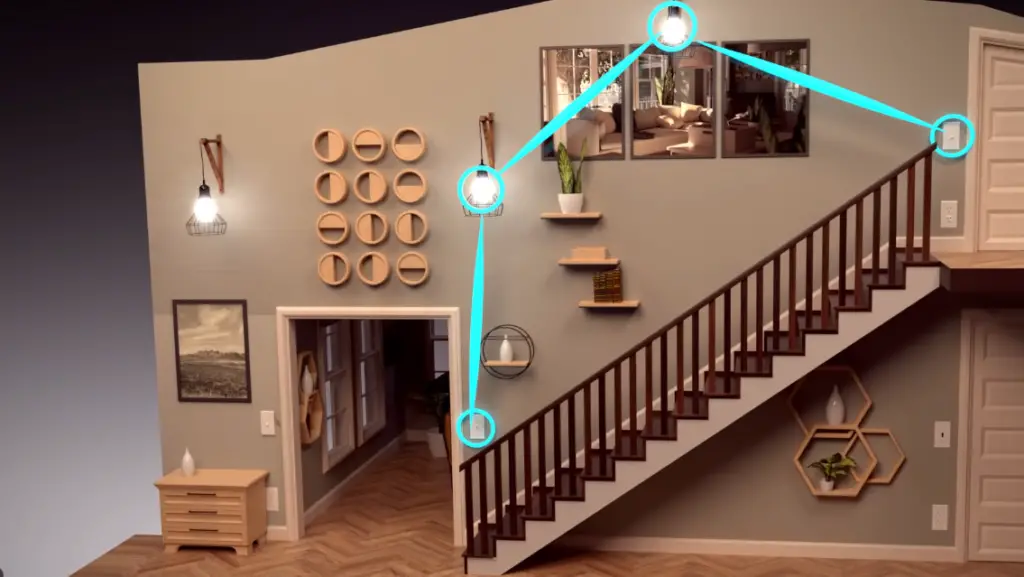
Three-way switches also offer additional safety benefits by allowing you to easily control access to electricity in certain areas. For example, if children have access to a room containing electrical outlets, you can use a three-way switch to keep the power off until an adult is ready to monitor them.
Setting up a three-way switch system is simpler than installing multiple light switches because you can connect the three-way switch to two different locations instead of running a wire from each switch. This makes it possible to control lighting in a large area with just one device.
Overall, using three-way switches for home lighting systems offers convenience, safety, and cost savings that are hard to beat. If you’re looking for an easy way to control your lights from multiple locations in your home, installing a three-way switch system might be the perfect solution.
Step-By-Step Guide to Installing a 3-Way Switch
- Turn off the power to the circuit you will be working on and use a voltage tester to verify that there is no electricity present.
- Remove the cover plate from your switch box and locate the three terminals (black, white, and red) inside.
- Make sure to connect each terminal with one end of a 3-way switch cable and ensure that all connections are secure and properly insulated using either electrical tape or heat shrink tubing.
- Run the other end of the 3-way switch cables into the other switch box in addition to running a single piece of 14/2 wire for connecting both switches together.
- Securely connect one end of 14/2 wire to the black terminal of the first switch, then to the red and black terminals on the second switch.
- Connect one end of a 3-way switch cable to each terminal in the second switch box, making sure that all connections are secure and insulated with electrical tape or heat shrink tubing.
- Connect all three cables from each switch box together in a junction box with wire nuts and cover it securely. [3]
- Turn your power back on and test out your new 3-way switch setup to make sure it is working properly by flipping both switches simultaneously–the light or appliance should turn on and off accordingly.
With these 8 simple steps, you can install a 3-way switch that will enable you to operate a light or appliance from two different locations. Just be sure to exercise caution when working with electricity, and if you are ever unsure of what you are doing, it is best to consult an experienced electrician.
Safety Tips When Working With Electricity
When working with electricity, it is important to stay safe. Here are some safety tips for when you’re installing a 3-way switch:
- Make sure you turn off the power before you begin working on any electrical wiring. This step should never be skipped as a precautionary measure against accidental shock or electrocution.
- Ensure that your circuit breaker or fuse box is labeled correctly so that you know which switch controls what area of your house. If there is no label, mark the switches yourself so you can easily tell them apart later on if needed.
- Double check all connections and make sure they are secure before turning the power back on to test the new 3-way switch. If anything feels loose or looks wrong, it’s best not to proceed as this could lead to a dangerous situation. [4]
- Wear protective gear such as gloves and safety glasses when working with electricity and wiring.
- Never work on electrical wiring if you are unfamiliar with the process or do not have experience in electrical work; hire an electrician for the job instead. In some cases, local building codes may require that all electrical work be done by a licensed electrician anyway in order to ensure safety standards are met.
- When finished, test your new 3-way switch before putting everything away and turning the power back on in the house. This ensures that you didn’t miss any steps and that the switch is working properly.
Following these safety tips will help keep you safe when installing a 3-way switch. Always be sure to exercise caution when working with electricity and never take shortcuts or skip precautionary measures. If in doubt, contact a professional electrician for assistance.
Difference Between a 2 Way Switch and a 3-Way Switch
A two-way switch is a simple on/off switch that allows you to control a light or other electrical devices from two different locations. A three-way switch, on the other hand, is slightly more complicated and has the ability to control a single fixture or device from multiple locations.
With a 3-way switch, there are three terminals connected to the switch: one terminal for power input (commonly known as Line), one terminal for power output when the switch is in the “on” position (known as Load) and one terminal for power output when the switch is in the “off” position (known as Neutral). The connection between these terminals will determine how the 3-way switch operates.
When the switch is in the “on” position, power flows from the Line terminal to the Load terminal. When it’s in the “off” position, power flows from the Line terminal to Neutral. This allows you to control a single light or device from two different locations.
In comparison, with a 2-way switch, there are only two terminals connected to the switch: one for power input (Line) and one for power output (Load). The connection between these two terminals will determine whether or not the circuit is open or closed. With a 2-way switch, you can only control a single light or device from one location.

In conclusion, understanding how a 3-way switch works is essential for anyone looking to make improvements in their home lighting system. Not only does it allow you to control a single light or device from multiple locations, but it also helps save energy by allowing you to turn off unused lights when they’re not needed. With this added convenience and efficiency, a 3-way switch is an invaluable addition to any modern home. [5]
Why Does One 3-way Switch Not Work?
One common problem homeowners encounter is when one 3-way switch does not work. This can happen due to a variety of reasons, such as improper wiring or faulty components in the switch itself. To troubleshoot this issue, first check that both switches have power and are connected properly. If the wiring appears correct, then you may need to replace either the 3-way switch in question or any associated light fixtures. It is also possible that there could be an issue with the circuit breaker that supplies electricity to the switches; if this is the case, resetting it should take care of the problem. If all else fails, it may be necessary to get a professional electrician to assess and fix the situation.
Regardless of why one 3-way switch is not working, it is important to practice safety when troubleshooting the issue. Make sure that you turn off power to the circuit before attempting any repairs and use proper tools and techniques if replacing components. Following these steps can help ensure your safety as well as get your 3-way switches back in working order.
What About Replacing a 3-Way Switch?
If you need to replace a 3-way switch, it is important to understand exactly how it works before attempting the task.
Fortunately, replacing a 3-way switch is relatively straightforward and can be done without any specialized tools or knowledge.
The first step in replacing a 3-way switch is to turn off your circuit breaker so that there’s no power running through your home wiring system. Next, remove the cover plate from the wall that contains the switch and unscrew the electrical cable clamps on either side of the box to loosen them up enough for removal. Once this is done, pull out the two switches (the existing one and its replacement) out of their boxes.
Before connecting wires together, make sure to examine the existing switch and its wiring. This will help you figure out how to connect the wires properly when replacing it with the new 3-way switch. The two screws on each side of a 3-way switch control two different circuits, so pay attention to which wire is connected to which screw in order to correctly rewire them in the replacement switch.
Once you have identified all of the wire connections, remove the old 3-way switch by unscrewing it from the box and disconnecting it from any loose wires that were attached to it. Then take your new 3-way switch and attach it onto one of the metal boxes that contains all of your main electrical connection points. Make sure that this box is securely fastened to the wall so that it won’t move or come loose when in operation. Connect the wires of the new switch according to how you identified them with the old one and screw it into place on the box.
Finally, turn your circuit breaker back on and test out your 3-way switch replacement. Make sure everything is working as expected before putting the cover plate back on and securing it with screws. With a little patience and attention to detail, replacing a 3-way switch can be done without any specialized tools or knowledge. It is important to follow all safety instructions when performing any type of electrical work in order to avoid potential hazards or injuries.
It is also recommended that if you are unfamiliar with wiring and electrical work that you contact a licensed and experienced electrician to handle the job for you. They will be able to correctly and safely replace or repair your 3-way switch without any risk of injury or damage.
How Many 3-Way Switches Are Required?
A 3-way switch is a special type of electrical wiring that allows you to control a light fixture or other electrical device from two different locations. For this reason, it’s sometimes called a “three-way” switch. To make the setup work, you need at least two 3-way switches and one regular switching device (such as a single pole switch).
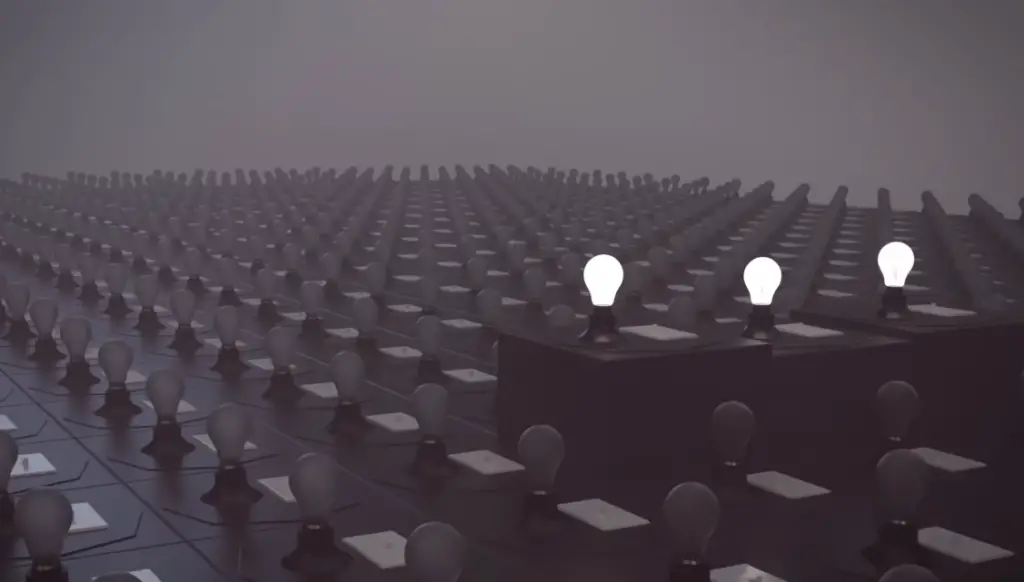
Multiple 3-way switches can be used in combination for more complex circuits.
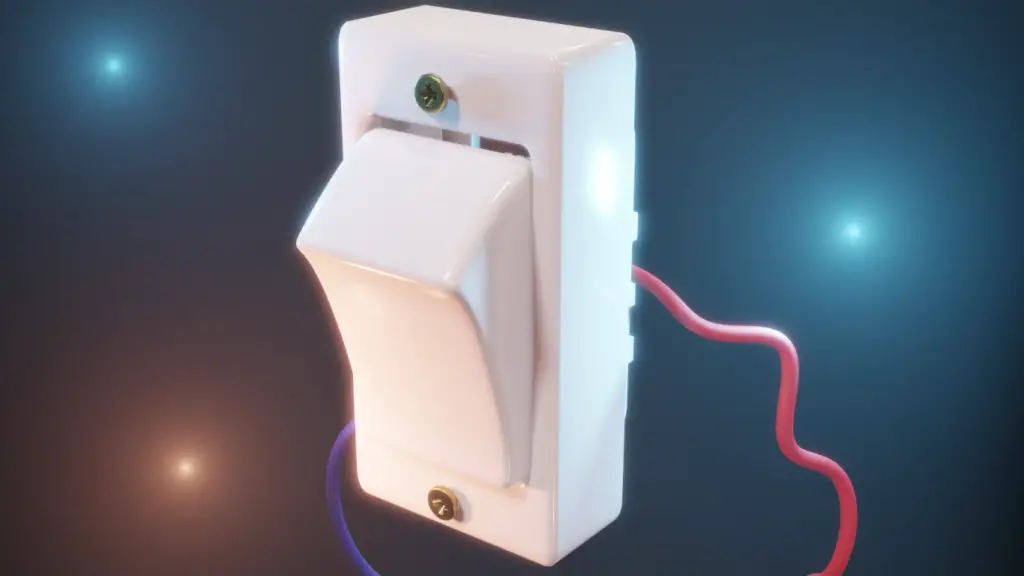
For example, if you wanted to have several switches controlling one light fixture, you would use multiple 3-way switches in combination with each other. This could be useful if you want to have different controls in multiple rooms for the same light fixture. In most cases, a single 3-way switch is all that’s required to control a light fixture from two separate locations. [6]
When wiring a 3-way switch, it’s important to make sure you have the right wires connected in the right places. You should also take extra caution when dealing with electrical work, especially if you don’t have much experience with it. If done incorrectly, 3-way switches can cause serious damage or even put you at risk of an electric shock. It’s usually best to hire a qualified electrician to ensure the job is done correctly and safely.
Is There a 4 Way Switch?
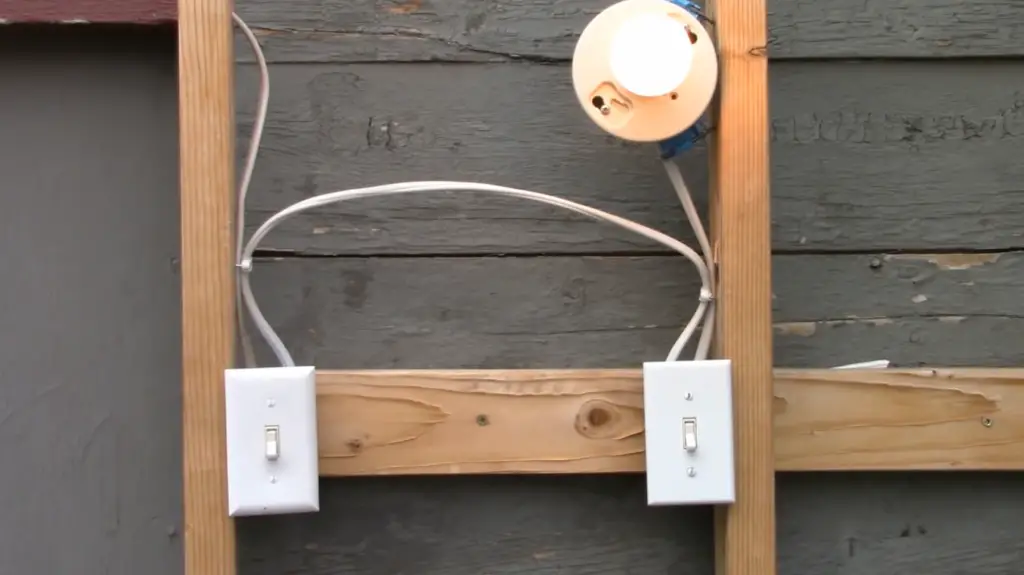
Yes, there is a 4-way switch. This switch is similar to a 3-way switch but instead of allowing one light to be controlled from two different locations, the 4-way switch allows two lights or more to be controlled from three or more different locations. It works in combination with two 3-way switches which are installed between the multiple locations (usually at either end of a hallway).
With their versatility, 4-way switches can be used in any application where multiple lights need to be controlled from several different locations. Their convenience and cost effectiveness make them a popular choice for both residential and commercial applications.
FAQ
How is a 3-way switch wired?
A three-way switch is wired so that it connects the hot wire (or black wire) from the electrical panel to one terminal and then connects the ground wire (or green wire) from the panel to a different terminal. The third terminal is connected to the hot lead of another device or fixture, such as a light or an outlet. To complete the circuit, two three-way switches are wired together: one at each end of a hallway, for example. When either switch is flipped, power will be supplied from one side to another.
What happens when you flip a 3-way switch?
When you flip a 3-way switch, it changes the direction of current flow in your wiring system by connecting either one of two hot wires to the other. This allows you to control a light or an outlet from two different locations. For example, one switch might be installed in the hallway leading into a bedroom, and another switch at the door of the bedroom itself. Flipping either one will turn on or off whatever device is connected to it.
Are 3-way switches safer than regular switches?
Yes, three-way switches are generally considered safer than regular single-pole switches because they require that both switches be flipped simultaneously in order for power to travel between them; this helps prevent accidental shorts or surges in your electrical system. Additionally, they provide additional protection against shock since there is no direct connection between one switch and another—all current must go through the intervening wiring.
Can a 3-way switch be used as a regular switch?
Yes, in some cases you can use a three-way switch instead of a single-pole switch. This can be helpful if, for example, you want to control power to an outlet from two different locations. However, it is important to note that the same safety considerations apply when using this type of switch—both sides must be flipped simultaneously in order for power to flow between them. Additionally, you may need additional components like dimmer switches or relays depending on the particular application. It is recommended that you consult with an electrician before attempting any kind of wiring project.
What is the difference between a 2-way switch and a 3-way switch?
A 2-way switch only has two positions, while a 3-way switch is designed to have three positions. This allows for more flexibility when controlling the lights in an area since you can use one switch to turn them on and off, and another switch to adjust their brightness. With a 3-way switch, you are able to turn the lights on and off from either side of the room. The 3-way switches also have a common wire that connects both sides of the room together. This common wire runs through each physical circuit in the house that contains a light fixture or other electrical device connected to it. When you flip one of the 3-way switches, it sends an electrical signal down this common wire which opens up or closes the circuit on the other side. That is how a 3-way switch works!
The main advantage of using a 3-way switch over a 2-way switch is increased convenience. With two switches, you can control lights from two different locations in the house. This makes it easier to adjust lighting levels for whatever activity you are doing without having to go up and down stairs or across rooms.
Will a 3-way switch work by itself?
No, a three-way switch will not work by itself. A 3-way switch requires two additional switches to turn the same light fixture on and off from two different locations. They are connected in such a way that when one of the switches is turned off or on, the other automatically turns off or on accordingly. The most common application for a 3-way switch is at the top and bottom of a staircase. This allows you to turn light fixtures on and off from both ends. It can also be used to control lighting in multiple rooms in your home from one location. A 3-way switch consists of three parts: the travelers (the wires connecting all the switches together), the two separate hot terminals (the wires connecting the switches to the light fixture), and a common terminal (where both travelers meet).
Useful Video: 3 Way Switch Animation. How a 3-Way switch Works
Conclusion
A 3-way switch is an incredibly useful tool for controlling multiple lights or other electrical devices from one area. It works by routing electricity through two different circuits, allowing you to turn the device on and off from two separate points. Understanding how a 3-way switch works helps make wiring easier and can help ensure your safety when using it. With a few simple tools and some basic knowledge of electricity, anyone can install this versatile switch!
References
- https://home.howstuffworks.com/three-way.htm
- https://asktheelectricalguy.com/3-way-light-switches-how-they-work/
- https://www.electrical101.com/3way-switches.html
- https://www.thespruce.com/anatomy-of-a-three-way-switch-1152436
- https://mepacademy.com/3-way-switch-wiring-explained/
- https://www.circuitbread.com/tutorials/how-a-3-way-switch-works-circuitbread-practicals




Leave a Reply