
If your Raspberry Pi isn’t booting, don’t worry! You’re not alone. Many people have had this problem, but it’s usually easy to fix. In this blog post, we will discuss some of the most common reasons why a Raspberry Pi might not be booting and how to fix them. We’ll also provide some helpful tips on how to prevent this from happening in the future.
Raspberry Pi Not Booting? Try These Tips
Raspberry Pi Power Issues
If you’re experiencing issues with your Raspberry Pi not booting, the problem is likely related to power. Check that your power supply is rated for at least 2.5A and that it’s properly plugged into the Raspberry Pi. [1]
SD Card Issues
The next most common reason for a Raspberry Pi not to boot is an issue with the SD card. Make sure that the SD card is inserted properly and that it’s formatted correctly. You can also try using a different SD card.
Incorrect BIOS Settings
If you’re still having trouble getting your Raspberry Pi to boot, the problem could be due to incorrect BIOS settings.
Raspberry Pi Boots But No Display?
If your Raspberry Pi is booting but you’re not seeing a display, the problem could be due to a faulty HDMI cable or an incorrect HDMI setting. Try using a different HDMI cable or connecting the HDMI cable to a different HDMI port. You can also try changing the HDMI settings in the BIOS.
Software Issues
In some rare cases, the reason your Raspberry Pi isn’t booting could be due to a software issue. Try re-installing the operating system and then try again.
Raspberry Pi Stuck on Rainbow Screen?
If your Raspberry Pi is stuck on the rainbow screen, the problem could be due to an over-voltage condition. Try unplugging all USB devices and then try again. You can also try reducing the over-voltage by adding a resistor between GPIO pin 2 and 3.
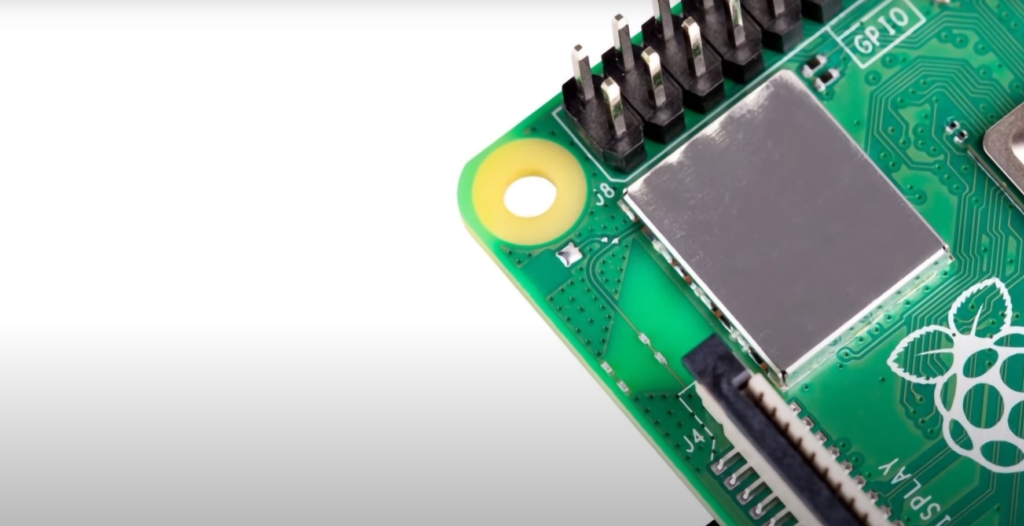
Check the Red and Green LED Lights
The two LED lights on the Raspberry Pi can give you some clues as to why it’s not booting. If the red LED is lit, it means that there’s a problem with the power supply. If the green LED is lit, it means that the SD card is not inserted properly.
Contact the Manufacturer
If you’ve tried all of the above and your Raspberry Pi still isn’t booting, you should contact the manufacturer for help.
Check Whether the OS is Installed Correctly or Not
If you are unable to boot your Raspberry Pi, then check whether the OS is installed correctly or not. Try re-installing the operating system and then try again.

Is HDMI Output Disabled?
If you cannot see the display on your monitor, then it is likely that the HDMI output of the Raspberry Pi is disabled. To enable the HDMI output, go to the Raspberry Pi Configuration tool and enable the HDMI output. [2]
Check the Cabling
If you are still unable to boot your Raspberry Pi, then check the cabling. Make sure that all the cables are connected properly and there is no loose connection.
Poorly Connected Accessories
If your Raspberry Pi is not booting, then it is possible that the accessories are not connected properly.
Check for Damaged Components
If you have checked all the above factors and your Raspberry Pi still doesn’t boot, then it is possible that there is a damaged component on the board. In this case, you will need to replace the damaged component.
Unplug Everything and Try Again
If you are still unable to boot your Raspberry Pi, then unplug everything from the board and try again. Make sure that there is no loose connection and all the components are securely connected. [3]
How to Boot Raspberry Pi 4 / 400 from USB
If your Raspberry Pi 4 or 400 is not booting from USB mass storage devices, it’s likely that the firmware on your device is out of date. To update the firmware, follow these steps:
- Download the latest firmware from the Raspberry Pi Foundation’s website.
- Extract the .img file from the ZIP archive you downloaded.
- Copy the .img file to a USB mass storage device.
- Connect the USB mass storage device to your Raspberry Pi 4 or 400.
- Press and hold the SHIFT key while pressing the RESET button on your device. Keep holding SHIFT until you see the boot menu appear.
- Select Update Firmware from the boot menu.
- The firmware update process will take a few minutes to complete. Once it’s finished, your Raspberry Pi 4 or 400 will reboot and should now be able to boot from USB mass storage devices. [4]
How to Prevent This In the Future?
There are a few things you can do to prevent this issue from happening in the future:
- Make sure that your power supply is rated for at least 2.5A.
- Use a high-quality SD card.
- Connect all cables securely.
- Check for damaged components and replace them if necessary.
- Follow the manufacturer’s instructions carefully.
Signs Your Raspberry Pi Defective
It can be really frustrating when your Raspberry Pi won’t boot. Here are some common signs that your device may be defective:
- The Green LED doesn’t turn on – This is often indicative of a problem with the power supply. Make sure you’re using a compatible power adapter and that it’s properly connected to the Raspberry Pi.
- The Red LED turns on but nothing else happens – This could mean that there’s a problem with the SD card or the operating system. Try re-flashing the SD card or using a different operating system image.
- You see a rainbow screen when you plug in the HDMI cable – This is usually caused by an incompatible display mode. Try changing the resolution or refresh rate in the Raspberry Pi configuration file.
- The screen is black when you plug in the HDMI cable – This could be caused by a number of issues, including an incompatible display mode, a faulty HDMI cable, or a problem with the SD card. Try changing the resolution or refresh rate in the Raspberry Pi configuration file, using a different HDMI cable, or re-flashing the SD card.
How Long Does a Raspberry Pi 4 Take to Boot?
If it takes longer than that, there may be something wrong with your device.
How Can I Test My Raspberry Pi?
If you’re not sure whether your Raspberry Pi is defective or not, there are a few ways to test it.
- Try booting up the device with a different SD card or operating system image. If the problem persists, then it’s likely that the Raspberry Pi is defective.
- Connect the Raspberry Pi to a monitor or television and see if anything appears on the screen. If you see a black screen, then there may be an issue with the HDMI cable, the display mode, or the SD card.
- If you’re able to boot into the operating system, try running some basic commands to see if everything is working properly. For example, you can try opening a file in the Nano text editor or running the “ls” command to list the contents of a directory.
- Try connecting to the Raspberry Pi using SSH. If you’re able to connect, then that means the networking is working properly.
- Run a benchmarking tool like sysbench to see if the performance is as expected. If the results are significantly lower than what you expect, then that could be an indication that the device is defective.
What Should I Do If My Raspberry Pi Is Defective?
If you think your Raspberry Pi is defective, the first thing you should do is contact the retailer or distributor from where you purchased it. They may be able to offer a replacement or refund.
You can also try contacting the Raspberry Pi Foundation directly. They may be able to offer advice or replacement parts.
Finally, you can try contacting the manufacturer of the Raspberry Pi. They may be able to offer a replacement or repair service. [5]
Things to Know About Raspberry Pi
The most common use for the Raspberry Pi is as a media center, but it can also be used for a variety of other tasks, such as gaming, web browsing, and word processing.
When choosing a project for your Raspberry Pi, it’s important to consider the following:
- The type of project you want to create – There are many different types of projects you can create with the Raspberry Pi. Some projects are simple, while others are more complex. Choose a project that matches your skill level and interests.
- The amount of time you have – Some projects can be completed in an afternoon, while others may take weeks or even months. Consider how much time you have to devote to your project before choosing one.
- The cost of materials – Some projects require expensive materials, while others can be completed with items you may already have around the house. Consider the cost of materials before starting your project.
- The difficulty level – Some projects are more difficult than others. Choose a project that you feel confident you can complete successfully.
- The required skills – Some projects require specific skills, such as programming or soldering. Make sure you have the required skills before starting your project.
With these things in mind, you’re ready to choose a project for your Raspberry Pi!
How Long Does Raspberry Pi Last?
The lifespan of a Raspberry Pi depends on a number of factors, including the operating system, the type of projects you use it for, and how well you take care of it.
In general, the Raspberry Pi can last for years with proper care. However, if you use it for demanding projects or expose it to harsh conditions, it may only last for a few months.
To extend the lifespan of your Raspberry Pi, consider the following:
- Use a good quality power supply – A cheap power supply can cause problems and shorten the lifespan of your Raspberry Pi. Choose a good quality power supply that can provide enough power for your projects.
- Keep your Raspberry Pi cool – Overheating can shorten the lifespan of your Raspberry Pi. Keep it in a cool, well-ventilated place and consider using a fan to help keep it cool.
- Be careful with the SD card – The SD card is one of the most fragile parts of the Raspberry Pi. Avoid inserting and removing it frequently, and be careful not to damage it.
- Update your software regularly – Keeping your software up to date can help fix bugs and improve performance. Check for updates regularly and install them when available.
- Store your data safely – Regularly backup your data to avoid losing it if something goes wrong. Use a reliable storage method, such as an external hard drive or cloud storage service.
By following these tips, you can help extend the lifespan of your Raspberry Pi and keep it running smoothly for years to come. [6]
How to Choose a Project for Your Raspberry Pi?
Choosing a project for your Raspberry Pi is an important decision. There are many factors to consider, including the type of project, the amount of time you have, and the cost of materials. With so many things to consider, it can be overwhelming to choose a project.
Here are a few tips to help you choose a project for your Raspberry Pi:
- Start with something simple – If you’re new to the Raspberry Pi, start with a simple project that doesn’t require any special skills or knowledge. This will help you get familiar with the platform and give you a better chance of success.
- Choose a project you’re interested in – The best projects are the ones you’re passionate about. Choose a project that interests you and you’ll be more likely to stick with it until completion.
- Consider the cost – Some projects require expensive materials, while others can be completed with items you may already have around the house. Consider the cost of materials before starting your project.
- Set a realistic goal – Don’t bite off more than you can chew. Choose a project that you feel confident you can complete successfully. Trying to do too much at once will only lead to frustration and disappointment.
By following these tips, you can choose a project for your Raspberry Pi that you’re interested in and that you have a good chance of completing successfully.
How to Know If My Raspberry Pi is Healthy?
There are a few signs that your Raspberry Pi is healthy and functioning properly. If your Raspberry Pi is booting up properly, displaying the correct text on the screen, and responding to input from the keyboard and mouse, then it is most likely healthy.
Other signs of a healthy Raspberry Pi include:
- The green LED is lit – The green LED on the Raspberry Pi indicates that it is receiving power. If the LED is lit, then your Raspberry Pi is receiving power and is most likely healthy.
- The red LED is blinking – The red LED on the Raspberry Pi indicates activity. If the LED is blinking, then your Raspberry Pi is active and is most likely healthy.
- You can access the internet – If you can connect to the internet, then your Raspberry Pi is most likely healthy.
- The screen is displaying properly – If the screen is displaying text and images correctly, then your Raspberry Pi is most likely healthy.
- You can hear sound – If you can hear sound through the audio output, then your Raspberry Pi is most likely healthy.
If your Raspberry Pi is exhibiting all of these signs, then it is most likely healthy. However, if you are experiencing problems with your Raspberry Pi, such as booting up properly or displaying the correct text on the screen, then it may be unhealthy. In this case, you should contact the support team for help.
How Much Power Does a Raspberry Pi Need?
The Raspberry Pi itself doesn’t need much power. The minimum power requirement is 500mA, but it is recommended to use a power supply that can provide at least 1A. A power supply that can provide 2A is ideal.
For example, if you are using a USB device, such as a keyboard or mouse, then it will require additional power. The amount of power required by each accessory will vary, so be sure to check the documentation for the specific accessory you are using.
In general, you should not use more than one accessory that requires additional power at the same time. If you need to use multiple accessories that require additional power, then you should use a powered USB hub.
You can also use a power supply that is designed for the Raspberry Pi. These power supplies are typically more expensive than standard power supplies, but they offer the benefit of being specifically designed for the Raspberry Pi and providing the recommended amount of power.
How to Choose a Power Supply for Your Raspberry Pi?
When choosing a power supply for your Raspberry Pi, there are a few things to keep in mind.
First, you need to choose a power supply that can provide enough power for your specific setup. The minimum power requirement is 500mA, but it is recommended to use a power supply that can provide at least 1A. A power supply that can provide 2A is ideal.
Second, you need to choose a power supply that is compatible with your Raspberry Pi. The most common type of power supply is a micro USB power supply. However, some newer models of the Raspberry Pi, such as the Raspberry Pi 3 Model B+, use a different type of connector. Be sure to check the documentation for your specific model of Raspberry Pi to see what type of power supply it requires.
Third, you need to choose a power supply that is safe to use. Power supplies can vary greatly in terms of quality and safety. Be sure to buy a power supply from a reputable company and that has been tested for safety.
Finally, you need to choose a power supply that is affordable. Power supplies can range in price from around $10 to $50. Be sure to shop around and compare prices before making your final decision.
FAQ
How do I fix my Raspberry Pi that won’t boot?
If your Raspberry Pi won’t boot, it’s possible that the cause is a corrupted SD card. Try these fixes:
- Use a different SD card
- Format your SD card
- Re-image your SD card
- Check your power supply
- Check your HDMI connection
- Check for hardware issues
If your Raspberry Pi still won’t boot, you may need to seek help from the Raspberry Pi community.
How do I force restart my Raspberry Pi?
To force restart your Raspberry Pi, you can use the following commands:
- sudo reboot
- sudo shutdown -r now
- sudo poweroff
- sudo halt
Why is my Raspberry Pi a black screen?
If your Raspberry Pi has a black screen, it’s possible that the cause is a corrupted SD card. Try these fixes:
- Use a different SD card
- Format your SD card
- Re-image your SD card
- Check for hardware issues
If your Raspberry Pi still has a black screen, you may need to seek help from the Raspberry Pi community.
How do you know if Pi is booting?
If you’re using a monitor or television connected to the HDMI port, you should see the green LED on the Raspberry Pi board light up. If your display is connected to the composite video port, you’ll need to wait until the operating system loads before you see anything on screen. The easiest way to do this is to use an SSH client to connect to your Raspberry Pi. Once you’re logged in, run the command ls /boot .You should see a list of files, including config.txt and cmdline.txt. If these files are present, then your Raspberry Pi has successfully booted.
Can I boot a Raspberry Pi from USB?
Yes, you can boot a Raspberry Pi from USB. To do this, you’ll need to first burn an operating system image to a USB drive. Then, plug the USB drive into the Raspberry Pi and boot up the system.
Does Raspberry Pi have a BIOS?
No, the Raspberry Pi does not have a BIOS. The boot process is handled entirely by the firmware on the board.
How long does a Raspberry Pi 4 take to boot?
The Raspberry Pi 4 can take up to 60 seconds to boot. This is normal behavior for the Pi 4, and is not indicative of a problem.
Useful Video: How to fix a raspberry pi that will not boot.
Conclusion
If your Raspberry Pi isn’t booting, it’s likely because of a problem with the power supply, SD card, or external peripherals. Try these solutions in order:
- Check that the power supply is properly plugged in and delivers the correct voltage.
- If you’re using an SD card adapter, make sure that it’s inserted all the way.
- Remove any external peripherals, such as USB devices or HDMI cables.
- If possible, try another SD card.
- If you’re still having trouble, contact the Raspberry Pi Foundation for support.
Hopefully, one of these solutions will get your Raspberry Pi up and running again. If not, you may need to replace the SD card, power supply, or another hardware component. Good luck!
References
- https://www.makeuseof.com/tag/raspberry-pi-wont-boot-fix/
- https://raspberryexpert.com/raspberry-pi-not-booting/
- https://linuxhint.com/not-booting-up-issue-fix-raspberry-pi/
- https://www.tomshardware.com/how-to/boot-raspberry-pi-4-usb
- https://support.thepihut.com/hc/en-us/articles/360001887937-My-Raspberry-Pi-4-will-not-boot-is-faulty
- https://linuxhint.com/how-long-raspberry-pi-last/