In the ever-evolving landscape of technology, the Raspberry Pi has emerged as a groundbreaking innovation, redefining the boundaries of what a compact computing device can achieve. At the heart of its versatility lies the ability to set up a Virtual Network Computing (VNC) server, a gateway to a world of remote possibilities.
Imagine seamlessly accessing and controlling your Raspberry Pi’s graphical interface from the comfort of your favorite device, whether you’re in the next room or miles away. In this comprehensive guide, we embark on a journey to demystify the process of setting up a VNC server on your Raspberry Pi, unveiling the steps, intricacies, and endless potentials it brings to the forefront.
Whether you seek to administer a headless server, delve into coding projects, or simply want to explore the Raspberry Pi’s capabilities, setting up a VNC server opens the door to a realm of remote control.
What is VNC?
Understanding VNC:
At its core, VNC is a technology that enables one computer to control another over a network connection. Unlike text-based remote access methods, VNC provides a full graphical user interface (GUI) experience, allowing users to visualize and interact with the remote desktop as if they were physically present in front of the machine. This functionality has wide-ranging applications, from IT support and system administration to personal use cases [1].
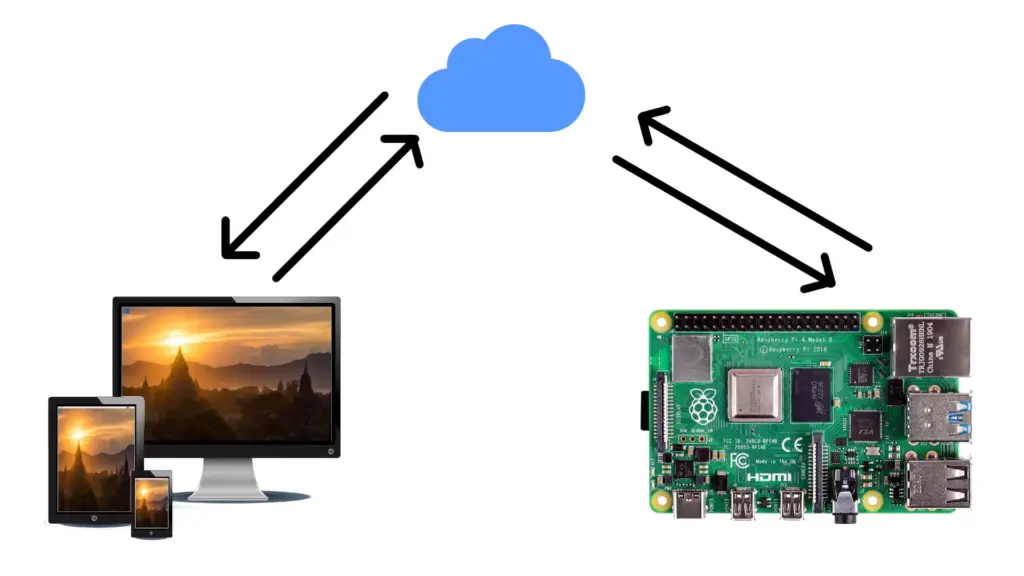
How VNC Works:
The VNC process involves two essential components: the VNC server and the VNC client. The VNC server runs on the computer that you wish to access remotely, while the VNC client runs on the device you are using to control the remote computer.
When a user initiates a VNC connection, the VNC server captures the desktop’s display and encodes it into a series of images or frames. These frames are then transmitted over the network to the VNC client. The client decodes these frames and displays them on the user’s local screen. Simultaneously, any input from the client, such as mouse movements and keyboard inputs, are encoded and sent back to the server, allowing the user to interact with the remote desktop.
Applications of VNC:
- Remote IT Support: VNC is widely used by IT professionals to troubleshoot and provide technical assistance to users located in different geographical locations. Support personnel can remotely diagnose and resolve issues, install software, and configure settings, all without being physically present;
- Server Administration: System administrators leverage VNC to manage and administer servers without requiring direct physical access. This is particularly useful for maintaining headless servers (servers without a monitor) that are located in data centers or remote locations;
- Educational and Training Purposes: VNC finds utility in educational settings, enabling teachers and trainers to showcase software applications, tutorials, and demonstrations to a remote audience;
- Cross-Platform Compatibility: VNC’s cross-platform compatibility makes it an attractive choice for users who need to access and control computers running different operating systems, such as Windows, Linux, and macOS;
- Personal Use: Beyond professional applications, VNC can be employed for personal use. Users can access their home computers while on the go, retrieve important files, or even run applications remotely;
Security Considerations:
While VNC offers convenience and versatility, it’s important to address security considerations. By default, VNC connections are not encrypted, which means that data transferred between the server and client could potentially be intercepted. To mitigate this, it’s advisable to use VNC over a secure connection, such as an encrypted Virtual Private Network (VPN) or tunneling VNC through Secure Shell (SSH) protocols.
Setting Up a VNC Server on the Raspberry Pi:
1) Recommended Equipment:
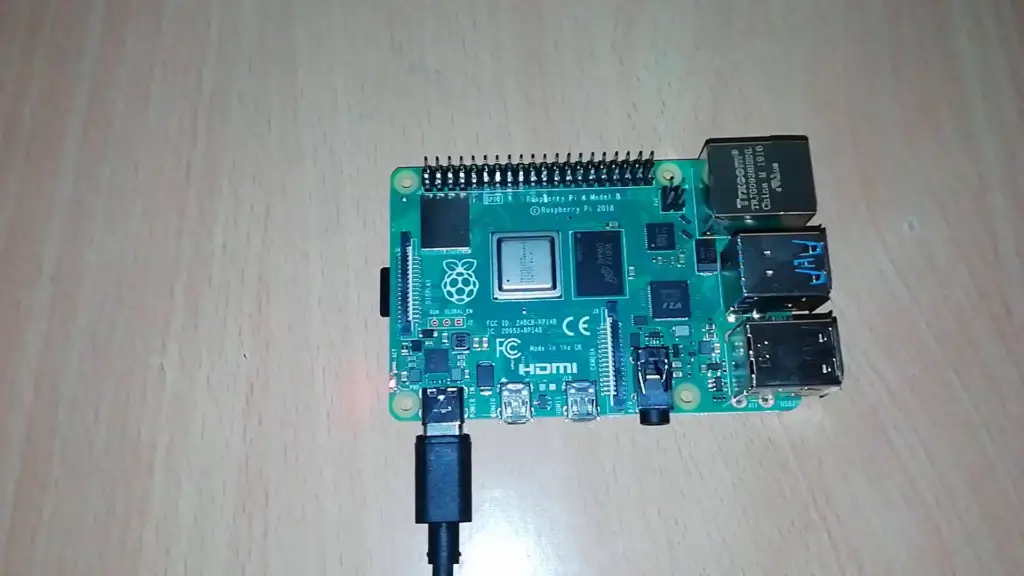
Before diving into the setup process, let’s ensure you have the necessary equipment at your disposal:
- Raspberry Pi: Any model of Raspberry Pi will work for this setup;
- MicroSD Card: A high-capacity microSD card to host the Raspberry Pi’s operating system;
- Power Supply: A compatible power supply to keep your Raspberry Pi running;
- Keyboard and Mouse: These will be necessary for the initial setup;
- HDMI Cable and Monitor: Needed for the initial configuration if you’re using a display;
- Network Connection: Ethernet cable or Wi-Fi adapter to connect your Raspberry Pi to the network;
2) Installing the VNC Server Software on Raspberry Pi:
Once you have the necessary equipment, follow these steps to install the VNC server software on your Raspberry Pi.
Update and Upgrade: Start by ensuring your Raspberry Pi’s operating system is up-to-date. Open a terminal and run:
sudo apt update
sudo apt upgrade
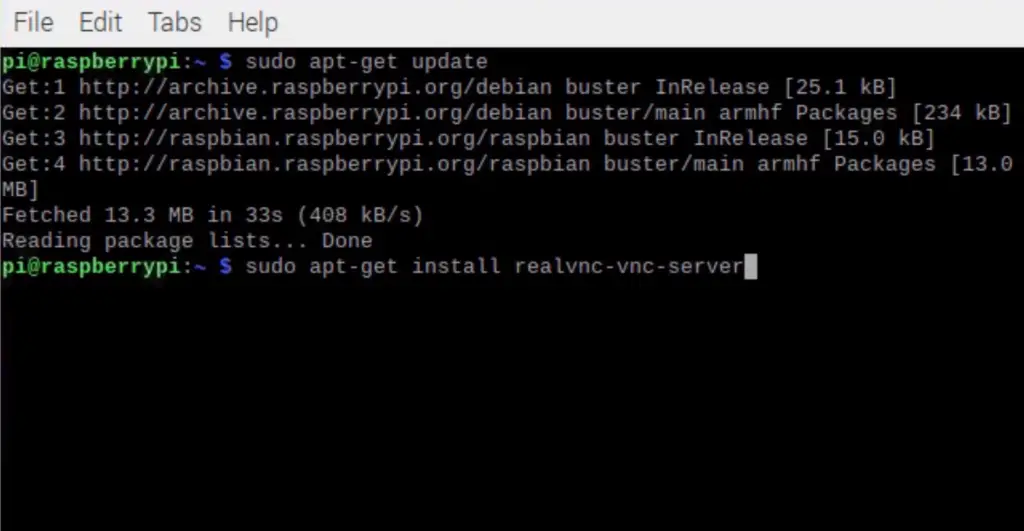
Install VNC Server: Next, install the VNC server software. In the terminal, enter:
sudo apt install realvnc-vnc-server
3) Configuring the VNC Server on Raspberry Pi:
With the VNC server software installed, let’s move on to configuring it to suit your needs.
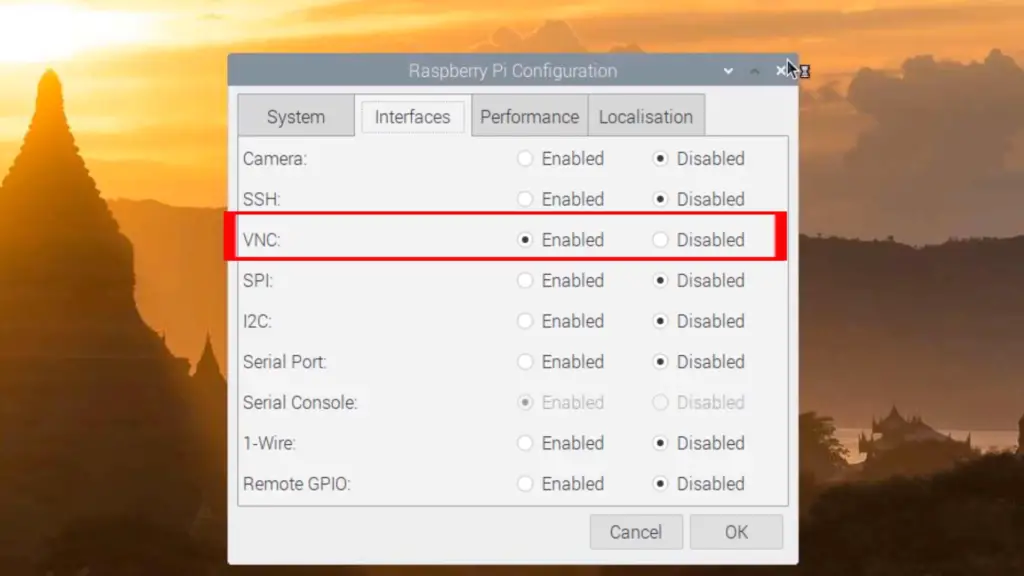
Enable VNC Server: Use the raspi-config tool to enable the VNC server:
sudo raspi-config
Navigate to Interfacing Options > VNC and select Yes to enable VNC.
Set VNC Password: To secure your VNC connection, set a password:
Vncpasswd
4) Starting the VNC Server at Startup:
To ensure the VNC server starts automatically every time your Raspberry Pi boots up, follow these steps.
Create a Startup Script: Open a terminal and enter:
sudo nano /etc/systemd/system/vncserver.service
Edit the Script: In the text editor, add the following lines:
[Unit] Description=VNC ServerAfter=syslog.target network.target [Service] Type=forking
User=pi
PAMName=login
PIDFile=/home/pi/.vnc/%H:%i.pid
ExecStartPre=-/usr/bin/vncserver -kill :%i > /dev/null 2>&1
ExecStart=/usr/bin/vncserver :%i -geometry 1920×1080 -alwaysshared -fg
ExecStop=/usr/bin/vncserver -kill :%i [Install] WantedBy=multi-user.target
Save and Exit: Press Ctrl + O to save and Ctrl + X to exit the text editor.
Enable and Start the Service: Run the following commands to enable and start the service:
sudo systemctl enable vncserver.service
sudo systemctl start vncserver.service
5) Creating the Service for VNC:
In this section, we’ll create a service for VNC to streamline its management.
Create a Service File: Open a terminal and enter:
sudo nano /etc/systemd/system/vncserver@.service
Edit the Service File: Add the following lines:
[Unit] Description=VNC Server on %IAfter=syslog.target network.target [Service] Type=forking
User=pi
WorkingDirectory=/home/pi
ExecStartPre=-/usr/bin/vncserver -kill :%i > /dev/null 2>&1
ExecStart=/usr/bin/vncserver :%i -geometry 1280×800 -alwaysshared -fg
ExecStop=/usr/bin/vncserver -kill :%i [Install] WantedBy=multi-user.target
Save and Exit: Press Ctrl + O to save and Ctrl + X to exit the text editor.
Reload and Enable the Service: Run the following commands to reload systemd and enable the new service [2]:
sudo systemctl daemon-reload
sudo systemctl enable vncserver@1.service
Starting the VNC Server On the Raspberry Pi:
1) Checking the Status of the VNC Server
Before diving into the intricacies of starting and configuring the VNC server, it’s essential to ensure that it is up and running. To check the status of the VNC server on your Raspberry Pi, follow these steps:
Open a Terminal: Access the terminal on your Raspberry Pi. You can do this by clicking on the terminal icon in the taskbar or using the Ctrl + Alt + T keyboard shortcut.
Check the Status: In the terminal, type the following command and press Enter:
systemctl status vncserver-x11-serviced.service
This command will display detailed information about the current status of the VNC server service.
2) Telling the VNC Server to Start at Boot
To ensure that the VNC server starts automatically every time your Raspberry Pi boots up, follow these steps.
Open a Terminal: Launch the terminal on your Raspberry Pi.
Enable the VNC Server Service: Enter the following command to enable the VNC server service to start at boot:
sudo systemctl enable vncserver-x11-serviced.service
Start the VNC Server: After enabling the service, you can start the VNC server by executing the following command:
sudo systemctl start vncserver-x11-serviced.service
3) Stopping the VNC Server
If you ever need to stop the VNC server for maintenance or other reasons, follow these steps.
Open a Terminal: Launch the terminal on your Raspberry Pi [3].
Stop the VNC Server: Enter the following command to stop the VNC server service:
sudo systemctl stop vncserver-x11-serviced.service
4) Disabling the Start at Boot on the Raspberry Pi
If you decide that you no longer want the VNC server to start automatically at boot, you can disable this behavior by following these steps.
Open a Terminal: Launch the terminal on your Raspberry Pi.
Disable the VNC Server Service: Enter the following command to disable the VNC server service from starting at boot:
sudo systemctl disable vncserver-x11-serviced.service
Troubleshooting
Even with careful setup, issues can sometimes arise when starting and managing the VNC server. Here are some common troubleshooting steps you can take:
- Check the Logs: If the VNC server isn’t starting or functioning as expected, examine the logs for any error messages. Use the following command to view the logs: journalctl -u vncserver-x11-serviced.service;
- Check Network Connectivity: Ensure that your Raspberry Pi is properly connected to the network. A stable network connection is essential for VNC server operation;
- Firewall and Port Forwarding: Verify that your router’s firewall settings and port forwarding rules are not blocking VNC traffic. VNC typically uses port 5900;
- Update Software: Make sure your Raspberry Pi’s operating system and VNC server software are up-to-date. Outdated software can lead to compatibility issues;
- Authentication Issues: If you encounter authentication problems, double-check the VNC server’s password and authentication settings;
- Permissions: Ensure that the user running the VNC server has the necessary permissions to access the required files and directories;
- Restart the Service: If you encounter issues, try restarting the VNC server service by executing: sudo systemctl restart vncserver-x11-serviced.service;

How To Enable the VNC Server On Raspberry Pi:
On Raspberry Pi OS:
Method 1: From the Desktop Environment
- Boot Up Raspberry Pi: Start by booting up your Raspberry Pi and logging into the desktop environment;
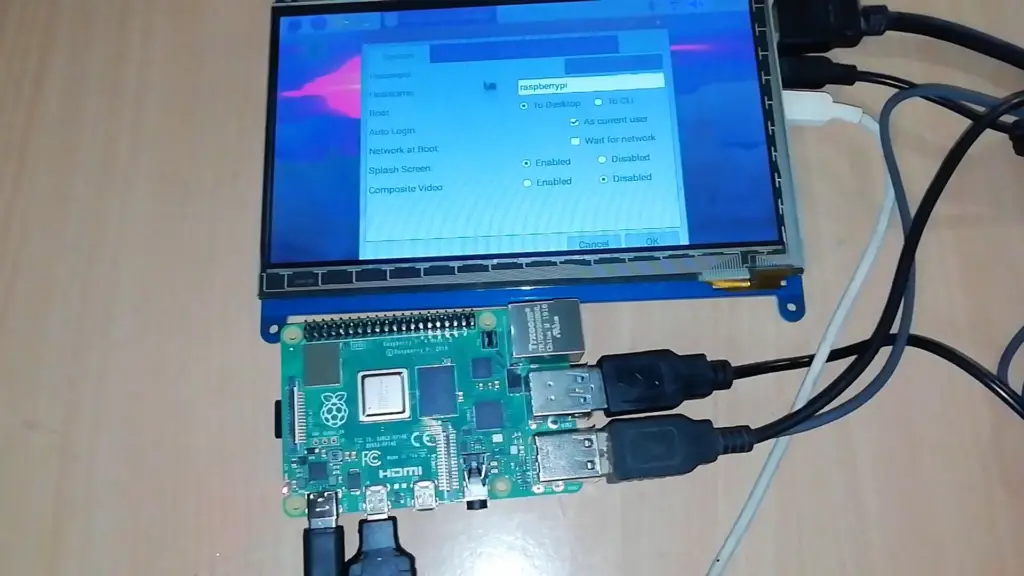
- Access Raspberry Pi Configuration: Click on the Raspberry icon in the top-left corner, navigate to “Preferences”, and select “Raspberry Pi Configuration”;
- Interfacing Options: In the Raspberry Pi Configuration window, go to the “Interfaces” tab;
- Enable VNC: Scroll down and locate “VNC” in the list of available interfaces. Click the “Enabled” radio button next to VNC;
- Apply Changes: Click the “OK” button to confirm and apply the changes. You might need to reboot your Raspberry Pi for the changes to take effect;
Method 2: With raspi-config
Open Terminal: If you prefer the command line, open a terminal window on your Raspberry Pi.
Run raspi-config: Type the following command and press Enter:
sudo raspi-config
Navigate to VNC: Use the arrow keys to navigate to “Interfacing Options” and press Enter.
Enable VNC: Scroll down and select “VNC” to enable it. Confirm your choice, and then exit raspi-config.
Reboot (Optional): You might need to reboot your Raspberry Pi for the changes to take effect.
On Other Systems:
Enabling the VNC server on systems other than Raspberry Pi OS involves a few additional steps. Here’s how you can do it.
Install VNC Server Software: Begin by installing the VNC server software on your Raspberry Pi. Open a terminal and run the following command [4]:
sudo apt install realvnc-vnc-server
Determine IP Address: Find the IP address of your Raspberry Pi. In the terminal, enter:
hostname -I
Download VNC Viewer: On the device from which you want to access the Raspberry Pi, download and install a VNC viewer application compatible with your operating system. You can choose from various options such as RealVNC Viewer, TigerVNC, or TightVNC.
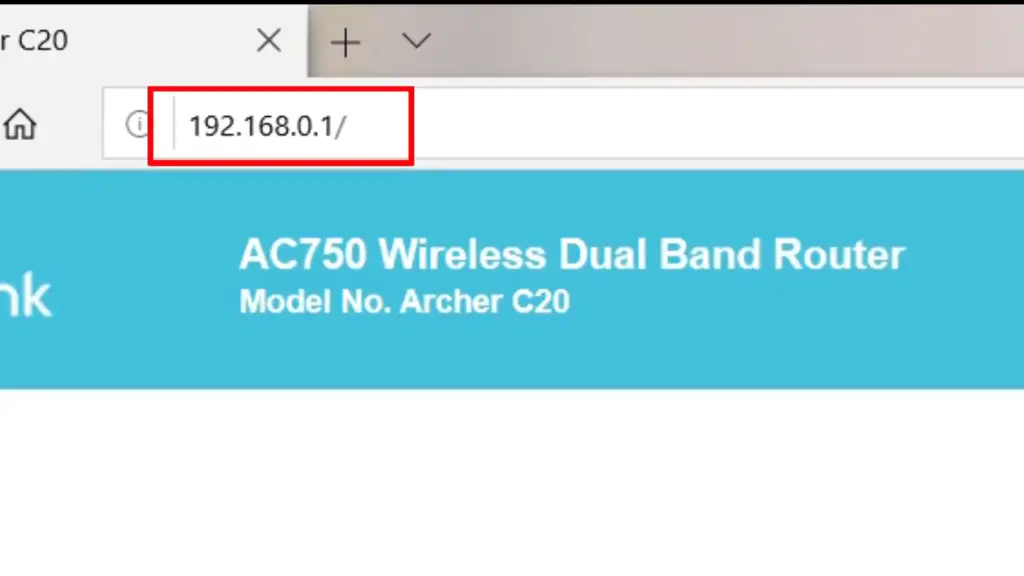
Connect via VNC Viewer: Open the VNC viewer and enter the IP address of your Raspberry Pi that you obtained earlier. You might need to provide a username and password (the default username is typically “pi” on Raspberry Pi OS).
Enjoy Remote Access: Once connected, you’ll have remote access to your Raspberry Pi’s graphical interface, allowing you to control it from a different device.
How To Install the VNC Client On Your Computer:
On Windows
Installing a VNC Client on Windows: Windows users have several options when it comes to VNC clients. Here’s a simple guide to installing a VNC client on your Windows computer:
- Visit the official website of the VNC client you prefer. Popular VNC clients for Windows include RealVNC, TightVNC, and UltraVNC;
- Download the installer file for your chosen VNC client from the website. Ensure that you download the appropriate version for your Windows operating system;
- Once the download is complete, locate the installer file and double-click on it to start the installation process;
- Follow the on-screen prompts and accept the license agreement. You may be asked to choose installation options such as installation directory and additional components;
- After the installation is complete, launch the VNC client from the Start menu or desktop shortcut;
- Configure the VNC client by entering the IP address or hostname of the remote computer you want to connect to. Provide any necessary login credentials if prompted;
- Once connected, you should be able to view and control the remote computer’s desktop through the VNC client interface;
On Linux
Installing a VNC Client on Linux: Linux users also have various VNC client options available. Here’s a step-by-step guide to installing a VNC client on your Linux computer:
- Open the terminal on your Linux distribution. You can typically find it in the Applications menu or by using the keyboard shortcut (e.g., Ctrl+Alt+T);
- Use the package manager specific to your Linux distribution to install the VNC client. For example, on Ubuntu, you can use the following command: sudo apt-get install . Replace with the name of the VNC client you want to install (e.g., sudo apt-get install xtightvnc for TightVNC);
- Enter your administrator password when prompted, and the package manager will download and install the VNC client along with any necessary dependencies;
- Once the installation is complete, you can launch the VNC client from the Applications menu or by running the appropriate command in the terminal;
- Configure the VNC client by entering the IP address or hostname of the remote computer you wish to connect to. Provide any required login credentials;
- After successfully connecting, you should have full control over the remote computer’s desktop through the VNC client interface [5];
How To Use VNC to control your Raspberry Pi Remotely:
1) Find the Raspberry Pi IP Address
Here’s how you can find the IP address:
- Boot Up Raspberry Pi: Start your Raspberry Pi and ensure it’s connected to the same network as the device you’ll use to control it;
- Open Terminal: Access the terminal on your Raspberry Pi. You can do this by clicking on the terminal icon or using the Ctrl + Alt + T keyboard shortcut;
- Check IP Address: In the terminal, type the following command and press Enter: hostname –I;
- The IP address of your Raspberry Pi will be displayed. Take note of it, as you’ll need it for the next steps;
2) Create A New Connection
Now that you have your Raspberry Pi’s IP address, it’s time to create a new VNC connection on your remote device (the device you’ll use to control the Raspberry Pi). Follow these steps:
- Download VNC Viewer: On your remote device, download and install a VNC viewer application. There are several VNC viewer options available, such as RealVNC Viewer, TigerVNC, and TightVNC;
- Open VNC Viewer: Launch the VNC viewer application on your remote device;
- Create a New Connection: In the VNC viewer, locate the option to create a new connection. This is typically labeled as “New Connection”, “Connect”, or something similar;
- Enter Raspberry Pi IP Address: In the connection settings, enter the IP address of your Raspberry Pi that you obtained earlier. Make sure to double-check the IP address for accuracy;
3) Start The Connection
With the connection settings configured, you’re ready to establish the remote connection to your Raspberry Pi. Follow these steps to start the connection:
- Initiate Connection: Click the “Connect” button or the equivalent option in the VNC viewer application. The VNC viewer will attempt to establish a connection to your Raspberry Pi;
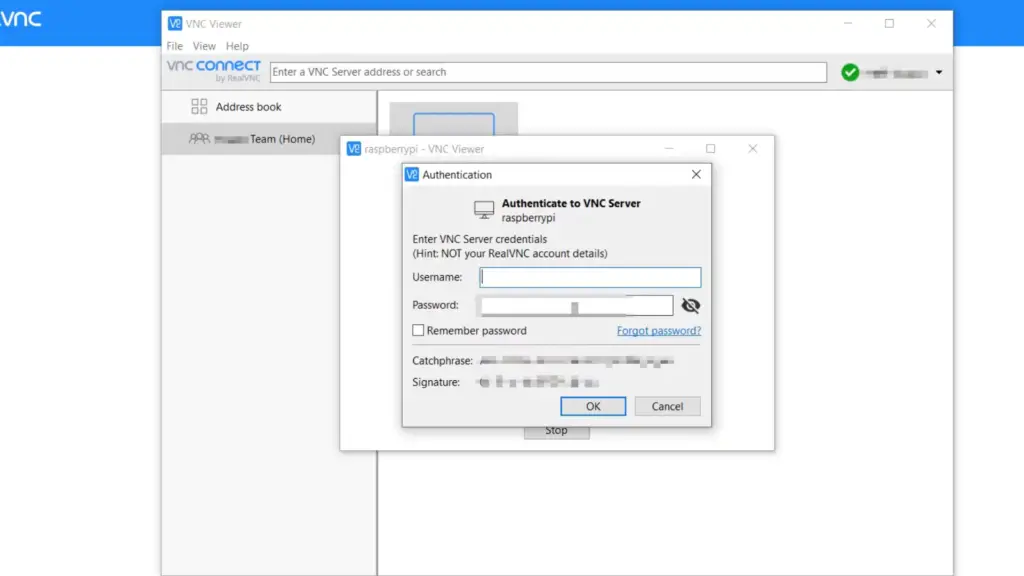
- Authentication: Depending on your VNC server setup, you might be prompted to enter a username and password. Use the credentials you set up when configuring the VNC server on your Raspberry Pi;
- Control Your Raspberry Pi: Once the connection is established, you’ll see your Raspberry Pi’s graphical interface on your remote device’s screen. You can now interact with your Raspberry Pi just as if you were sitting in front of it [6];
FAQ:
1. How to fix the error: “Cannot currently show the desktop” with VNC?
This error might occur due to various reasons such as display driver issues or incorrect configurations. To fix it, try these steps:
- Make sure the VNC server is properly installed and configured on the Raspberry Pi;
- Check if the desktop environment is running and properly configured on the Raspberry Pi;
- Ensure you have the correct permissions and ownership set for the VNC server files;
- Restart the VNC server and try connecting again;
2. How to change the default resolution in VNC?
To change the default resolution in VNC, you can modify the VNC server’s configuration file. For example, if you’re using RealVNC, you can edit the /boot/config.txt file on the Raspberry Pi and adjust the framebuffer_width and framebuffer_height values to your desired resolution.
3. What’s the default username and password for VNC?
The default username for VNC on Raspberry Pi is usually “pi” and the default password is “raspberry”. However, it is strongly recommended to change the password for security reasons.
4. How to install a VNC server on Raspberry Pi?
To install a VNC server on Raspberry Pi, you can use the following command:
sudo apt install realvnc-vnc-server
5. Does Raspberry Pi come with a VNC server?
Raspberry Pi does not come with a VNC server pre-installed, but you can easily install and set up one as needed.
6. How do I start a VNC server?
After installing the VNC server, you can start it using the command:
vncserver
7. How to setup Ubuntu and VNC remote desktop on Raspberry Pi?
While Raspberry Pi OS is more commonly used, you can follow similar steps to set up Ubuntu and VNC. Install a VNC server, configure it, and use a VNC client on another device to connect to the Raspberry Pi.
8. How to start VNC server on boot Raspberry Pi?
To start the VNC server on boot, enable the VNC server service using:
sudo systemctl enable vncserver-x11-serviced.service
9. How to enable VNC on Raspberry Pi without a monitor?
You can enable VNC without a monitor by adding hdmi_force_hotplug=1 to the /boot/config.txt file on the SD card. This will simulate the presence of a monitor.
10. How to install and configure a VNC server?
Install a VNC server software, configure it by setting passwords and other options, and then start the server. Configuration may vary based on the VNC server software you choose.
11. Is VNC server-free?
Yes, many VNC server solutions are open-source and free to use, including RealVNC’s community edition.
12. How to setup VNC Remote Desktop?
Set up a VNC server on the Raspberry Pi, install a VNC client on your remote device, and use the client to connect to the Raspberry Pi’s IP address.
13. What is the difference between VNC and RDP on Raspberry Pi?
VNC and RDP are both remote desktop protocols. VNC is more platform-independent, while RDP is developed by Microsoft and is optimized for Windows systems.
14. What port is VNC?
The default port for VNC is 5900. Additional sessions use ports 5901, 5902, and so on.
15. How to find a VNC server address?
The VNC server address is the IP address of the machine running the VNC server. Use the hostname -I command on the Raspberry Pi to find its IP address.
16. Does VNC use IP addresses?
Yes, VNC uses IP addresses to establish connections between the client and server.
17. What is a RealVNC server?
RealVNC is a company that develops remote access software, including VNC servers and clients. Their software is known for its user-friendly interface and features.
18. How do I use a RealVNC server?
Install the RealVNC server software on your Raspberry Pi, configure it, and use the RealVNC Viewer client on another device to connect to the Pi.
19. Is RealVNC free for Raspberry Pi?
Yes, RealVNC offers a free version of their VNC server for Raspberry Pi, known as RealVNC Connect (Home Edition).
20. What are alternatives to VNC for Raspberry Pi?
Some alternatives to VNC for Raspberry Pi include xrdp (RDP protocol), TeamViewer, AnyDesk, and SSH for command-line access.
21. Why is the VNC server not starting on Raspberry Pi?
The VNC server may not start due to configuration errors, missing dependencies, or conflicts with other software. Check logs and troubleshoot accordingly.
22. How to enable VNC headless on Raspberry Pi?
To enable VNC headless (without a monitor), you can add hdmi_force_hotplug=1 to the /boot/config.txt file on the SD card.
23. Can VNC be used to spy?
VNC can potentially be misused for unauthorized access, but it is designed for legitimate remote control purposes. Always use VNC responsibly and securely.
24. Is VNC secure on Raspberry Pi?
By default, VNC connections are not encrypted. For security, use VNC over a secure connection like VPN or SSH tunneling.
25. What is the difference between TightVNC and TigerVNC?
TightVNC and TigerVNC are both VNC server and client implementations. TightVNC is known for compression algorithms, while TigerVNC focuses on performance improvements.
26. What is the difference between RealVNC and TightVNC?
RealVNC and TightVNC are two different VNC implementations. RealVNC offers commercial and free versions with user-friendly features, while TightVNC is known for efficient compression.
27. Do I need VPN for VNC?
While not strictly required, using a Virtual Private Network (VPN) can add an extra layer of security when accessing VNC remotely over the internet.
28. Is VNC server software pre-installed on Raspberry Pi OS?
No, the VNC server software is not pre-installed. You need to install it using the command: sudo apt install realvnc-vnc-server.
29. How do I find the IP address of my Raspberry Pi for VNC connection?
Open the terminal on your Raspberry Pi and type: hostname -I. The IP address displayed is the one you’ll use to connect via VNC.
30. Can I change the default resolution of the VNC connection?
Yes, you can modify the resolution in the VNC server’s configuration. For instance, if you’re using RealVNC, edit /boot/config.txt and adjust framebuffer_width and framebuffer_height.
31. What’s the default username and password for VNC on Raspberry Pi?
The default username is usually “pi”, and the default password is “raspberry”. It’s recommended to change the password for security.
32. How do I start the VNC server?
After installing the VNC server, you can start it by typing vncserver in the terminal.
33. How can I ensure the VNC server starts on boot?
Enable the VNC server service with: sudo systemctl enable vncserver-x11-serviced.service.
34. Can I use VNC without a physical monitor on Raspberry Pi?
Yes, you can simulate a monitor by adding hdmi_force_hotplug=1 to /boot/config.txt.
35. Is VNC secure for remote access?
By default, VNC connections aren’t encrypted. For security, use VNC over a secure connection like VPN or SSH tunneling.
36. Are there alternatives to VNC for remote access on Raspberry Pi?
Yes, alternatives include RDP (xrdp), TeamViewer, AnyDesk, and SSH for command-line access.
37. What is RealVNC, and is it free for Raspberry Pi?
RealVNC is a remote access software company. They offer a free version of their VNC server for Raspberry Pi, known as RealVNC Connect (Home Edition).
38. How do I troubleshoot if my VNC server isn’t starting?
Check logs (journalctl -u vncserver-x11-serviced.service), ensure proper configuration, and verify network connectivity.
39. Can VNC be used for unauthorized surveillance?
While VNC is designed for legitimate remote access, any technology can be misused. Always use VNC responsibly and securely.
40. What’s the difference between VNC and RDP on Raspberry Pi?
VNC is more platform-independent, while RDP (xrdp) is developed by Microsoft and optimized for Windows systems.
Useful Video: How to access Raspberry pi remotely with VNC direct connection and cloud connection
References
- https://www.realvnc.com/en/blog/how-to-setup-vnc-connect-raspberry-pi/
- https://thesecmaster.com/step-by-step-tutorial-to-set-up-vnc-on-raspberry-pi/
- https://raspberrytips.com/use-vnc-raspberry-pi/
- https://raspberrypi-guide.github.io/networking/connecting-via-VNC
- https://pimylifeup.com/raspberry-pi-vnc-server/
- https://www.ionos.com/digitalguide/server/configuration/setting-up-virtual-network-computing-on-raspberry-pi/




Leave a Reply