Are you looking to take your engineering skills to the next level? Programming STM32 microcontrollers can be an exciting and rewarding experience, but it can also seem a bit intimidating. Don’t worry; we have compiled some essential background information on programming STM32 that will get you ready for success in this field of expertise. In this blog post, we will give you all of the tools and info necessary for understanding how to program these versatile microcontrollers so that you can make full use of their many features. With our help, entering the world of coding is just a few clicks away!
What is STM32?
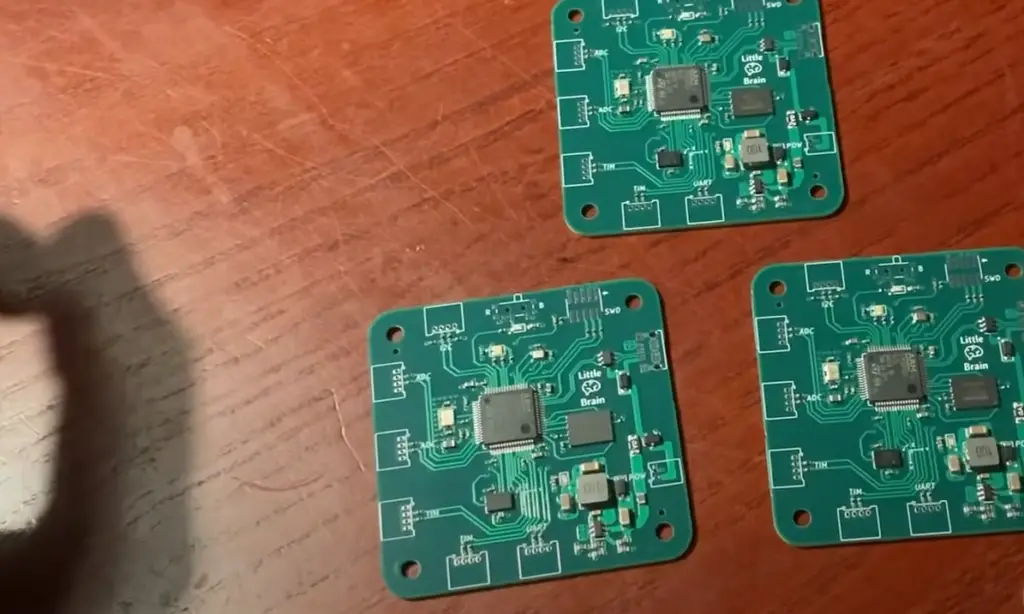
STMicroelectronics offers a range of 32-bit microcontrollers known as STM32. It is based on the ARM Cortex-M architecture and includes a range of peripherals, memory sizes and communication interfaces. The STM32 family of microcontrollers offers developers a wide choice of options for designing embedded applications, including advanced real-time control and low-power, low-cost solutions.
The programming language used for the STM32 microcontrollers can be either C or C++. With the right tools and knowledge, it’s easy to get started with programming your STM32 device. In this article, we will provide an overview of how to program STM32 devices using the Arduino IDE platform. [1]
Benefits of Using STM32 Microcontrollers
STM32 microcontrollers can offer numerous advantages over other microcontroller solutions. In particular they are well suited for embedded applications due to their low power consumption and small size. STM32 chips also have a wide range of features such as:
- High-performance computing capabilities, enabling fast response times;
- Advanced connectivity options such as Bluetooth, Wi-Fi, USB, and Ethernet support;
- Ability to use real-time operating systems (RTOS), offering reliable multitasking performance;
- A large selection of inputs/outputs (I/O) for sensors and devices;
- Built-in security features, including encryption and authentication protocols; and
- Flexible memory configurations, allowing for the storage of large amounts of data.
The combination of these features makes STM32 microcontrollers ideal for a wide range of applications including: home automation, robotics, medical devices, wearable technology, industrial control systems and automotive systems. As well as being easy to program with existing development tools, STM32 chips also provide open source options which allow developers to create custom solutions. With the power and flexibility offered by STM32 microcontrollers, it’s no wonder that they are becoming increasingly popular among engineers and hobbyists alike!
With the right programming tools, you can quickly and easily develop your own custom solutions for any embedded application. Whether it’s creating a home automation system or building a new robotic arm, STM32 microcontrollers provide an excellent platform to work from. So if you’re looking for a powerful yet affordable solution for your embedded application, consider using STM32 microcontrollers!
What Do I Need To Program The STM32?
1. Documentation
You will need to have access to the STM32 datasheet. This is available from STMicroelectronics’ website.
2. Language
You will need to know a programming language such as C or C++, as these are the languages most commonly used for STM32 microcontrollers. [2]
3. Hardware
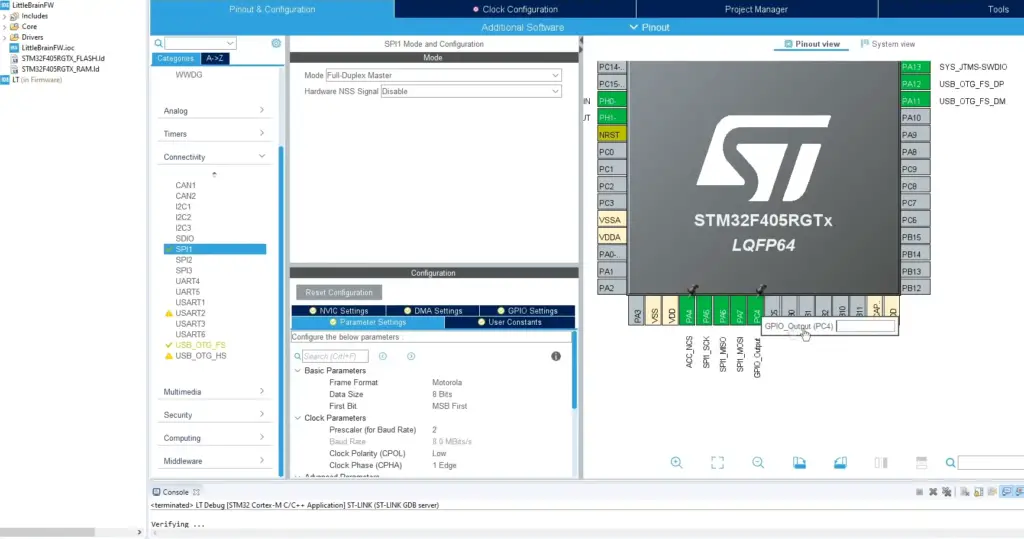
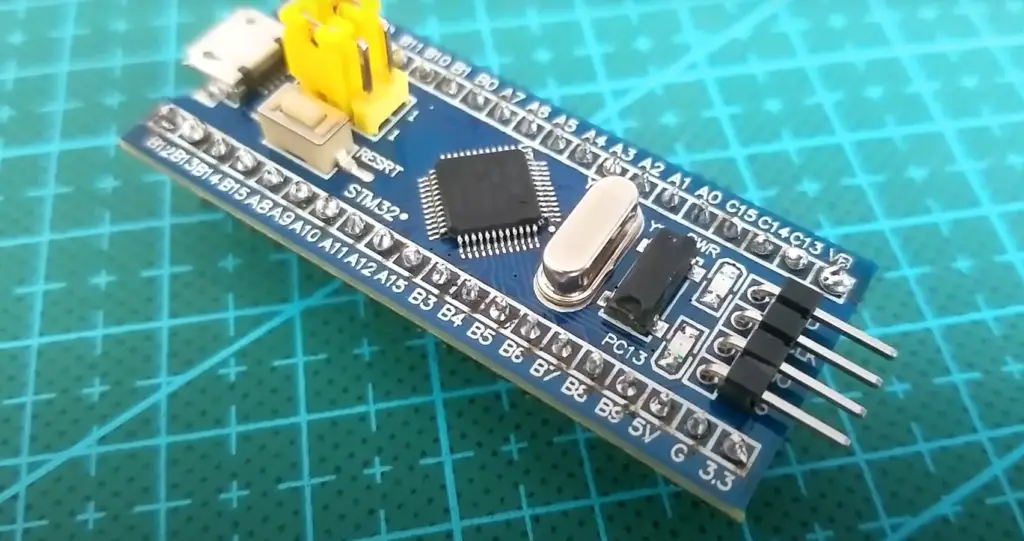
In order to program the STM32, you will also need hardware such as a development board or ST-Link programmer. These are available from various suppliers.
4. Software Development Environment (IDE)
You will need an Integrated Development Environment (IDE) such as IAR Embedded Workbench, Keil MDK, or SW4STM32 (System Workbench for STM32). Each of these IDEs has different features and capabilities that you should consider when selecting the right one for your project.
5. Drivers
You may need to install device drivers in order to communicate with your hardware through a USB port. Most devices come with either preloaded drivers or instructions on how to download them from the manufacturer’s website.
6. Firmware
Once you have your hardware setup and drivers installed, you will need to install the firmware that is specific to your device. This can be done through the IDE or by downloading it directly from the manufacturer’s website.
Developing the First Application
Once the setup is complete, the next step is to develop the first application for STM32. The best way to learn this process is by following some tutorials or examples from trustworthy sources online. One of the most important skills needed for programming STM32 is knowledge of the C programming language.
Once you are comfortable with C, you can move on to creating a project using Cubemx software. With Cubemx, users can quickly generate code and configure their peripherals using graphical user interfaces (GUIs). After generating the code, users must compile it in order to be able to flash it into their microcontroller. [3]
Building and Flashing the Code
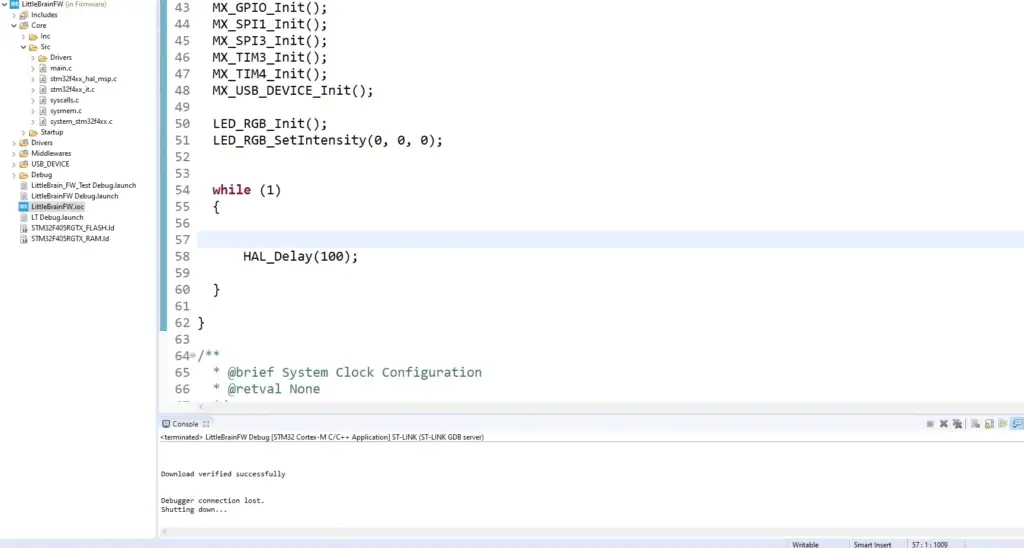
Once you have created the code, the next step is to build and flash it. For this process, you will need an integrated development environment (IDE), such as System Workbench for STM32 or Eclipse with a plug-in for STM32. You should then compile your code in the IDE and generate a .hex file that can be used to flash your microcontroller. After setting up the connections between the microcontroller and your computer, you can use a debugging tool like STLink Utility or OpenOCD to send the code onto your device. Once complete, you can test out your program!
Interrupt System
The interrupt system of STM32 microcontrollers is based on the Arm Cortex-M processor core. It allows programs to be interrupted and suspend execution in order to quickly respond to external events, such as a button press or timer expiration. When an interrupt occurs, the processor changes its program flow to execute a piece of code associated with that interrupt event before resuming normal operation.
Interrupts are managed by the NVIC (Nested Vectored Interrupt Controller). The NVIC provides software controlled prioritization for all interrupts connected to it. This means you can prioritize certain types of interrupts over others so that more important events are serviced first. In addition, each interrupt source has its own vector table entry which contains its own code address and priority.
When an interrupt occurs, the program begins executing at the address set in the vector table entry associated with that interrupt event. This allows for different types of interrupts to have their own dedicated handler functions. After the handler function is complete, the processor resumes normal operation from where it left off before the interrupt occurred. [4]
Extended Interrupts and Events Controller (EXTI)
It is a feature of the STM32 microcontroller that can be used to program interrupt events. It allows you to assign an external signal or internal peripherals as sources of interrupts, and then configure the way those interrupts should be handled by the processor. By using EXTI, you can create complex interactions between different components, such as when a certain button is pressed, a certain motor will start running.
EXTI programming in STM32 consists of two main steps: configuring the source of the trigger (e.g., external pin) and setting up interrupt handlers for various events. The configuration step usually involves writing specific registers located in the device’s memory map with some data which defines how the system should behave when a particular event occurs. In order to define the handlers, you can use a special function called an interrupt service routine (ISR). ISRs are usually written in assembly language and they instruct the microcontroller on how to react when a certain condition is met.
EXTI programming allows for many possibilities such as detecting changes in the environment reacting to user inputs quickly and reliably. As it is a powerful tool, it is important to understand its usage correctly in order to ensure optimal system performance. In addition to that, EXTI also adds flexibility and robustness to applications since you can easily change the configuration if anything unexpected happens. By using EXTI, your applications will be more reliable and perform better overall.
External Interrupt and GPIO Mapping
When programming an STM32 microcontroller, you will need to map its GPIO pins to external interrupts in order to trigger certain events. External interrupt mapping is done through the NVIC (Nested Vector Interrupt Controller), which allows you to program a given pin to generate an interrupt when a particular condition is met. The details of how this process works can vary depending on the specific microcontroller model and architecture, but typically the main steps are as follows:
- Start by configuring your system clock frequency and enable the necessary clock gate for the GPIO port of interest.
- Next, configure the pin that you want to be used as an external interrupt input by setting its mode and function with either the register or bit manipulation functions.
- Configure the external interrupt for the pin by setting its priority level and enabling it in NVIC.
- Finally, you need to write your own interrupt handler code and link it to the external interrupt vector in the startup file of your program.
Understanding how to program STM32’s GPIO pins as external interrupts is an important step towards developing efficient and reliable embedded systems on these microcontrollers. With a few simple steps, you can easily set up your system so that certain events can trigger a response from the microcontroller – enabling you to create more sophisticated embedded applications. [5]
Tips for Programming STM32 Microcontrollers
- Make sure that you have the right development environment setup before getting started. You’ll need to obtain an STM32 board, a compatible toolchain, and software such as STM32CubeIDE or System Workbench for STM32.
- Familiarize yourself with the pinout diagram of your specific board model so you know which pins are available for certain tasks. That way you won’t be wasting time trying to connect components in the wrong places later on.
- Read through all of the documentation associated with your programming language and development environment before attempting to program any code onto your board. This will help ensure that you understand how everything works and that it is all set up properly.
- Take advantage of the online resources available for STM32 programming, such as user forums and tutorials. Many people have gone through the same process that you are going through now, so they may be able to offer helpful advice or even provide solutions to issues you are having.
- Before attempting anything more complex, try practicing some basic code on your board using LED lights or other components connected via GPIO pins. This will help you become familiar with how microcontrollers work and understand the basics before diving into more complicated projects.
- Once you have a better understanding of programming principles and microcontroller architecture, begin experimenting with more advanced applications such as data logging and motor control. This will help you get more out of your board and become a better programmer.
- Finally, don’t be afraid to ask for help if you’re stuck! There are plenty of knowledgeable people in the STM32 community who will be happy to answer any questions you may have and offer advice on best practices. [6]
Pros and Cons of STM32 Programming
Pros of STM32 programming:
- The STM32 family is based on the ARM core architecture, which provides a high level of performance and low power consumption compared to other microcontrollers.
- It also offers a wide range of peripherals such as ADC, SPI, I2C and USART for easy connectivity with different external devices.
- The software development environment offered by STM32 enables a fast and easy development process with drag and drop components from libraries.
- It supports various integrated development environments (IDEs) like System Workbench, Keil MDK-ARM, IAR Embedded workbench etc., enabling users to choose the IDE that fits their needs best.
Cons of STM32 programming:
- It has a steep learning curve, as the architecture is complex and users need to understand how it works in order to program effectively.
- Debugging can be difficult if the code becomes large, as it is hard to track down errors due to lack of debugging tools.
- The development environment offered by STM32 requires users to install additional drivers for certain components like Ethernet or Bluetooth which can be time consuming.
- The peripherals available are limited compared to other microcontroller families. This limits the choice when selecting devices for a particular application.
Overall, STM32 programming is a great option for those looking for high performance and low power consumption microcontrollers that have a wide range of peripherals. The architecture may be complex but with a bit of effort and dedication, users can program STM32 efficiently. However, it is important to keep in mind the cons mentioned above when selecting components for an application.
Is STM32 Easy?
The answer to this question is generally yes, programming STM32 microcontrollers is relatively easy. The main challenge may be understanding the underlying hardware architecture and the various software tools available for development.
For beginners, the best way to get started with coding STM32 microcontrollers is by using an Integrated Development Environment (IDE). This will allow you to write and debug code without having to use command line tools or manually setting up your own toolchain. Popular IDEs for developing STM32 microcontrollers include System Workbench for STM32 (SW4STM32) and TrueStudio.
Once you have set up your IDE, it’s time to start writing code! For newbies, the Arduino IDE is a great place to start. It provides many of the basic functions and libraries that are needed for programming these microcontrollers. However, as you become more experienced, you may want to move onto other programming languages such as C/C++ or Python. [7]
FAQ
What language is STM32 programmed in?
STM microcontrollers are typically programmed in C or C++, but other programming languages such as Python and Rust can also be used. Some models use assembly language. The exact language varies depending on the model of STM32 being used.
Can I program an STM32 without a debugger?
Yes, you can program an STM32 without a physical debugger by using the integrated development environment (IDE) provided by Atollic, Keil, IAR Systems, or System Workbench for STM32. Each IDE will have its own set of tools and tutorials to help you get started with creating and debugging code for your device.
What is the best way to learn how to program an STM32?
The best way to learn how to program an STM32 is to begin with the specific development board or evaluation board that you are using. After setting up your board, the next step is usually to download the IDE for it and look through its tutorials so you can become familiar with the interface and tools available. Once you feel comfortable with navigating through the IDE, then you can start writing code and experimenting with different commands and functions. Additionally, there are many online resources available such as articles, books, YouTube videos and forums which could provide helpful information when programming an STM32 device.
Are there any free tools available for programming an STM32?
Yes, there are several popular free tools available for programming an STM32 device.
Additionally, System Workbench for STM32 Community Edition also provides a free IDE with similar features. Finally, the Cortex Microcontroller Software Interface Standard (CMSIS) library can be used to create software programs on any ARM Cortex-based microcontroller.
Are there any programming challenges available specifically for STM32?
Yes, there are several coding challenges available specifically for STM32 microcontrollers. For example, the STMicroelectronics & Hackster Embedded C Programming contest offers challenges that focus on developing code and applications using the latest embedded MCUs. Additionally, the STM32 Coding Challenge provides an opportunity to compete and create innovative solutions using STM32 microcontrollers.
Are there any open source projects available for programming an STM32?
Yes, there are several open source projects available related to programming an STM32 device. The popular open-source platform Arduino also supports a wide range of STM32 boards and allows users to easily program them using its IDE. Additionally, ChibiOS is an open source real-time operating system designed for ARM Cortex-based microcontrollers which can be used on several STM32 models. Finally, the libopencm3 library provides access to all peripherals on any ARM Cortex M processor with a unified API for all Cortex M series microcontrollers.
Can I program an STM32 using a Raspberry Pi?
Yes, it is possible to program an STM32 microcontroller using a Raspberry Pi as long as the correct hardware and software are in place. The STM32 should be connected to the Raspberry Pi with a serial connection (such as UART or SPI) and then programmed via the GPIO pins on the Raspberry Pi. Additionally, you can use tools such as OpenOCD and System Workbench for STM32 to create programs for your device.
Can I program an STM32 without an IDE?
It is possible to program an STM32 without using any integrated development environment (IDE). This can be done by using a text editor to write code and then compiling it with a compiler such as the GNU Compiler Collection (GCC). Additionally, you can use tools such as OpenOCD and STM32CubeProgrammer to upload your compiled programs to the device.
Is STM32 better than Arduino?
The decision of which platform to use is largely dependent on the project and its requirements. Both STM32 and Arduino are powerful platforms for embedded development but each has its own strengths and weaknesses. Generally speaking, STM32 devices tend to be more powerful than their Arduino counterparts but also require a bit more programming experience to use. Additionally, the cost of an STM32 device may be higher than an Arduino board.
Useful Video: STM32 Programming Tutorial for Custom Hardware | SWD, PWM, USB, SPI
Conclusion
In conclusion, programming an STM32 can be a complex yet rewarding process. With the right hardware and software, you can take advantage of the powerful features of the STM32 microcontroller in your designs. By following these steps and taking advantage of various tutorials and resources available online, you can program an STM32 quickly and easily. If you’re looking for a great introduction to embedded system programming with STM32 controllers, then this guide should have given you the information that you need to get started. Good luck!
References
- https://wiki.st.com/stm32mcu/wiki/STM32StepByStep:Getting_started_with_STM32_:_STM32_step_by_step
- https://smartsolutions4home.com/how-to-program-stm32/
- https://www.st.com/en/development-tools/stm32-ides.html
- https://predictabledesigns.com/introduction-to-programming-stm32-arm-cortex-m-32-bit-microcontrollers/
- https://hackaday.com/2022/12/05/epic-guide-to-bare-metal-stm32-programming/
- https://reversepcb.com/programming-stm32-microcontrollers-a-step-by-step-guide/
- https://stm32-base.org/guides/getting-started.html





Leave a Reply