
Installing a photocell to control multiple lights can significantly enhance the efficiency and convenience of your lighting system. Wiring a photocell to multiple lights allows for intelligent lighting control, ensuring that the lights activate when natural light diminishes and deactivate when sufficient daylight is available.
In this comprehensive guide, we will walk you through the step-by-step process of wiring a photocell to control multiple lights effectively. Whether you want to automate outdoor lighting for energy efficiency, security, or aesthetic purposes, this article will provide you with clear instructions and essential tips to execute a seamless installation.
From understanding the wiring configuration to ensuring proper connections and safety measures, you will gain the knowledge and confidence to set up a sophisticated photocell lighting system that efficiently adapts to changing lighting conditions.
What Is a Photocell and How Does It Work?
The construction of a photocell is relatively straightforward, consisting of a semiconductor material that is sensitive to light. Typically, cadmium sulfide (CdS) or cadmium selenide (CdSe) is used for this purpose. These materials have a high resistance in darkness, which drops significantly when exposed to light. The photocell is often enclosed in a protective casing to shield it from external factors that could interfere with its operation.
The working principle of a photocell is based on the interaction between light photons and the semiconductor material. When photons strike the surface of the photocell, they excite electrons within the material, increasing their energy level. This process creates electron-hole pairs, where electrons are freed from their bound state and move more freely through the semiconductor lattice.
The freed electrons are now able to conduct electricity, reducing the overall resistance of the material. As a result, when light intensity increases, more photons strike the surface of the photocell, generating a larger number of electron-hole pairs, and consequently, lowering the resistance further. Conversely, in low light conditions, the generation of electron-hole pairs diminishes, leading to higher resistance.
The relationship between light intensity and resistance is typically nonlinear, meaning that small changes in light intensity can cause significant variations in resistance. This nonlinearity allows photocells to be sensitive to even subtle changes in illumination, making them highly suitable for light-sensing applications.
Photocells find widespread use in various fields. One common application is in automatic lighting systems, where they can detect ambient light levels and adjust the intensity of artificial lighting accordingly. Additionally, they are used in outdoor lighting fixtures to activate lights at dusk and deactivate them at dawn.
In the domain of photography, photocells are employed in light meters to measure the amount of light falling on a scene. This information helps photographers determine the most appropriate camera settings for optimal exposure. Moreover, photocells are integral components in solar panels, converting incident sunlight into electrical energy, and contributing to the generation of renewable power.
How Many Watts Can a Photocell Handle?
In general, the wattage capacity of a photocell refers to the maximum electrical power it can handle without causing damage or malfunction. This capacity is closely related to the maximum voltage and current ratings of the device. A photocell’s wattage-handling ability is often specified by the manufacturer and can vary widely depending on the model and construction.
For low-power or consumer-grade photocells commonly used in light-sensitive switches or simple automatic lighting systems, the wattage capacity may range from a few milliwatts (mW) to around 1 watt. These photocells are designed for relatively low-power applications and are not suitable for handling higher loads.
On the other hand, industrial-grade photocells, or those used in more robust applications, such as outdoor lighting systems or streetlights, may have higher wattage-handling capabilities. These industrial-grade photocells can typically handle wattages ranging from 5 watts to 100 watts or more, depending on the specific model.
It’s crucial to adhere to the manufacturer’s specifications and guidelines when using photocells. Exceeding the maximum wattage rating can lead to overheating, premature failure, or even safety hazards. Additionally, factors like ambient temperature and the presence of other electrical components in the circuit can influence a photocell’s wattage-handling capacity [2].
In situations where higher wattages are required, it’s common to use relays or contactors in conjunction with the photocell. The photocell controls the switching of the relay or contactor, which, in turn, handles the higher power load. This setup allows the sensitive photocell to control more substantial electrical loads without being subjected to full power directly.
When installing photocells, it’s essential to ensure proper heat dissipation and protection from environmental factors. Heat sinks and proper housing can help dissipate excess heat, thereby extending the photocell’s operational life and enhancing its wattage-handling capabilities.
How to Install the Photocells?
Materials Needed:
- Photocell (photoresistor or light-dependent resistor);
- Photocell housing or casing (if not included with the photocell);
- Electrical wires and connectors;
- Screwdriver;
- Drill (if needed for mounting);
Step 1: Choose the Location
Select a suitable location for the photocell installation. Ensure it has a clear view of the area where you want to detect light changes. Avoid placing the photocell directly facing bright light sources like streetlights, as this could lead to inaccurate readings.
Step 2: Mount the Photocell
If the photocell comes with a housing or casing, mount it securely at the chosen location using screws. If not, you may need to provide protective housing to shield the photocell from environmental factors.
Step 3: Wiring
Consult the manufacturer’s instructions to identify the electrical terminals on the photocell. Most photocells have two terminals for connection. Connect one end of the electrical wire to each terminal of the photocell. You can use wire connectors or soldering to make secure connections.
Step 4: Connect to the Load
Next, determine what you want the photocell to control, such as a light fixture or an electrical circuit. Connect the free ends of the electrical wires to the appropriate input terminals of the load. If the load requires higher wattage handling, consider using a relay or contactor in conjunction with the photocell (as mentioned in the previous response).
Step 5: Grounding (Optional)
If required or recommended by the manufacturer, ground the photocell and the load for added safety.
Step 6: Test the Installation
Before fully securing all the components, test the installation to ensure it works as expected. Cover the photocell with your hand or shield it from light to trigger the action you want (e.g., turning on a light). Remove the obstruction to return to the previous state (e.g., turning off the light). Adjust the sensitivity or settings if necessary.
Step 7: Secure and Weatherproof
Once you have confirmed that the photocell works correctly, secure all the components in place using screws or appropriate mounting mechanisms. Ensure that all electrical connections are protected from exposure to moisture or adverse weather conditions.
Step 8: Final Check
Double-check all connections and ensure there are no exposed wires or potential safety hazards. Verify that the photocell is detecting light changes accurately [3].
Safety Precautions When Installing or Using a Photocell:
They Require A Small Current To Operate During The Daytime
One of the unique characteristics of photocells is that they require a small current to operate during the daytime. This current can come from either the load or the power source. To avoid electrical shock, always turn off the power to the circuit when working on it. Furthermore, handle photocells with care, as they are sensitive electronic devices that can be damaged by static electricity or rough handling.
They Can Be Used To Control Multiple Lights
Photocells can be used to control multiple lights, making them a convenient and cost-effective way to automate outdoor lighting. However, remember that photocells are rated for a specific maximum load. Before connecting multiple lights to a single photocell, check the specifications of the device to ensure that it is capable of handling the load. Failure to do so can result in overloading the photocell, which can cause it to fail or create a fire hazard.
They Are Similar To Dusk-To-Dawn Sensors
Photocells are similar to dusk-to-dawn sensors in that they both provide automatic control of outdoor lighting. However, there are some differences to note. Dusk-to-dawn sensors rely on a built-in clock or timer to turn lights on and off at specific times, while photocells vary the amount of light needed to turn the lights on or off.
Crucial Safety Tips When Working With Photocell Wiring:
- Power off the circuit;
- Follow the manufacturer’s guidelines;
- Choose the right wattage handling;
- Proper grounding (if required);
- Protect from moisture and environmental factors;
- Test before finalizing installation;
- Regular maintenance and inspection;
- Use proper light sources;
- Avoid obstructions;
Photocell Applications: Lighting Control and Beyond
Photocells’ versatility extends to various applications, making them invaluable in modern electronics and beyond. Here are some common uses of photocells:
Automatic Lighting Control
One of the most prevalent applications of photocells is in automatic lighting systems. They are often used to control outdoor lights, such as streetlights and garden lights, turning them on at dusk and off at dawn. This energy-efficient approach ensures lights are only active when needed.
Daylight Harvesting
In buildings, photocells are employed for daylight harvesting systems. These systems adjust artificial lighting levels based on available natural light, optimizing energy consumption and creating a well-lit and comfortable environment.
Light Meters
Photocells are integral components in light meters used by photographers to measure the intensity of light in a scene. This information helps photographers determine the most appropriate camera settings for optimal exposure.
Solar Panels
Photocells play a vital role in solar panels, converting incident sunlight into electrical energy. This process, known as the photovoltaic effect, is the foundation of solar power generation, contributing to renewable energy sources.
Security Systems
Photocells are integrated into security systems to detect movement or changes in light levels. They trigger alarms or activate lighting when motion or disturbances are detected.
Traffic Control Systems
Photocells are utilized in traffic lights and other traffic control systems. They help regulate traffic flow by detecting vehicles and adjusting signal timings accordingly [4].
Photocells vs. Dusk-to-Dawn Sensors
Photocells:
- Respond directly to changes in light intensity and alter the current accordingly;
- Can control multiple lights or circuits based on the connected load’s wattage handling;
- Require a small current to operate during the daytime, continuously adjusting to varying light conditions;
Dusk-to-Dawn Sensors:
- Generally incorporate a timer or internal clock to control the lighting, regardless of light intensity;
- Often designed for controlling a single light fixture or a specific lighting zone;
- May not require continuous operation during the daytime, as they rely on preset schedules;
How Do You Wire a Photocell Circuit?
Materials Needed:
- Photocell (photoresistor or light-dependent resistor);
- Photocell housing or casing (if not included with the photocell);
- Electrical wires and connectors;
- Screwdriver;
- Load (e.g., light fixture) to be controlled by the photocell;
Step 1: Choose the Location
Select an appropriate location for the photocell installation, ensuring it has an unobstructed view of the area where you want to detect light changes.
Step 2: Mount the Photocell
If the photocell comes with a housing or casing, mount it securely at the chosen location using screws. If not, provide a protective housing to shield the photocell from environmental factors.
Step 3: Identify Electrical Terminals
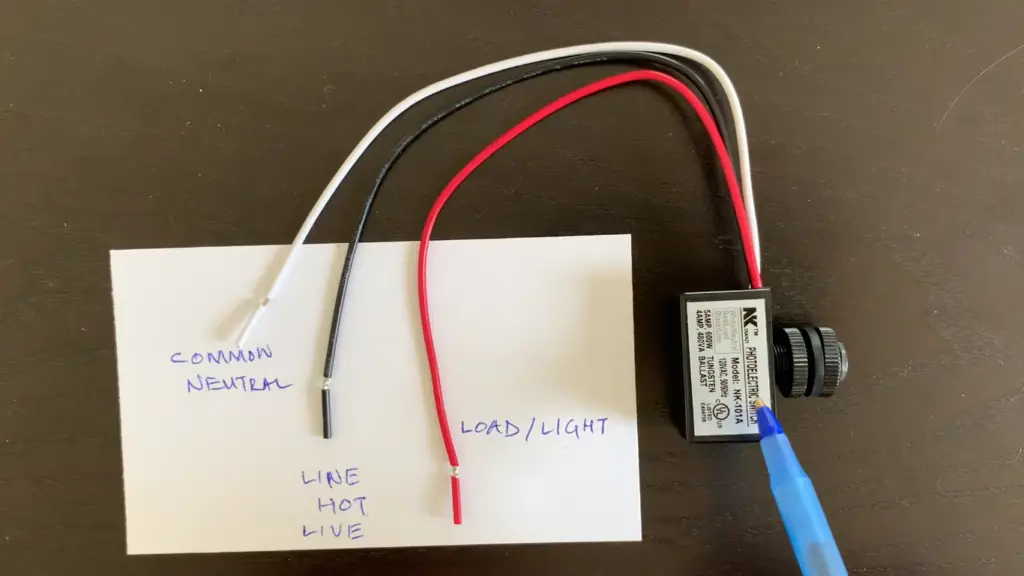
Consult the manufacturer’s instructions to identify the electrical terminals on the photocell. Most photocells have two terminals for connection, labeled “L” (line) and “N” (neutral) or “IN” (input) and “OUT” (output).
Step 4: Wiring Configuration
There are two common wiring configurations for photocell circuits, depending on whether you want the load to be on or off during daylight hours.
Load Off During Daytime (Typical Application):
- In this configuration, the photocell controls the load so that it remains off during daylight hours and turns on when it gets dark;
- Connect one end of the electrical wire to the “L” (line) terminal of the photocell;
- Connect the other end of the wire to the incoming live (hot) wire from the power source;
- Connect one end of another electrical wire to the “N” (neutral) terminal of the photocell;
- Connect the other end of this wire to the neutral wire from the power source;
- Connect one end of the electrical wire to the “OUT” (output) terminal of the photocell;
- Connect the other end of this wire to the live (hot) wire going to the load (e.g., the light fixture);
- Connect the neutral wire from the load to the neutral wire from the power source;
Load On During Daytime (Reversed Application)
- In this configuration, the photocell controls the load so that it remains on during daylight hours and turns off when it gets dark;
- Connect one end of the electrical wire to the “L” (line) terminal of the photocell;
- Connect the other end of the wire to the incoming live (hot) wire from the power source;
- Connect one end of another electrical wire to the “N” (neutral) terminal of the photocell;
- Connect the other end of this wire to the neutral wire from the power source;
- Connect one end of the electrical wire to the “OUT” (output) terminal of the photocell;
- Connect the other end of this wire to the neutral wire going to the load (e.g., the light fixture);
- Connect the live (hot) wire from the load to the live (hot) wire from the power source;
Step 5: Test the Wiring
Before fully securing all the components, test the photocell circuit to ensure it works as expected. Cover the photocell with your hand or shield it from light to trigger the action you want (e.g., turning on or off the load). Remove the obstruction to return to the previous state (e.g., turning off or on the load). Adjust the sensitivity or settings if necessary.
Step 6: Secure and Weatherproof
Once you have confirmed that the photocell circuit works correctly, secure all the components in place using screws or appropriate mounting mechanisms. Ensure that all electrical connections are protected from exposure to moisture or adverse weather conditions.
Step 7: Final Check
Double-check all connections and ensure there are no exposed wires or potential safety hazards. Verify that the photocell circuit is detecting light changes accurately and controlling the load as intended [5].
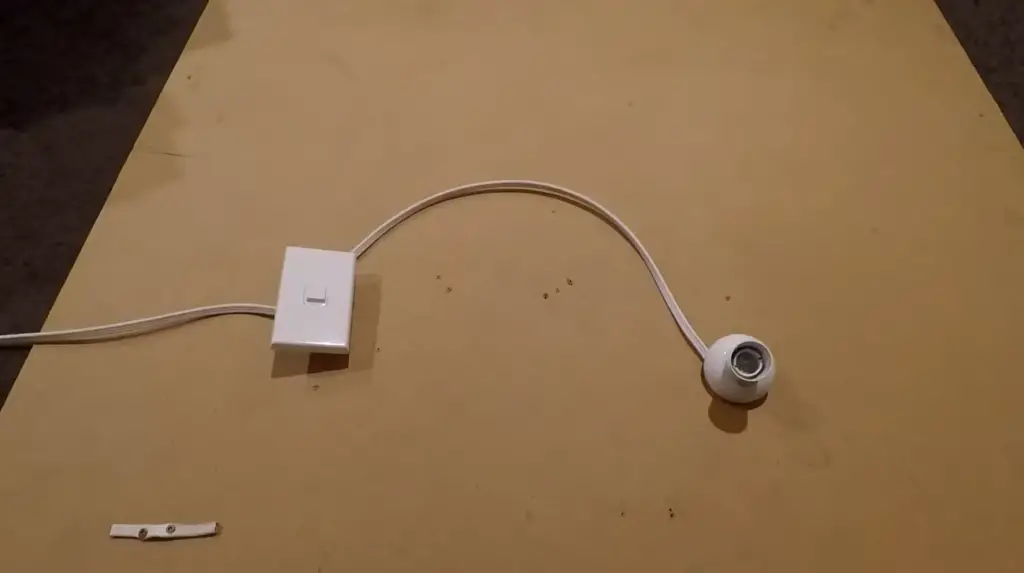
How Do You Wire A Photocell To A Switch?
Wiring a photocell to a switch allows you to control a light or electrical load using both the photocell’s light-sensing capabilities and manual control through the switch.
This setup is commonly used for outdoor lighting systems, where the photocell can automatically turn the light on or off based on ambient light levels, while the switch provides flexibility for manual control.
Materials Needed:
- Photocell (photoresistor or light-dependent resistor);
- Photocell housing or casing (if not included with the photocell);
- Electrical wires and connectors;
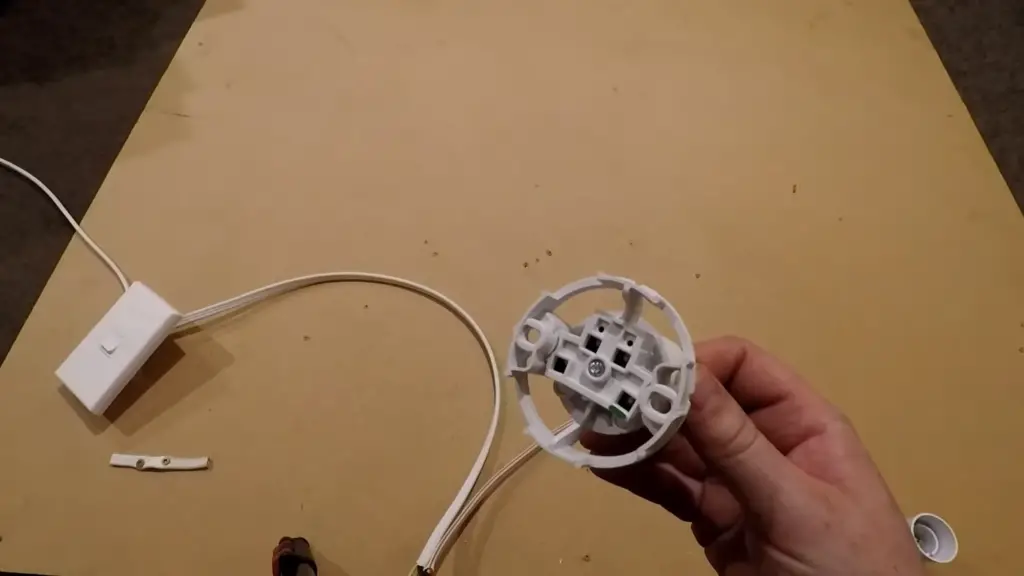
- Switch (single-pole single-throw – SPST);
- Light fixture or electrical load to be controlled by the photocell and switch;
Step 1: Choose the Location
Select a suitable location for the photocell installation, ensuring it has a clear view of the area where you want to detect light changes.
Step 2: Mount the Photocell
If the photocell comes with a housing or casing, mount it securely at the chosen location using screws. If not, provide a protective housing to shield the photocell from environmental factors.
Step 3: Identify Electrical Terminals
Consult the manufacturer’s instructions to identify the electrical terminals on the photocell. Most photocells have two terminals for connection, labeled “L” (line) and “N” (neutral) or “IN” (input) and “OUT” (output).
Step 4: Wiring Configuration
To wire the photocell to a switch, you’ll need to connect both the photocell and the switch to the electrical circuit and the load (e.g., the light fixture). Here’s the wiring configuration:
- Connect one end of an electrical wire to the “L” (line) terminal of the photocell;
- Connect the other end of the wire to the incoming live (hot) wire from the power source;
- Connect one end of another electrical wire to the “N” (neutral) terminal of the photocell;
- Connect the other end of this wire to the neutral wire from the power source;
- Connect one end of an electrical wire to the “OUT” (output) terminal of the photocell;
- Connect the other end of this wire to one terminal of the switch;
- Connect one end of an electrical wire to the other terminal of the switch;
- Connect the other end of this wire to the live (hot) wire going to the load (e.g., the light fixture);
- Connect the neutral wire from the load to the neutral wire from the power source;
Step 5: Test the Wiring
Before fully securing all the components, test the photocell and switch wiring to ensure they work as expected. When the switch is turned on, it should manually activate the load regardless of the light level detected by the photocell. When the switch is off, the photocell should control the load based on ambient light levels.
Step 6: Secure and Weatherproof
Once you have confirmed that the photocell and switch wiring work correctly, secure all the components in place using screws or appropriate mounting mechanisms. Ensure that all electrical connections are protected from exposure to moisture or adverse weather conditions.
Step 7: Final Check
Double-check all connections and ensure there are no exposed wires or potential safety hazards. Verify that the photocell and switch setup is detecting light changes accurately and providing the desired manual control.
Can One Photocell Control Multiple Lights:
Photocells, also known as photoresistors or light-dependent resistors (LDRs), are versatile devices used in automatic lighting control systems. One common question that arises is whether a single photocell can effectively control multiple lights. The answer to this question depends on various factors, including the number of lights, the number of circuits, and the source of energy:
1) Number of Lights
A single photocell can control multiple lights, provided that the combined wattage of all the lights falls within the photocell’s wattage-handling capacity. The wattage-handling capacity of the photocell is the maximum electrical power it can handle without causing damage or malfunction. If the total wattage of the lights exceeds the photocell’s rating, the photocell may overheat or fail to function correctly.
When planning to control multiple lights with a single photocell, it is essential to calculate the total wattage of all the lights and ensure it is well below the photocell’s specified wattage capacity. If the total wattage is within the limits, the photocell can reliably control the lights, turning them on or off based on changes in ambient light levels.
2) Number of Circuits
The number of circuits that a single photocell can control depends on its design and electrical configuration. Some photocells have multiple output terminals, allowing them to control more than one circuit. In this case, each circuit can have its set of lights, and the photocell will activate or deactivate each circuit independently based on the light level it detects.
For photocells with only one output terminal, they can still control multiple circuits using relays or contactors. A relay is an electrically operated switch that can be controlled by the photocell’s output. When the photocell detects a certain light level, it activates the relay, which, in turn, switches the lights on or off in different circuits.
3) Source of Energy
The source of energy for the lights controlled by the photocell can vary. If the lights are connected to the main electrical grid, the photocell can control them directly by interrupting the power supply based on the light level. In this scenario, the photocell acts as a switch, controlling the flow of electricity to the lights.
On the other hand, if the lights are powered by alternative energy sources, such as solar panels or batteries, the photocell can still regulate their operation. For solar-powered lights, the photocell can trigger the lights to turn on at dusk and turn off at dawn, conserving energy and extending battery life.
How to Wire a Photocell to Multiple Lights?
By utilizing photocell sensors to automate the control of outdoor lighting and indoor lighting fixtures, homeowners and business owners can save energy and increase safety:
Know the Number of Lights
Knowing the number of lights you intend to automate is the first step in wiring a photocell to multiple lights. This will help you determine the necessary voltage range needed to operate your lighting circuit effectively. Simply count the number of lamps that you will be connecting to the photocell to help with the planning process.
Determine the Number of Circuits
Once you’ve identified how many lights you intend to use, the next step is to determine the number of circuits you’ll need. Based on the number of lights and their voltage requirements, it may be necessary to split them into different circuits, each wired through a different photocell.
Determine Whether You’ll Use Indoor Lighting to Share Power
Suppose you’re wiring ten outdoor lights with a total power requirement of 2,400 watts. If you wire this on a dedicated outdoor circuit, it may trip the circuit breaker. But, if you connect the lighting to an indoor circuit with a larger capacity, the circuit could accommodate the load without tripping a breaker.
Another advantage of using indoor lighting is that you can turn the lights on and off from an indoor switch, so you don’t have to brave the elements every time you need to change lighting settings.
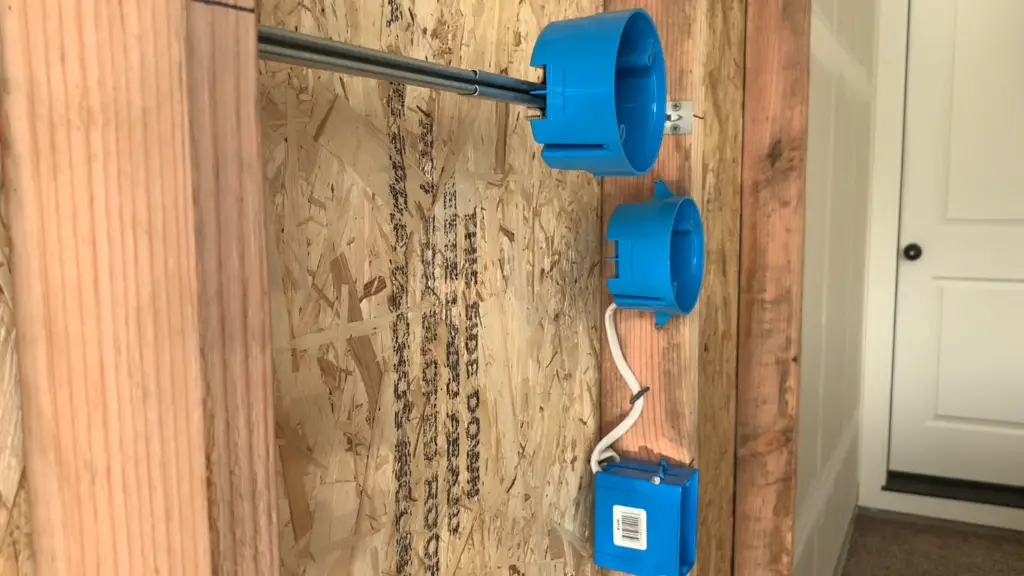
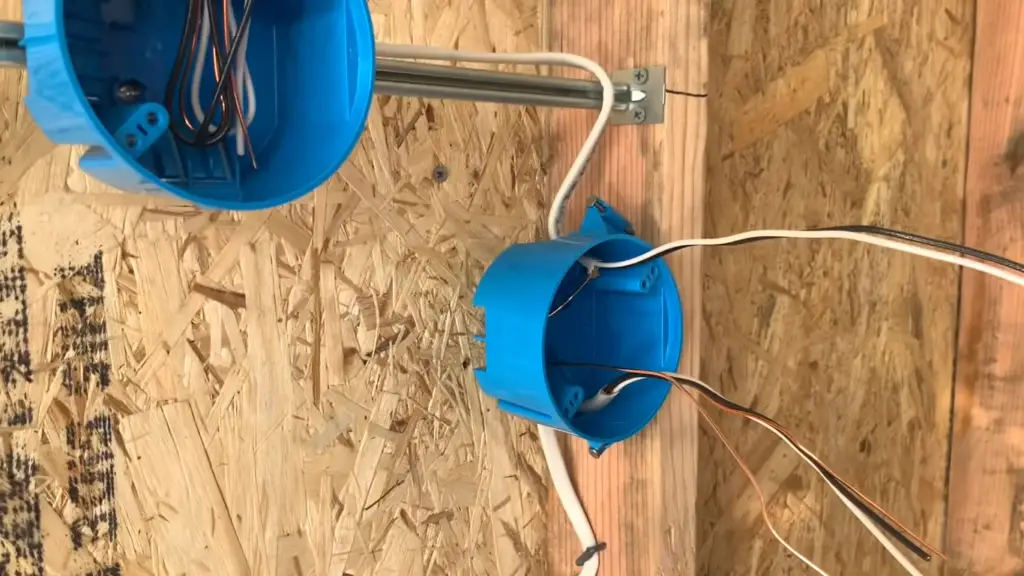
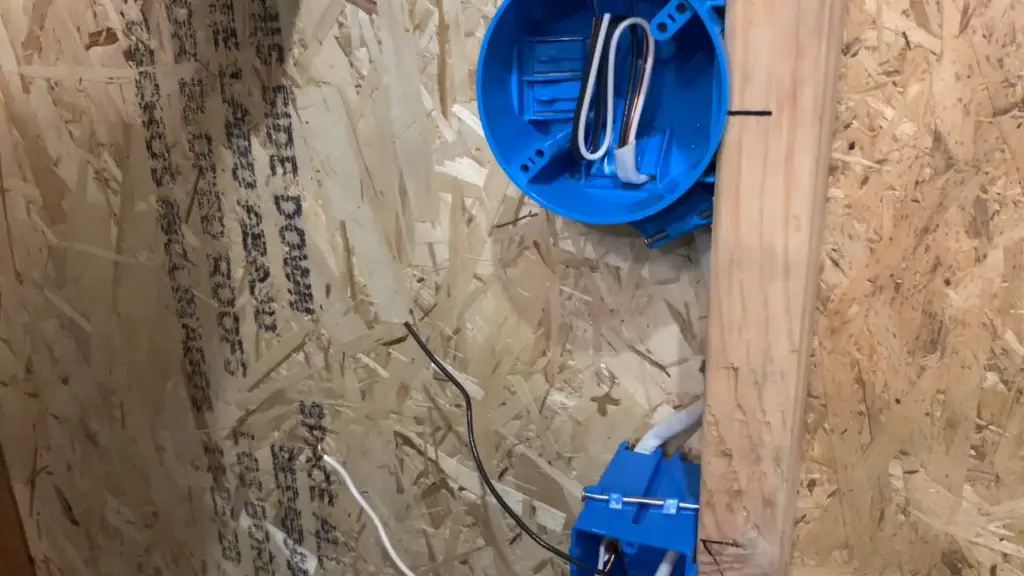
Install Electrical Conduit Pipes
The next step is to install electrical conduit pipes. To do this, drill small holes through the walls to run electrical conduit pipes. This is necessary to ensure that electrical wires are properly protected. If you’re running wires through the outdoor portion of the lighting circuit, use a PVC electrical conduit, which can withstand the elements.
Fed Wire Through Conduits
Once the electrical conduit pipes are in place, pull wires through them. You will need to run wires from the electrical panel to the photocell sensor and connect them according to the manufacturer’s instructions. If you’re wiring multiple circuits, you’ll need to run wires from the photocell sensors to the lighting fixtures.
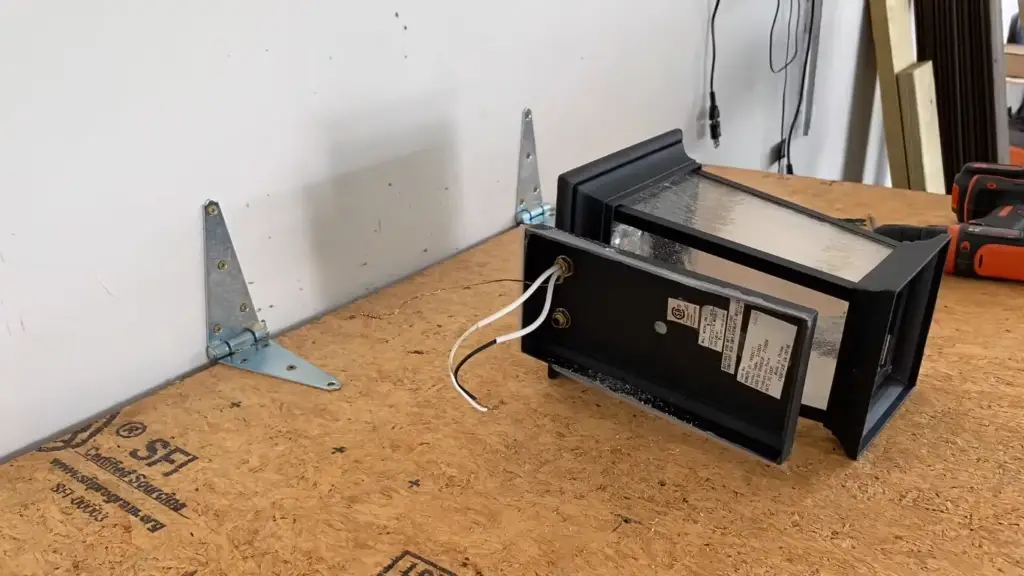
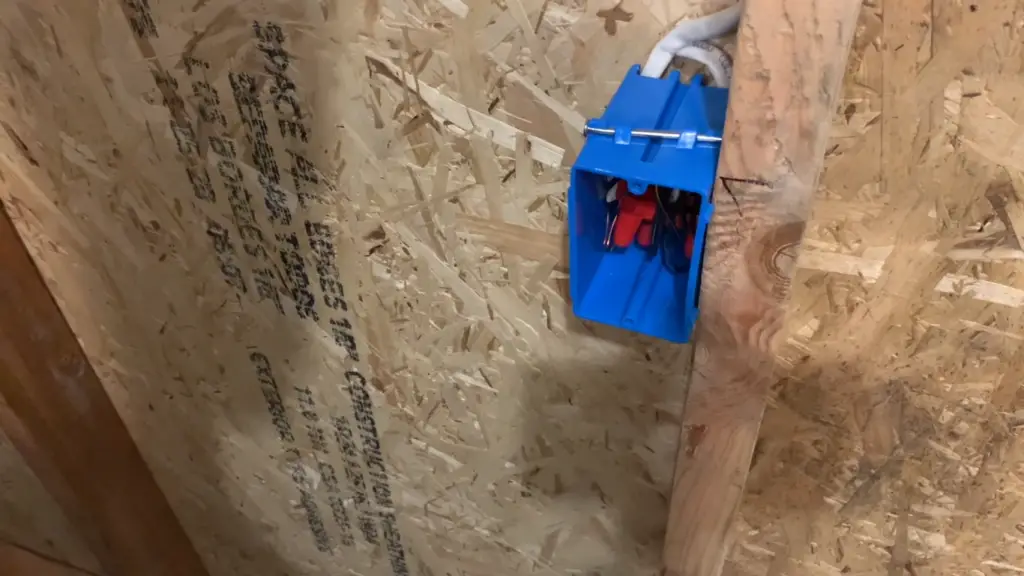
Mount and Connect the Photocell
Lastly, mount and connect the photocell. Mount the photocell in a location that will get exposed to daylight during daytime hours to ensure that the sensor works consistently. Photocells are notorious for malfunctioning, so choose a location that is protected from the elements but offers plenty of sunlight exposure [6].
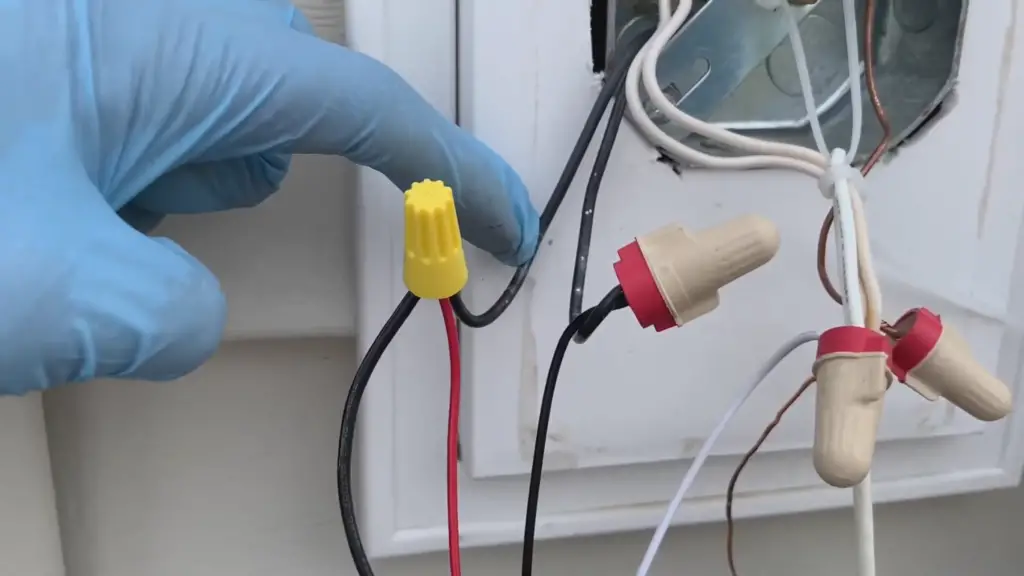
Once the photocell is mounted in the desired location, connect it to the wires you threaded through the conduits. Attach the red wire from the photocell to the incoming hot wire, attaching the wire to the load side of the contactor. Next, attach the white wire to the incoming neutral wire. Lastly, connect the green or bare copper wire to the grounding wire.
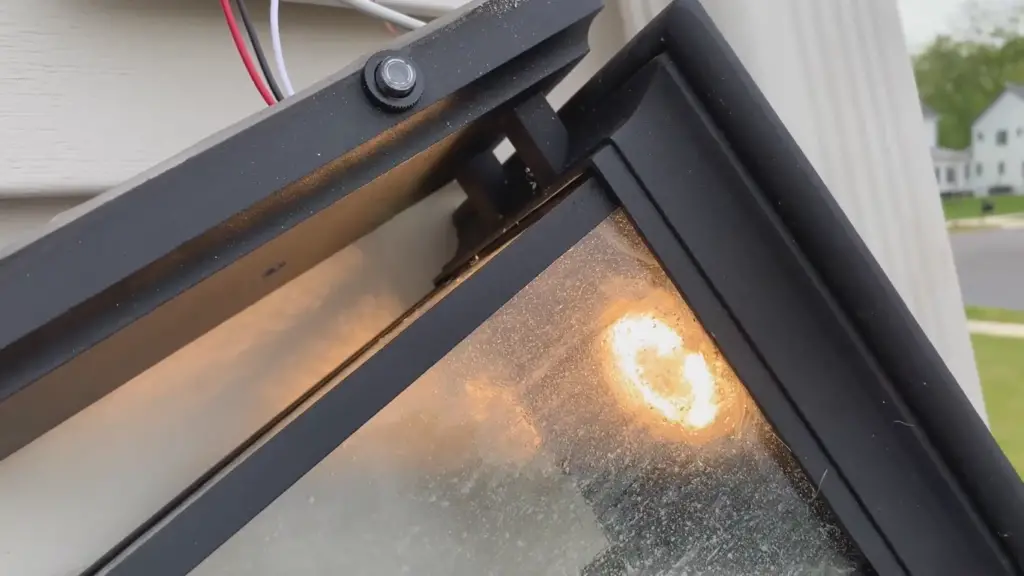
Once you’ve completed all the connections, switch the circuit breaker back on. The photocell will take over from there and control the lighting automatically. During daylight hours, the photocell will turn off the lights, and during nighttime hours, the photocell will turn on the lights.
FAQ:
1. How many watts can a photocell handle?
The wattage capacity of a photocell can vary depending on the specific model and type. Generally, consumer-grade photocells used in light-sensitive switches or simple lighting control applications can handle a few milliwatts (mW) to around 1 watt. Industrial-grade photocells designed for more substantial loads, such as outdoor lighting fixtures or streetlights, can handle wattages ranging from 5 watts to 100 watts or more.
2. Can photocells be used with LEDs?
Yes, photocells can be used with LEDs. LED lights are low-power devices, and most photocells can handle the wattage of LED bulbs without any issues. However, it’s essential to check the specific wattage-handling capacity of the photocell to ensure it is suitable for the total wattage of the LED lights being used.
3. Do photocells need neutrality?
Photocells do not require neutrality. They can be used with both AC (alternating current) and DC (direct current) power sources, making them versatile for various applications.
4. How to install the photocells?
To install photocells, follow these general steps:
- Choose the location with a clear view of the area where you want to detect light changes;
- Mount the photocell securely, using a housing or casing if necessary;
- Identify the electrical terminals on the photocell and wire it to the load and power source following the manufacturer’s guidelines;
- Test the installation before securing all the components and weatherproof the connections;
5. How many amps does a ceiling fan use?
The average ceiling fan typically uses around 0.5 to 1.5 amps.
6. How many ceiling fans can be on a 15-amp circuit?
A 15-amp circuit can handle several ceiling fans, depending on their individual amp ratings and the total amp load on the circuit. As a general rule, it’s best to avoid exceeding 80% of the circuit’s capacity, which would mean about three ceiling fans on a 15-amp circuit.
7. What does a typical ceiling fan draw, or how many amps do ceiling fans use?
As mentioned earlier, a typical ceiling fan draws around 0.5 to 1.5 amps.
8. How many amps does a 52-inch ceiling fan pull?
A 52-inch ceiling fan typically pulls around 1 to 1.5 amps.
9. Does a ceiling fan need its own circuit?
Ceiling fans do not typically require their own circuit, but it’s essential to consider the total electrical load on the circuit and avoid overloading it with other appliances or devices.
10. How many fans can you run on a 20-amp breaker?
A 20-amp breaker can handle several ceiling fans, similar to the guidelines for the 15-amp circuit. It’s advisable not to exceed 80% of the circuit’s capacity to ensure safety and prevent tripping.
11. What is the maximum wattage a photocell can handle?
The maximum wattage that a photocell can handle depends on the specific model and type. Industrial-grade photocells can handle higher wattages, ranging from 5 watts to 100 watts or more.
12. How many lights can be connected to a photocell?
The number of lights that can be connected to a photocell depends on the total wattage of the lights and the photocell’s wattage-handling capacity. Ensure that the total wattage of all the lights does not exceed the photocell’s specified capacity.
13. How do you wire a photocell in series?
To wire photocells in series, connect the “OUT” (output) terminal of one photocell to the “IN” (input) terminal of the next photocell in the series. The last photocell’s “OUT” terminal is connected to the load or power source.
14. How to wire one motion sensor to multiple lights?
To wire one motion sensor to multiple lights, connect the motion sensor’s “OUT” (output) terminal to the first light’s “IN” (input) terminal. Then, connect the “OUT” terminal of the first light to the “IN” terminal of the next light, and so on. The last light’s “OUT” terminal is connected to the power source.
15. How far should a photocell be from a light?
The ideal distance between a photocell and the light it is sensing depends on the specific model and application. As a general guideline, place the photocell close enough to detect changes in light accurately but not so close that the light source directly affects it.
16. What is the best position for a photocell?
The best position for a photocell is where it has an unobstructed view of the area you want to detect light changes. Avoid placing the photocell directly facing bright light sources, as this may lead to inaccurate readings.
17. Is photocell the same as LDR?
Yes, photocell and LDR (Light-Dependent Resistor) are synonymous terms used to refer to the same device. They both describe a semiconductor component that changes its electrical resistance in response to changes in light intensity.
18. How do you connect a photocell light sensor?
Connecting a photocell light sensor involves wiring it to the electrical circuit and loading it will control based on light intensity. Refer to the manufacturer’s instructions for the specific wiring configuration of the photocell.
19. What are the different types of photocells?
There are various types of photocells, including but not limited to:
- Cadmium sulfide (CdS) photocells: Commonly used for general light sensing applications;
- Phototransistors: Photocells with a transistor output for more sensitive detection;
- Silicon photocells: Used in solar panels to convert light into electricity;
20. What is the lifespan of a photocell?
The lifespan of a photocell can vary depending on its quality, usage conditions, and application. On average, high-quality photocells can last anywhere from 10,000 to 100,000 hours or more.
21. What is the difference between a photocell and a photoelectric cell?
The terms “photocell” and “photoelectric cell” are often used interchangeably to refer to the same light-sensitive device, such as a cadmium sulfide (CdS) photocell. Both terms describe a semiconductor component that changes its resistance or conductivity based on changes in light intensity.
Useful Video: Install one photocell for multiple outdoor lights
References
- https://www.circuitsgallery.com/how-to-wire-a-photocell-to-multiple-lights/
- https://www.brightlighthub.com/how-to-wire-a-photocell-to-multiple-lights/
- https://yardandgardenguru.com/how-to-wire-a-photocell-to-multiple-lights/
- https://lightow.com/how-to-wire-a-photocell-to-multiple-lights/
- https://toolsweek.com/how-to-wire-a-photocell-to-multiple-lights/
- https://www.starlanguageblog.com/how-to-wire-a-photocell-to-multiple-lights