Soldering is a process of joining metals by heating them to the point that the solder alloy (a fusible metal) liquefies and flows into the joint, filling any voids. It is commonly used in electrical and electronic equipment assembly.
When it comes to dealing with electronics, soldering is a truly helpful skill. Learning to solder might be simple, but becoming a pro takes some practice. Upskilling in this area will allow you to be more efficient and confident when working on more sophisticated tasks [1].
Here are some tips on how you can practice your soldering skills:
- Start by practicing on some scrap pieces of metal. This will allow you to get a feel for the process and help perfect your technique;
- Pay close attention to the temperature of your soldering iron. Too much heat can damage sensitive components, while not enough heat will make it difficult to form strong bonds;
- Practice making both clean and tight joints. This will ensure that your connections are durable and won’t come loose over time;
- Be patient! Rome wasn’t built in a day, and neither is becoming a soldering expert. Take your time and keep practicing until you’re confident in your abilities;
What Is Soldering?
Soldering is a technique used to join conductive metals by melting and fusing their surfaces together at high temperatures. The solder is heated to its melting point and then applied to the junction; it cools and solidifies to fill the space between the two pieces of metal.
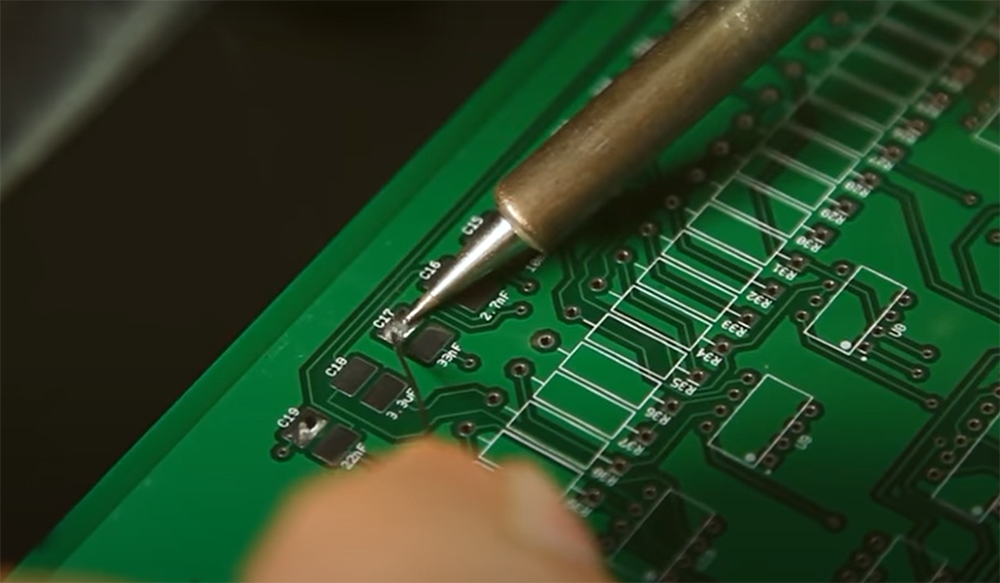
Soldering is a skill that involves combining two metals with heat, and it can be used to connect or mend an electric circuit, seal a leak in a container, join dissimilar metals, repair a broken pipe, join two pieces of metal, or create a decorative design [2].
There are 4 main types of soldering:
- Soft soldering is the most common type and is used for electrical wiring and electronic components;
- Hard soldering is used for metalwork that will be subject to high temperatures or stress, such as jewelry making;
- Surface-mount soldering is used for attaching electronic components to printed circuit boards;
- Ball soldering is a type of soft soldering that uses a small ball of solder to join two pieces of metal;
What You Need To Practice Soldering:
1) Soldering Iron
A soldering iron is the most important tool. It needs to be at the correct temperature and have a pointed tip. If you are just starting out, you can use a simple soldering iron with adjustable temperature control.
If you are a beginner, practice on some scrap pieces of metal first. You want to get a feel for how hot the iron needs to be and how much solder to use.
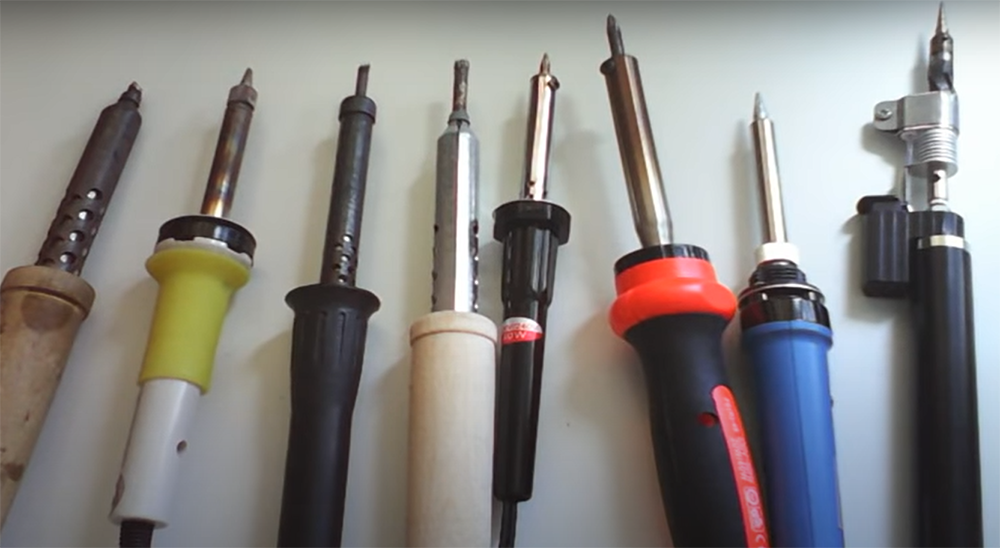
Too little solder and the connection won’t be strong.
Too much and it will be a big mess.
The key is to apply just enough solder so that it flows into the crevice and creates a smooth, shiny bead.
Once you are comfortable with using the soldering iron, you can move on to practicing on a circuit board.
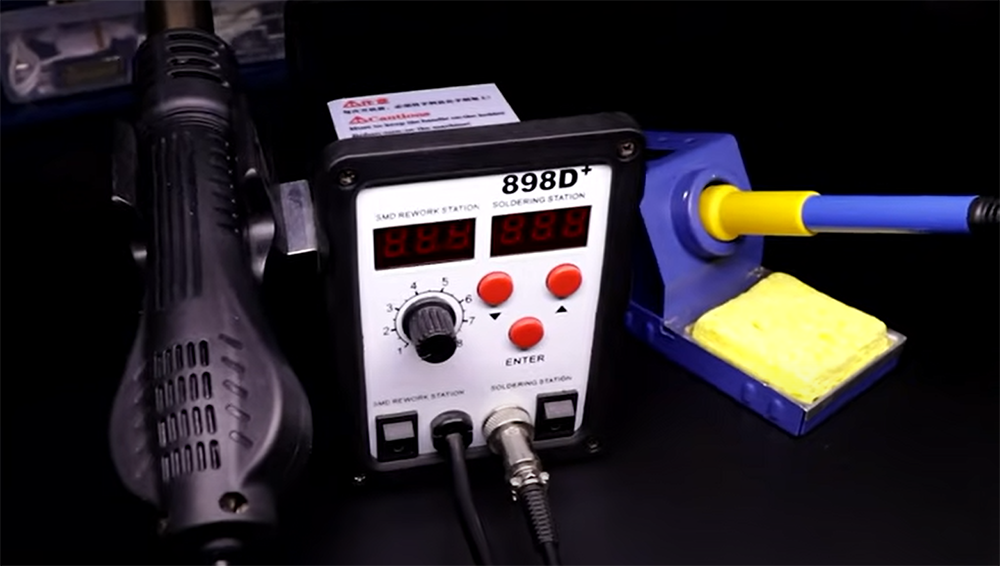
2) Soldering Station
A soldering station is not required, but it makes the process much easier<. It has a holder for the iron and a sponge to clean the tip.
It also has a power regulator so you can set the temperature precisely. This is important because different types of solder have different melting points.
The ability to precisely change the soldering iron temperature is one of the main advantages of a soldering station. These stations may also offer a safer work environment because they contain sophisticated temperature sensors, alert settings, and even security measures [3].
3) Soldering Iron Tips
The tip of the soldering iron is important because it needs to be the correct size and shape for the job. There are many different tips available, so you will need to find the one that is right for you.
If you are working on a circuit board, you will need a fine-tipped soldering iron. This will allow you to solder components without damaging them.
You can also get tips that have a chisel shape or other shapes that can be used for specific tasks.
Tinning the tip of the soldering iron is important because it helps to conduct heat better. It also helps to prevent oxidation of the tip.
To tin the tip, simply apply a small amount of solder to the tip and then wipe it off with a damp sponge.
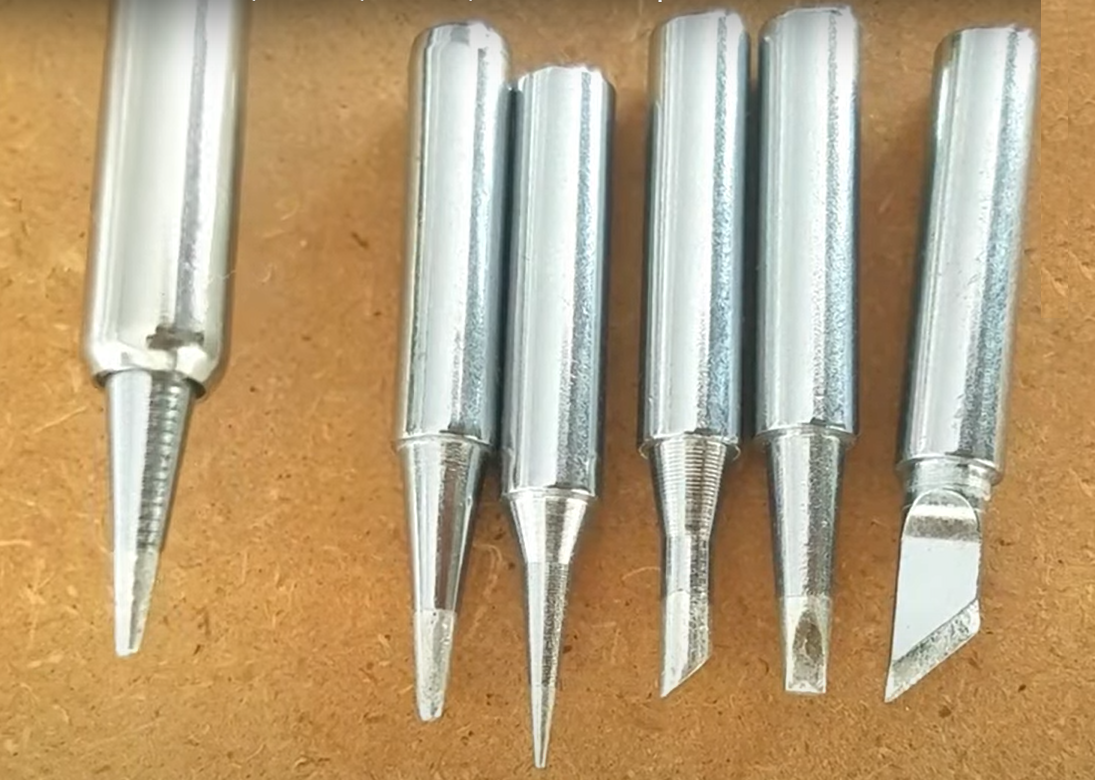
You should do this every time you use the soldering iron to ensure that it is always clean and ready to use.
Getting the right tip is important because it will make your job easier and help you avoid damage to your workpiece.
4) Brass Or Conventional Sponge
You will need to clean the tip often because it will get dirty quickly. The sponge should be damp, not wet.
Wetting the sponge too much can cause it to rust and damage the tip of the soldering iron.
Cleaning the tip is important because it will help you avoid damaging your workpiece and ensure that your solder joint is strong.
5) Soldering Iron Stand
A soldering iron stand is not required, but it can be helpful. It will keep the soldering iron from rolling off the work surface and getting damaged.
It will also help to keep the tip clean because it will be less likely to meet dirt or other materials.
Using a stand is not required, but it can be helpful, especially if you are working on a delicate project.
6) Solder
A solder is an alloy of metals that’s melted to form a permanent connection between electrical components. It comes in both lead and lead-free versions with diameters of .032 and .062 inches. The flux material found within the solder core helps to enhance electrical contact and mechanical strength.
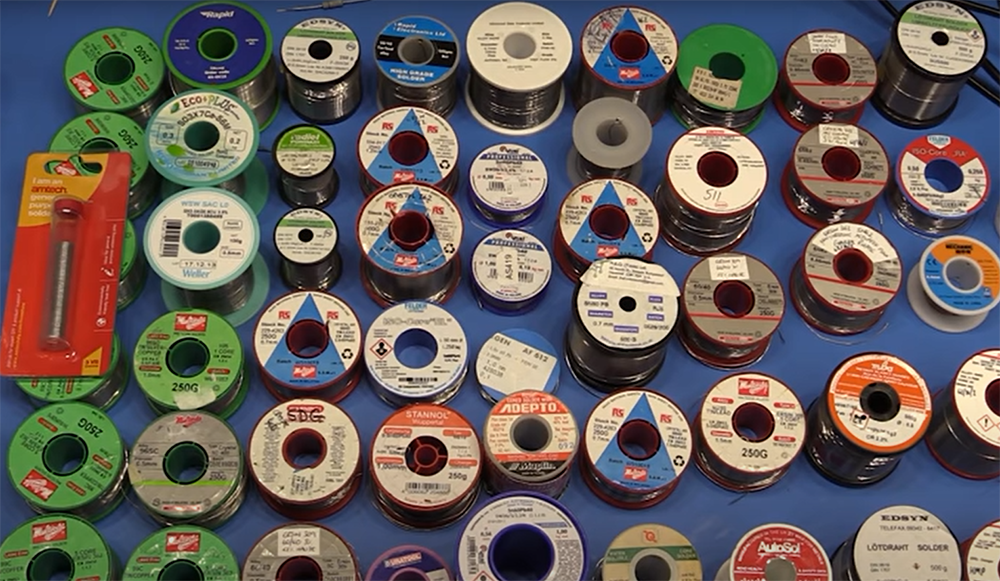
When purchasing solder, be sure it’s not acid-core solder since this will damage your electronics and components. Acid core solder is available at home improvement stores and is typically used in the construction industry.
Soldering, like all other metal work, is done with a variety of soldering irons. Solder has several diameters to choose from.
The thicker diameter solder (0.062 inches) is better for fast soldering of bigger connections, but it makes smaller joints difficult to solder. As a result, having both sizes on hand is always a smart idea for each job you do.
7) Helping Hand (Third Hand)
A helping hand, or third hand, is a tool that holds your work in place while you solder. It consists of a base with two adjustable arms that end in clips.
The clips can be used to hold components in place while you solder them. This is helpful because it frees up your hands to work on the soldering.
8) Safety First
Working with a soldering iron can be dangerous. Always use caution and follow the manufacturer’s instructions [4]:
- Never leave a soldering iron unattended, especially if it is turned on;
- Always unplug the soldering iron when you are finished using it;
- Store the soldering iron in a safe place where it will not be damaged;
- Be sure to read the manufacturer’s instructions before using a soldering iron. This will help you avoid accidents and ensure that you use the tool safely;
Soldering is a skill that takes practice to master. These tips will help you get started, but don’t forget to always use caution when working with a soldering iron. Practice makes perfect!
How To Practice Soldering: Different Methods
One of the most important skills you need to learn when working with electronics is soldering. This process allows you to create a connection between two pieces of metal using a lead-based alloy, which can be extremely useful for tasks such as repairing circuit boards or creating electrical wiring [5].
Despite its importance, soldering can be a difficult skill to master – but, luckily, there are various methods you can use to practice and improve your technique.
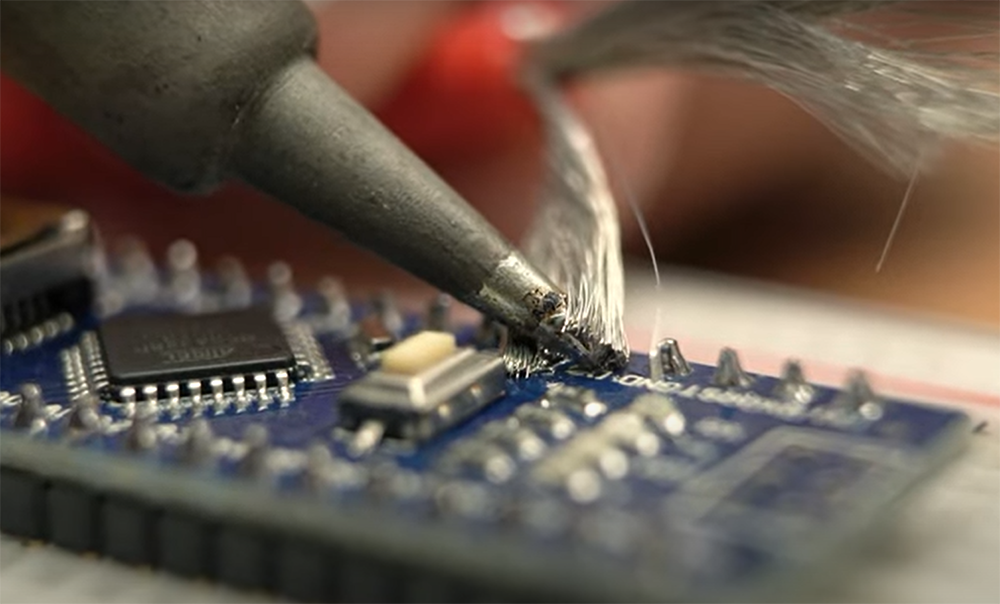
The first method is by using a practice kit. These kits come with all of the necessary tools and materials needed for soldering, as well as a few different exercises to help you get started.
Another way to practice soldering is by using an online simulator. These simulators allow you to work with electronic components in a virtual environment, which can be helpful for getting a feel for the process without having to deal with actual hardware.
You can also create your own practice setup by soldering together some simple circuit boards. This method is more hands-on and will give you a better understanding of how actual electronics work.
Finally, one of the best ways to learn how to solder is by attending a workshop or taking a class from an experienced instructor. This will allow you to get real-time feedback and guidance so that you can perfect your technique.
Signs Of A Strong Solder Joint [6]:
- The joint should be shiny and smooth;
- There should be a small bead of solder around the circumference of the joint;
- The solder should not be too thick or thin;
- The wires should be securely attached to the component lead and pad;
- The joint should not be touching any other nearby components;
- There should be no visible cracks in the solder;
If your joint does not meet all of these criteria, then it is likely that the joint is not strong and may need to be reworked.
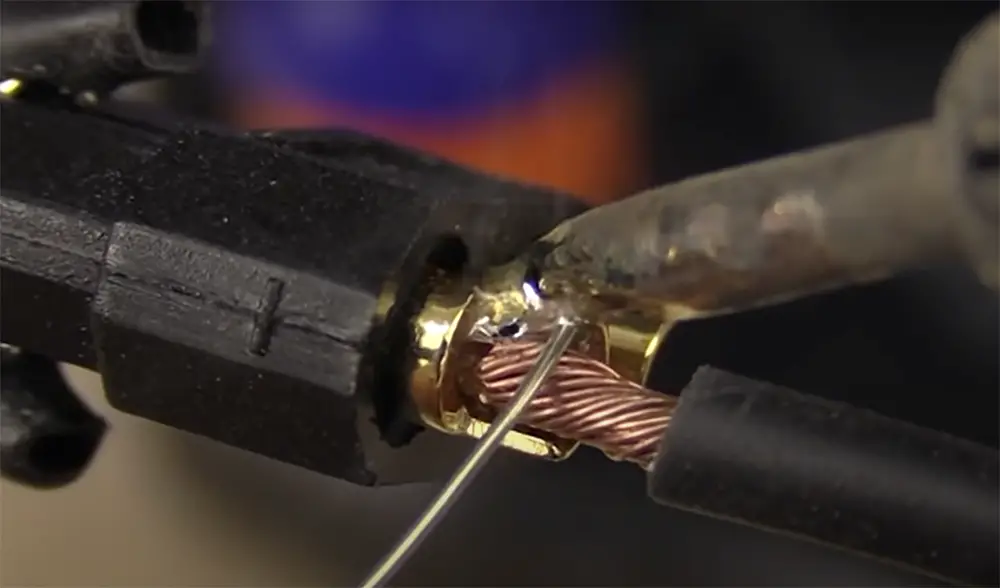
In a case, your soldering looks good then congratulations! You’ve mastered one of the most important skills in electronics. If it doesn’t look so great, don’t worry, practice makes perfect.
Comparison of Soldering Practice Techniques
There are various techniques and methods that can be used to improve your soldering abilities. This table compares several key indicators of different soldering practice techniques to help you choose the best one for your needs.
| Technique | Practice Time | Difficulty | Skill Development | Cost |
|---|---|---|---|---|
| Soldering Practice Kits | 20-30 minutes per day | Easy | Beginner to Intermediate | $15-$30 |
| Soldering Iron Practice Board | 30 minutes per day | Moderate | Intermediate to Advanced | $20-$50 |
| Actual Soldering Projects | Varies by project | Difficult | Intermediate to Advanced | $50-$100+ |
The table compares three different soldering practice techniques based on four key indicators: practice time, difficulty level, skill development, and cost. Soldering practice kits are the easiest and most affordable option for beginners, while soldering iron practice boards offer a more intermediate level of practice. Actual soldering projects provide the most challenging and advanced level of practice but come with a higher cost. Ultimately, the best technique for you depends on your skill level and budget.
FAQ:
Can I teach myself to solder?
Yes, you can teach yourself to solder. The best way to learn is by doing it yourself. There are many online tutorials and resources that can help you get started.
Another great way to learn is by taking a class from a local community college or trade school. You can also find online courses that can help you learn the basics of soldering.
Once you have learned the basics, you can practice soldering at home by building simple projects such as LED lights or small electronic circuits. Practice makes perfect!
If you want to get really good at soldering, there are competitions held around the world where people compete to see who can solder the best. Some of these competitions even offer prize money!
What is the secret to good soldering?
It’s much easier to solder with a shiny, clean tip. Wipe the end of the iron clean with a damp synthetic sponge as it cools. To prevent oxidation from occurring on the tip, avoid leaving the iron plugged in when not in use. Do not overheat the iron by using it at a temperature above that required to melt solder [7].
If you are having difficulty soldering, it is likely that your iron tip is not clean. A good way to practice soldering is to use a small amount of solder on a scrap piece of metal. This will help you get a feel for the correct amount of heat and pressure required.
A solder should flow freely onto the metals being joined. If the solder does not seem to be flowing evenly, try increasing the temperature of the iron slightly. Be careful not to overheat the area, as this can cause damage to the components.
Once you have mastered the basic techniques, you can move on to more complex projects. There are many excellent books and online resources available that can teach you how to solder like a pro!
Is soldering like welding?
The main difference between soldering and welding is the temperatures that are used during each process. Soldering is done at lower temperatures than welding, which means that it can be used to join together delicate materials like electronic components without damaging them. Because of this, soldering is the preferred method for joining together circuit boards and other sensitive electronics.
Another key difference between soldering and welding is the type of material that is used to create the joint. In soldering, a filler metal with a lower melting point than the base metals being joined is used. This filler metal melts and flows into the joint, bonding the two pieces of metal together. Welding, on the other hand, uses an electrode that melted both the base metals and the electrode material, creating a bond between the metals and the electrode.
One of the most important things to remember when soldering is to use the right type of solder for the job.
There are two main types of solder:
- Rosin-core solder is typically used for electronic work, as it contains a flux that helps to clean the metal surfaces being joined and prevent oxidation;
- Acid-core solder should be avoided for electronic work, as the acidity can damage sensitive components;
Another important tip for soldering is to make sure that your iron is properly calibrated. An iron that is too hot will damage delicate components, while an iron that isn’t hot enough won’t melt the solder properly. Most soldering irons have a dial or switch that can be used to adjust the temperature, so make sure to set it to the correct setting before beginning your project.
Finally, always use proper safety precautions when soldering. Solder contains lead, which can be harmful if inhaled or ingested. Always work in a well-ventilated area and avoid breathing in the fumes. If you must solder near sensitive electronic components, consider using a fume extractor to remove the smoke from the area.
Is soldering toxic?
Soldering smoke is harmful and can cause health issues. Using equipment like fume extraction stations will keep you and others safe from dangerous gases.
When you are just starting to learn how to solder, it is best to use lead-free solder. Lead can be very harmful if ingested, and it is important to avoid coming into contact with it. Once you have more experience, you can try using leaded solder if you find it easier to work with.
It is also important to practice good ventilation when soldering. Always open a window or door when working with soldering irons to let the smoke escape. You should also wear gloves and a mask to protect yourself from the fumes [8].
How do you solder smoothly?
The biggest obstacle to soldering smoothly is usually not the skill of the person doing the soldering, but rather the quality of the equipment. A good soldering iron will have a tip that is well-tinned and heats evenly. The best tip for soldering is a conical or chisel tip.
If you are just starting out, it is best to use a smaller diameter soldering iron tip. This will make it easier to control the heat and avoid damaging sensitive components. Once you get more practice, you can move up to a larger diameter tip.
What temperature is best for soldering?
The optimum temperature for lead-based soldering is 600°- 650°F (316°- 343°C), whereas the ideal temperature for lead-free soldering is 650°- 700°F (343°- 371°C). The heat travels along the leads and reduces the lifespan of the soldering tip if it’s too hot, so you don’t want to overheat it [9].
You can use a soldering iron with temperature control to maintain a consistent temperature, or you can practice using different wattages and tip sizes to find what works best for you. A higher wattage iron will heat up the joint faster, so if you’re new to soldering, it’s best to start with a lower wattage and work your way up.
Will solder stick to any metal?
No, it will not. Metals such as aluminum and stainless steel require a different type of solder that contains flux, which helps the solder to adhere to the metal.
The best way to ensure a good connection is to use a soldering iron with a flat tip, apply heat evenly to both surfaces that you’re joining, and then touch the solder wire to both the component lead and the pad at the same time. The solder should flow freely onto both surfaces.
Why does my solder ball up?
When soldering silver, you may find that the solder balls fly when you’re using hard or soft solder – it just refuses to leap no matter how long it’s under the heat. This is because the flux has burned out and there is now no medium through which the solder may jump (or run as others would claim).
The silver has also oxidized and no longer has a clean surface to which the solder may adhere.
The best way to avoid this is to keep the area you’re soldering clean – use only as much flux as you need, and apply it carefully so that it evenly coats the area to be soldered.
If you can see that the flux is getting burned, stop heating and add more flux. You can also try using a different type of solder – one with a lower melting temperature, for example. Finally, make sure that your iron tip is clean before starting to solder [10].
What metals can you not solder?
Because the chromium alloying element generates oxides that necessitate strong fluxes, stainless steel, and high-alloy steel have a low soldering propensity. The only way to sell these metals is by pre-plating them in a solderable metal.
You also can’t solder aluminum because it has a strong affinity for oxygen. The oxide layer that forms on the metal’s surface is impermeable to most soldering fluxes [11].
Titanium and its alloys are also difficult to solder because they readily form intermetallic compounds with most metals. These compounds have a high melting point, making them hard to weld.
Gold is another metal that’s difficult to solder. This is because gold does not wet easily – meaning that the molten solder will not spread evenly over the surface of the gold. As a result, you’ll end up with an uneven joint that’s prone to leaking.
What is the best surface to solder on?
Ceramic soldering boards are a fantastic surface on which to do any sort of soldering or annealing. Because the surface reflects and absorbs heat, ceramic is an excellent material for conveying heat. These boards are ideal for novices since they are so versatile and long-lasting.
Glass is also a good choice for a soldering surface. It can be used for both flat and curved surfaces. However, it should be noted that glass is a poor conductor of heat. This means that you’ll have to apply more heat to the area you’re soldering in order to get the job done [12].
Wood is another option for a soldering surface, although it’s not as popular as ceramic or glass. The advantage of using wood is that it’s easy to find and inexpensive.
However, keep in mind that wood is a poor conductor of heat, so you’ll need to apply more heat to the area you’re soldering. In addition, wood can catch fire if it’s not properly protected.
How do you clean metal before soldering?
Clean metal is required for soldering. A solder won’t flow on a dirty or oily surface. Before you begin, make sure the metal is clean.
Clean your metal with a non-bleach cleaner like “Bar Keepers Friend” and a metal cleaner like “Penny Brite” for an instant shine, or leave it in your pickle pot for a few minutes to soak up any excess moisture [13].
If you’re using a chemical cleaner, follow the instructions on the label. Some cleaners may require that you rinse the metal with water after cleaning. Once you’ve cleaned the metal, dry it with a soft cloth to remove any residual cleaner.
You can also clean your metal by sanding it with fine-grit sandpaper. This will remove any dirt or grime that’s on the surface of the metal. Just make sure to sand in one direction to avoid scratching the metal.
Useful Video: Soldering Crash Course: Basic Techniques, Tips and Advice!
References:
- https://www.wikihow.com/Practice-Soldering
- https://nerdytechy.com/how-to-practice-soldering/
- https://www.makerspaces.com/how-to-solder/
- https://www.makeuseof.com/tag/learn-solder-simple-tips-projects/
- https://www.wikihow.com/Practice-Soldering
- https://www.helifreak.com/showthread.php?t=386196
- https://www.sciencebuddies.org/science-fair-projects/references/how-to-solder
- https://www.reichelt.com/magazin/en/guide/protecting-yourself-against-poisonous-soldering-fumes/
- https://www.techspray.com/ultimate-guide-to-electronic-soldering
- https://stonesandfindings.com/how-to-solder-with-flux-and-avoid-balling-up-the-flux/
- https://en.wikipedia.org/wiki/Solderability
- https://www.seattlefindings.com/Different-Types-of-Soldering-Boards_b_71.html
- https://www.jewelrytools.com/pages/five_rules_for_successful_soldering.html






Leave a Reply