
It’s happened to all of us. You’re plugging in a new appliance or device and suddenly there’s a loud pop and a shower of sparks. Your heart races as you wonder what just happened – was it the new TV? The lamp? The toaster oven? Panic sets in as you realize that you have no idea how to find a short circuit with a multimeter. Relax! We’re here to help. In this article, we’ll answer some common questions about finding short circuits with multimeters, and provide some useful tips that will make the process easier for you.
What is a Short Circuit?
A short circuit is an electrical circuit that allows current to travel along an unintended path with little or no resistance. This results in excessive current flowing through the circuit.
A short circuit occurs when there is a break in the continuity of an electrical circuit. This can happen if the insulation on the wires wears down, or if something like a nail or screw punctures through both wires. A short circuit can also occur if one of the devices in the circuit draws too much power, causing an overload. When this happens, electricity will flow from one wire to the other, causing a spark or fire.
Short circuits can be dangerous because they can cause fires or electric shocks. That’s why it’s necessary to know how to find a short circuit with a multimeter, so you can fix it before it becomes a hazard.

If you suspect there is a short circuit in your home, it’s important to find it and fix it as soon as possible. A multimeter is a useful tool for finding short circuits. [1], [2], [3]
What is a Multimeter
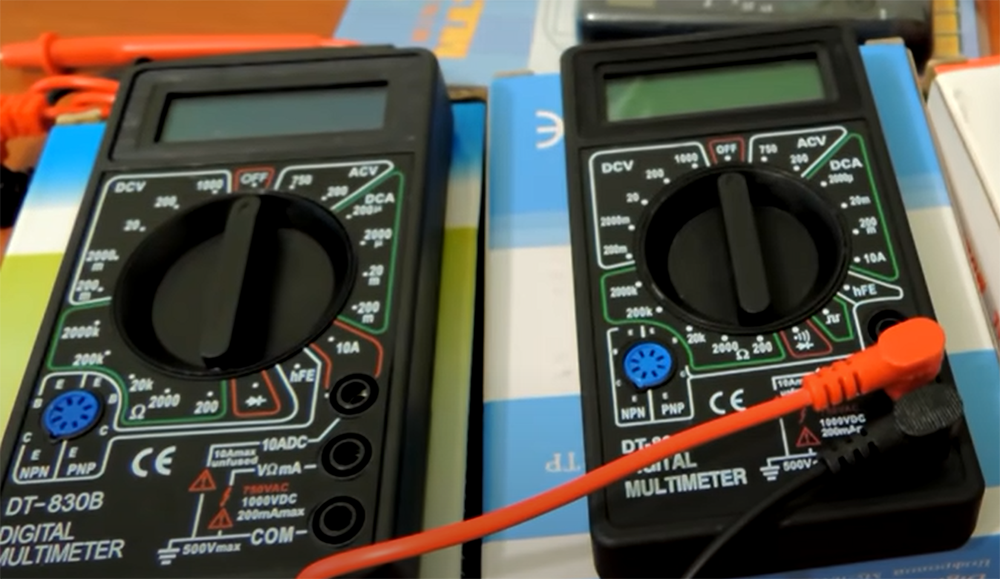
Before we get into how to find a short circuit with a multimeter, let’s first understand what a multimeter is. A multimeter is an electrical testing device that measures voltage, current, and resistance. It is a useful tool for diagnosing electrical problems.
There are two types of multimeters: analog and digital. Analog multimeters use a needle and dial to display readings, while digital ones use a numerical display. Most modern multimeters are digital, as they are more accurate and easier to read than analog ones.
To use a digital multimeter, you must first select the mode you want to measure in by turning the knob to the appropriate setting. For example, to measure voltage, you would turn the knob to the “V” setting. Once the mode is selected, you can then take a reading by touching the probes to the appropriate points in the circuit. [3]
General Tips on How to Use a Multimeter
Now that we’ve covered the basics of what a multimeter is and how it works, let’s get into some general tips on how to use one.
Use the correct device
First and foremost, make sure you’re using the correct device for the job. While multimeters are versatile tools, they are not intended for use on all electrical devices. Certain appliances have their own dedicated circuit breakers and fuses that are designed to handle the high current levels they draw. Testing them with a multimeter could damage the device or cause injury.
Additionally, some digital multimeters have special features that make them better suited for certain tasks. For example, some models include a “hold” function that allows you to freeze the display so you can take a reading without having to keep your finger on the probes. This can be helpful when you’re trying to read in a difficult-to-reach place. When in doubt, consult the manual that came with your multimeter or ask an electrician for help.
Get to know ports and plugs
The next thing you need to do is get to know the ports and plugs. There are four ports on a multimeter: two input ports, one for the black probe and one for the red probe; an output port; and a ground port. The input ports are where you’ll attach the probes when taking measurements. The output port is used for continuity testing, and the ground port is used to ground the device.
When you first get a multimeter, you might be overwhelmed by the amount of different symbols and numbers on it. However, most multimeters are actually quite simple to use once you understand the basics. The most important thing is to make sure you’re using the right setting for the job.
For example, if you’re trying to measure voltage, you’ll need to set the knob to the “V” setting. There are two types of voltage: AC and DC. AC voltage is the kind of voltage that comes from your outlets, while DC voltage is the kind that comes from batteries. Most multimeters can measure both types of voltage, but you’ll need to set the knob to the “AC” or “DC” setting accordingly.
Examine features and safety of your multimeter
Wear safety equipment
Before you start using a multimeter, it’s important to make sure you’re wearing the proper safety equipment. This includes gloves, eye protection, and non-conductive clothing.
Gloves protect you from shocks in case you accidentally touch something that is live. Eye protection is necessary in case there is a spark or fire. Non-conductive clothing helps to prevent electrical current from flowing through your body if you come into contact with a live wire.
Never use a multimeter on an electrical circuit that is energized (live). Always turn off the power before testing for voltage, current, or resistance.
Test the multimeter itself before use
It’s always a good idea to test your multimeter before using it on an electrical circuit. This will help ensure that the multimeter is working properly and is accurate.
To test a digital multimeter, you can use a voltmeter or ohmmeter to measure the resistance of a known resistor. The value should be within the tolerance range printed on the resistor. If it’s not, then the multimeter is not accurate and you should calibrate it or get a new one. [3], [4]
How to Find a Short Circuit With a Multimeter?
Now that we’ve covered some of the basics, let’s get into how to find a short circuit with a multimeter.
As we mentioned earlier, a short circuit is an electrical circuit that has a low resistance path between the positive and negative terminals. This causes excessive current to flow through the circuit, which can damage electrical components and pose a fire hazard.
In this article, we will measure the short circuit using “Continuity Testing” with a multimeter. This is a quick and easy way to find shorts in electrical wiring, as well as to check the integrity of electrical connections. Keep in mind that these methods only work if the short circuit is in the part of the circuit that you’re testing.
Double Check Your Electric Equipment
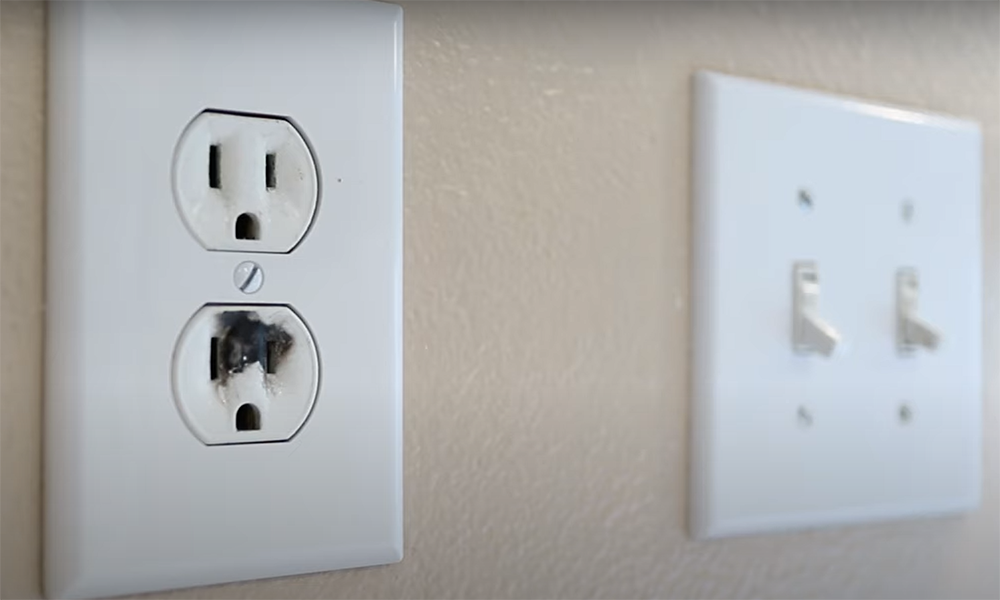
First, check for any obvious signs of damage, such as burns, melted insulation, or charred components. If you see any of these, it’s a good indication that there’s a short circuit somewhere in the equipment.
Next, check for less obvious signs of damage, such as cracks in the housing or loose wires. These can also be indicative of a short circuit.
If you don’t see any signs of damage, that doesn’t necessarily mean there isn’t a short circuit present. However, it does narrow down the possibilities and will help you focus your testing.
It’s also a good idea to check the fuse box or circuit breaker to see if there has been any recent power surges. If so, this could be the cause of the short circuit.
Once you’ve double-checked your electric equipment and ruled out any other potential causes, you can move on to testing for a short circuit.
Turn Your Multimeter to Continuity Test
After you pin-pointed the potential area of the short, you will need to turn your multimeter to the “continuity” setting or resistance mode. This setting is used to measure the resistance between two points in an electrical circuit. On most devices, it will be represented by a diagram of an infinity symbol.
Probe the Circuit
Now it’s time to test the potential short circuit by probing the circuit with your multimeter. Touch the black probe to the ground of the electrical circuit and the red probe to the section you’ll be testing.
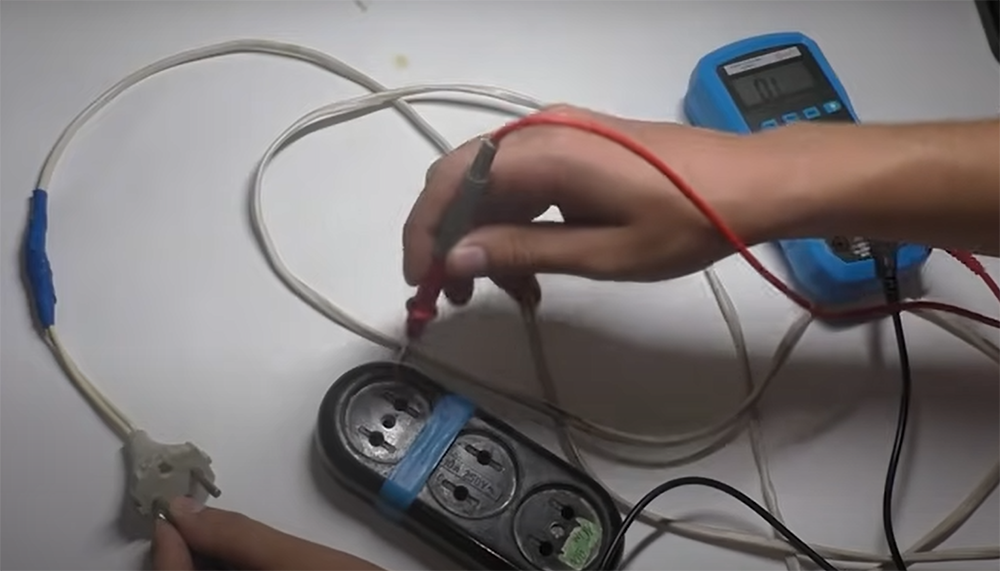
If there’s no short circuit present, you should see a reading of around 0.3 on your multimeter. This means there’s no continuity between the two points and no current can flow through the circuit.
However, if there is a short circuit present, you’ll see a reading of 1 ohms. This means there is a direct connection between the two points and excessive current can flow through the circuit.
If your readings show “infinity” or “- OL”, this means there is an open circuit and no current can flow between the two points. This isn’t necessarily indicative of a short circuit, but it’s an indicator that you will need to replace your breaker.
Shut Off the Power
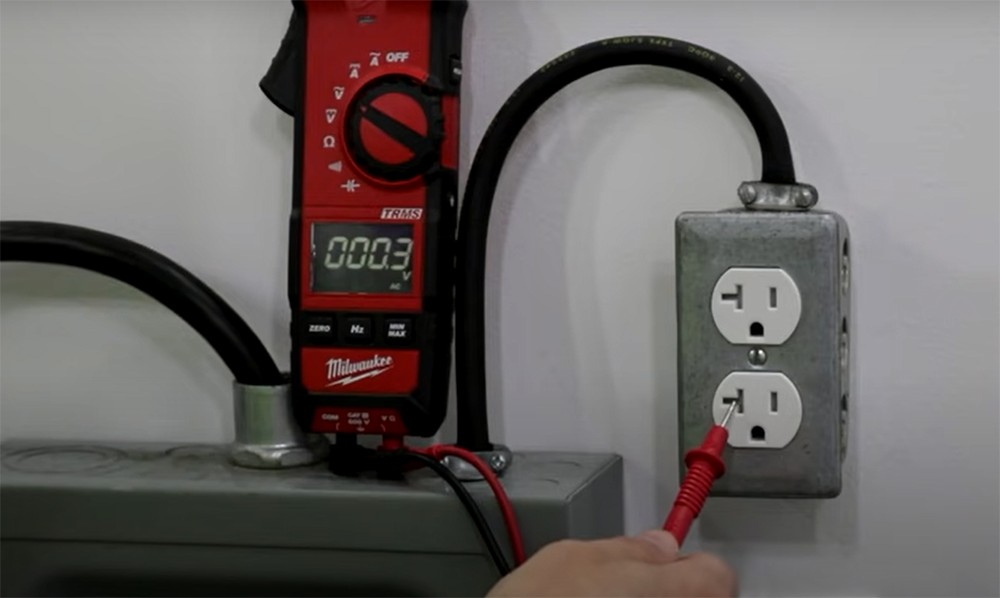
Turn Multimeter to Voltage
After you’ve shut off the power and tested for continuity, you will need to turn your multimeter to the AC voltage setting. This setting is used to measure the voltage in an electrical circuit. On most devices, it will be represented by a diagram of a light bulb.
With the power off, insert the probes into the problem switch or outlet. If there is no voltage present, you should see a reading of 0 on your multimeter. However, if there is voltage present, this means there is a break in the circuit and current can still flow through the circuit. This can be dangerous, so it’s important to shut off the power to the equipment and call an electrician to further inspect the problem.
Test the Terminal Boxes
If you’re still having trouble finding the source of the short circuit, you can remove the cover of the electrical panel and test the terminal boxes. To do this, turn off the power to the panel and remove the cover.
Then, use your multimeter to test each terminal box for continuity. Again, if there is a problem with one of the boxes, your multimeter will show continuity between the two points.
Deal with the issue
Once you have found the source of the short circuit, you will need to repair or replace the equipment that is causing the problem.
Replace the defective receptacle or switch
If the receptacle or switch is defective, you will need to replace it with a new one. To do this, turn off the power to the equipment and remove the cover plate.
Then, use a screwdriver to remove the screws that hold the receptacle or switch in place. Be careful not to touch any of the wires as you remove the old receptacle or switch.
Once the old receptacle or switch is removed, you can install the new one by following the instructions that come with it. Make sure to secure it in place with screws and tighten them so they’re snug. Then, turn on the power and test your new receptacle or switch to make sure it’s working properly.
You should also inspect the wires and make sure they’re not damaged. If they are, you will need to replace them with new ones.
Once you have completed the necessary reparations, you can plug the cables back, reinstall the cover and turn on the power. Your equipment should now be working properly.
If you’re still having trouble finding the source of the short circuit or aren’t comfortable dealing with electrical repairs, you can call an electrician to help inspect your equipment. They will be able to use their expertise to find the source of the problem and make any necessary repairs. [1], [2], [3]
FAQ
Can you damage a circuit with a multimeter?
If you’re not careful, it is possible to damage a circuit with a multimeter. That’s why it’s important to know how to use one properly before attempting to find a short circuit. Luckily the chances of damaging the circuitry are low if you follow all the proper procedures.
What is the easiest way to find an open circuit or shorted wire?
The easiest way to find an open circuit or shorted wire is to use a multimeter. A multimeter is an electrical testing tool that can be used to measure voltage, resistance, and continuity.
To test for an open circuit, simply attach the leads of the multimeter to each end of the wire you suspect is not working. If the multimeter shows continuity, then there is an open circuit and the wire is not completing the circuit.
How do you find a broken electrical circuit?
There are a few ways that you can find a broken electrical circuit. One way is to use a multimeter. A multimeter is an instrument that is used to measure voltage, current, and resistance in an electrical circuit. To use a multimeter to find a broken circuit, you will need to set the multimeter to the “resistance” setting. Then, you will need to touch the probes of the multimeter to the circuit. If there is continuity in the circuit, then this means that there is a break in the circuit.
Useful Video: Diagnosing Open & Short Circuits
Conclusion
Short circuits can be dangerous and cause damage to your equipment. However, by following the steps in this guide, you can safely find and fix the problem. In this article, we’ve gone over how to find a short circuit with a multimeter. We’ve also covered some useful tips that can help you troubleshoot the problem. By following these steps, you should be able to find a short circuit with a multimeter. However, if the problem persists or if you are not comfortable dealing with electrical repairs, it is always best to call a professional. Thanks for reading!
References:
- https://www.thespruce.com/what-causes-short-circuits-4118973
- https://itstillruns.com/short-multimeter-12204907.html
- https://toolsweek.com/how-to-find-a-short-circuit-with-a-multimeter/
- https://www.howtogeek.com/318722/how-to-use-a-multimeter/