Have you ever wondered how to create a web server that can rival some of the more impressive commercial offerings? Now, with the help of the Lua programming language and ESP8266 microcontroller, you can make a powerful web server that will truly amaze you. ESP8266-based servers are growing in popularity due to their ease of use and ability to handle complex requests. Follow this comprehensive guide to learn about everything you need to know to create an impressive ESP8266-based web server with the power of Lua.
What is ESP8266?
ESP8266 is a low-cost Wi-Fi microchip with full TCP/IP stack and microcontroller capability produced by Shanghai-based Chinese manufacturer, Espressif Systems. The chip first came to the attention of Western makers in August 2014 with the ESP-01 module, made by a third-party manufacturer, AI-Thinker. This small module allows microcontrollers to connect to a Wi-Fi network and make simple IoT (Internet of Things) projects.
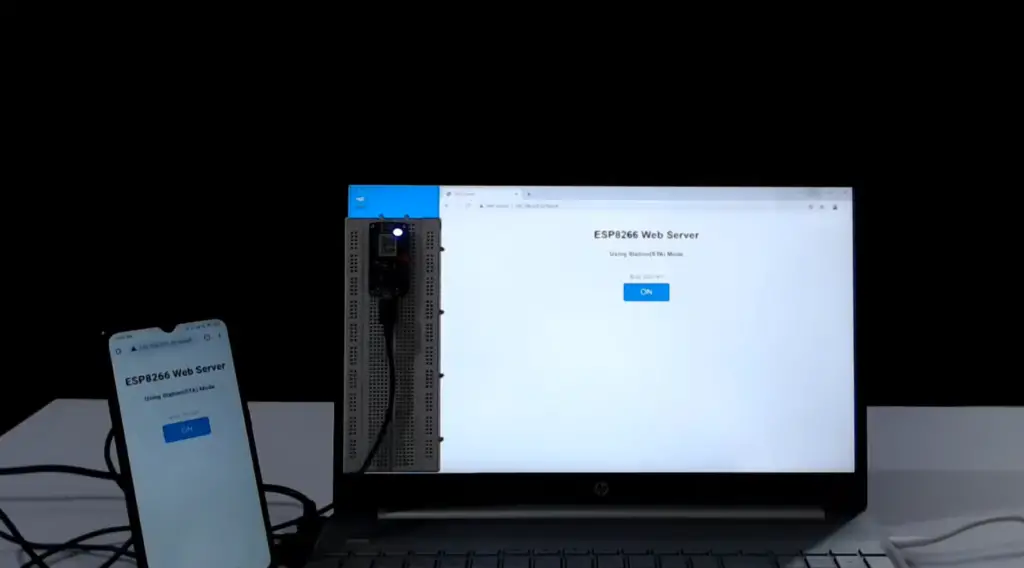
The ESP8266 is both a powerful and reliable platform for IoT projects. It can connect to multiple wireless networks simultaneously, allowing for more flexible networking solutions. Additionally, it features 32-bit architecture which allows it to process data faster than other Wi-Fi solutions available on the market today.
The ESP8266 also has built-in security features such as WPA2 authentication and AES encryption which make it difficult for hackers to access data sent over the network. This makes it an ideal solution for applications requiring secure communication between devices.
Overall, the ESP8266 is an affordable and reliable platform for building a variety of IoT projects. Its low cost, combined with its powerful features make it an ideal choice for hobbyists and professionals alike. With its wide range of capabilities, the ESP8266 makes it possible to create almost any connected device imaginable [1].
What is a web server?
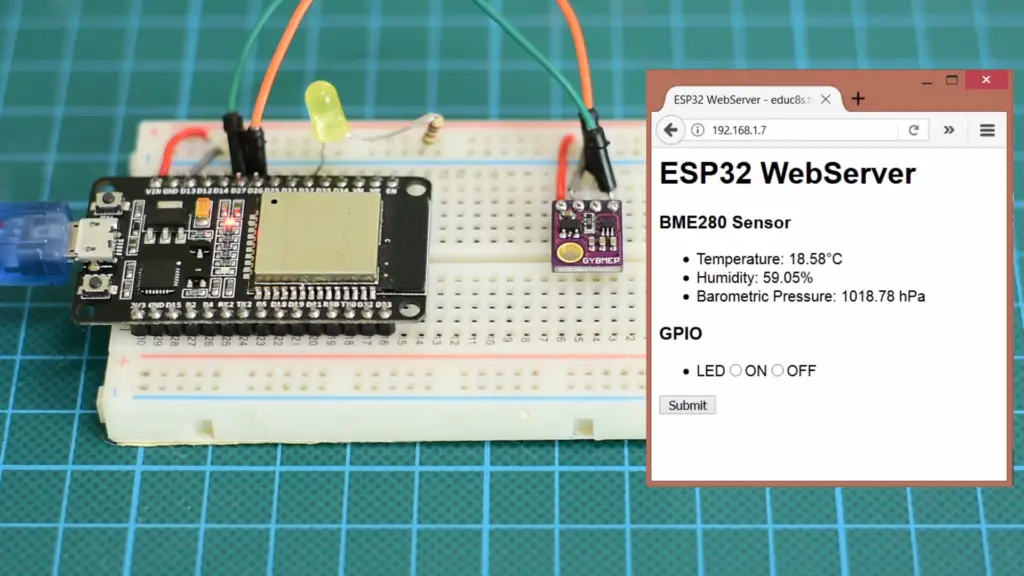
A web server is a computer system that runs websites. It stores and presents website content, from images to HTML documents, by responding to requests from clients. The client computers are usually browsers such as Chrome, Firefox, or Safari. Web servers are responsible for providing the requested information back to the user.
Web servers can support different types of content including static pages, forms, multimedia files (images, audio, and video), and even database queries containing dynamic information. Web servers also control how the website functions and make sure everything runs correctly by HTTP protocols.
To make sure your website is available to everyone around the world, web server hosting is used. This service allows you to rent space on a web server located in a remote location, which will host your website. Hosting companies provide secure networks and all the necessary resources to make sure your website is always up and running.
By optimizing the server setup, web administrators can ensure that their websites are running smoothly – no matter how much traffic or data is requested by users. This helps businesses create a professional online presence and reach a larger audience. With the help of web servers, you can build an engaging and user-friendly website that suits your needs.
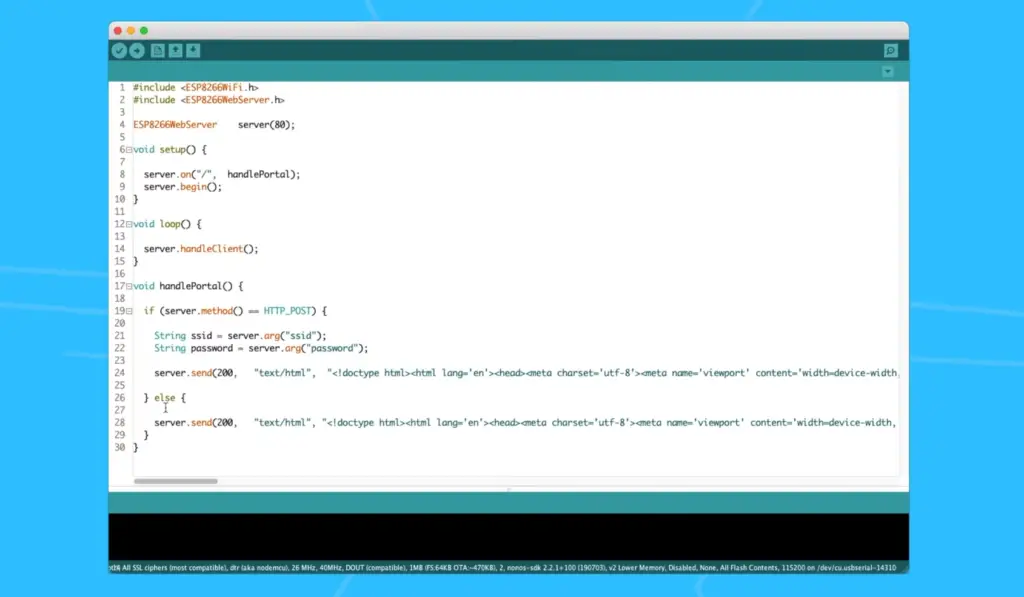
Create a web server using ESP8266 on LUA
Prepare the Arduino LUA IDE
- Download the Arduino LUA IDE from the official website.
- Install it on your computer and launch it.
- Select your board from the list of available boards, such as “ESP8266” (for NodeMCU).
- Plug in your ESP8266 device to your computer with a USB cable.
- In the Arduino LUA IDE, go to Tools > Board and select your ESP8266 device model from the list of available boards. The board types are usually printed on the device itself or specified in its manual/datasheet.
- Go to Tools > Port and select the serial port connected to your ESP8266 that appears in this menu entry.
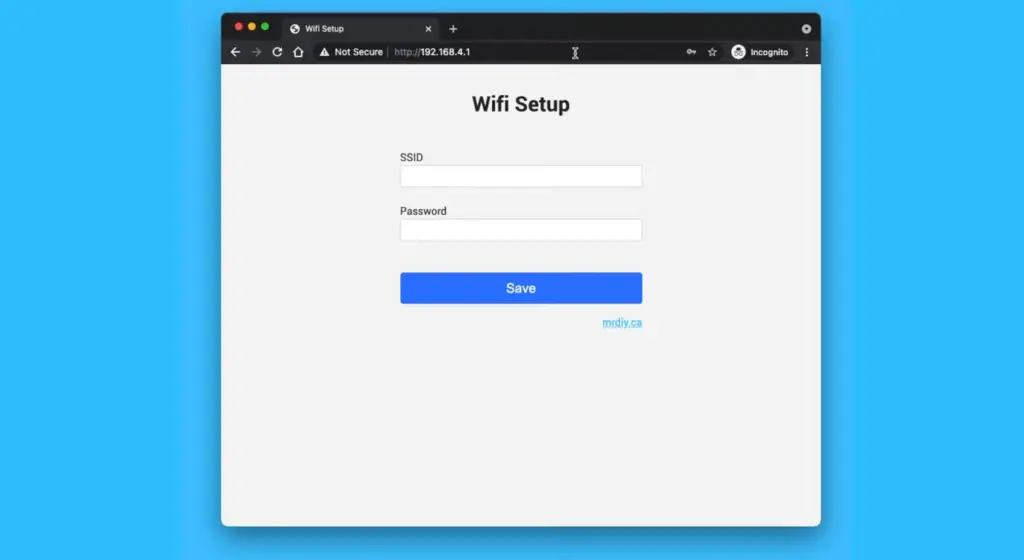
Write the LUA code for creating a web server
- Create a new file in the Arduino LUA IDE and save it with a .lua extension.
- Enter the following code into your file:
`wifi.setmode(wifi.STATION)`
`wifi.sta.config(“YOUR_NETWORK_NAME”,”YOUR_PASSWORD”)`
`srv=net.createServer(net.TCP) srv:listen(80,function(conn)`
` conn:on(“receive”, function(client,request)`
`print(request)` \n — print received request
`conn:send(”
Hello, NodeMCU.
“)` \n — send a response
` end)`
`end)`
- Replace YOUR_NETWORK_NAME and YOUR_PASSWORD with the name and password of your WiFi network.
- Upload the code to your ESP8266 board using the “Upload” icon in the Arduino LUA IDE.
- Once the upload is complete, you should see an IP address printed on the serial monitor for your ESP8266 device. This is the local IP address that you can use to access it from other devices connected to the same WiFi network (e.g. your laptop or smartphone).
- To test the web server, open a web browser and enter the IP address of your ESP8266 device into the address bar (e.g. http://192.168.1.100). You should see “Hello, NodeMCU” printed on the page as a response from the ESP8266 web server [2]!
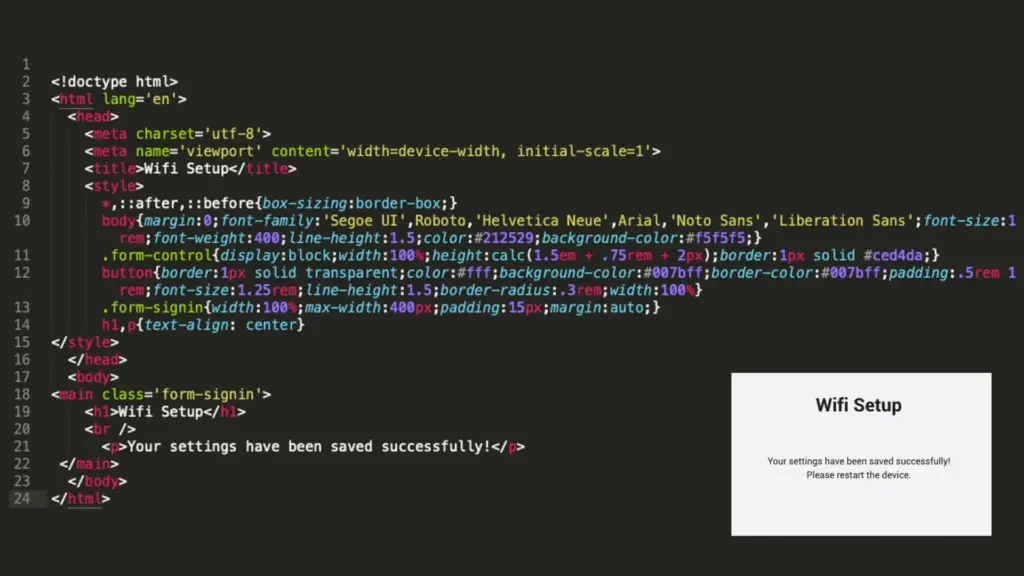
Testing the Web Server
Once the web server is successfully installed, it is important to test it. This can be done by running simple tests like pinging the server or by using specialized testing software. Pinging the server will allow you to determine whether the server is online and able to respond. Specialized testing software can run more in-depth tests that look for potential problems in the setup and configuration of the web server.
It’s also important to test the web server for performance issues such as security breaches, poor accessibility, slow response time, and compatibility with other systems. These tests help ensure that your website runs smoothly and securely for visitors. Performance testing should be done regularly throughout the lifespan of a website so any issues can be addressed promptly.
Finally, a web server should also be tested for compatibility with other systems. This includes making sure that the web server can communicate with other servers or applications that are connected to it. Compatibility testing will help ensure that your website functions properly when integrated with other technologies and platforms.
Overall, testing a web server is important to make sure it is secure, reliable, and compatible with other systems. By conducting thorough tests, you can rest assured that your website will run smoothly for visitors and remain safe from malicious attacks. Additionally, regular testing helps uncover any potential issues before they become bigger problems down the line. With careful testing and maintenance, you can ensure your web server runs optimally throughout its lifespan.
FAQ
How to make ESP8266 as a web server?
ESP8266 can be used as a web server by using Arduino IDE to create an HTML page and access point. The program will use command-line tools like curl, wget, or telnet to send commands to the ESP8266 which will act as a web server. This program is responsible for sending the appropriate response back to the client through HTTP protocol. The HTML pages are stored in SPIFFS (SPI Flash File System) which allows data storage on the ESP module itself.
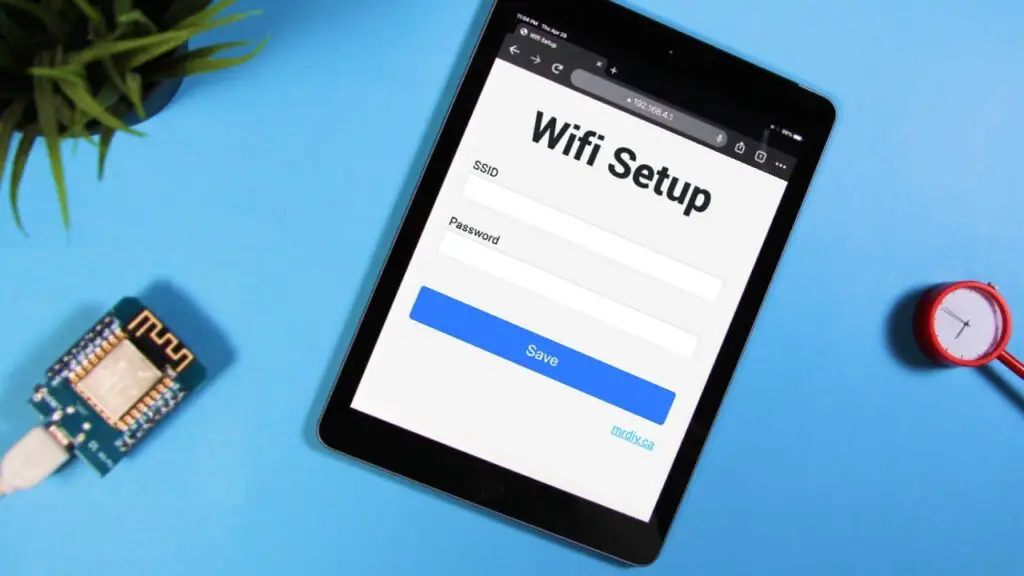
To make your ESP8266 a web server, you have to configure it first with your WiFi credentials such as SSID and password. After that, you should upload the sketch containing HTML files onto your ESP board and then run the program in the Arduino IDE. You can then open a browser and type in the IP address of your ESP board to view the web page served by it.
How do I connect ESP8266 to a WiFi network?
ESP8266 can be easily connected to any local area network (LAN) or a Wi-Fi network with SSID and password. To connect, you should first configure your ESP module with your wireless credentials such as SSID and password. Then upload the sketch file containing HTML files onto your ESP board. After that, you can use command-line tools like curl, wget, or telnet to send commands to the ESP8266 which will act as an access point for connecting to a Wi-Fi network. Finally, you can open a browser and type in the IP address of your ESP board to view the web page served by it.
What is an Access Point?
An access point (AP) is a networking device that connects wireless devices to the internet. It acts as a bridge between two or more networks, allowing them to communicate with each other. In the case of ESP8266, it allows you to connect your ESP module to any local area network (LAN) or Wi-Fi network with SSID and password. It also creates its own Wi-Fi network for connecting multiple devices wirelessly. This makes it easier for users to configure their ESP modules without having to use cables or physically plug them into a router.
How to upload files to ESP8266?
You can use the Arduino IDE or any other code development tool to upload files onto your ESP board. To do this, you will need the IP address of your ESP module and its port number. You can get these by connecting your board to a Wi-Fi network and then opening a browser and typing in the IP address for your ESP board. Once you have connected, you should open the sketch file containing HTML pages and then click on the “Upload” button in the IDE. This will start uploading the HTML page onto your ESP board.
Once you have uploaded the HTML page, you can open it in a browser by typing in the IP address of your ESP board. This will display the web page served by the ESP8266. You can also use command-line tools like curl, wget, or telnet to send commands to your ESP board and view its responses in a browser window.
Can I control my home appliances with ESP8266?
Yes, you can control your home appliances using your ESP8266 module. To do this, you should first upload the code for controlling the appliance onto your ESP module. After that, you can use command-line tools like curl or telnet to send commands to your board which will then act as an access point for connecting to the appliance directly from a web browser. This allows you to control it remotely without having to physically be present at the appliance itself.
You can also use a smartphone application to control your home appliances with ESP8266. To do this, you should first configure your board with the app and then upload the code for controlling it. Once you have done this, you can connect your smartphone to the WiFi network of your ESP module and then use the app to control the appliance.
These are just some of how you can control your home appliances with ESP8266. There are many more possibilities depending on what kind of applications you want to build. With some creativity and experimentation, you can find even more interesting ways to control your home using an ESP board!
Can ESP8266 host a web server?
Yes, ESP8266 can be used to host a web server. To do this, you should first configure your board with the necessary wireless credentials such as SSID and password. After that, you should upload the sketch containing HTML files onto your ESP board and then run the program in the Arduino IDE. You can then open a browser and type in the IP address of your ESP board to view the web page served by it. Additionally, you can use command-line tools like curl or telnet to send commands to your board and view its responses in a browser window. This makes it easy for users to host their own websites on an ESP8266 module!
Can I interface sensors with ESP8266?
Yes, it is possible to interface sensors with your ESP8266 module. To do this, you will need to configure your board with the necessary wireless credentials such as SSID and password. After that, you should upload the sketch containing HTML files onto your ESP board and then run the program in the Arduino IDE. Once you have done this, you can connect your sensor to your ESP board and then use command-line tools like curl or telnet to send commands to it. This allows you to read data from the sensor and display it on a web page served by your ESP8266!
In addition, some sensors may require additional libraries for them to work properly with an ESP board. For example, if you are using a DHT11 temperature sensor, you should install the DHT library from the Arduino IDE before using it with your ESP8266. This allows you to easily read data from your sensors and display them on a web page served by your board!
Overall, it is possible to interface various types of sensors with an ESP8266 module. With some creativity and experimentation, you can create interesting applications that make use of data collected from multiple sensors connected to your board.
Can ESP8266 be used for home automation?
Yes, ESP8266 can be used for home automation. To do this, you should first configure your board with the necessary wireless credentials such as SSID and password. After that, you should upload the sketch containing HTML files onto your ESP board and then run the program in the Arduino IDE. This will allow you to create a web page that can be used to control different home appliances such as lights, fans, air conditioners, etc. Additionally, you can use command-line tools like curl or telnet to send commands to your board and view its responses in a browser window. This makes it easy for users to control their home appliances remotely with just an ESP8266 module!
How to send ESP8266 data to a website?
You can send data from your ESP8266 to a website using the HTTP POST method. To do this, first configure your board with the necessary wireless credentials such as SSID and password. After that, you should upload the sketch containing HTML files onto your ESP board and then run the program in the Arduino IDE. Once you have done this, you can use command-line tools like curl or telnet to send commands to your board which will then act as an access point for connecting to a website directly from a web browser. This allows you to easily send data from your ESP board to any website of your choice!
Additionally, some websites may require authentication before allowing access. In this case, you should set up an API key in order to authenticate your requests. Once you have done this, you can use the API key in your commands to access the website and send data from your ESP board. This makes it easy for users to securely connect their boards to a website of their choice!
How to control ESP8266 with a web page?
You can control your ESP8266 board with a web page by first uploading the code for controlling it onto your ESP module. After that, you can use command-line tools like curl or telnet to send commands to your board which will then act as an access point for connecting to the appliance directly from a web browser. This allows you to control it remotely without having to physically be present at the appliance itself.
Does ESP8266 support HTTP?
Yes, ESP8266 supports HTTP. To use HTTP with your ESP module, you should first configure your board with the necessary wireless credentials such as SSID and password. After that, you should upload the sketch containing HTML files onto your ESP board and then run the program in the Arduino IDE. Then, you can use command-line tools like curl or telnet to send commands to your board and view its responses in a browser window. This makes it easy for users to access web pages served by their ESP modules using HTTP!
How to get ESP8266 online?
You can get your ESP8266 online by first configuring it with the necessary wireless credentials such as SSID and password. After that, you should upload the sketch containing HTML files onto your ESP board and then run the program in the Arduino IDE. This will allow you to connect to a Wi-Fi network with your board. Once connected, you can use command-line tools like curl or telnet to send commands to your board and view its responses in a browser window.
How to debug ESP8266?
You can debug your ESP8266 board by first configuring it with the necessary wireless credentials such as SSID and password. After that, you should upload the sketch containing HTML files onto your ESP board and then run the program in the Arduino IDE. This will allow you to view debug information for your board directly from the serial monitor within the Arduino IDE. Additionally, you can use command-line tools like curl or telnet to send commands to your board and view its responses in a browser window. This makes it easy for users to troubleshoot their boards quickly and easily!
Why is ESP8266 popular?
The ESP8266 is a very popular microcontroller board because it offers great features at an affordable price. It has integrated Wi-Fi capabilities, which makes it easy to connect to any network and access the internet. Additionally, its small size and low power consumption make it ideal for use in projects that require long battery life. In addition, its support for a wide range of programming languages such as Arduino and C++ makes it very versatile and suitable for a variety of applications. All these factors have contributed to the popularity of the ESP8266 among electronics enthusiasts!
Useful Video: ESP32 Web Server Tutorial with a BME280 Sensor
Conclusion Paragraph
If you want to make an ESP8266 Lua Webserver for your project, this tutorial is the right place to start. By following all the steps mentioned above, you can create a functional ESP8266 Lua Webserver in no time. Although it may seem daunting at first, with a bit of patience and effort, anyone can learn how to make an ESP8266 Lua Webserver. Not only that, but it also provides a great way to get started with IoT projects involving microcontrollers like the ESP8266. So, what are you waiting for? Give it a try and see what amazing projects you can come up with!
References
- https://www.nabto.com/esp8266-for-iot-complete-guide/
- https://www.best-microcontroller-projects.com/esp8266-webserver.html






Leave a Reply