
Diving into the world of Raspberry Pi can be an exciting journey, filled with great possibilities. However, as any experienced maker knows, it is essential to ensure you have a reliable workflow set-up before getting things started. One crucial step you should take is to install VirtualBox on your Raspberry Pi board – this way you’ll be able to run multiple programs and platforms at once while staying within your limited hardware capacity. In this blog post, we’re going to walk through the entire process so that anyone who wants to explore their creative projects using a Raspberry Pi has all the information they need!
Specifics of Working with Raspberry Pi
When working with a Raspberry Pi, there are many details to consider. We’ve put together a few of the most important ones so you can make sure your project is successful. [1]
Powering Your Raspberry Pi
The first step in powering up your Raspberry Pi is choosing the right power supply. The official recommended power supply for all models of Raspberry Pi is 5 volts and at least 2.5 amps.
Network Connectivity
Your system needs to be connected to your local network in order to access the internet and other devices on the same network. You can use either an Ethernet cable or a wireless connection for this. To set up a wireless connection, you’ll need to have a compatible Wi-Fi dongle (such as one made for the Raspberry Pi). Once connected, you can configure your settings directly from the Raspberry Pi’s desktop.
Storage Requirements
You’ll need to consider storage requirements when setting up a project. Depending on your application, you may need to add an additional microSD card or USB flash drive. The Raspberry Pi is capable of using cards with up to 64GB of storage.
Types of Projects
Raspberry Pi can be used for a variety of projects, from simple educational applications to more complex networked systems. Before starting your project, consider the type of application you want to create and make sure you have the necessary hardware and software requirements. You can find many tutorials online that will help you get started.
Security Considerations
When working with Raspberry Pi, security is always a concern. Make sure to enable SSH on your device and configure it securely with strong passwords and encryption if applicable. Additionally, be sure to regularly update the operating system and applications to ensure your data is safe from any potential threats.
Learning Resources
When learning how to work with Raspberry Pi, there are plenty of helpful resources you can use. The official Raspberry Pi website has a wealth of information and tutorials that can help you get started. Additionally, there are several online forums and communities dedicated to helping people build projects with the Raspberry Pi. These can be great places for asking questions and getting answers from experienced users.
There are many books and courses available which cover topics regarding Raspberry Pi. These can provide a great way to gain more in-depth knowledge about the Raspberry Pi platform. With some dedication and effort, you can become an expert in no time! [2]
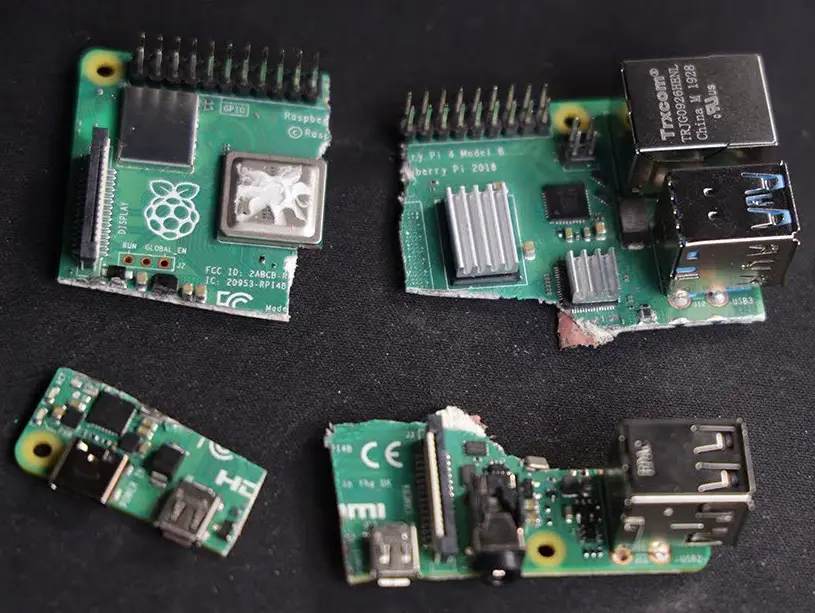
What Types of Raspberry Pi Exist?
There are several different types of Raspberry Pi available on the market. The most popular models are the Raspberry Pi 4, 3B+, 3A+, Zero W, and Zero WH.
- The Raspberry Pi 4 is the most powerful model that features a 1.5 GHz 64-bit quad-core ARM Cortex-A72 CPU, dual monitor support up to 4K resolution, USB 3.0 ports, and Gigabit Ethernet.
- The Raspberry Pi 3B+ is the successor to the popular Raspberry Pi 3 B model and features a 1.4 GHz 64-bit quad-core ARM Cortex-A53 CPU, dual monitor support up to 1080p resolution, USB 2.0 ports, and 10/100 Ethernet.
- The Raspberry Pi 3A+ is a more compact version of the 3B+ and features a 1.4 GHz 64-bit quad-core ARM Cortex-A53 CPU, single monitor support up to 1080p resolution, USB 2.0 ports, and 10/100 Ethernet.
- The Raspberry Pi Zero W is the smallest model in the lineup and features a 1.0 GHz single-core ARM Cortex-A5 CPU, support for 1080p resolution, USB 2.0 ports, and onboard Wi-Fi and Bluetooth.
- The Raspberry Pi Zero WH is an improved version of the Zero W that includes soldered GPIO headers to make it easier to use with HATs or pHATs (add-on boards).
No matter what your needs are, there is a Raspberry Pi suitable for the job. With an ever-growing community of enthusiasts, it’s no wonder why this small but powerful device is so popular among makers and tinkerers alike! [3]
What Are the Best Projects to Build with Raspberry Pi?
When it comes to learning and experimenting with computer hardware, there’s no better tool than the Raspberry Pi. It’s a small, affordable device that can be used for a variety of projects. Whether you’re just starting out or you’re an experienced maker looking for something new, here are some fun Raspberry Pi projects to get your creative juices flowing:
- Make a security camera system. With the Raspberry Pi, you can set up a security camera to keep an eye on your property from anywhere in the world. All you need is a USB webcam and some surveillance software like MotionEyeOS and you can get started right away. [4]
- Build a retro gaming console. It makes it easy to build a powerful gaming console with classic games like Mario Bros., Sonic the Hedgehog and more. All you need is an emulator, some ROM files and an HDMI-compatible display.
- Create a media server. The system is great to stream music and video from services like YouTube, Netflix, Pandora and more directly to your TV or speaker system. It’s perfect for those long weekends when you want to kick back and relax with some movies.
- Construct a weather station. With the help of sensors, the Raspberry Pi can be used to measure temperatures, humidity and barometric pressure, allowing you to create your own weather station at home. You can even connect it to the internet and share your readings with others in real-time.
- Put together a home automation system. The system can be applied to control almost any electronic device in your home, from lights and appliances to music players and thermostats. With the right software, you can have an automated schedule for almost anything in your house.
- Develop a robot. Thanks to its powerful processor and versatile GPIO pins, the Raspberry Pi can be used to create robots of all shapes and sizes. Whether you want a robot that moves around on its own or one that responds to voice commands, the Raspberry Pi has everything you need.
- Launch your own website. It is an ideal platform for hosting a personal website or blog. With the help of some web server software like Apache and a domain name, you can have your own website up and running in no time. [5]
Specifics of Working with VirtualBox
VirtualBox is a powerful and easy to use virtualization platform that allows you to run multiple operating systems on a single computer. This type of software can be invaluable for software developers, system administrators, and users who need access to different operating systems without having multiple physical machines. When working with VirtualBox, there are some important things to keep in mind. [6]
System Requirements
Before using VirtualBox, it is important to ensure that your system meets the necessary requirements. This includes having a CPU with hardware virtualization support, as well as potentially additional memory and storage depending on the operating systems you plan to run. You should also make sure that your computer has enough RAM to handle the demands of running multiple guest operating systems.
Disk Images and Storage Requirements
In order to use VirtualBox, you will need to create disk images for each operating system that you plan to run in the virtual environment. These disk images should be stored on separate hard drives or other storage media in order to ensure optimal performance. Plus, it is important to make sure that you have enough storage space for all of your disk images and guest operating systems.
Network Connectivity
It is essential to ensure that you have an adequate network connection in order to maximize performance. You should make sure that your internet connection is fast enough to handle the demands of running multiple virtual machines at once, as well as any other applications or services that you may be running. Additionally, you should ensure that your router or modem is properly configured to handle the additional demands of the virtual environment.
Security Considerations
As with any type of computing, it is important to consider security when working with VirtualBox. You should make sure that all guest operating systems have appropriate firewall and antivirus software installed, as well as any necessary patching and updates to ensure that your environment is secure. Plus, ensure that all guest operating systems are properly configured in order to minimize the risk of unauthorized access or other malicious activity.
Performance Considerations
When running multiple VirtualBox machines, it is important to consider the performance of your environment. You should make sure that all guest operating systems are configured for optimal performance, as well as ensuring that you have enough RAM and storage to handle the demands of running multiple machines at once. Additionally, you should consider disabling any unnecessary services or applications in order to minimize resource usage and maximize performance. [7]
How to Install VirtualBox on Raspberry Pi?
Installing is a great way to get the most out of your home computer. With VirtualBox, you can run multiple operating systems at once and switch between them with ease. Here’s how to install it on your Raspberry Pi:
- Firstly, make sure that you have the latest version of Raspbian installed on your device. If you do not have the latest version, go to the official Raspberry Pi website and download it from there.
- Next, open up your terminal and enter the following commands: `sudo apt-get update` followed by `sudo apt-get install virtualbox`. This will automatically download and install VirtualBox on your Raspberry Pi.
- Once the installation is completed, you can launch VirtualBox by typing `virtualbox` into your terminal.
- Follow the onscreen instructions to complete the installation process and then you’re good to go!
VirtualBox allows you to create multiple virtual machines with different operating systems installed within them. This means that you can run Linux, Windows, or even Mac OSX. By running different operating systems, you can perform various tasks and use software that may not be available for the Raspbian OS.
Furthermore, VirtualBox gives you complete control over the settings of your virtual machines. You can set up networking configurations, allocate RAM to each machine, and much more. This makes it easy to optimize your system for specific tasks. [8]
How to Set Up a Raspberry Pi Desktop on Virtualbox?
Virtualbox is a great tool for running virtual machines on your computer. It can be used to create and run multiple operating systems from the same machine, allowing you to easily switch between different environments. The Raspberry Pi is a popular development platform due to its small size and affordability. With Virtualbox, users are able to set up a Raspberry Pi desktop environment on their computers, allowing them to easily test and debug their Raspberry Pi projects.
Let’s walk through the steps of setting up a Raspberry Pi desktop on Virtualbox:
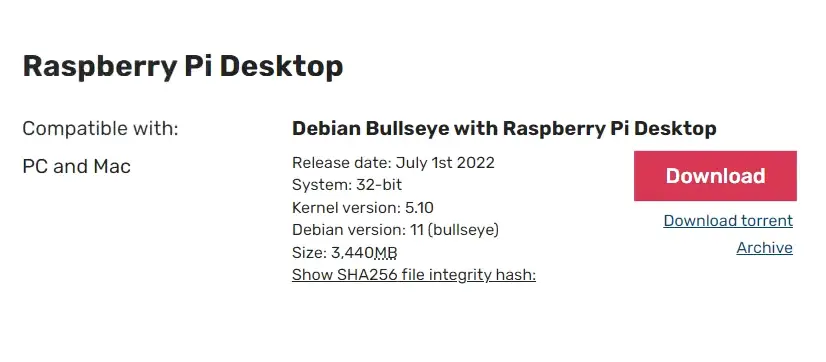
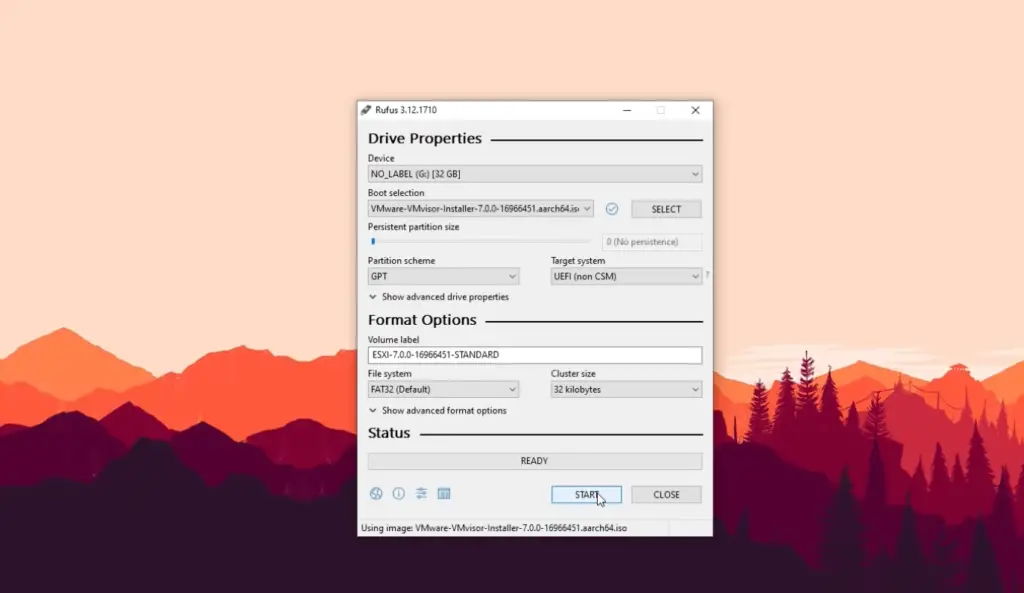
- Download the appropriate Raspberry Pi image for your version of Virtualbox. You can find images for the latest versions of both Raspbian and Ubuntu from their respective download pages.
- Create a new virtual machine in Virtualbox and select the downloaded .img file as its disk image.
- Assign resources to your virtual machine: Set an amount of RAM and CPUs that will allow your Raspberry Pi to operate optimally.
- Configure the networking for your virtual machine: You can select a NAT network or bridged network depending on your requirements.
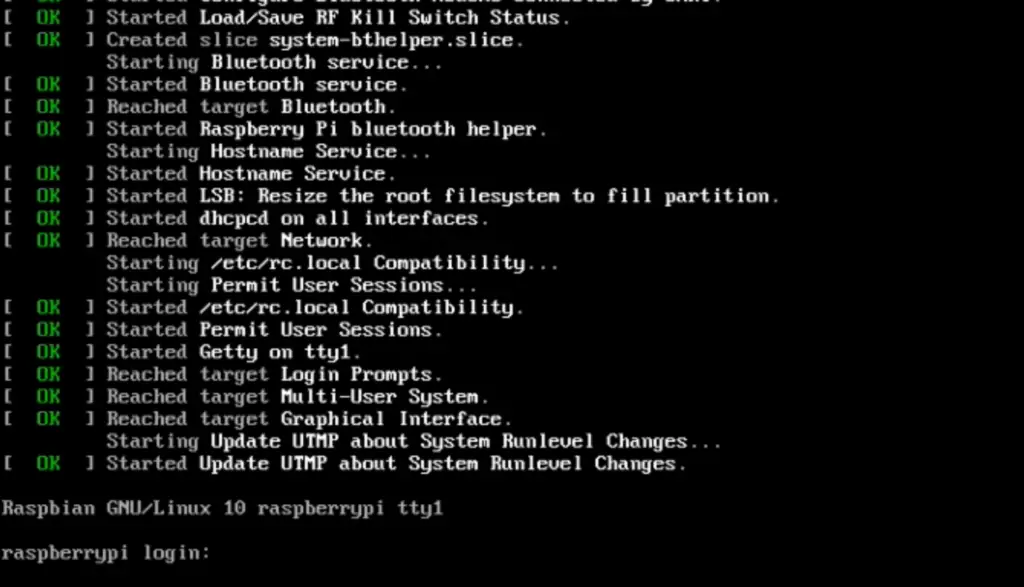
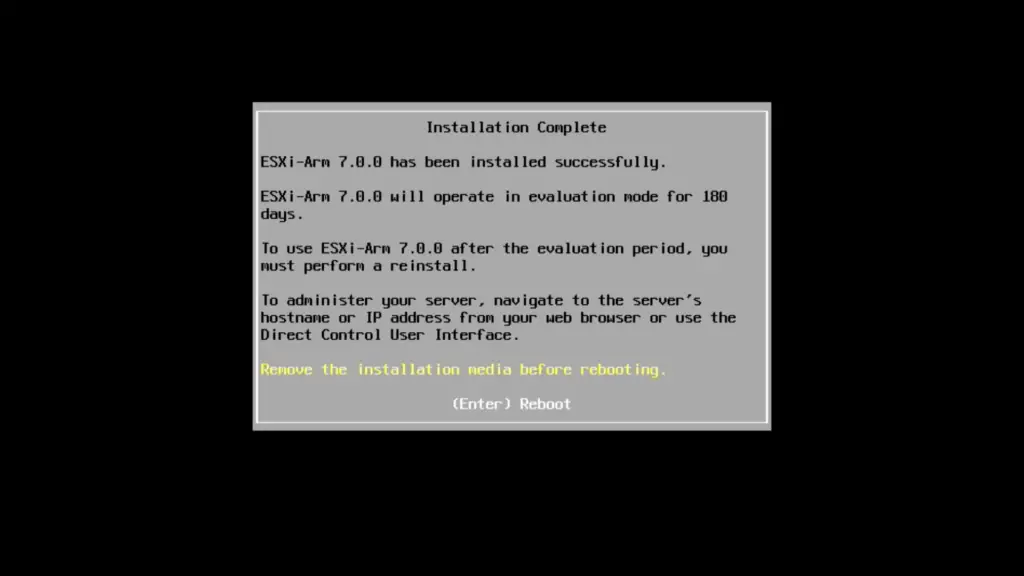
- Start up the virtual machine and it should boot into the Raspberry Pi operating system just like a regular Raspberry Pi would do when connected to an HDMI display.
- You can now use the Raspberry Pi operating system as if it was running on a physical device, allowing you to test and debug your projects on Virtualbox instead of a real Raspberry Pi.
With these steps, you should be able to successfully set up a Raspberry Pi desktop on Virtualbox and begin testing and debugging your projects without having to invest in a physical Raspberry Pi. [9]
What Issues Can Arise with VirtualBox on Raspberry Pi?
VirtualBox is widely available and straightforward to use, issues can arise when running it on Raspberry Pi devices. Some of the main issues that one may encounter when running VirtualBox on Raspberry Pi include:
Poor Performance
Due to its limited hardware capabilities, the Raspberry Pi is not optimal for running VirtualBox. This can result in noticeable levels of lag and choppy performance which may be unacceptable for certain applications. It is worth considering whether a higher-powered device would better suit your needs before investing in a VirtualBox setup on a Raspberry Pi.
Insufficient Memory
The Raspberry Pi has limited memory, and this can become a major issue when running VirtualBox. If the memory requirements become too high for the device, then it will struggle to keep up with all of the processes that need to be carried out. Just make sure that you have enough RAM when running VirtualBox on a Raspberry Pi, otherwise your experience may be severely hindered.
Limited Software Support
The system is not supported by all software currently available for VirtualBox, which may limit your choice of operating system or application.
Heat Buildup
Due to their limited processing power and lack of built-in cooling, running VirtualBox on Raspberry Pi devices can cause the hardware to overheat. This may lead to instability in the system or even permanent damage if not addressed quickly. Ensure that your device has adequate ventilation when running VirtualBox so as to avoid any potential issues with heat. [10]
FAQs
Can you install a virtual machine on a Raspberry Pi?
Yes, it is possible to install a virtual machine on a Raspberry Pi. One of the most popular and widely used virtual machine software for Raspberry Pi is called VirtualBox. It allows users to run multiple guest operating systems (e.g. Windows, Linux, MacOS) on their Pi device without having to partition the hard disk or change any hardware components. With VirtualBox, you can easily create and manage virtual machines on your Raspberry Pi.
How to install VirtualBox in Linux OS?
Installing VirtualBox on a Linux operating system is simple and straightforward. First, you will need to download the software from the official website. Once you have downloaded it, open a terminal window (or command line) and use the following command to install:
- `sudo apt-get install virtualbox`
Once the installation is complete, you can launch VirtualBox from the Applications menu. From here, you will be able to create and manage your virtual machines.
In addition to installing on Linux-based systems, VirtualBox can also be downloaded directly from its website for Mac OS X and Windows computers. The installation process is similar – simply download the software and follow the provided instructions to complete the installation.
Once you’ve installed VirtualBox, make sure to install the virtual machine extensions (also known as guest additions) so that your virtual machines have access to all of their features.
Finally, if you want to be able to use your Raspberry Pi with VirtualBox, then you’ll need to enable hardware virtualization on the Pi. This can be done by running the following command in a terminal window:
- `sudo raspi-config`
Under the “Interfacing Options” menu, select “Enable/Disable automatic loading of ARM Virtualization extensions”. This will enable the hardware virtualization on your Raspberry Pi, so you can use it with VirtualBox.
Can VirtualBox emulate Raspberry Pi?
The simple answer is no – VirtualBox does not have the capability to emulate a Raspberry Pi. However, it is possible to install and run a version of VirtualBox on the Raspberry Pi, allowing you to use existing virtual machines (VMs) or create new ones.
This can be done by using a third-party program called ExaGear Desktop, which is a virtual machine that allows you to run x86 applications on the Raspberry Pi. ExaGear Desktop provides an environment that can emulate x86 Linux OS, so it can support VirtualBox.
How to install VirtualBox Guest Additions Raspberry Pi?
VirtualBox Guest Additions is a set of drivers and system applications that can be installed inside the guest operating system to improve performance. It provides improved graphics, mouse pointer integration, better video support and easy file sharing between host and guest systems. To install VirtualBox Guest Additions on Raspberry Pi, you will need to download the ISO image from the official website.
Once you have downloaded the ISO image, connect your Raspberry Pi to your computer. You will need an external keyboard and mouse for this step. Then open up VirtualBox, create a new machine from the ISO image, and start it up.
Next, you’ll need to install the Guest Additions package. Just click on ‘Devices’ in the upper menu bar, and then select ‘Install Guest Additions’. A wizard will appear that will guide you through the installation of the Guest Additions package.
Once the installation is complete, restart your Raspberry Pi. Your system should now be running VirtualBox with the Guest Additions installed.
Useful Video: How to Install Raspberry Pi OS (Raspbian) on VirtualBox in Windows 11
The Bottom Line
All in all, installing VirtualBox on your Raspberry Pi is not a difficult task if you follow these simple steps. With the Raspberry Pi’s increasing power and capabilities, it’s no wonder why so many people are turning to this versatile computer for their daily digital needs. Not only can you use the Raspberry Pi to browse the web, but with VirtualBox installed, you also have the ability to run thousands of Windows programs on your machine! Be sure to give it a try and don’t forget to share your experiences with others. With more knowledge and resources shared, we can continue pushing forward the boundaries of what technology is capable of achieving!
References
- https://nordvpn.com/blog/what-is-raspberry-pi/
- https://linuxhint.com/how-does-raspberry-pi-work/
- https://pimylifeup.com/raspberry-pi-versions/
- https://www.bytesbuzz.com/best-raspberry-pi-projects/
- https://itsfoss.com/raspberry-pi-projects/
- https://www.nakivo.com/blog/use-virtualbox-quick-overview/
- https://www.spiceworks.com/tech/cloud/articles/what-is-virtualbox/
- https://raspians.com/how-to-install-virtualbox-on-raspberry-pi/
- https://roboticsbackend.com/install-raspbian-desktop-on-a-virtual-machine-virtualbox/
- https://pimylifeup.com/raspberry-pi-virtualbox/