
Unlock the potential of your Raspberry Pi by bridging it with the versatility of your laptop! In this comprehensive guide, we’ll take you on a step-by-step journey, demystifying connecting a Raspberry Pi to your laptop. Whether you’re a tech enthusiast, a DIY hobbyist, or just curious about the endless possibilities these compact computers offer, join us as we unravel the seamless integration that can turn your laptop into a powerful ally for your Raspberry Pi projects. Get ready to embark on a connectivity adventure that opens the door to innovation and unleashes the true potential of your computing experience!
Brief Overview of Raspberry Pi and Its Uses
Before we delve into the intricacies of connecting a Raspberry Pi to a laptop, let’s take a moment to appreciate the marvel that is the Raspberry Pi. Originally designed to be an affordable, credit card-sized computer for educational purposes, the Raspberry Pi has transcended its initial intentions to become a powerhouse in the world of DIY electronics and programming. [1]
Equipped with GPIO (General Purpose Input/Output) pins, USB ports, HDMI outputs, and more, the Raspberry Pi boasts impressive capabilities for its size and price. It runs on a variety of operating systems, with Raspbian (now known as Raspberry Pi OS) being the official choice. From creating retro gaming consoles to home automation systems, media centers, and even small-scale servers, the Raspberry Pi has found its way into countless projects, fostering creativity and innovation among enthusiasts worldwide.
Importance of Connecting Raspberry Pi to a Laptop for Various Projects and Development
So, why should you consider connecting your Raspberry Pi to a laptop? The synergy between these two devices opens up a world of possibilities, making your Raspberry Pi projects more accessible and user-friendly. Here are some key reasons why this connection is crucial:
Programming and Development
Connecting your Raspberry Pi to a laptop facilitates seamless programming and development. You can write and test code directly on your laptop before deploying it to the Raspberry Pi, streamlining the development process. [1]
Remote Access and Control
By establishing a connection, you gain the ability to remotely access and control your Raspberry Pi from the comfort of your laptop. This is particularly useful for headless setups, where the Raspberry Pi operates without a dedicated monitor, keyboard, or mouse.
Data Transfer and File Management
Transferring files between your laptop and Raspberry Pi becomes effortless. Whether you’re working on large datasets, transferring code, or managing multimedia files, a direct connection simplifies the process.
Debugging and Troubleshooting
When issues arise, having your Raspberry Pi connected to your laptop makes debugging and troubleshooting more efficient. You can monitor logs, run diagnostics, and make necessary adjustments without the need for additional peripherals.
Educational Opportunities
For educational purposes, connecting a Raspberry Pi to a laptop enhances the learning experience. Students and enthusiasts can easily experiment with programming, electronics, and various projects, fostering a hands-on approach to technology. [2]
Let’s dive into the steps and unlock the full potential of this collaborative synergy!
Understanding the Hardware
Before we proceed with the step-by-step guide on connecting your Raspberry Pi to a laptop, let’s familiarize ourselves with the essential hardware components involved in this process.
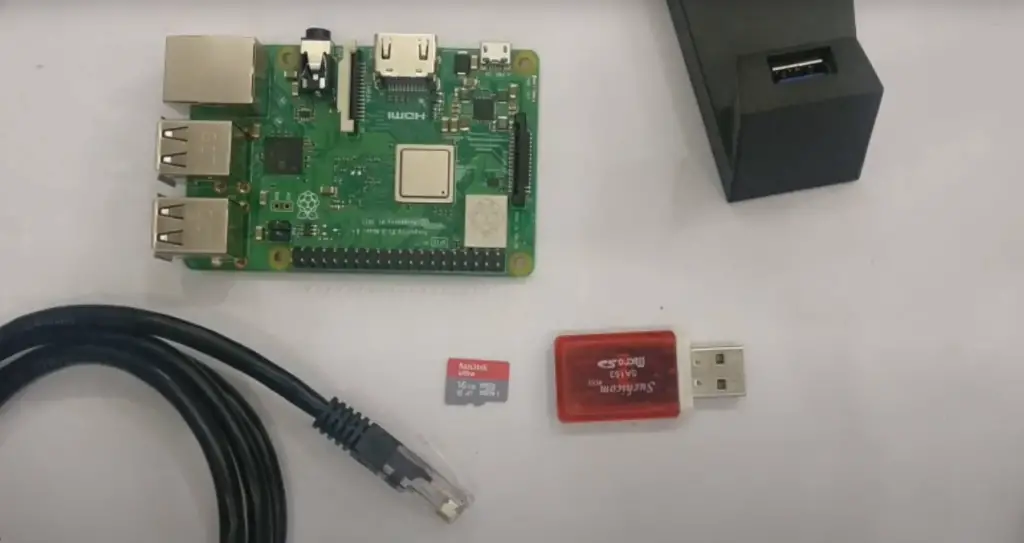
Cables, Adapters, and Peripherals:
- Micro USB or USB-C Cable: The power source for your Raspberry Pi. Connect one end to the power input on the Raspberry Pi and the other end to a power supply or a USB port on your laptop.
- HDMI Cable: For video output. Connect one end to the HDMI port on the Raspberry Pi and the other end to an available HDMI port on your laptop or through an HDMI-to-USB adapter if needed.
- Ethernet Cable (Optional): If you want a wired network connection, use an Ethernet cable. Connect one end to the Ethernet port on the Raspberry Pi and the other end to an available Ethernet port on your laptop or through a USB-to-Ethernet adapter.
- MicroSD Card: The storage device for your Raspberry Pi’s operating system. Insert the microSD card into the designated slot on the Raspberry Pi.
Ports and Connectors:
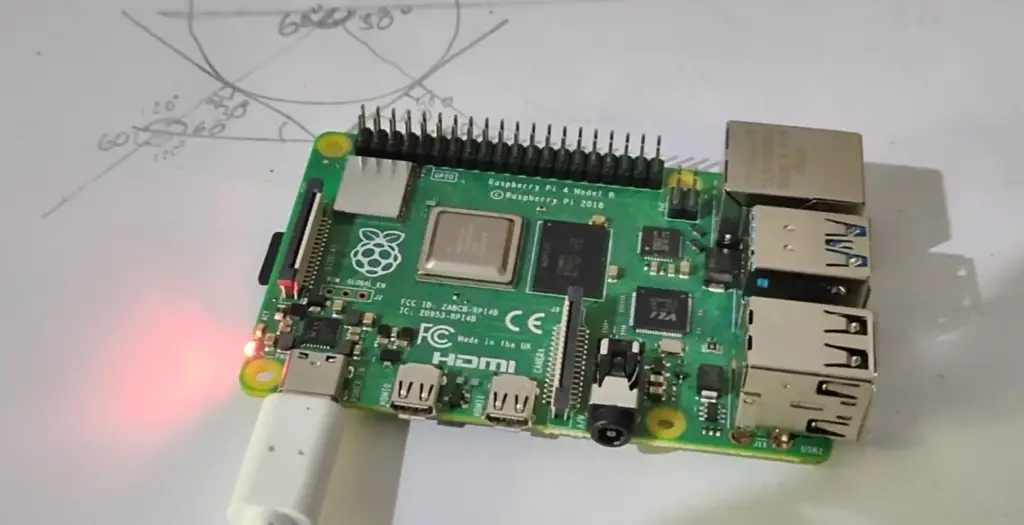
Raspberry Pi:
- USB Ports: Use these for connecting peripherals such as a keyboard, mouse, or USB Wi-Fi dongle.
- HDMI Port: For connecting the Raspberry Pi to a display, monitor, or laptop via an HDMI cable.
- GPIO Pins: General Purpose Input/Output pins for connecting external devices and components.
- Power Input: Connect the micro USB or USB-C cable for powering the Raspberry Pi.
- Ethernet Port: If using a wired network connection, connect an Ethernet cable here.
Laptop:
- USB Ports: For connecting peripherals and potentially for powering the Raspberry Pi or providing network connectivity.
- HDMI Port: To receive video output from the Raspberry Pi. Some laptops may require an HDMI-to-USB adapter.
- Ethernet Port (If Available): For a wired network connection. You can use a USB-to-Ethernet adapter if your laptop lacks an Ethernet port.
Understanding these hardware components and their respective ports is crucial for establishing a seamless connection between your Raspberry Pi and laptop. Now, armed with this knowledge, let’s proceed to the step-by-step guide to bring these devices together and unlock a realm of possibilities for your projects and development endeavors. [3]
Setting Up the Connection
Now that we have a solid grasp of the necessary hardware components let’s walk through the step-by-step process of physically connecting your Raspberry Pi to your laptop.
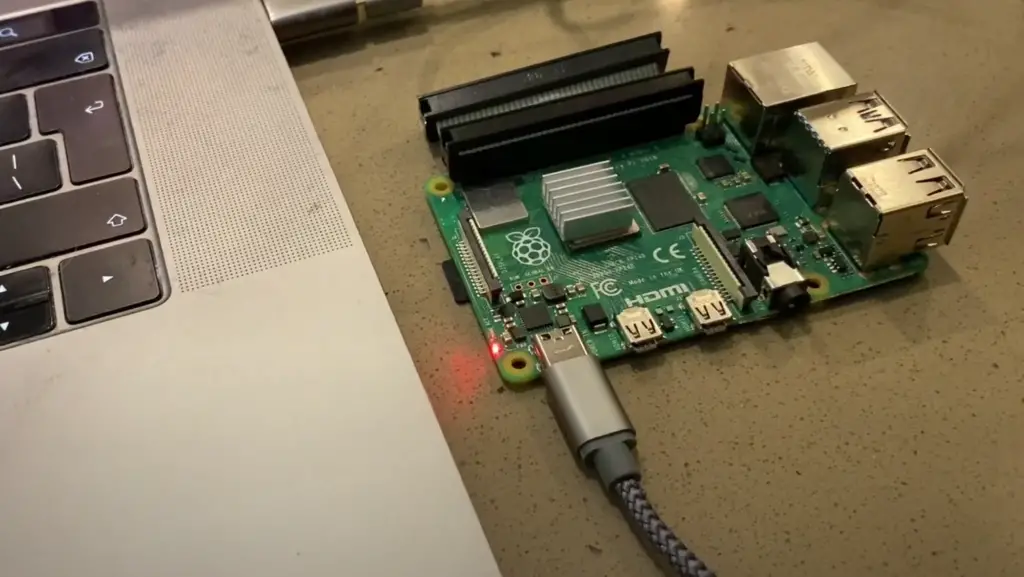
Step 1: Powering the Raspberry Pi
- Insert the microSD card with the operating system into the designated slot on the Raspberry Pi.
- Connect one end of the micro USB or USB-C cable to the power input on the Raspberry Pi.
- Plug the other end of the cable into a power source or an available USB port on your laptop.
Step 2: Establishing Video Output
- Connect one end of the HDMI cable to the HDMI port on the Raspberry Pi.
- Plug the other end of the HDMI cable into an available HDMI port on your laptop. If your laptop lacks an HDMI port, use an HDMI-to-USB adapter and connect it to an available USB port.
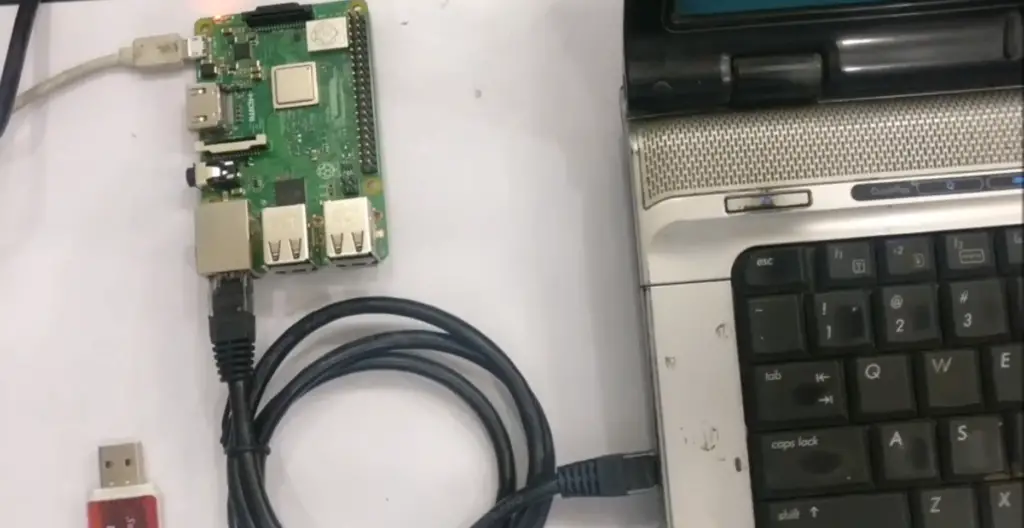
Step 3: Network Connectivity (Optional)
- If you prefer a wired network connection, connect one end of the Ethernet cable to the Ethernet port on the Raspberry Pi.
- Plug the other end of the Ethernet cable into an available Ethernet port on your laptop. If your laptop doesn’t have an Ethernet port, use a USB-to-Ethernet adapter and connect it to an available USB port.
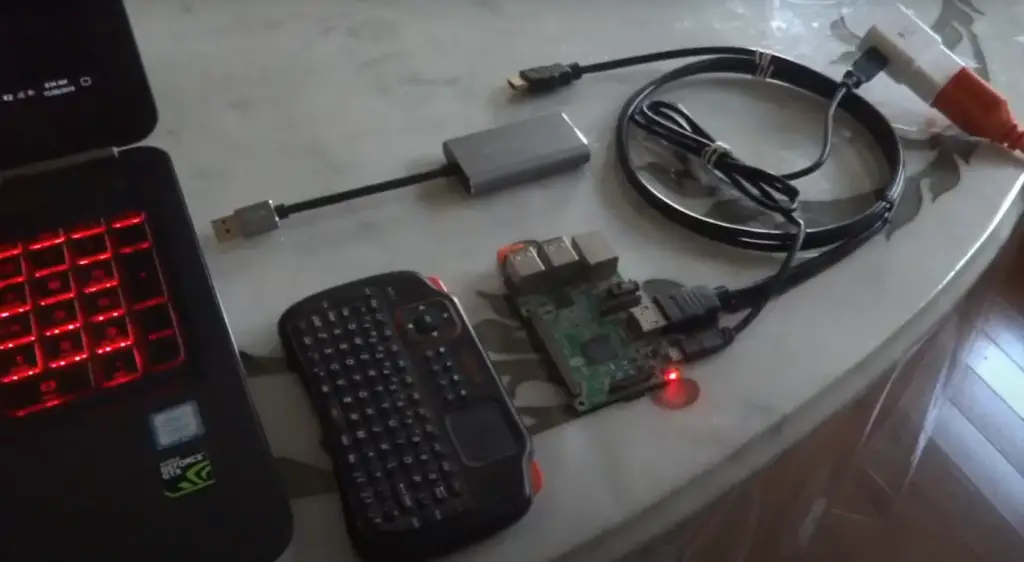
Step 4: Peripheral Connections (Optional)
Connect any additional peripherals, such as a USB keyboard, mouse, or other USB devices, to the USB ports on the Raspberry Pi or your laptop.
Now that you’ve physically connected your Raspberry Pi to your laptop, it’s time to power on both devices and witness the magic unfold. If everything is set up correctly, your laptop should recognize the Raspberry Pi, and you may see the Raspberry Pi desktop on your laptop screen. [3]
Troubleshooting Tips for Common Connection Issues
No Display Output:
- Check the HDMI connection and make sure the cable or adapter is securely plugged in.
- Verify that your laptop is set to receive input from the HDMI port you’ve connected to.
No Power to Raspberry Pi:
- Ensure that the micro USB or USB-C cable is securely connected to both the Raspberry Pi and a power source.
- Check that the power source is providing sufficient power.
Network Connection Issues:
- If using a wired connection, ensure the Ethernet cable is securely connected to both the Raspberry Pi and your laptop.
- Verify that your laptop’s network settings are configured to recognize a wired connection.
Peripheral Not Recognized:
- Check the USB connections for your peripherals and make sure they are securely plugged into the Raspberry Pi or your laptop.
- Ensure that the peripherals are compatible with the Raspberry Pi.
By following these steps and troubleshooting tips, you should be well on your way to establishing a successful connection between your Raspberry Pi and laptop. Now, explore the endless possibilities that this collaboration unlocks for your projects and development endeavors!
Configuring the Software
Now that you’ve physically connected your Raspberry Pi to your laptop, it’s time to configure the software to facilitate seamless communication between the two devices. This step is crucial for remote access and interaction with your Raspberry Pi. Below are instructions for setting up SSH (Secure Shell) or VNC (Virtual Network Computing) for remote access, as well as installing and configuring necessary software on your laptop.
Setting Up SSH for Remote Access
SSH allows you to access and control your Raspberry Pi’s terminal remotely. Follow these steps:
Enable SSH on Raspberry Pi: On your Raspberry Pi, open a terminal or use the Raspberry Pi Configuration tool to enable SSH.
Find Raspberry Pi’s IP Address: On your Raspberry Pi, enter the following command in the terminal:
hostname -I
Note the IP address displayed. This is the address you’ll use to connect to your Raspberry Pi.
Access Raspberry Pi from Laptop:
Open a terminal on your laptop. Type the following command, replacing your_pi_ip with the IP address of your Raspberry Pi:
ssh pi@your_pi_ip
Enter the default password when prompted (default is raspberry unless you changed it).
Configuring SSH: For enhanced security, consider changing the default password on your Raspberry Pi and using key-based authentication.
Setting Up VNC for Remote Desktop Access:
VNC allows you to access the graphical desktop of your Raspberry Pi remotely. Follow these steps:
Install VNC Server on Raspberry Pi: On your Raspberry Pi, open a terminal and run the following command to install the VNC Server:
sudo apt-get install realvnc-vnc-server
Set Up VNC Server: Run the following command to enable and start the VNC Server:
sudo raspi-config
Navigate to “Interfacing Options” and enable VNC.
Install VNC Viewer on Laptop: Download and install VNC Viewer on your laptop from the official website (https://www.realvnc.com/en/connect/download/viewer/). [4]
Access Raspberry Pi Desktop from Laptop: Open VNC Viewer on your laptop. Enter the IP address of your Raspberry Pi in the VNC Viewer and connect. Enter the username and password when prompted.
Installing and Configuring Necessary Software on Laptop:
SSH Client: Ensure that your laptop has an SSH client installed. For Windows, you can use PuTTY, and for macOS or Linux, the built-in terminal can be used.
FTP Client (Optional): If you need to transfer files between your laptop and Raspberry Pi, consider installing an FTP client like FileZilla.
Programming Tools: Install the necessary programming tools and IDEs on your laptop, depending on the languages you’ll be using (e.g., Python, Java, C++).
By completing these software configuration steps, you’ll establish a robust connection between your laptop and Raspberry Pi, enabling seamless remote access and interaction. Now, whether you’re developing code, managing files, or exploring the capabilities of your Raspberry Pi, you can do so with ease from the comfort of your laptop.
Practical Applications
Upon successfully intertwining your Raspberry Pi with your laptop, a realm of practical applications and exciting projects unveils itself. Let’s delve into various possibilities, spanning programming and data analysis to Internet of Things (IoT) development.
Programming and Coding Projects
Leverage the dynamic duo of your Raspberry Pi and laptop for seamless Python development. Write scripts, create applications, and automate tasks with ease. The ability to code remotely enhances your coding experience, making the process smooth and efficient.
Data Analysis and Visualization
Unleash the computational prowess of your Raspberry Pi for data analysis and machine learning tasks. Process datasets, run algorithms, and visualize results directly from your laptop. The connection facilitates real-time monitoring and analysis, making data-driven decisions a breeze.
IoT Development
Elevate your IoT development game by turning your Raspberry Pi into a central hub for home automation projects. Seamlessly control smart devices, monitor security cameras, and manage IoT devices from the comfort of your laptop. The integration simplifies the development and deployment of IoT solutions.
Remote Access and Control
Liberty from dedicated peripherals is granted as you operate your Raspberry Pi headlessly. Access and control your Raspberry Pi remotely through SSH or VNC with your laptop as the control center. File management becomes a breeze, allowing you to transfer, organize, and manage projects effortlessly.
Educational Projects
Extend the collaborative power of your devices to educational settings. Conduct coding workshops, showcasing programming concepts and guiding learners through hands-on exercises. For STEM education, introduce students to electronics and programming with interactive projects controlled through your laptop.
Security and Network Monitoring
Enhance your understanding of network security by setting up monitoring tools on your Raspberry Pi. Visualize network traffic data on your laptop, gaining insights into potential security threats. Additionally, configure your Raspberry Pi as a VPN server for secure remote connections.
In this collaborative ecosystem, the Raspberry Pi and laptop tandem provide a versatile platform for exploration and innovation. Whether you’re coding, analyzing data, or developing IoT solutions, the synergy between these devices unlocks a realm of possibilities, fostering creativity and efficiency in your computing endeavors.
FAQ
How can I connect my Raspberry Pi to my laptop using an ethernet cable?
To establish an Ethernet connection between your Raspberry Pi and laptop, simply connect one end of the Ethernet cable to the Raspberry Pi’s Ethernet port and the other end to an available Ethernet port on your laptop. Ensure both devices are powered on, and you should have a wired connection.
What are the steps to connect a Raspberry Pi to a laptop screen and keyboard without an external monitor or keyboard?
To connect your Raspberry Pi to a laptop without external peripherals, use SSH for remote access. Connect your Raspberry Pi to the same network as your laptop, find its IP address, and use an SSH client on your laptop to access the Raspberry Pi’s terminal remotely.
How do I find the IP address of my Raspberry Pi to connect to it from my laptop using SSH or VNC?
On your Raspberry Pi, open a terminal and enter the command hostname -I to display its IP address. Use this IP address to connect to your Raspberry Pi via SSH or VNC from your laptop.
Can I use a VNC (Virtual Networked Computer) connection to display my Raspberry Pi on my laptop screen?
Yes, you can. Install a VNC server on your Raspberry Pi, enable it through the Raspberry Pi Configuration tool, and use a VNC viewer on your laptop to connect to the Raspberry Pi’s desktop remotely.
What are the methods for connecting a Raspberry Pi to a laptop, such as USB to Serial connection, SSH connection, and Virtual Network?
You can connect a Raspberry Pi to a laptop through various methods, including USB to Serial connection for terminal access, SSH for remote access, and Virtual Network (e.g., VNC) for graphical desktop access. Each method serves different purposes based on your requirements.
How can I troubleshoot common problems when connecting a Raspberry Pi to a laptop, such as crashes during operation or artifacts on the screen?
If you encounter issues, check your physical connections, ensure proper power supply, and review configurations. For crashes, examine system logs. For artifacts on the screen, verify cable connections and monitor compatibility. Updating software and firmware might also resolve certain issues.
What are the hardware and software requirements for connecting a Raspberry Pi to a laptop, and how can I verify an Ethernet network connection to the Pi?
Hardware requirements include cables (USB, HDMI, Ethernet), adapters if needed, and peripherals. Software requirements involve SSH or VNC clients on your laptop. To verify an Ethernet connection, check the link lights on both the Raspberry Pi and your laptop’s Ethernet port and use the ifconfig command on the Raspberry Pi to confirm network settings.
Conclusion
In the realm of technology, the marriage of a Raspberry Pi and a laptop unlocks a gateway to creativity, innovation, and endless possibilities. As we navigated through the steps of physically connecting these devices, configuring the software for seamless interaction, and exploring practical applications, it became evident that this collaboration transcends the traditional boundaries of computing.
Connecting your Raspberry Pi to a laptop is not just a technical feat; it’s an invitation to explore the convergence of hardware and software, enabling a dynamic synergy that empowers enthusiasts, developers, and educators alike. Whether you’re embarking on coding adventures, delving into data analysis, or immersing yourself in the Internet of Things (IoT) landscape, this connection bridges the gap between potential and realization.
The collaborative power of these devices fosters a hands-on approach to learning, programming, and development. It facilitates remote access, unleashing the full potential of your Raspberry Pi without the constraints of dedicated peripherals. The applications range from educational endeavors to sophisticated IoT projects, providing a versatile platform for both novice explorations and advanced innovations.
As we conclude this journey into the world of connecting a Raspberry Pi to a laptop, remember that this is just the beginning. The bond formed between these two devices sets the stage for ongoing exploration and discovery. Whether you’re a hobbyist building a smart home system, a student delving into STEM projects, or a professional developing cutting-edge applications, the collaborative potential of the Raspberry Pi and laptop connection is a catalyst for turning ideas into reality.
So, armed with knowledge, connectivity, and a dash of curiosity, venture forth into the landscape of possibilities that await when a Raspberry Pi and a laptop join forces. The future of your projects and endeavors is limited only by your imagination and ingenuity. Happy exploring!
References
- https://spin.atomicobject.com/2019/06/09/raspberry-pi-laptop-display/
- https://www.makeuseof.com/how-to-connect-raspberry-pi-to-laptop-or-pc-usb/
- https://robu.in/how-to-connect-raspberry-pi-to-laptop/
- https://linuxhint.com/connect-raspberry-pi-laptop/