From building smart home systems to crafting intricate web servers, the Raspberry Pi’s potential seems boundless. Yet, amidst this technological marvel, lies a fundamental consideration that often determines the efficiency and accessibility of these projects: the choice between a dynamic and a static IP address.
An IP address, akin to a digital passport, distinguishes each device within a network, facilitating data transmission and routing across the internet or a local connection [1]. While dynamic IP addresses are automatically assigned by routers through DHCP, a static IP address offers a consistent, predetermined identity for a Raspberry Pi, a feature indispensable for projects necessitating unwavering connectivity and accessibility. This guide illuminates the nuanced journey of configuring such a steadfast address, providing step-by-step instructions to navigate the process with confidence and ease.
By equipping users with the knowledge to harness a static IP address for their Raspberry Pi, this guide transcends the mundane and ventures into a realm where digital landscapes are seamlessly interconnected, where web services hum with reliability, and where remote access is as straightforward as it is secure.
As we embark on this exploration, we unveil the significance of a static IP address and empower Raspberry Pi enthusiasts to transcend the boundaries of dynamic networking, ensuring that their projects thrive with uninterrupted communication and steadfast connectivity.
What Is An IP Address?
It serves two primary purposes:
- Device Identification: An IP address is used to uniquely identify devices (such as computers, smartphones, servers, routers, etc.) on a network. Just as a street address helps identify a physical location, an IP address identifies a device’s location in the digital world;
- Routing and Communication: IP addresses are crucial for routing data packets across the internet or any network. When you send data over the internet, it is broken down into small packets, and these packets are routed from one device to another based on their IP addresses. IP addresses help ensure that data reaches the intended destination and can be sent back if a response is needed;
IP addresses come in two main versions: IPv4 (Internet Protocol version 4) and IPv6 (Internet Protocol version 6). IPv4 addresses are written in a format like “192.168.1.1”, consisting of four sets of numbers ranging from 0 to 255. Due to the rapid growth of devices connecting to the internet, IPv4 addresses are running out, which led to the development of IPv6. IPv6 addresses are much longer and follow a hexadecimal format like “2001:0db8:85a3:0000:0000:8a2e:0370:7334” [2].
IP addresses are managed by regional internet registries (RIRs) that allocate blocks of addresses to internet service providers (ISPs), organizations, and other entities. ISPs then assign IP addresses to their customers, allowing them to connect to the internet.
IP addresses play a fundamental role in Internet communication, enabling devices to find and interact with each other across vast networks.
Private vs. Public IP
Private IP Address
A private IP address is used within a local network to uniquely identify devices. Private IP addresses are not directly reachable from the internet and are primarily meant for local communication. They are commonly used in homes, businesses, and other organizations to establish a network of devices.
Private IP addresses are part of reserved address ranges defined by the Internet Assigned Numbers Authority (IANA). The most common private IP address ranges for IPv4 are:
10.0.0.0 to 10.255.255.255
172.16.0.0 to 172.31.255.255
192.168.0.0 to 192.168.255.255
These addresses can be assigned to devices within a local network, such as computers, printers, smartphones, and other devices connected to a router. Private IP addresses are used for internal communication, such as file sharing, device discovery, and data exchange within the same network [3].
Public IP Address:
A public IP address is assigned to a device by the internet service provider (ISP) and is used to identify the device on the global internet. It is unique across the entire internet and serves as the address that other devices use to communicate with the device over the internet. Public IP addresses are essential for accessing websites, sending and receiving emails, and other internet-based activities.
When you access a website or send data to a server on the internet, your device uses its public IP address to establish the connection. The server’s response is then sent back to your public IP address, and your router forwards the response to the appropriate device within your local network.
Public IP addresses are a limited and valuable resource, which is why ISPs allocate them based on their available address pool. In some cases, multiple devices within a local network share a single public IP address using a technique called Network Address Translation (NAT). NAT allows multiple devices to access the internet through a single public IP address by mapping internal private addresses to a single public address.
Why Do You Need A Static IP Address For Your Raspberry Pi?
Before delving into the benefits of a static IP address, it’s important to grasp the concept of an IP address. An IP (Internet Protocol) address is a unique numerical label assigned to each device connected to a network. It serves as the device’s digital identifier, enabling it to send and receive data over the internet or a local network. Think of an IP address as a virtual home address that helps data packets find their way to the correct recipient.
Dynamic vs. Static IP Addresses
By default, most networks assign dynamic IP addresses to devices. A dynamic IP address is temporary and subject to change each time a device connects to the network. While this setup works well for general internet browsing and casual use, it may not be ideal for certain scenarios, particularly those involving devices that need consistent and predictable connectivity, like a Raspberry Pi [4].
A static IP address, on the other hand, is one that remains constant and does not change each time the device connects to the network. It’s like having a dedicated parking spot for your device on the network. This static assignment can be especially advantageous for Raspberry Pi projects that require uninterrupted communication and accessibility.
Benefits of a Static IP Address for Your Raspberry Pi
Reliable Access and Connectivity
When your Raspberry Pi has a static IP address, you can access it reliably from other devices on the network. This is particularly important for remote access, such as SSH (Secure Shell) connections, VNC (Virtual Network Computing) access, or accessing web-based applications hosted on the Raspberry Pi. With a dynamic IP address, you might find yourself searching for the device’s new IP address each time it reconnects to the network, causing inconvenience and potential disruptions.
Easy Networked Services Setup
Many Raspberry Pi projects involve setting up services that other devices interact with. These could be a file server, a media center, a home automation system, or even a web server. Having a static IP address simplifies the process of configuring these services, as you can reliably specify the Raspberry Pi’s address in your configurations. This makes it easier for other devices to locate and communicate with the Raspberry Pi.
Port Forwarding and External Access
If you intend to expose your Raspberry Pi to the internet for tasks like hosting a website or accessing it remotely from outside your local network, a static IP address is crucial. When you have a static IP, you can easily set up port forwarding on your router, directing incoming requests to the Raspberry Pi’s fixed address. This ensures that external devices can reliably connect to your Raspberry Pi without having to constantly update IP addresses.
Network Monitoring and Security
For network monitoring and security purposes, having a consistent IP address can be invaluable. With a static IP, you can easily track Raspberry Pi’s activity, apply access control rules, and monitor traffic patterns. This is especially important if you’re using the Raspberry Pi for network analysis, intrusion detection, or other security-related tasks.
Integration with DNS and Domain Names
If you’re hosting services like websites or applications on your Raspberry Pi, having a static IP address simplifies domain name configuration. You can associate a domain name with Raspberry Pi’s fixed IP address, allowing users to access your services using a memorable and user-friendly URL.
How to Setup a Raspberry Pi Static IP Address:
1. Required Equipment
- Raspberry Pi (any model);
- Micro SD Card (with Raspberry Pi OS installed);
- Power supply;
- Ethernet cable or Wi-Fi dongle (depending on your network preference);
- Raspberry Pi case (for protection);
- HDMI cable;
- Monitor;
- USB keyboard;
- USB mouse;
Having the recommended equipment will ensure a smoother setup process, while the optional items can enhance your overall Raspberry Pi experience.
2. Prerequisites: Get the Network Configuration
Before you begin setting up a static IP address, it’s important to gather some information about your network configuration. You’ll need details such as the IP address range used by your router and the IP address of the router itself. This information is vital for configuring the static IP address effectively [5].
3. Get the IP Address of Your Router
Log in to your router’s administration interface. This is usually done by entering the router’s IP address into a web browser. Once logged in, navigate to the network settings section, where you can find the router’s IP address. Note down this IP address; you will need it later.
4. Set a Static IP for the Raspberry Pi on the Router
Within the router’s administration interface, look for the option to set static IP addresses. This option might be labeled as “Static IP Reservation” or something similar. Associate your Raspberry Pi’s MAC address with a specific IP address within the router’s DHCP settings. This ensures that the router assigns the same IP address to your Raspberry Pi every time it connects to the network.
5. Get the DHCP Range
While still in the router’s administration interface, find the DHCP range. This is the range of IP addresses that the router can automatically assign to devices when they connect to the network. Make a note of the starting and ending addresses of this range.
6. Get a List of the Currently Used IP Addresses
To avoid assigning an IP address that is already in use, check the list of currently assigned IP addresses on your network. Most routers provide a list of connected devices along with their IP addresses. Make sure the IP address you choose for your Raspberry Pi is outside the DHCP range and is not already in use by another device.
7. Set a Static IP on Raspberry Pi OS Desktop
If you’re using the Raspberry Pi OS desktop version, follow these steps:
- Click on the network icon in the top-right corner of the desktop;
- Select “Wireless and Wired Network Settings”;
- In the “Connection” tab, click on the wired or wireless connection you’re using;
- Click on the gear icon to open the settings for that connection;
- In the IPv4 tab, change the method to ‘Manual”;
- Enter the IP address, subnet mask, gateway, and DNS server addresses;
- Click “Apply” to save the settings;
8. Set a Static IP in the Command Line
If you’re comfortable working with the command line, you can set a static IP address using the terminal:
- Open a terminal window on your Raspberry Pi;
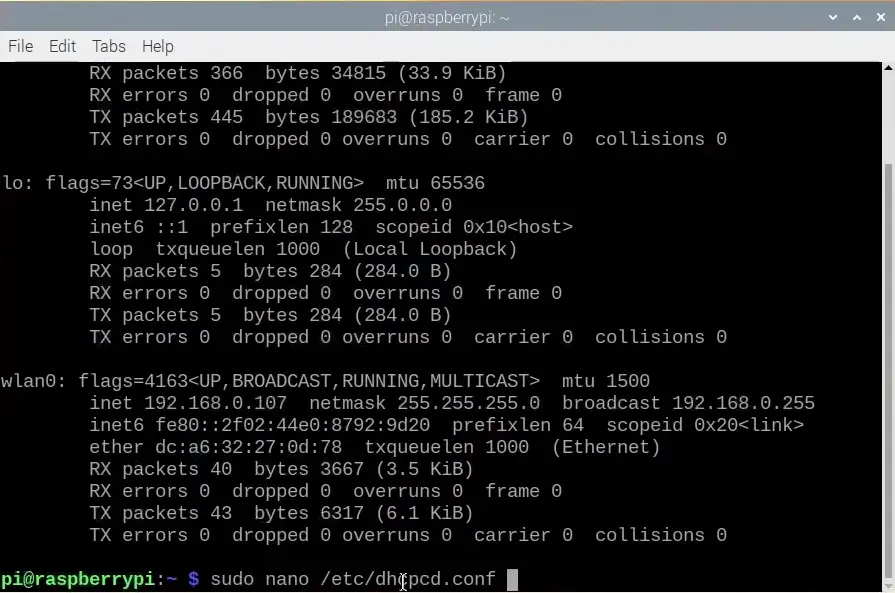
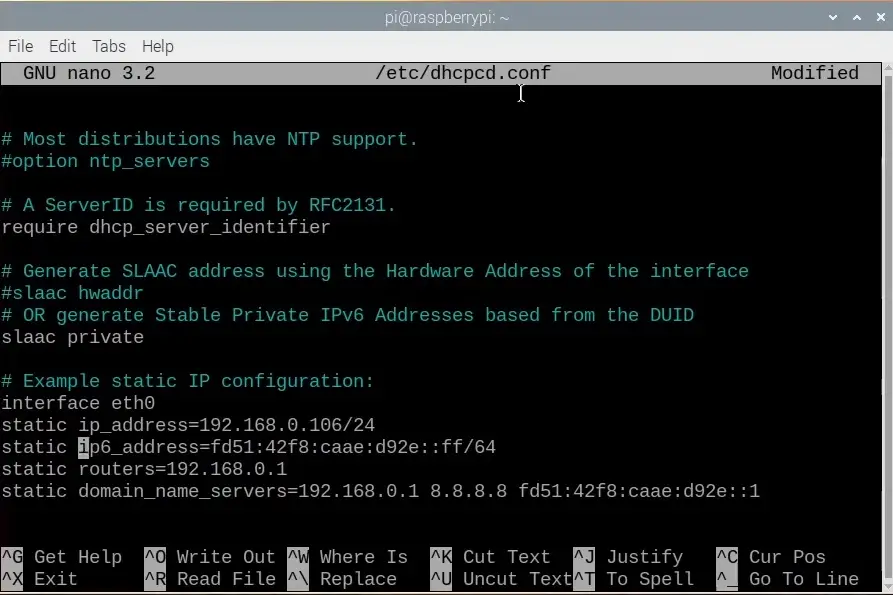
- Edit the dhcpcd.conf file: sudo nano /etc/dhcpcd.conf;
- Scroll down to the interface you’re using (e.g., eth0 for Ethernet or wlan0 for Wi-Fi);
Add the following lines, replacing the values with your network information:
interface
static ip_address=/24
static routers=
static domain_name_servers=
Press Ctrl + O to save the file, then Ctrl + X to exit.
Restart the dhcpcd service: sudo service dhcpcd restart
9. Setting Up the Terminal
If you prefer the terminal approach, follow these steps [6]:
- Open a terminal window on your Raspberry Pi;
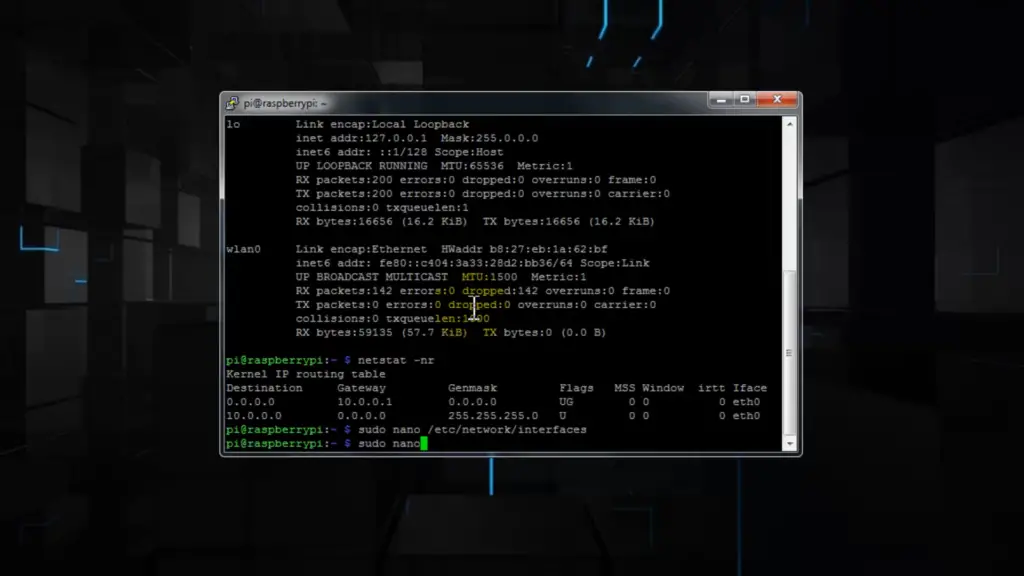
- Edit the interfaces file: sudo nano /etc/network/interfaces;
- Find the interface configuration (e.g., eth0 for Ethernet or wlan0 for Wi-Fi);
Add the following lines, replacing the values with your network information:
iface inet static
address
netmask
gateway
dns-nameservers
Press Ctrl + O to save the file, then Ctrl + X to exit.
Restart the networking service: sudo service networking restart
10. Prioritizing Internet Interface
If you’re using both Ethernet and Wi-Fi connections, you can prioritize one over the other. To do this:
- Open a terminal window on your Raspberry Pi;
- Edit the dhcpcd.conf file: sudo nano /etc/dhcpcd.conf;
Scroll to the bottom of the file and add the following lines:
interface
metric
Replace with the name of the interface (e.g., eth0 or wlan0) and with a lower
value for the interface you want to prioritize.
Press Ctrl + O to save the file, then Ctrl + X to exit
Restart the dhcpcd service: sudo service dhcpcd restart
11. Disabling Static IP Address
If you wish to revert to using a dynamic IP address, follow these steps:
- Open a terminal window on your Raspberry Pi;
- Edit the dhcpcd.conf file: sudo nano /etc/dhcpcd.conf;
- Find the interface configuration and remove the static IP settings you added;
- Press Ctrl + O to save the file, then Ctrl + X to exit;
- Restart the dhcpcd service: sudo service dhcpcd restart;
12. Testing the Static IP
To ensure that your Raspberry Pi is successfully configured with a static IP address, follow these steps:
- Reboot your Raspberry Pi: sudo reboot;
- After the reboot, check the IP address: ip a;
You should see your chosen static IP address listed alongside the network interface you configured.
How to Assign a Static IP to a Raspberry Pi:
Determine Raspberry Pi’s Current IP V4 Address
Before making any changes, it’s important to know your Raspberry Pi’s current IP address. This can be easily found using the following command in the terminal:
hostname -I
Make a note of this IP address, as you will need it for reference during the configuration process.
Get Router’s IP Address If You Don’t Already Know It
To assign a static IP to your Raspberry Pi, you’ll need to access your router’s configuration page. This typically involves typing the router’s IP address into a web browser. If you’re unsure of your router’s IP address, you can often find it in your router’s manual or through a quick online search.
Get the IP Address of DNS (Domain Name Server)
DNS servers translate domain names (like www.example.com) into IP addresses that computers can understand. You’ll need to know the IP addresses of your DNS servers to ensure proper connectivity. Your ISP’s DNS servers are usually used by default, but you can also use public DNS servers like Google’s (8.8.8.8 and 8.8.4.4) or Cloudflare’s (1.1.1.1) [7].
Open /etc/dhcpcd.conf For Editing In Nano
To begin the static IP assignment process, you’ll need to edit the dhcpcd.conf file. This file controls various network settings, including IP addresses, on your Raspberry Pi. Open the file using the Nano text editor:
sudo nano /etc/dhcpcd.conf
Add The Following Lines To The Bottom Of The File
Navigate to the bottom of the dhcpcd.conf file, where you’ll add the configuration for the static IP address. The format should look something like this:
interface
static ip_address=/
static routers=
static domain_name_servers=
Replace with the appropriate interface (e.g., eth0 for Ethernet or wlan0 for Wi-Fi), with the desired static IP address, with the appropriate subnet mask (often /24 for a common home network), with your router’s IP address, and with the IP address of your preferred DNS server.
Save The File By Hitting CTRL + X And Reboot
Once you’ve added the necessary lines, save the changes to the dhcpcd.conf file by pressing Ctrl + X, then Y to confirm the changes, and finally Enter.
To apply the new static IP configuration, you’ll need to reboot your Raspberry Pi:
sudo reboot
After the reboot, your Raspberry Pi should be using the static IP address you configured.

Testing the Static IP Address
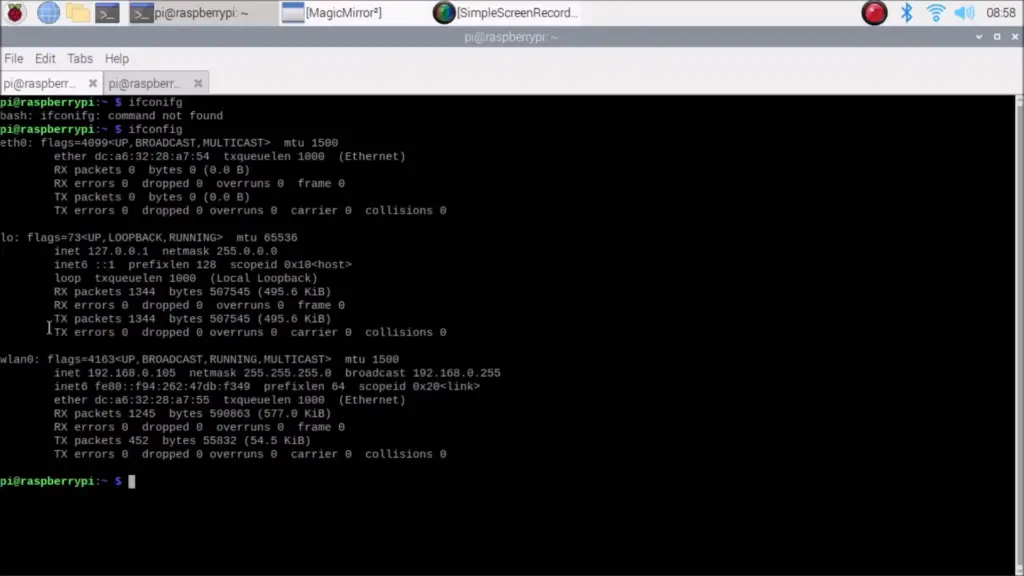
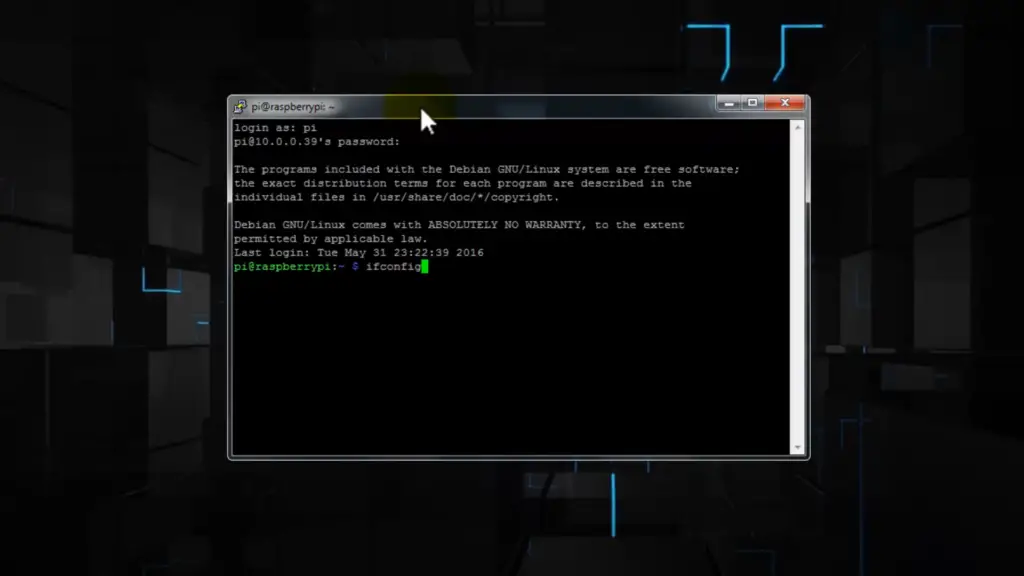
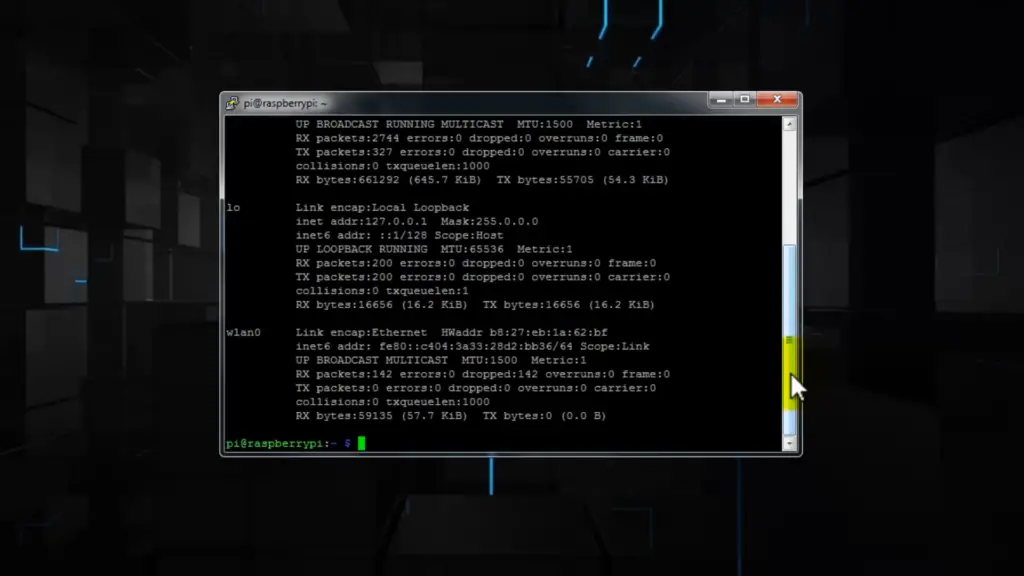
To confirm that the static IP address has been successfully assigned to your Raspberry Pi, you can use the ifconfig command. Open a terminal window and type:
ifconfig
Look for the interface you configured (e.g., eth0 or wlan0) and verify that the assigned IP address matches the one you set as static.
Using the Raspberry Pi OS Guide to Set a Static IP
To begin the process of setting a static IP address on your Raspberry Pi, you’ll utilize the user-friendly interface of the Raspberry Pi OS. Follow these steps:
- Locate the Network Status Icon: In the top-right corner of your Raspberry Pi OS desktop, you’ll find a network status icon, often represented as two arrows pointing up and down. This icon signifies your network connection status;
- Right Click: Right-click on the network status icon to reveal a context menu. This menu provides access to various network-related options;
- Select Wireless & Wired Network Settings: From the context menu, navigate to the “Wireless & Wired Network Settings” option. Clicking on this option will open a new window where you can configure your network settings;
Select The Appropriate Interface
Carefully review the available interfaces and select the appropriate one that corresponds to your network connection. For example, if you’re connected via Ethernet, choose the “eth0” option. If you’re using Wi-Fi, select “wlan0”.
Enter the IP Addresses Into The Relevant Fields
Setting a static IP address involves entering specific values into the relevant fields. These values include the desired IP address, subnet mask, gateway address, and DNS server addresses.
Follow these steps to input the necessary information:
- IP Address: In the “IPv4 Method” section, select the “Manual’ option. This indicates that you’ll be manually entering the IP address;
- Static IP Address: Enter your chosen static IP address in the designated field. Ensure that the IP address you select is within the valid IP range for your network;
- Subnet Mask: Input the subnet mask for your network. The subnet mask helps define the network’s boundaries and enables proper communication between devices;
- Gateway: Enter the IP address of your router or gateway. This address serves as the entry point for communication between your Raspberry Pi and other devices on the network;
- DNS Servers: Finally, input the IP addresses of your preferred DNS servers. DNS servers are responsible for translating domain names into IP addresses, facilitating internet connectivity [8];
Click Apply, Close The Window, And Reboot Your Pi
After entering the necessary IP address details, it’s time to apply the changes and ensure that they take effect. Follow these steps:
- Apply Changes: Once you’ve entered the required IP address information, locate the “Apply” button within the “Wireless & Wired Network Settings” window. Click on the “Apply” button to implement the changes;
- Close the Window: After applying the changes, close the “Wireless & Wired Network Settings” window. Your static IP address configuration is now in place;
- Reboot Your Raspberry Pi: To ensure that the static IP address settings are fully integrated, it’s recommended to reboot your Raspberry Pi. You can do this by clicking on the Raspberry menu in the top-left corner, selecting “Shutdown”, and choosing the “Reboot” option;
FAQ:
1. How to assign a static IP address to my Raspberry Pi?
To assign a static IP address to your Raspberry Pi, you need to edit the network configuration file. Here’s a step-by-step guide:
Open a terminal on your Raspberry Pi.
Edit the dhcpcd.conf file using a text editor like Nano:
sudo nano /etc/dhcpcd.conf
Scroll to the bottom of the file and add the following lines (replace the values with your network configuration):
interface
static ip_address=/24
static routers=
static domain_name_servers=
Press Ctrl + O to save the file, then Enter.
Press Ctrl + X to exit Nano.
Restart the dhcpcd service:
sudo service dhcpcd restart
2. How to configure static IP in Raspberry Pi 4?
The process of configuring a static IP on a Raspberry Pi 4 is the same as on other Raspberry Pi models. Follow the steps mentioned above for assigning a static IP address to your Raspberry Pi.
3. Does Raspberry Pi have a static IP address?
By default, the Raspberry Pi obtains an IP address dynamically from a DHCP server. However, you can manually configure a static IP address for your Raspberry Pi by editing the network configuration file (dhcpcd.conf).
4. How can you set a static IP address free?
Setting a static IP address for your devices, including a Raspberry Pi, is typically a configuration option provided by your router’s settings. Most home routers allow you to assign static IP addresses to devices on your network through the router’s administration interface. This feature is usually available without any additional cost.
5. What is the IP address 127.0.0.1 Raspberry Pi?
The IP address 127.0.0.1 is the loopback address, also known as the “localhost”. It always refers to the current device itself. When used on a Raspberry Pi or any other device, it points to the device’s own network interface. It’s commonly used for testing network software and services on the local machine.
6. What are static IP and DHCP in Raspberry Pi?
A static IP address is manually assigned to a device and remains constant. It doesn’t change each time the device connects to the network. DHCP (Dynamic Host Configuration Protocol) is a network protocol that dynamically assigns IP addresses to devices on a network. Raspberry Pi can use either a static IP or obtain an IP dynamically through DHCP.
7. Why does static IP keep changing Raspberry Pi?
If a static IP address keeps changing on your Raspberry Pi, it may be due to incorrect configuration or conflicts with other devices on the network. Make sure that the chosen static IP is outside the DHCP range and not assigned to another device. Additionally, ensure the correct configuration in the dhcpcd.conf file.
8. What is the command for the Raspberry Pi IP address?
To view the IP address of your Raspberry Pi, open a terminal and use the command:
hostname -I
9. How to set a static IP address in the command prompt?
Setting a static IP address involves editing the network configuration file. Open a terminal and use a text editor like Nano to edit the dhcpcd.conf file:
sudo nano /etc/dhcpcd.conf
Then, follow the steps mentioned earlier for adding the static IP configuration.
10. How to set a static IP address in Arduino?
Arduino devices typically don’t have built-in network interfaces like Raspberry Pi. However, if you’re referring to connecting an Arduino to a network, the process depends on the specific hardware and networking shield you’re using with the Arduino. Consult the documentation for your Arduino hardware and networking shield to configure network settings.
11. Is static IP better for gaming?
A static IP address isn’t inherently better for gaming. It can be useful if you want to ensure that your gaming device (like a console or PC) consistently uses the same IP address on your local network. However, it doesn’t directly impact gaming performance. Other factors, such as network quality and latency, have a more significant impact on the gaming experience.
12. Does Raspberry Pi IP address change?
By default, the Raspberry Pi’s IP address can change if it is configured to obtain an IP address dynamically from a DHCP server. However, if you set up a static IP address, it will remain constant unless you manually change it.
13. Why doesn’t Raspberry Pi get an IP address?
If your Raspberry Pi is not obtaining an IP address, it could be due to network configuration issues, DHCP server problems, or connectivity problems. Check your router’s DHCP settings, network cables, and ensure that your Raspberry Pi is correctly connected to the network.
14. How to enable SSH on Raspberry Pi?
To enable SSH on your Raspberry Pi, follow these steps:
- Open a terminal on your Raspberry Pi;
- Run the command: sudo raspi-config;
- Navigate to “Interfacing Options” and select “SSH”;
- Choose “Yes” to enable SSH;
- Reboot your Raspberry Pi;
15. What is the SSH password for Raspberry Pi?
The default SSH password for the Raspberry Pi user “pi” is “raspberry.” It’s recommended to change this password for security reasons after enabling SSH.
16. Does static IP cost more?
Assigning a static IP address to a device within your local network usually does not incur any additional costs. However, if you’re obtaining a public static IP address from your internet service provider (ISP), there may be associated costs. Public static IPs are often used for hosting websites or remote access and may require a fee from your ISP.
17. Is static IP more secure than DHCP?
Static IP addresses themselves do not inherently provide better security than DHCP. Security is influenced by various factors, including firewall settings, network infrastructure, and software configurations. However, using static IP addresses can simplify network management and reduce the risk of IP address conflicts, which could indirectly contribute to a more stable and potentially secure network environment.
Useful Video: How to Assign Static IP Address to Raspberry Pi!
References
- https://www.tomshardware.com/how-to/static-ip-raspberry-pi
- https://www.makeuseof.com/raspberry-pi-set-static-ip/
- https://www.ionos.com/digitalguide/server/configuration/provide-raspberry-pi-with-a-static-ip-address/
- https://phoenixnap.com/kb/raspberry-pi-static-ip
- https://raspberrypi-guide.github.io/networking/set-up-static-ip-address
- https://raspberrytips.com/set-static-ip-address-raspberry-pi/
- https://pimylifeup.com/raspberry-pi-static-ip-address/
- https://lededitpro.com/static-ip-address-on-raspberry-pi/





Leave a Reply