
Spring clip speaker terminals are a common and convenient way to connect speaker wires to audio devices and speakers. However, like any electronic component, these terminals can encounter issues over time, such as loose connections, poor audio quality, or damaged springs.
When faced with these problems, knowing how to repair spring clip speaker terminals can save you from the expense of replacing the entire speaker or terminal board.
In this comprehensive guide, we will walk you through the step-by-step process of repairing spring clip speaker terminals, equipping you with the knowledge and skills to troubleshoot and rectify common issues.
Whether you’re an audio enthusiast, a DIY enthusiast, or someone looking to maintain and extend the life of your speakers, this article will provide valuable insights into fixing and restoring the functionality of spring clip speaker terminals. Get ready to delve into the world of audio repairs and take control of your audio system’s performance with this detailed and informative guide.
What Are Spring Clip Speaker Terminals?
When it comes to setting up a home audio system or connecting speakers to various devices, the type of speaker terminals used can significantly impact the overall audio quality and ease of installation. One commonly encountered speaker terminal is the “Spring Clip” or “Push-Type” speaker terminal. In this post, we will explore what spring clip speaker terminals are and their advantages and limitations [1].
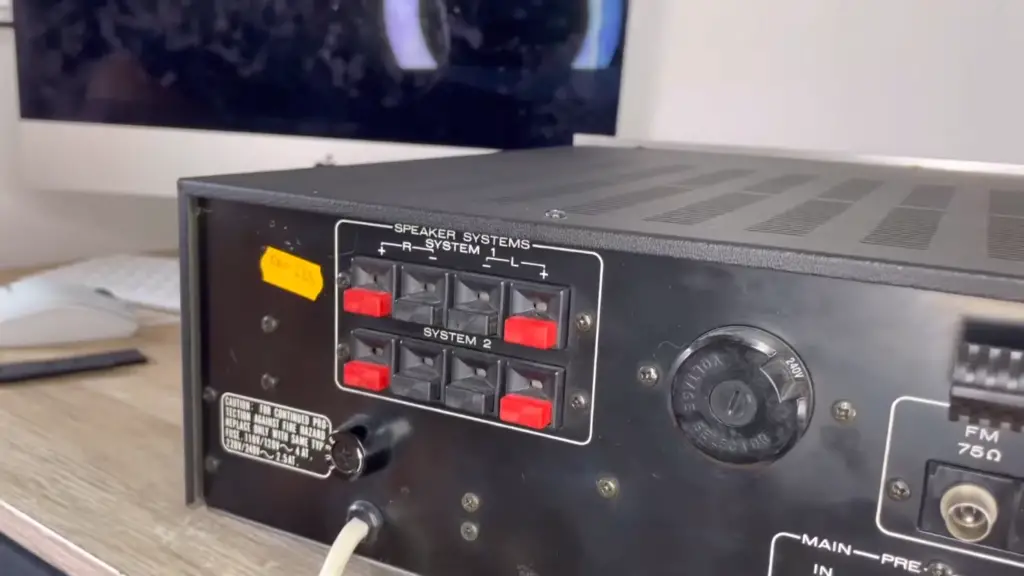
Spring clip speaker terminals are a simple and user-friendly mechanism used to secure the speaker wire connections to a speaker or audio device. They consist of two metal plates that are held together by a spring mechanism. To connect the speaker wire, you simply press down on the clip, creating an opening between the metal plates. Then, insert the bare wire ends into the opening, and the spring action clamps the wire tightly in place. This design eliminates the need for screwdrivers or tools, making it easy for anyone to connect their speakers without any technical knowledge.
One of the significant advantages of spring clip speaker terminals is their convenience. They are quick to use and require no special skills or tools, making them an excellent choice for beginners or those who prefer a hassle-free setup. Additionally, these terminals can accommodate various wire sizes, from thin gauge wires to thicker ones, providing versatility and compatibility with a wide range of speaker cables.
However, there are some limitations to consider when using spring clip terminals. One drawback is that they might not provide as secure a connection as other terminal types, such as binding posts or banana plugs. While they are generally sufficient for most home audio setups, they may not be ideal for high-power applications or professional audio systems that demand the utmost reliability.
Furthermore, spring clip terminals may not offer the same level of signal fidelity as higher-end terminals. The contact area between the metal plates and the wire might not be as robust, potentially leading to increased resistance and signal loss. Audiophiles and audio enthusiasts seeking the best possible sound quality may prefer alternative terminal types that provide a more solid and consistent connection.
Why Should You Repair Spring Clip Speaker Terminals?
Repairing spring clip speaker terminals can be a practical and cost-effective solution under certain circumstances.
While these terminals are generally considered simple and disposable, there are a few reasons why you might want to repair them instead of replacing the entire speaker or terminal board:
- Budget Constraints: If you are on a tight budget and don’t want to invest in new speakers or terminal boards, repairing the spring clip terminals can be a more economical option. Often, the repair process is relatively straightforward and may only require basic tools and materials, which can save you money compared to buying new equipment;
- Availability of Replacement Parts: In some cases, finding exact replacements for specific speaker models or terminal boards might be challenging, especially for older or less common speakers. Repairing the existing spring clip terminals becomes the only viable option when suitable replacement parts are scarce;
- Sentimental Value: If you have a speaker system with sentimental value, such as a gift from a loved one or a speaker you’ve had for a long time, you may be more inclined to repair it rather than replace it. Fixing the spring clip terminals can help you maintain the emotional connection you have with the equipment;
- Environmental Considerations: Opting for repair instead of replacement can be a more environmentally friendly choice. It reduces electronic waste, which can be harmful to the environment, and promotes a sustainable approach to consumer electronics;
- DIY Skills and Satisfaction: Repairing spring clip speaker terminals can be a DIY project, and successfully fixing the terminals can provide a sense of accomplishment and satisfaction. It allows you to learn more about the inner workings of your speakers and enhances your technical skills [2];
If you decide to repair the terminals, follow these general steps:
- Assessment: Examine the terminals carefully to identify the issue. Common problems include loose connections, bent metal plates, or spring fatigue;
- Cleaning: Dust, debris, or oxidation can hinder proper contact. Clean the terminals and wires using a soft brush, cotton swab, or compressed air to ensure a clean connection;
- Realigning Metal Plates: If the metal plates are bent or misaligned, gently adjust them back into position to create a better contact surface;
- Spring Adjustment: If the spring is too loose or too tight, you may need to adjust its tension to ensure a secure grip on the speaker wire;
- Replacing Springs: If the spring is damaged or worn out, you might be able to find suitable replacement springs at hardware stores or online retailers;
- Testing: After the repair, thoroughly test the terminals by connecting the speaker wires and playing audio to ensure the connections are stable and the sound is clear;
Remember that while repairing spring clip speaker terminals can be a viable option in specific situations, it’s essential to prioritize safety. If you’re unsure about handling electronics or lack experience in repairing speakers, it’s best to seek assistance from a professional or consider replacing the terminals with new ones.
How Do You Replace Speaker Terminals: A Step-By-Step Guide
Step 1: Unscrew the Speaker Terminal
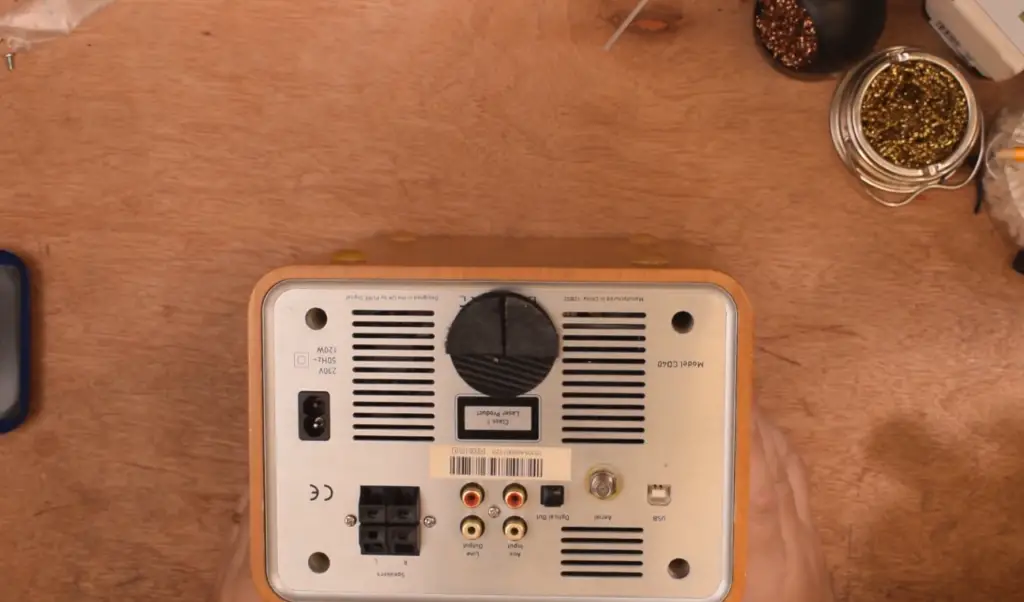
Before delving into the replacement process, you must first prepare the speaker for the procedure. Begin by turning off any connected audio devices and disconnecting the speaker wires. It’s essential to eliminate any potential electrical hazards before proceeding with the replacement. Once the speaker is isolated from the audio system, carefully examine the existing speaker terminals. Depending on the speaker’s make and model, the terminals might be mounted on the rear panel, side, or bottom of the speaker enclosure.
Using the appropriate tools, typically a screwdriver or a nut driver, remove the screws or nuts securing the speaker terminal to the speaker enclosure. Take your time during this step, as you don’t want to damage the speaker cabinet or the existing terminals. Keep track of the removed screws or nuts to ensure you can reassemble the speaker correctly later.
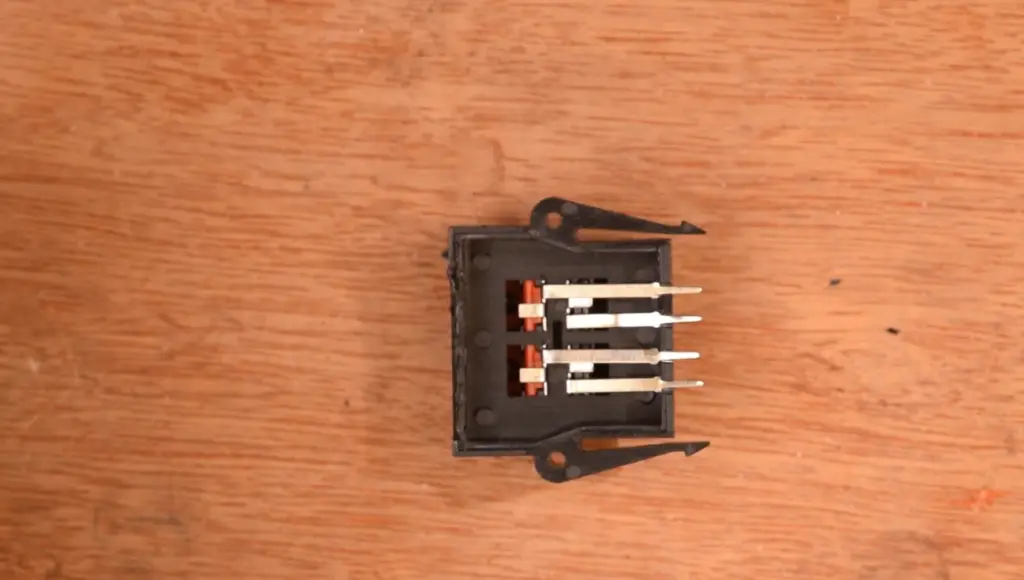
Step 2: Slide Out the Unit
After unscrewing the speaker terminal, gently slide it out from its mounting location. In some cases, the terminals might be connected to a terminal plate or a terminal cup mounted on the rear panel. In such instances, you’ll need to slide out the entire terminal plate or cup along with the speaker terminal. Exercise caution during this step to avoid tugging or pulling too forcefully, as it could lead to unintended damage to the speaker’s internal components.
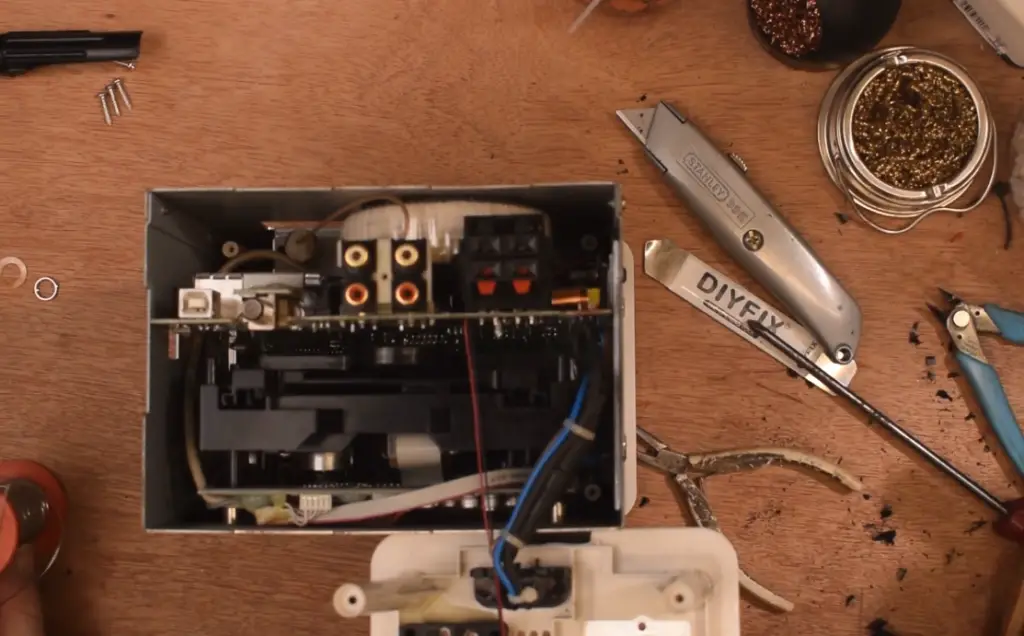
Step 3: Desolder the Connections
Once you have the speaker terminal unit in hand, closely examine the connections between the terminals and the speaker’s internal wiring. Typically, the connections are soldered to the speaker’s crossover or driver. To remove the existing speaker terminals, you’ll need a soldering iron and some desoldering braid or a desoldering pump.
Begin by heating up the solder joints holding the speaker terminal connections. Apply the soldering iron to each solder joint and allow the solder to melt. As the solder becomes liquid, use the desoldering braid or pump to soak up the molten solder, effectively removing it from the joint. Repeat this process for all the connections until the speaker terminals are completely detached from the speaker’s internal wiring.
Step 4: Solder the New One
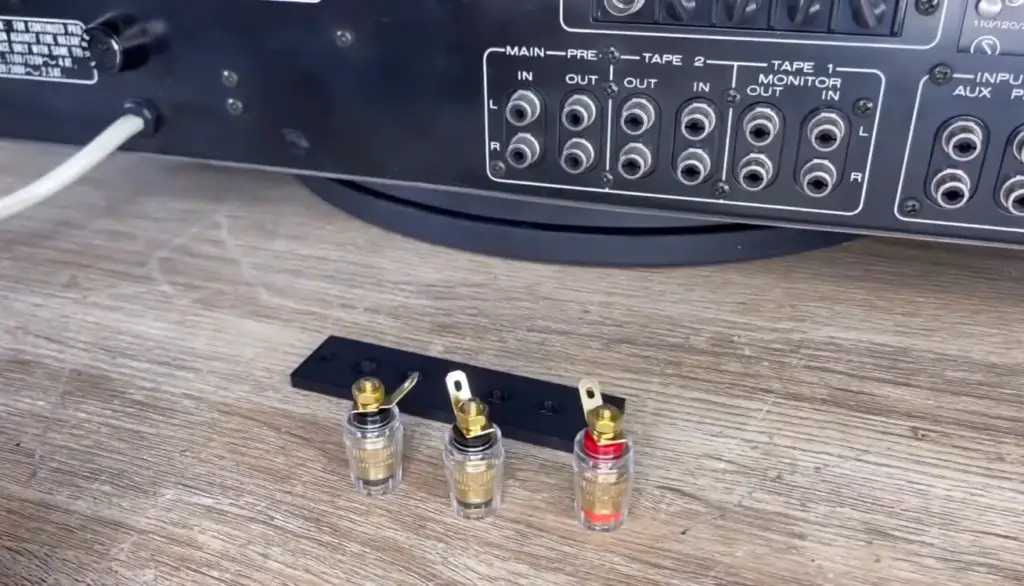
With the old speaker terminals removed, it’s time to install the new ones. Before proceeding, ensure that you have the appropriate replacement speaker terminals that match the specifications of your speaker and are compatible with your preferred speaker cables. Quality speaker terminals are essential for achieving a reliable and long-lasting connection.
To solder the new speaker terminals, begin by preparing the wires. Strip a small section of insulation from the ends of the speaker wires to expose the bare conductors. Twist the bare wires gently to prevent fraying and ensure a clean and secure connection.
Position the new speaker terminals in place, aligning them with the original mounting holes or terminal cups. Hold the speaker terminal unit firmly in place while soldering to prevent any accidental movement that could disrupt the connection.
Heat up the soldering iron and apply it to the soldering points on the new speaker terminals and the exposed wires. As the solder begins to melt, insert the bare wire ends into the molten solder and maintain pressure until the solder cools and solidifies, creating a strong bond between the terminal and the wire. Repeat this process for all the connections until all the speaker terminals are securely soldered in place [3].
How Do You Fix Speaker Connectors?
Fixing speaker connectors can help resolve common issues such as poor audio quality, intermittent connections, or a loose fit.
Whether you’re dealing with spring clip terminals, binding posts, or banana plug connectors, the following steps will guide you through the process of fixing speaker connectors effectively:
Step 1: Identify the Issue
Before attempting to fix the speaker connectors, it’s essential to determine the nature of the problem. Inspect the connectors and the speaker cables to identify any visible damage or loose connections. Additionally, check for signs of oxidation or corrosion, which can hinder proper electrical contact.
Step 2: Clean the Connectors
If the connectors appear dirty or oxidized, cleaning them can often solve connection-related issues. Use a soft brush, cotton swab, or compressed air to remove dust, debris, or oxidation from the connectors. For more stubborn dirt or corrosion, you can lightly dampen the cotton swab with a mixture of isopropyl alcohol and water (1:1 ratio) and gently clean the connectors. Ensure that the connectors are completely dry before reassembling.
Step 3: Tighten Loose Connections
Loose connections can lead to intermittent audio or poor sound quality. If you are dealing with binding posts or banana plug connectors, check if they are properly tightened. Use the appropriate tool (usually a screwdriver) to secure the connectors firmly in place.
Step 4: Adjust Spring Clip Terminals
For spring clip speaker terminals, you can adjust the tension of the spring to ensure a snug fit with the speaker wire. Gently press down on the spring clip to open the terminal, then release it so that it clamps down on the speaker wire more firmly. Be cautious not to apply too much force, as it may damage the terminal.
Step 5: Check Speaker Cable Ends
Examine the ends of the speaker cables to ensure they are stripped appropriately and free from damage. If the wire ends are frayed or damaged, trim a small section to expose clean, untarnished wire, and twist the strands gently together to prevent further fraying.
Step 6: Reinsert Speaker Cable
After cleaning and checking the connectors and speaker cables, reinsert the speaker cable into the appropriate connectors. For binding posts or banana plug connectors, make sure the cable is securely fastened by tightening the connectors. For spring clip terminals, ensure the wire is inserted fully into the terminal and held firmly by the spring mechanism.
Step 7: Test the Audio
With the speaker connectors fixed and the speaker cables reconnected, test the audio output to check if the issues have been resolved. Play various audio tracks at different volume levels to ensure the connections are stable and the sound quality is satisfactory [4].
Step 8: Consider Replacing Connectors
If you’ve attempted to fix the speaker connectors, but the issues persist, it may be time to consider replacing the connectors altogether. Over time, connectors can wear out or become damaged beyond repair. Upgrading to higher-quality connectors or connectors with a different design might also improve audio performance.
Safety Precautions
Do Banana Plugs Work With Spring Clips?
Yes, banana plugs can work with spring clip speaker terminals. In fact, using banana plugs with spring clips can be a convenient and effective way to enhance the connection between your speakers and audio equipment.
Banana plugs are designed to provide a secure and reliable connection between the speaker wire and the speaker terminal. They feature a banana-shaped metal pin with a collar or flange at the base. This design allows the banana plug to be inserted into the terminal and held in place by the spring mechanism of the spring clip. When the banana plug is inserted, the spring clip’s pressure ensures a tight and stable connection, preventing the plug from slipping or coming loose [5].
Here’s how you can use banana plugs with spring clip speaker terminals:
- Prepare the Speaker Wire: Strip a small section of insulation from the end of the speaker wire to expose the bare copper strands. Banana plugs typically have setscrews or compression mechanisms that require the bare wire to be inserted into the plug’s opening;
- Insert the Banana Plug: Insert the exposed end of the speaker wire into the opening of the banana plug. Depending on the type of banana plug you have, you may need to loosen the setscrew or compression mechanism before inserting the wire;
- Tighten the Connection: Once the wire is fully inserted into the banana plug, tighten the setscrew or use the compression mechanism to secure the wire in place. This ensures a solid electrical connection between the banana plug and the speaker wire;
- Insert the Banana Plug into the Spring Clip Terminal: With the banana plug securely attached to the speaker wire, insert the banana plug into the spring clip speaker terminal. Push the banana plug into the terminal until it clicks or fits snugly in place;
Using banana plugs with spring clip terminals offers several advantages:
- Convenience: Banana plugs allow for quick and easy connections without the need to strip and twist the speaker wire every time you connect or disconnect your speakers;
- Reliability: The combination of banana plugs and spring clip terminals provides a more reliable connection compared to using bare wire alone. This can reduce the risk of signal loss or intermittent connections;
- Compatibility: Banana plugs are compatible with various speaker terminals, including binding posts, spring clips, and certain types of terminal cups, making them a versatile choice for many speaker setups;
- Neatness and Organization: Banana plugs provide a tidy and organized appearance, reducing the risk of accidental wire fraying and tangling;
However, it’s essential to ensure that the banana plugs you use are compatible with your specific spring clip terminals. Different spring clip designs may have varying tolerances for accepting banana plugs. Some speakers or terminal plates might have narrow openings that may not accommodate certain types of banana plugs. Therefore, before purchasing banana plugs, check the dimensions and compatibility to ensure a proper fit.
How Do You Connect Spring Clip Terminals?
Connecting spring clip terminals is a straightforward process that allows you to establish a secure and reliable connection between your speakers and audio equipment. Spring clip terminals are commonly found on the back or bottom of speakers and are designed to accommodate various wire sizes.
Here’s a step-by-step guide on how to connect spring clip terminals:
Step 1: Prepare the Speaker Wire
Start by preparing the speaker wire that you will use to connect your speakers. Measure and cut the required length of wire, ensuring you have enough to reach from the audio device to the speaker with some extra length for flexibility.
Step 2: Strip the Speaker Wire
Using a wire stripper or a sharp utility knife, strip off a small section of insulation from the ends of the speaker wire to expose the bare copper strands. The exposed length should be sufficient to fit comfortably into the spring clip terminal without any bare wire extending beyond the terminal’s opening.
Step 3: Identify the Positive and Negative Terminals
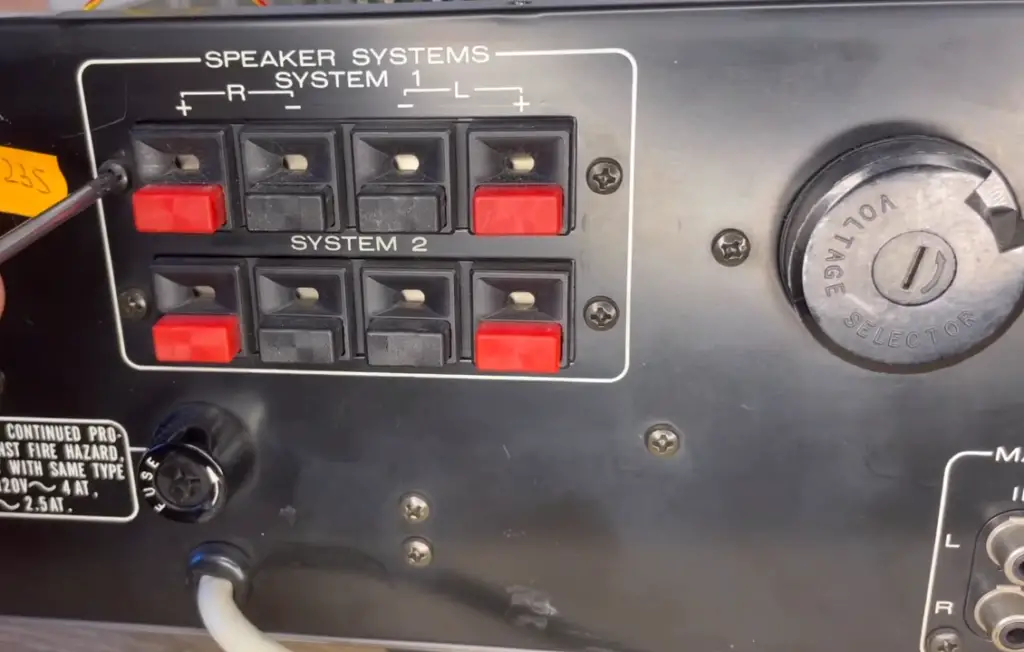
Most speakers and audio devices have polarity markings to indicate the positive (+) and negative (-) terminals. It’s crucial to connect the speaker wire correctly to maintain proper phase alignment and sound quality. The positive terminal is usually marked with a red indicator or a “+” sign, while the negative terminal is marked with a black indicator or a “-“ sign.
Step 4: Connect the Speaker Wire
Hold the speaker wire with the exposed ends and identify the positive and negative wires (usually distinguished by different colors or markings). For proper connection, insert the positive wire into the positive terminal and the negative wire into the negative terminal.
Step 5: Insert the Speaker Wire into the Spring Clip Terminal
To connect the speaker wire to the spring clip terminal, locate the small hole or gap in the clip. This is where the speaker wire will be inserted. For spring clip terminals, you typically don’t need to strip the wire ends further; simply insert the exposed wire into the appropriate hole.
Step 6: Secure the Connection
With the speaker wire inserted into the spring clip terminal, release pressure on the clip. The spring action of the clip will grip the speaker wire securely in place, creating a reliable connection.
Step 7: Check the Connection
Gently tug on the speaker wire to ensure it is held firmly in the spring clip terminal. Verify that the positive and negative wires are connected to the corresponding terminals according to the polarity markings.
Step 8: Repeat for Other Speakers
If you have multiple speakers, repeat the above steps for each speaker to connect them to the audio device or amplifier. Ensure consistency in connecting the positive and negative wires to the correct terminals on all speakers to maintain proper phasing across the entire audio system [6].
FAQ:
1. What are the terminals of a speaker?
The terminals of a speaker are the connection points on the back or bottom of the speaker enclosure where you attach the speaker wire. These terminals are designed to provide a secure electrical connection between the speaker and the audio device or amplifier. Common types of speaker terminals include binding posts, spring clips, and banana plug connectors.
2. Why do my speakers have 4 terminals?
Speakers with 4 terminals often indicate that they are bi-wireable or bi-amplifiable. Bi-wiring and bi-amplification involve using separate speaker cables or amplifier channels for the low-frequency (bass) and high-frequency (treble) drivers in the speaker. This can potentially reduce interference and improve overall sound quality in some setups.
3. How to connect 4 speakers to 2 outputs?
To connect 4 speakers to 2 outputs, you can use either a series or parallel wiring configuration. In series wiring, you connect the positive terminal of one speaker to the negative terminal of the next speaker, forming a chain. In parallel wiring, you connect all the positive terminals together and all the negative terminals together. Ensure that the total speaker impedance matches the amplifier’s impedance capabilities to avoid overloading the amplifier.
4. How to wire a 4-terminal speaker?
A 4-terminal speaker, typically a bi-wireable speaker, can be wired using separate speaker cables for the low and high-frequency drivers. Connect the positive terminal of the amplifier to the positive terminal of the low-frequency driver and the negative terminal of the amplifier to the negative terminal of the low-frequency driver. Repeat the same process for the high-frequency driver using another set of speaker cables.
5. How do you identify speaker terminals?
Speaker terminals are often labeled as “+” and “-“ symbols, indicating the positive and negative connections. Additionally, they might be color-coded, with red indicating the positive terminal and black for the negative terminal. In some cases, the terminals might have text labels such as “POS” and “NEG”.
6. How do you connect speaker wire to banana clips?
To connect speaker wire to banana plugs, strip a small section of insulation from the end of the speaker wire. Insert the exposed wire into the opening of the banana plug. Tighten the setscrew or use the compression mechanism to secure the wire in place.
7. How do you use spring clip terminals?
To use spring clip terminals, press down on the clip to open it, insert the exposed speaker wire into the opening, and release the clip to secure the wire in place. Spring clip terminals provide a quick and easy connection without the need for tools.
8. How do you install speaker connectors?
To install speaker connectors like binding posts or banana plugs, follow the manufacturer’s instructions. Typically, you’ll need to attach the connectors to the speaker cabinet using screws and then connect the speaker wire to the connectors as described earlier.
9. Can you use super glue to repair a speaker?
Using super glue to repair a speaker is generally not recommended. Super glue can create a rigid and brittle bond, which may affect the speaker’s flexibility and audio performance. Instead, use appropriate adhesives designed for speaker repairs.
10. How do you install spring clips?
Spring clips are typically integrated into the speaker terminal cup. To install them, position the terminal cup on the speaker enclosure, align it with the mounting holes, and secure it in place using screws or other appropriate fasteners.
11. How does a spring-loaded clip work?
A spring-loaded clip uses a spring mechanism to create tension. When you press down on the clip, it opens to allow the speaker wire to be inserted. Once released, the spring action clamps the wire securely, creating a stable electrical connection.
12. Do banana plugs fit all amplifiers?
Banana plugs are designed to fit most speaker terminals on amplifiers and audio devices. However, it’s essential to ensure that the banana plugs you purchase match the size and specifications of your amplifier’s speaker terminals.
13. How do you release a spring clip?
To release a spring clip, press down on it firmly with your finger or a small tool until it opens, allowing you to remove the speaker wire.
14. How do you open spring clips?
To open spring clips, press down on the clip with sufficient force to create an opening between the metal plates, allowing you to insert or remove the speaker wire.
15. How are spring clips made?
Spring clips are typically made from metal, such as steel or copper. The metal plates are shaped to create a spring-like tension when pressed together, ensuring a secure grip on the speaker wire.
16. How do you remove spring clips from a frame?
To remove spring clips from a frame, you can gently pry them open using a small flat-head screwdriver or a similar tool. Be cautious not to apply excessive force, as it may damage the clips or the frame.
Useful Video: Speaker Terminal Replacement : Pure Legato : Cheap Fix
References
- https://www.circuitsgallery.com/repair-spring-clip-speaker-terminals/
- https://www.diyaudio.com/community/threads/replacement-of-spring-clip-speaker-terminal.396616/
- https://www.talkbass.com/threads/repairing-weak-springs-in-hi-fi-speaker-connectors.1301744/
- https://www.avsforum.com/threads/solution-for-broken-spring-clips.3044754/
- https://www.reddit.com/r/diysound/comments/hq56lg/help_with_broken_speaker_wire_terminal_on_yamaha/
- https://www.the-home-cinema-guide.com/how-to-connect-speaker-wire.html