An automatic night light circuit is a convenient and energy-efficient solution that can automatically turn on and off based on the level of ambient light in the room.
Building an automatic night light circuit is a fun and practical project for electronics enthusiasts and hobbyists. The project can be completed with basic tools and components and is suitable for beginners who have basic knowledge of electronics and circuit building.
Overall, this article will provide a comprehensive guide on how to make an automatic night light circuit, along with explanations of the basic electronic principles behind each component.
Types of Night Light Circuits:
LED Night Light Circuit
Connect them in series, and power them with a battery, and the circuit will be complete. The LED produces a dim glow that’s perfect for hallways, staircases, and even as a reading lamp [1].

Solar-Powered Night Light Circuit
A solar-powered night light circuit utilizes a solar panel, which collects energy from the sun during daylight hours and stores it in a battery. At night, it switches on the light to provide the required illumination. The power generated by the sunlight is sufficient to keep the light on intermittently without draining the battery.
Automatic Night Light Circuit
The automatic night light circuit is designed to turn on when the ambient light drops below a certain level. The circuit employs a light-dependent resistor (LDR) which detects the variation in the light and changes its resistance accordingly. When the resistance drops below a specific level, the circuit turns on the light. It is perfect for hallways, children’s bedrooms, and staircases.
PIR Motion Sensor Night Light Circuit
The PIR motion sensor night light circuit is triggered by movement, using a passive infrared (PIR) sensor. When the sensor detects motion, it activates the light, making it an excellent security option around doors, windows, and in outdoor settings.
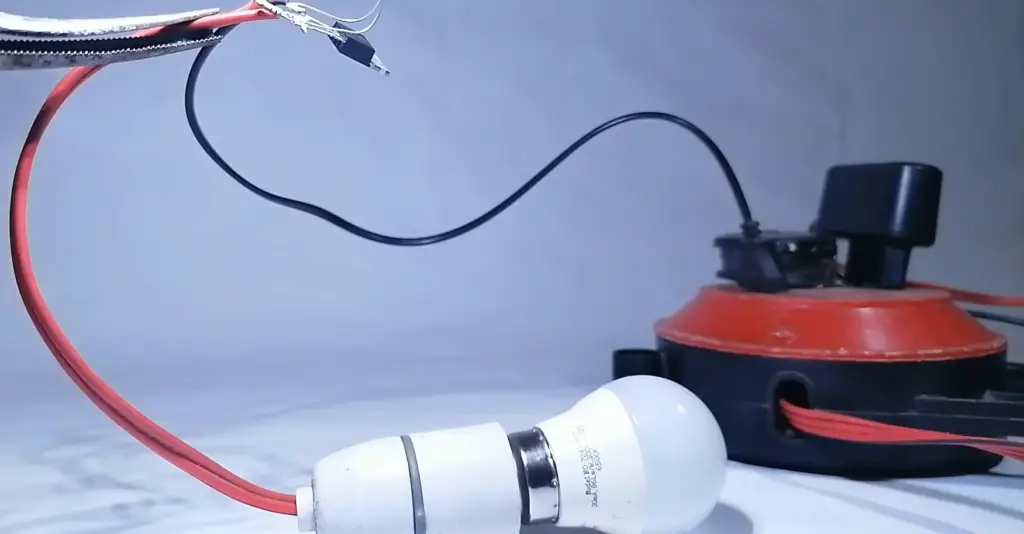
How To Build An Automatic Night Light Circuit:
The Components You’ll Need:
- Light Dependent Resistor (LDR): The LDR detects changes in ambient light levels;
- NPN Transistor: Choose a general-purpose NPN transistor, such as the 2N3904;
- Resistors: You will need resistors to control the current flow and set the sensitivity of the circuit. Common values include 1k Ohm and 4.7k Ohm resistors;
- LED (Light Emitting Diode): Select an LED of your preferred color to act as the light source;
- Battery Holder: Choose a suitable battery holder for the power source [2];
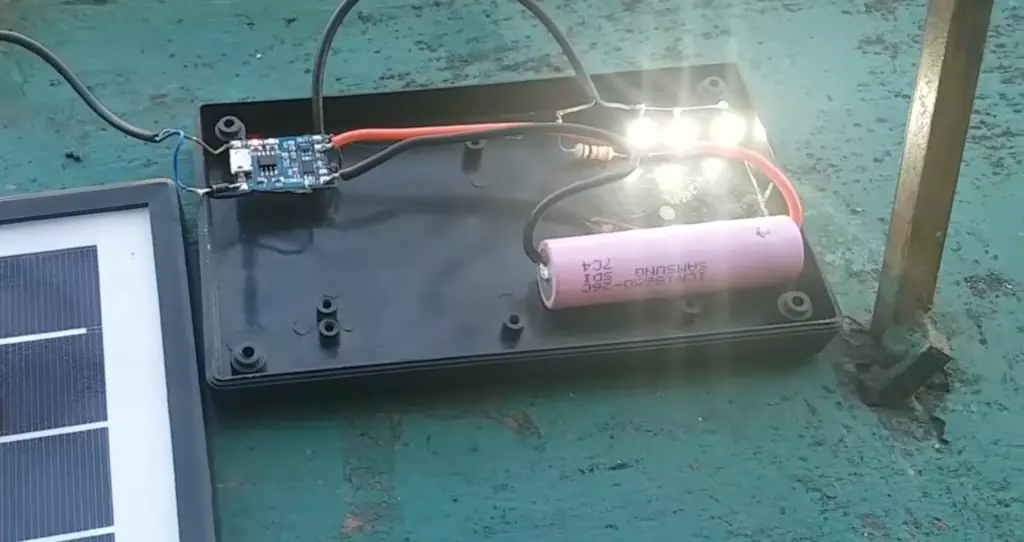
How the Night Light Circuit Works:
The automatic night light circuit operates based on the principle of the light-dependent resistor (LDR) and transistor control.
In darkness or low-light conditions, the LDR’s resistance is high, preventing current from flowing through the base of the transistor. As a result, the transistor remains in an off state, and the LED does not illuminate.
As ambient light intensity increases, the LDR’s resistance decreases. This allows a small current to flow through the base of the transistor, turning it on. Consequently, a larger current flows from the collector to the emitter, lighting up the LED with a gentle glow.
As ambient light intensity continues to increase, the LDR’s resistance decreases further, causing an increased current flow through the transistor. This results in a brighter LED illumination.
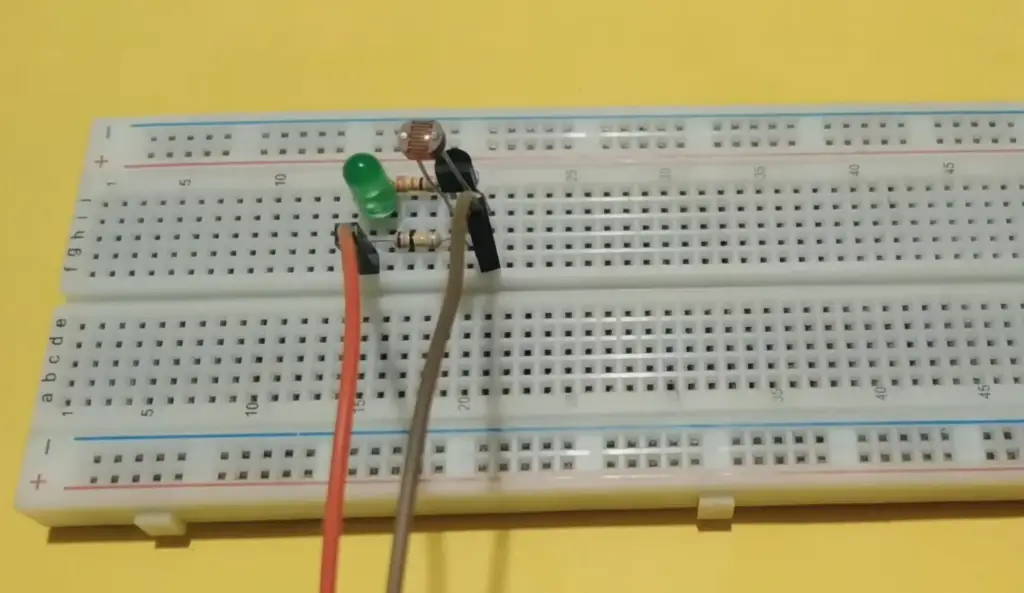
What Are the Voltages Out From the Voltage Divider?
In the automatic night light circuit, a voltage divider consisting of the LDR and a resistor is used to sense the light levels. The voltages at different points in the voltage divider can help determine the light conditions. As the resistance of the LDR changes, the voltage at the junction of the LDR and the resistor varies. By measuring this voltage, you can determine the light intensity [3].
Circuiting
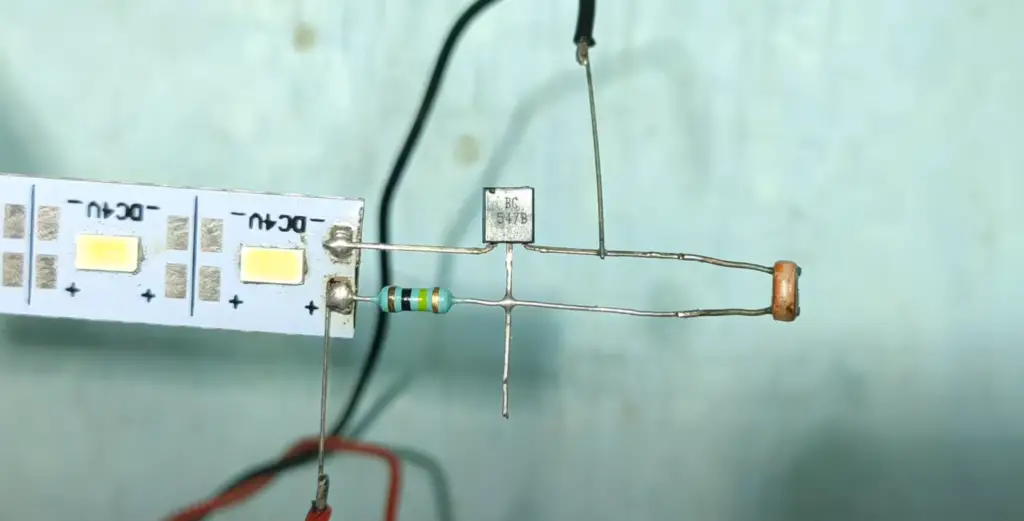
To start constructing the circuit, place the components on a breadboard or PCB (Printed Circuit Board). Connect the components as follows:
- Connect one end of the LDR to the positive rail of the breadboard;
- Connect the other end of the LDR to the base of the transistor through a resistor;
- Connect the emitter of the transistor to the ground (GND) rail on the breadboard;
- Connect the collector of the transistor to the positive rail on the breadboard through a current-limiting resistor;
- Connect the anode of the LED (longer leg) to the collector of the transistor, and the cathode (shorter leg) to the GND rail;
Attachments
To power the circuit, connect the positive terminal of the battery holder to the positive rail on the breadboard. Connect the negative terminal of the battery holder to the emitter of the transistor, completing the circuit.
Circuit Construction and Testing
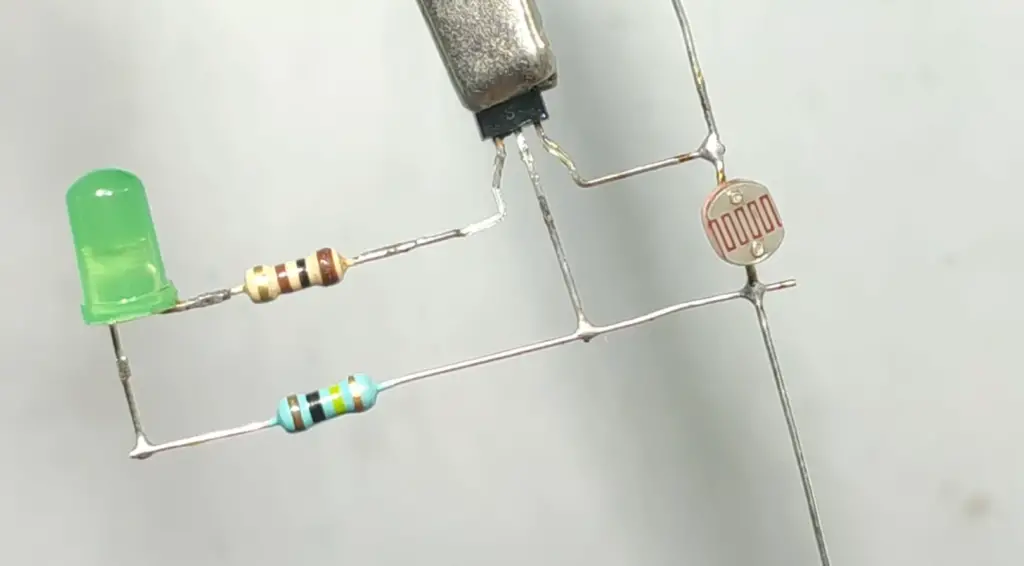
Once the circuit is constructed, it’s important to test its functionality. Ensure that all connections are secure and that there are no loose wires or components. Insert the battery into the battery holder and observe the behavior of the LED. In low-light conditions, the LED should light up, gradually increasing in brightness as the ambient light increases and the LDR’s resistance decreases. Conversely, when exposed to bright light, the LED should dim or turn off completely.
Adjustments may be necessary, such as changing resistor values or repositioning the LDR to fine-tune the circuit’s sensitivity [4].
The Final Stage
Once you are satisfied with the circuit’s performance, you can proceed with finalizing the construction. Consider soldering the components onto a prototyping PCB or a custom-designed PCB for a more permanent and robust setup. Take caution to follow proper soldering techniques to avoid damaging the components.
Before installing the automatic night light circuit in its intended location, consider housing it in an enclosure for safety and aesthetics. You can use a plastic or wooden box that allows easy access to the battery compartment and the LED for maintenance and replacement.
When installing the circuit, ensure that it is positioned in an area where the LDR can effectively detect changes in light levels. Avoid placing it in direct sunlight or in areas with excessive artificial lighting, as this may affect its functionality.
Remember to regularly check the circuit for any signs of wear and tear, loose connections, or component failure. This proactive approach ensures the long-term reliability and safety of the night light circuit.
The Easiest DIY Automatic Night Light Circuit Project:
Parts:
- LDR (Light Dependent Resistor): The LDR detects changes in light intensity and acts as the primary sensor in the circuit;
- NPN Transistor: Select a general-purpose NPN transistor, such as the 2N3904, which will serve as the switch in the circuit;
- 1k Ohm Resistors: These resistors help control the current flow in the circuit;
- 4.7k Ohm Resistors: The 4.7k Ohm resistors are used to adjust the sensitivity of the circuit;
- LED (Light Emitting Diode): Choose an LED of your preferred color to act as the light source;
- Battery Holder: Select a battery holder suitable for the chosen power source [5];
Transistors:
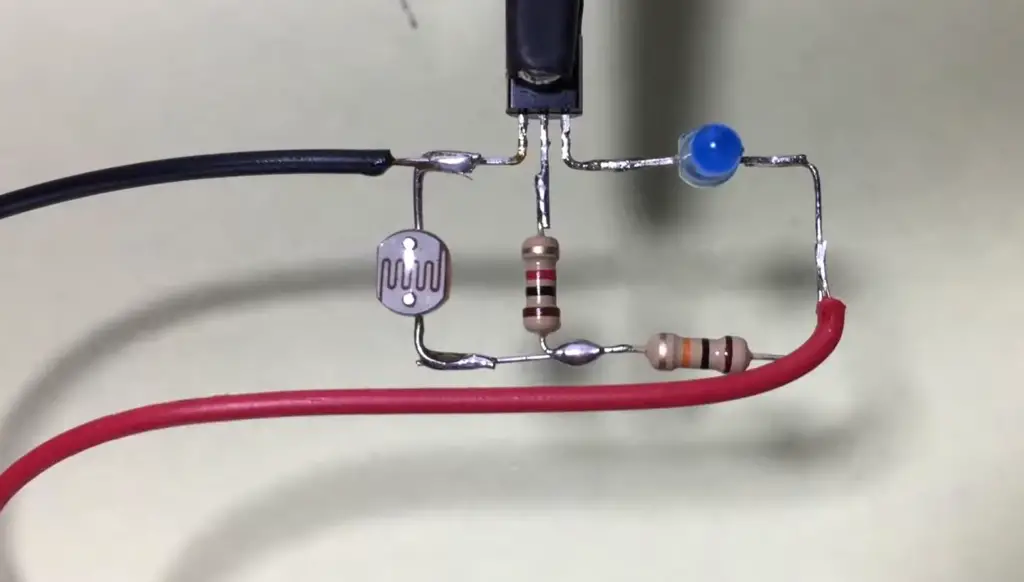
Begin by placing the NPN transistor on the breadboard. Identify the three terminals: the emitter, the base, and the collector. Connect the emitter to the ground (GND) rail on the breadboard.
Resistors 1k Ohm:
Next, connect a 1k Ohm resistor from the base of the transistor to a free row on the breadboard.
Resistors 4.7k Ohm:
Place a 4.7k Ohm resistor in series with the LDR. Connect one end of the resistor to the positive rail on the breadboard and the other end to one leg of the LDR. Connect the remaining leg of the LDR to the base of the transistor.
Wire Connections:
Connect the positive terminal of the battery holder to the positive rail on the breadboard. Connect the negative terminal of the battery holder to the emitter of the transistor.
LED:
Finally, connect the LED to the collector of the transistor, ensuring that the longer leg (the anode) is connected to the positive rail on the breadboard and the shorter leg (the cathode) is connected to the collector.
Battery Attachment:
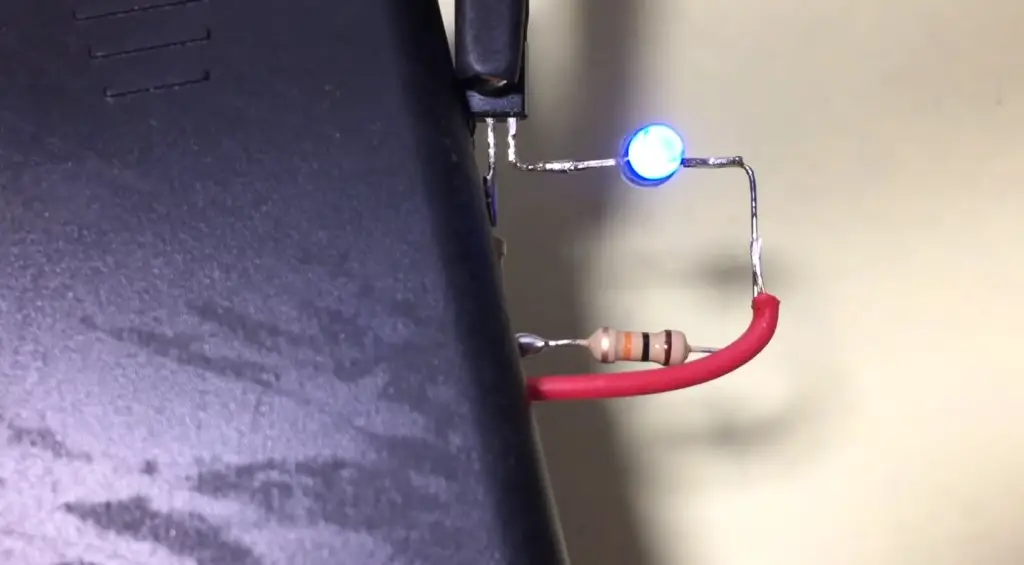
Insert the battery into the battery holder and ensure that the circuit is complete and functioning properly. The LED should illuminate when the ambient light is low and turn off when the light intensity increases.
FAQ
1. How do you make a lamp motion-activated?
To make a lamp motion-activated, you can use a motion sensor to detect movement and trigger the lamp to turn on. Here’s a basic outline of the process:
Components:
- Motion sensor: Passive Infrared (PIR) sensor or any other motion detection sensor;
- Lamp: The lamp you want to make motion-activated;
- Relay or transistor switch: A relay or transistor can be used to control the power supply to the lamp
- Power source: A suitable power source to provide power to the motion sensor, switch, and lamp;
- Connecting wires: To establish connections between the components [6];
Steps:
- Connect the power source’s positive terminal to the input terminal of the motion sensor, and connect the negative terminal to the sensor’s ground;
- Connect the output terminal of the motion sensor to the control terminal of the relay or the base of a transistor switch;
- Connect the lamp to the normally open (NO) contact of the relay or to the collector (C) of the transistor switch;
- Connect the common (COM) contact of the relay or the emitter (E) of the transistor switch to the negative terminal of the power source;
- Apply appropriate power to the circuit;
- Adjust the sensitivity and time settings on the motion sensor according to the manufacturer’s instructions;
- When the motion sensor detects movement, it sends a signal to the relay or transistor switch, which activates and connects the power supply to the lamp;
- The lamp turns on and remains illuminated for the specified duration set by the motion sensor;
- After the set time elapses, the motion sensor stops detecting movement, and the relay or transistor switch disconnects the power supply from the lamp, turning it off;
2. How do you make a dark sensor circuit?
To make a dark sensor circuit, you will need a few basic electronic components, including a light-dependent resistor (LDR), a resistor, a transistor, and an LED. The LDR will act as the sensor that detects the level of ambient light in the room. The transistor will amplify the signal from the LDR and control the LED. When the ambient light level is low, the resistance of the LDR will be high, which will trigger the transistor to turn on the LED.
When the ambient light level is high, the resistance of the LDR will be low, which will turn off the transistor and the LED. To make this circuit, you can follow a schematic diagram and use a breadboard or a PCB to build the circuit [7].
3. How to make an automatic night light with Arduino?
To make an automatic night light with Arduino, you can use an LDR to detect the level of ambient light in the room and an LED to act as the night light:
- You will need to connect the LDR to one of the analog input pins on the Arduino board and the LED to one of the digital output pins;
- Then you can write a simple Arduino program that reads the value of the LDR and turns on the LED when the ambient light level is low enough;
- When the ambient light level is high, the LED will turn off automatically;
- You can also adjust the sensitivity of the circuit by altering the resistance of the LDR or the value of the resistor;
4. What are the components of an automatic night lamp circuit?
The components of an automatic night lamp circuit typically include an LDR, a transistor, a diode, a capacitor, and a few other passive components such as resistors and capacitors. The LDR acts as the sensor that detects the level of ambient light in the room. The transistor amplifies the signal from the LDR and controls the LED.
The diode protects the transistor from reverse voltage spikes. And the capacitor filters out noise in the circuit. All of these components work together to create a circuit that turns on and off automatically based on the level of ambient light in the room [8].
5. Do automatic night lights use a lot of electricity?
Automatic night lights typically use less electricity than traditional night lights because they only turn on and off when necessary.
However, the exact amount of electricity consumed will depend on the specific design of the circuit and the components used.
Therefore, it is important to choose the right components and design the circuit properly in order to minimize electricity usage.
6. What are the disadvantages of automatic night lights?
One disadvantage of automatic night lights is that they can be sensitive to sudden changes in ambient light. For example, if a car’s headlights shine into the room, the night light may turn off suddenly and cause a disruption to the person in the room.
Additionally, automatic night lights require a power source, which may be difficult to install in certain locations.
Finally, while automatic night lights are generally energy-efficient, they still consume some amount of electricity, so if the circuit is not designed properly, it may end up consuming more energy than necessary.
7. How is LDR used in night lights?
LDRs are commonly used in night lights as a sensor that detects the level of ambient light in the room. When the ambient light level is low, the resistance of the LDR increases, which triggers the circuit to turn on the LED or other light source. When the ambient light level is high, the resistance of the LDR decreases, which turns off the circuit. LDRs are particularly well-suited for use in night lights because they are sensitive to changes in ambient light and can accurately detect the low light levels present in a room at night [9].
8. How do I make my outdoor lights automatic?
To make outdoor lights automatic, you will need to use a sensor that can detect the presence of ambient light and trigger the lights to turn on and off accordingly.
One common sensor used for this purpose is a photocell, which is a type of resistor that changes its resistance based on the level of ambient light. You can use a relay or a transistor to control the lights and write a program to monitor the output of the photocell and turn the lights on and off as necessary.
9. How do automatic lights work in the house?
Automatic lights in the house typically work by using a sensor to detect the presence of motion or a decrease in ambient light levels.
When the sensor detects movement or a decrease in light, it sends a signal to the lighting controller, which then turns on the lights. Once the motion stops or the light levels increase, the sensor sends another signal to turn the lights off.
Some automatic lights may also be connected to a smart home system, allowing for remote control and scheduling of the lights.
10. How to make a daylight sensor street light?
To make a daylight sensor street light, you will need to use a light-sensitive resistor (LDR), also known as a photocell, as the sensor that detects the level of ambient light. When the ambient light level falls below a certain threshold, the resistance of the LDR increases, which triggers the circuit to turn on the street lights.
When the ambient light level increases, the resistance of the LDR decreases, which causes the lights to turn off. You will also need to use a relay or transistor to control the lights and a power supply to provide the necessary voltage for the circuit.
11. What equipment is needed for automatic street lights?
The equipment needed for automatic street lights includes a sensor such as a photocell or a motion sensor to detect the presence of people or vehicles, a controller to receive the signals from the sensor and control the lights, and a power supply to provide the necessary voltage for the circuit. Additionally, you will need light sources such as LEDs or high-intensity discharge lamps and a circuit to connect all of the components.
12. Which software is used in automatic street lights?
There are several software programs that can be used to control automatic street lights, depending on the specific needs and requirements of the system. Some popular software programs for controlling street lights include LightSensor, StreetLight, and Luxriot EVO. These programs can be used to adjust the brightness and timing of the lights, monitor energy usage, and detect and respond to faults or malfunctions in the system.
13. How many volts is a night light?
The voltage for a night light can vary, depending on the specific type and model. However, most night lights typically use low voltage power sources, such as 6 volts or 12 volts. Some models may use standard 120-volt AC power, but typically these types of night lights are set up with a transformer to convert the voltage to a lower, safer level [10].
14. Which sensor is used in an automatic lighting system?
There are several types of sensors that can be used in an automatic lighting system, depending on the specific application and requirements. The most common types of sensors used in these systems are motion sensors, light sensors, and occupancy sensors. Motion sensors detect movement in a room or area, light sensors detect changes in ambient light levels, and occupancy sensors detect the presence or absence of people in a room.
15. Can I turn any light into a smart light?
Yes, it is possible to turn almost any light into a smart light by using a smart light bulb or a smart switch. Smart light bulbs can be easily installed in existing light fixtures, allowing them to be controlled via a smartphone app or voice commands. Smart switches, on the other hand, can be installed in place of existing light switches, allowing any light connected to the switch to be controlled remotely or with a voice assistant.
16. How do driverless LEDs work?
Driverless LEDs are LED lighting devices that do not require a separate driver or power supply to operate. Instead, they are designed with an integrated circuit that regulates the voltage and current directly to the LED chips. This simplifies the installation process and reduces the overall cost while maintaining high efficiency and longevity.
17. How long do LED auto lights last?
This lifespan is much longer than traditional incandescent or fluorescent bulbs, making them a more economical and eco-friendly choice for automotive lighting [11].
18. How do you make a motion light stay on permanently?
To make a motion light stay on permanently, it’s necessary to bypass the motion sensor and connect the light directly to a power source. To do this, locate the motion sensor switch or the wires near the sensor that connect to the light and disconnect them. Then, connect the wires leading to the light directly to a power source such as a switch or an outlet. Note that this will disable the motion sensor feature, and the light will stay on continuously until it is disconnected or the power is turned off.
19. Do motion lights scare thieves?
Motion lights can be effective in scaring off potential burglars or intruders by illuminating the area and alerting occupants of the presence of an intruder. The sudden bright light can disorient the intruder and make them feel exposed, and can also draw attention from nearby neighbors or the police. However, whether motion lights are effective in all situations depends on various factors such as the location, design, and timing of the lights [12].
20. What is the circuit for an LDR?
The circuit for an LDR (Light Dependent Resistor) typically consists of an LDR as a sensor, a resistor as a voltage divider, and an output device such as an LED or a relay. The LDR is placed in series with the resistor, creating a voltage divider that produces a voltage proportional to the light intensity [13]. The output device is then connected to the junction of the LDR and resistor and is activated when the voltage falls below a certain threshold. This threshold can be adjusted by varying the value of the resistor. The circuit can be used in a variety of applications such as automatic light sensors, security alarms, and ambient light dependent circuits.
21. Is A LDR analog or digital?
An LDR (Light Dependent Resistor) is an analog device, meaning it produces a continuously varying output in response to changes in light intensity. Unlike digital devices that produce discrete output signals (1s and 0s), analog devices produce signals that can have an infinite number of values. Therefore, LDR-based circuits typically require analog signal processing circuits to amplify, filter, or convert the output signals to meaningful analog or digital outputs.
22. What are the materials of an automatic light sensor?
An automatic light sensor typically consists of a semiconductor material that changes its electrical properties in response to changes in light intensity. The most common material used for automatic light sensors is the LDR (Light Dependent Resistor), which has a resistance that decreases as the light intensity increases.
Other materials used for automatic light sensors include photodiodes, phototransistors, and photoresistors, each with their own unique properties and applications. These materials are typically chosen for their sensitivity, spectral response, speed of response, linearity, and noise characteristics. Additionally, automatic light sensors may also include control circuits, interface circuits, and power sources depending on the specific application.
23. Is 7000 lumens too bright?
Whether 7000 lumens is too bright depends on the specific application, as brightness requirements can vary widely depending on the intended usage. However, in most cases, 7000 lumens is considered very bright, even for commercial or industrial applications.
For comparison, a standard 60-watt incandescent light bulb produces around 800 lumens, while a 100-watt bulb produces around 1600 lumens. Therefore, 7000 lumens would be equivalent to the brightness of several dozen 100-watt bulbs.
24. How bright is 300 lumens at night?
The brightness of 300 lumens at night depends on a variety of factors, including the size of the room, the reflectivity of the surfaces, and the sensitivity of the human eye to light. However, in general, 300 lumens is considered a relatively low level of brightness and may be sufficient for basic navigation in a darkened room, but not bright enough for activities such as reading or working.
25. How many amps is a night light?
The current draw for a typical night light is usually between 0.1 and 0.5 amps. However, this can vary depending on the specific type of night light and its power source. For example, a night light that uses LED technology will typically use less current than one that uses an incandescent bulb.
26. How do auto light sensors work?
Auto light sensors typically work by using a sensor, such as an LDR (Light Dependent Resistor), to detect changes in light intensity. When the light intensity falls below a certain threshold, the sensor triggers the activation of an output device, such as a relay or a transistor that turns on or off a light or other appliance. Some auto light sensors may also include additional circuitry, such as timers, to adjust the sensitivity or duration of the output signal.
27. Do motion lights work in the dark?
Yes, motion lights can work in the dark. Most modern motion sensors use infrared or microwave technology to detect motion, which is independent of the visible light spectrum. Therefore, even in complete darkness, these sensors can still detect motion and trigger the activation of the lights or other appliances. However, some motion sensors may adjust their sensitivity based on the ambient light conditions, so it is important to test and adjust them to ensure proper functionality.
Useful Video: How To Build An Automatic Night-Light
References
- https://www.build-electronic-circuits.com/night-light-circuit/
- https://www.instructables.com/How-to-Make-an-Automatic-Night-Light/
- https://www.instructables.com/Automatic-Night-Light-6/
- https://www.jameco.com/Jameco/workshop/JamecoBuilds/automatic-night-light-circuit.html
- https://studentprojects.in/electronics/basic-electronics/automatic-night-light-using-ldr/
- https://electronicsarea.com/automatic-night-light-with-one-led-circuit/
- https://www.engineersgarage.com/automatic-night-light-control/
- https://www.wellpcb.com/night-light-circuit.html
- https://www.electroinvention.co.in/automatic-night-light-automatic-streetlight-system/
- https://www.electronicshub.org/auto-night-lamp/
- https://www.hackatronic.com/automatic-night-lamp-circuit-diagram-using-ldr-and-lm358-opamp/
- https://www.seminarsonly.com/Engineering-Projects/Physics/automatic-night-lamp.php
- https://bestengineeringprojects.com/automatic-night-lamp-circuit/






Leave a Reply