Raspberry Pi, the versatile single-board computer, has captivated enthusiasts and professionals alike with its myriad applications. From IoT projects and robotics to home automation and media centers, its flexibility knows no bounds. Yet, within this realm of limitless possibilities, lies the power to finely tune its features according to specific needs. One such feature is Wi-Fi connectivity, which, while integral to many projects, might need to be disabled in certain scenarios.
This article embarks on a journey to uncover the intricacies of disabling Wi-Fi on a Raspberry Pi, offering insights into the reasons behind such a decision and guiding users through comprehensive steps to achieve this task. Whether driven by power-saving considerations, security concerns, or the quest for a streamlined network setup, the ability to selectively disable Wi-Fi grants enthusiasts the reins to optimize their Raspberry Pi experience.
As we delve into the various methods and techniques, you’ll gain not only a deeper understanding of Raspberry Pi’s inner workings but also the empowerment to tailor its capabilities to suit your project’s unique requirements. So, join us on this exploration of Raspberry Pi’s untapped potential as we unveil the art of disabling its Wi-Fi functionality, illuminating the path toward enhanced control and efficiency in your digital endeavors.
What Is WiFi on Raspberry Pi?
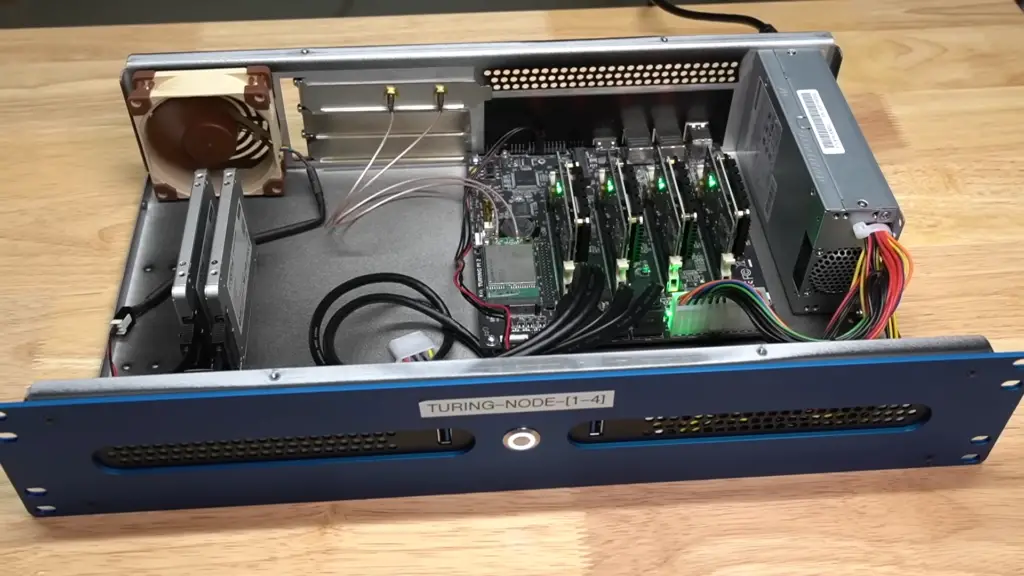
The WiFi functionality on a Raspberry Pi is provided by a wireless networking module, typically integrated into the Raspberry Pi’s circuit board. This module contains the necessary hardware components, such as radio transceivers and antennas, to establish and maintain wireless connections.
Overall, WiFi on Raspberry Pi opens up a world of possibilities, allowing the device to seamlessly connect to networks and interact with other devices, both locally and over the internet. It’s a valuable feature that enhances the versatility and capabilities of Raspberry Pi for various projects and applications.
Specifications of WiFi on Raspberry Pi
Most Raspberry Pi models typically include built-in WiFi capabilities. However, Raspberry Pi models that included WiFi used various wireless chips, including the Broadcom BCM43143, BCM43438, and BCM43455 chips, which support different WiFi standards like 802.11n and 802.11ac. The specific features and specifications of the WiFi on Raspberry Pi could vary based on the model and version.
These features might include:
- WiFi Standards: The supported WiFi standards might include 802.11b, 802.11g, 802.11n, and potentially 802.11ac, which offer different levels of speed and range;
- Frequency Bands: The Raspberry Pi WiFi modules may support both 2.4 GHz and 5 GHz frequency bands. The 2.4 GHz band usually offers broader coverage but potentially lower data rates, while the 5 GHz band provides higher data rates with a potentially shorter range;
- Data Rates: The maximum data rates achievable over WiFi can vary based on the WiFi standard and frequency band. For example, 802.11n might provide up to 300 Mbps, while 802.11ac can offer even higher speeds;
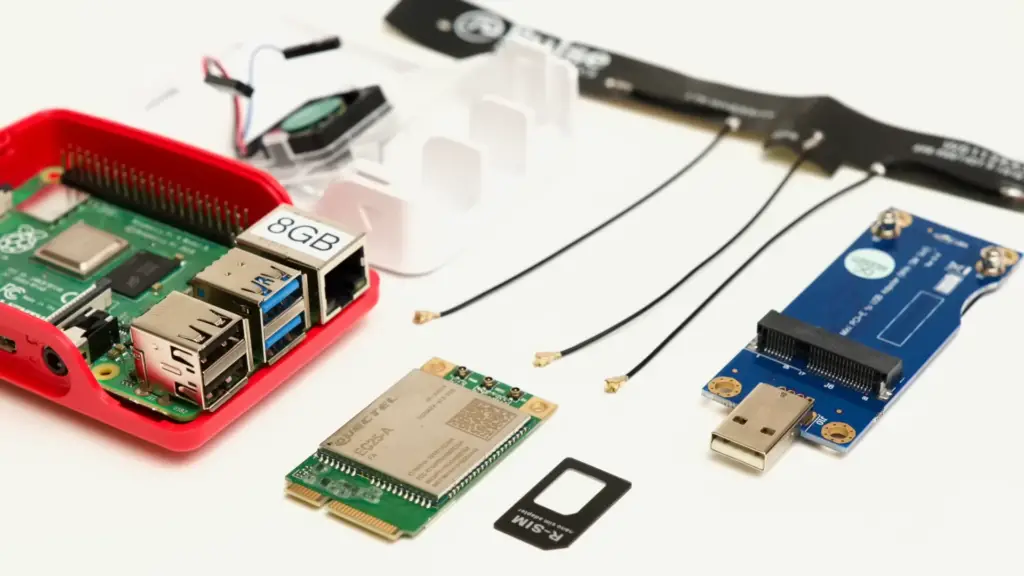
- Antenna: Raspberry Pi models with WiFi often have an integrated antenna on the board. Some models might also provide options for connecting an external antenna for improved signal strength and range;
- Driver and Software Support: Raspberry Pi OS (formerly Raspbian) typically includes drivers and software support for the onboard WiFi chips. These drivers are essential for proper functioning and may include utilities for connecting to WiFi networks and managing wireless settings;
- Power Consumption: The power consumption of the WiFi module can vary based on factors such as usage and signal strength. Generally, WiFi usage can consume additional power, which might impact the overall power requirements of your Raspberry Pi project;
- Security: Raspberry Pi models with WiFi often support WPA2 (WiFi Protected Access 2) for securing wireless connections. This ensures that your WiFi communications are encrypted and secure;
- Compatibility: The WiFi on Raspberry Pi is generally compatible with common WiFi routers and access points that follow industry standards;
- Wireless Standards: The WiFi modules on Raspberry Pi models support various wireless standards, such as 802.11b, 802.11g, 802.11n, and potentially 802.11ac. These standards dictate the speed, range, and compatibility of the wireless connection;
- Frequency Bands: WiFi modules on Raspberry Pi devices can operate on both the 2.4 GHz and 5 GHz frequency bands. The 2.4 GHz band offers broader coverage, while the 5 GHz band provides potentially higher data rates and reduced interference;
- Networking: With WiFi, a Raspberry Pi can connect to local wireless networks, including home and office networks, public hotspots, and WiFi routers. This enables internet access, file sharing, and communication with other devices on the same network;
- Headless Configuration: WiFi is particularly useful for headless setups, where you don’t have a monitor, keyboard, or mouse connected to the Raspberry Pi. You can access and control the Raspberry Pi remotely over the wireless network using SSH (Secure Shell) or VNC (Virtual Network Computing);
- Internet of Things (IoT) and Home Automation: WiFi-equipped Raspberry Pi devices can be integrated into IoT networks, allowing them to communicate with smart devices, sensors, and actuators. This is useful for home automation and monitoring applications;
- Software Support: The Raspberry Pi operating system, such as Raspberry Pi OS (formerly Raspbian), includes drivers and software support for the onboard WiFi modules. This support ensures seamless integration with the operating system and facilitates easy setup and configuration;
- Security: WiFi on Raspberry Pi supports encryption protocols like WPA2 (WiFi Protected Access 2) to ensure secure and encrypted wireless communication;
- External Antennas: Some Raspberry Pi models provide the option to attach external antennas, which can enhance the WiFi signal strength and range, particularly in scenarios where the built-in antenna may have limitations;
- Power Consumption: While WiFi is convenient, it can consume additional power compared to a wired Ethernet connection. This is an important consideration, especially in battery-powered or energy-efficient projects [2];
Remember to refer to the official Raspberry Pi documentation or product specifications for the most accurate and up-to-date information about WiFi capabilities on specific Raspberry Pi models.
Reasons To Use WiFi On Your Raspberry Pi Device
Using WiFi on a Raspberry Pi device can offer several benefits and use cases. Here are some reasons why you might choose to use WiFi on your Raspberry Pi:
- Wireless Connectivity: WiFi enables you to connect your Raspberry Pi to the internet and other devices without the need for physical cables. This can be especially useful in scenarios where running cables is impractical or inconvenient;
- Remote Access and Control: With WiFi, you can access and control your Raspberry Pi remotely from another device on the same network. This is particularly helpful for headless setups (no monitor or keyboard attached) where you can manage the Raspberry Pi using SSH (Secure Shell) or VNC (Virtual Network Computing);
- IoT and Home Automation: WiFi connectivity allows your Raspberry Pi to become part of an Internet of Things (IoT) network or home automation system. You can control smart devices, sensors, and actuators using the Raspberry Pi and interact with them remotely;
- Web Server or Hosting: WiFi-enabled Raspberry Pi devices can be used as web servers or hosting platforms for websites, blogs, and web applications. This is useful for local development or small-scale hosting needs;
- Streaming and Media Centers: You can set up your Raspberry Pi as a media center or streaming device, accessing online content and streaming media over WiFi. This is often done using software like Kodi or Plex;
- Wireless File Sharing: WiFi allows you to transfer files wirelessly between your Raspberry Pi and other devices on the same network. This is convenient for data sharing and backup purposes;
- Software Updates and Downloads: WiFi connectivity makes it easy to download software updates, packages, and dependencies directly to your Raspberry Pi without the need to manually transfer files using external storage devices;
- Internet Browsing and Email: While Raspberry Pi is not as powerful as a full-fledged desktop computer, you can still browse the internet, send emails, and perform basic online tasks using WiFi connectivity;
- Education and Learning: WiFi-enabled Raspberry Pi devices can be used in educational settings to teach networking concepts, internet protocols, and web development;
- Mobile Projects: If you’re building a portable or mobile project, such as a robot or a portable gaming console, WiFi connectivity allows your Raspberry Pi to connect to networks on the go;
- Wireless Printing: You can use a WiFi-connected Raspberry Pi to manage and control networked printers, enabling wireless printing from various devices;
- Sensor Networks: WiFi-equipped Raspberry Pi devices can interact with wireless sensors and gather data from different locations, making them suitable for environmental monitoring and data collection projects;
- Remote Monitoring and Surveillance: WiFi-enabled Raspberry Pi devices can be used for remote monitoring and surveillance, streaming video from cameras and sensors to a central location;
Remember that while WiFi offers convenience and flexibility, it’s important to consider security measures, such as using strong passwords, enabling encryption, and keeping software up to date to protect your Raspberry Pi and its connections.
Why Do You Need to Disable Raspberry Pi Wi-Fi?
There could be several reasons why you might want to disable the WiFi functionality on your Raspberry Pi device:
- Power Conservation: WiFi consumes additional power, which might be a concern in battery-powered or energy-efficient projects. Disabling WiFi can help conserve battery life and reduce overall power consumption;
- Security: If you’re working on a security-sensitive project or in an environment where WiFi connectivity poses a potential security risk (e.g., air-gapped systems), you might choose to disable WiFi to minimize potential attack vectors;
- Network Isolation: Disabling WiFi can be useful for creating a network-isolated environment. This might be relevant in scenarios where you want to ensure that your Raspberry Pi is only connected to specific wired networks and not to potentially unsecured wireless networks;
- Network Troubleshooting: In some cases, you might need to troubleshoot network-related issues or conflicts. Disabling WiFi temporarily can help you diagnose problems and determine if they are related to the wireless connection;
- Using an Ethernet Connection: If you prefer a wired Ethernet connection for better stability or performance, you might disable WiFi to ensure that your Raspberry Pi uses the desired network interface;
- Headless Configuration: If you’re setting up your Raspberry Pi in a headless configuration (without a monitor or keyboard), you might disable WiFi initially to avoid potential network connectivity issues during the setup process. Once your headless setup is complete, you can enable WiFi if needed;
- Reducing Interference: In environments with heavy WiFi congestion, you might choose to disable WiFi to reduce interference and ensure stable network connections for other devices;
- Custom Networking Configurations: Some projects might require specific networking configurations that involve only wired connections. Disabling WiFi can help ensure that your project operates as intended;
- Privacy Concerns: If you’re concerned about privacy and want to minimize the potential for your Raspberry Pi to connect to unknown or open WiFi networks, disabling WiFi can provide an added layer of control;
- Focusing on Specific Tasks: In certain projects, you might want your Raspberry Pi to focus on specific tasks that don’t require network connectivity. Disabling WiFi can help minimize distractions and potential disruptions [3];
It’s important to note that disabling WiFi on your Raspberry Pi is a reversible process, and you can re-enable it when needed. The method to disable WiFi might vary based on the Raspberry Pi model and the operating system you are using. If you decide to disable WiFi, make sure you have an alternative means of accessing and managing your Raspberry Pi, such as through a wired Ethernet connection or direct access via HDMI and USB peripherals.

How To Disable Wi-Fi On Raspberry Pi: Tutorial
1. Required Equipment:
- Wi-Fi Module or Ethernet Cable: You’ll need a Wi-Fi module for wireless connections or an Ethernet cable for wired connectivity;
- Micro SD Card: This is essential for storing the operating system and your configurations;
- Power Supply: Ensure your Raspberry Pi is powered up;
- Raspberry Pi: The heart of your project;
- USB Keyboard: Useful for manual input during configuration;
- Raspberry Pi Case: Provides protection and organization;
- Monitor: Offers visual feedback;
- HDMI Wire: Connects your Raspberry Pi to a monitor;
- USB Mouse: Simplifies navigation;
2. Effective Methods of Disabling Raspberry Pi WiFi:
Crontab
Crontab, a time-based job scheduler in Unix-like operating systems, can be harnessed to disable Wi-Fi at specified times. Create a crontab entry to turn off the Wi-Fi interface when needed, conserving power during idle periods.
Config.txt
The config.txt file, located in the boot partition of your micro SD card, allows you to configure various aspects of your Raspberry Pi. Adding the dtoverlay=pi3-disable-wifi line to this file will disable the Wi-Fi module on boot.
Raspi Blacklist
Blacklisting Wi-Fi drivers prevents the module from being loaded at startup. Modify the /etc/modprobe.d/raspi-blacklist.conf file by adding blacklist brcmfmac to disable the driver [4].
Modprobe
Use the modprobe command to control kernel modules. Disable the Wi-Fi driver with sudo modprobe -r brcmfmac. For a persistent change, append blacklist brcmfmac to /etc/modprobe.d/blacklist.conf.
Systemctl
Systemctl manages system services. Disable the dhcpcd service, responsible for networking, with sudo systemctl disable dhcpcd.
RFKill
RFKill is a tool for enabling and disabling wireless devices. Utilize rfkill to block the Wi-Fi interface: sudo rfkill block wifi.
3. Raspberry Pi OS Desktop
For those using the Raspberry Pi OS desktop environment, disable Wi-Fi through the system tray. Right-click on the Wi-Fi icon, select “Turn off Wi-Fi”, and confirm.
Step-by-Step Instructions:
Method: Crontab
Open the terminal.
Enter crontab -e to edit the crontab file.
Add the following line to turn off Wi-Fi at 10 PM daily:
0 22 * * * sudo ifconfig wlan0 down
Save and exit.
Method: Config.txt
- Insert the micro SD card into your computer;
- Navigate to the boot partition;
- Open config.txt in a text editor;
- Add dtoverlay=pi3-disable-wifi to the end of the file;
- Save and eject the micro SD card;
Method: Raspi Blacklist
- Open the terminal;
- Enter sudo nano /etc/modprobe.d/raspi-blacklist.conf;
- Add blacklist brcmfmac to the file;
- Save and exit;
Method: Modprobe
- Open the terminal [5];
- Enter sudo modprobe -r brcmfmac;
Method: Systemctl
- Open the terminal;
- Enter sudo systemctl disable dhcpcd;
Method: RFKill
- Open the terminal
- Enter sudo rfkill block wifi;
Method: Raspberry Pi OS Desktop
- Click on the Wi-Fi icon in the system tray;
- Right-click and select “Turn off Wi-Fi”;
Tips To Improve Your Network Speed:
Modify the Cables of Your Ethernet
Ethernet cables are the backbone of your wired network, and their quality can significantly impact your network speed.
Here are some cable-related tips to consider:
- Choose Quality Cables: Not all Ethernet cables are created equal. Opt for Cat 6 or Cat 7 cables, which offer better shielding and higher data transfer rates compared to older cable types;
- Check for Damage: Over time, cables can degrade or suffer physical damage. Inspect your Ethernet cables for any visible wear and tear, and replace damaged cables promptly;
- Reduce Cable Length: Long Ethernet cables can introduce signal degradation. Whenever possible, use the shortest cable length required to connect your devices;
- Avoid Interference: Keep Ethernet cables away from sources of interference, such as power cables, fluorescent lights, and electronic devices. This can help maintain a cleaner signal and improve network speed;

Use an Enhanced Switch
Network switches play a crucial role in managing the flow of data between devices on your network. Upgrading to a more advanced switch can contribute to better network performance.
Consider the following:
- Gigabit or 10-Gigabit Switch: If you’re using an older switch with lower data transfer rates, consider upgrading to a Gigabit or even a 10-Gigabit switch. These switches offer faster data handling and reduce bottlenecks;
- Managed Switch: A managed switch provides greater control over your network traffic. You can prioritize certain devices or applications, reducing latency for critical tasks;
- Quality of Service (QoS): Look for a switch with QoS features. QoS allows you to assign priority levels to different types of network traffic, ensuring that bandwidth-intensive applications receive the necessary resources;
- Jumbo Frames: Some switches support jumbo frames, which are larger data packets. Enabling jumbo frames can reduce the overhead associated with smaller packets, leading to improved network efficiency [6];
Use a Raspberry Pi 4
The Raspberry Pi 4, a powerful and affordable single-board computer, can be utilized to enhance your network speed in creative ways:
- Network Monitoring: Install network monitoring software on a Raspberry Pi 4 to keep track of bandwidth usage and identify potential bottlenecks. This information can help you optimize your network for better performance;
- Network-wide Ad Blocking: Set up a Raspberry Pi 4 as a network-wide ad blocker using tools like Pi-hole. By blocking ads at the network level, you can reduce the amount of unnecessary data flowing through your network, resulting in improved speed;
- VPN Server: Use a Raspberry Pi 4 as a VPN server to encrypt and secure your internet connection, especially when accessing public Wi-Fi networks. While encryption may slightly impact speed, the added security can be invaluable;
- Network Attached Storage (NAS): Transform your Raspberry Pi 4 into a NAS by attaching external storage. This allows you to centralize and share files across your network, freeing up device storage and potentially improving network speed by offloading data traffic;
Troubleshooting When Disabling WiFi on Raspberry Pi
1. Network Configuration Conflicts
Issue: Disabling Wi-Fi may disrupt your network configuration, especially if your Raspberry Pi primarily relied on wireless connectivity.
Solution: Before disabling Wi-Fi, ensure you have an alternative means of accessing your Raspberry Pi, such as a wired Ethernet connection. Adjust your network settings accordingly to avoid losing remote access.
2. Unexpected Loss of Connectivity
Issue: After disabling Wi-Fi, you might experience an unexpected loss of connectivity, rendering your Raspberry Pi inaccessible.
Solution: Double-check your configurations and connections. If you’re unable to regain access, consider re-enabling Wi-Fi temporarily to troubleshoot and rectify the issue.
3. Driver or Module Issues
Issue: Disabling Wi-Fi might lead to complications with drivers or modules, causing errors or unexpected behavior.
Solution: Ensure you’ve followed the correct procedure to disable Wi-Fi. Verify that no residual configurations conflict with the changes you’ve made. If issues persist, consider a system reboot to ensure all changes take effect.
4. Power Management Impact
Issue: Disabling Wi-Fi can impact power management settings, especially if your project relied on dynamic power-saving features.
Solution: Adjust your power management settings to align with your new network configuration. Optimize other power-saving features to maintain efficiency.
5. Peripheral and Accessory Interactions
Issue: Some projects and accessories might rely on Wi-Fi, even if it’s not the primary function. Disabling Wi-Fi could affect these secondary functions.
Solution: Evaluate the impact of disabling Wi-Fi on your entire setup. Consider alternative ways to achieve the desired outcomes without Wi-Fi if necessary [7].
6. Reverting Changes
Issue: After disabling Wi-Fi, you might find the need to revert the changes due to unforeseen complications.
Solution: Always document your changes and configurations. If needed, you can follow the reverse procedure to re-enable Wi-Fi and troubleshoot the root cause of the issue.
Alternatives to Disabling WiFi on Raspberry Pi
While disabling WiFi on a Raspberry Pi might be necessary for certain scenarios, there are alternative approaches you can consider to achieve specific goals without completely disabling WiFi. These alternatives offer flexibility while retaining wireless capabilities.
Here are some options:
1. Network Priority Settings
Instead of disabling WiFi entirely, you can adjust network priority settings to ensure your Raspberry Pi primarily uses a wired Ethernet connection. This approach allows you to maintain both connectivity options while prioritizing the wired connection for stability and speed.
2. Firewall Rules
Utilize firewall rules to control network access for specific applications or services. This enables you to restrict WiFi access for particular processes while keeping other functionalities intact.
3. Airplane Mode
Implement an “airplane mode” configuration that toggles WiFi on and off based on specific triggers or conditions. This dynamic control can help you conserve power and connectivity based on your project’s requirements.
4. Virtual LAN (VLAN) Configuration
Set up VLANs to segregate network traffic effectively. This approach allows you to direct different types of traffic (such as IoT devices or media streaming) to specific network interfaces while leaving others enabled.
5. Custom Scripts
Develop custom scripts to manage WiFi connectivity based on predefined criteria. For example, you can create scripts that automatically enable or disable WiFi based on the time of day, network availability, or device activity.
6. Power Management Settings
Adjust power management settings to control WiFi behavior. For instance, you can configure WiFi to enter a low-power mode during periods of inactivity, reducing power consumption without completely disabling it.
7. Use of USB WiFi Dongles
If you’re concerned about power consumption or network interference, you can use a USB WiFi dongle in lieu of the built-in WiFi module. This allows you to disable the onboard WiFi while still having the option to use wireless connectivity when needed.
8. Separate Network Profiles
9. Physical Switches or Buttons
Integrate physical switches or buttons into your Raspberry Pi setup to toggle WiFi on and off manually. This hands-on approach provides direct control over network connectivity.
10. Scheduled WiFi Disabling
Schedule WiFi to be disabled during specific time periods when it’s not needed, such as during nighttime or when your project is idle.
FAQ:
1. How to disable a saved WiFi network on Raspberry Pi?
To disable a saved WiFi network on Raspberry Pi, follow these steps:
Open the terminal.
Edit the wpa_supplicant.conf file using the following command:
sudo nano /etc/wpa_supplicant/wpa_supplicant.conf
Locate the network configuration you want to disable.
Add a # symbol at the beginning of the lines for that network configuration to comment them out.
Save the file (Ctrl + O) and exit (Ctrl + X).
Reboot your Raspberry Pi for the changes to take effect.
2. How to turn off Raspberry Pi without SSH?
You can safely turn off your Raspberry Pi without SSH by running the following command in the terminal:
sudo shutdown -h now
3. How to check my Raspberry Pi WiFi?
You can check the WiFi status of your Raspberry Pi by running the following command:
iwconfig
Look for the “wlan0” interface to see information about your WiFi connection.
4. How to turn on WiFi on Raspberry Pi 3?
To turn on WiFi on Raspberry Pi 3, you can use the following command:
sudo ifconfig wlan0 up
5. Why is Raspberry Pi WiFi not working?
There could be various reasons for WiFi issues on a Raspberry Pi, including incorrect configurations, driver problems, signal interference, or hardware issues. Troubleshoot by checking your configurations, ensuring the correct drivers are installed, and verifying signal strength.
6. How to connect my Raspberry Pi to no Internet?
If you want to connect your Raspberry Pi to a network without internet access, you can do so by configuring the WiFi settings to connect to the desired network without specifying a gateway address.
7. How to Enable SSH and WiFi on Raspberry Pi?
To enable SSH and WiFi on Raspberry Pi, you can use the following commands:
sudo raspi-config
Navigate to the “Interfacing Options” menu and enable both SSH and WiFi.
8. Does Raspberry Pi support 5G?
Raspberry Pi does not natively support 5G cellular networks. The WiFi on Raspberry Pi models typically supports 2.4 GHz and 5 GHz WiFi bands, not 5G cellular technology.
9. What Raspberry Pi has built-in WiFi?
Raspberry Pi models that have built-in WiFi capabilities include Raspberry Pi 3, Raspberry Pi 4, and some earlier versions. However, it’s essential to verify the specifications of the specific model you have.
10. How to disable Wi-Fi in Ubuntu 20.04 terminal?
To disable Wi-Fi in Ubuntu 20.04 terminal, you can use the following command:
sudo nmcli radio wifi off
This command turns off the WiFi radio. To turn it back on, use:
sudo nmcli radio wifi on
Note that these commands work in systems using NetworkManager for network management.
Useful Video: 6 Ways to Disable Wi-Fi on Raspberry Pi
References
- https://pimylifeup.com/raspberry-pi-disable-wifi/
- https://raspberrytips.com/disable-wifi-raspberry-pi/
- https://linuxhint.com/disable-wifi-raspberry-pi-through-terminal/
- https://www.ourpcb.com/raspberry-pi-disable-wi-fi.html
- https://forums.raspberrypi.com/viewtopic.php?t=342095
- https://sleeplessbeastie.eu/2022/06/01/how-to-disable-onboard-wifi-and-bluetooth-on-raspberry-pi-4/
- https://www.animmouse.com/p/how-to-disable-wifi-and-bluetooth-on-raspberry-pi/




Leave a Reply