
Are you looking for a comprehensive guide on all things ESP32-CAM? Look no further! In this article, we will answer some of the most common questions about this versatile board, as well as provide useful tips to get you started on your own projects. Whether you’re just getting started with electronics or are a seasoned pro, there’s something for everyone in this guide. So let’s get started!
What is a ESP32-CAM
It has a small form factor, making it ideal for projects where size is a concern, such as wearable or robotic applications. The ESP32-CAM can be used to capture images and stream video wirelessly, providing a way to remotely monitor locations or objects. Additionally, its onboard sensor array can track motion and detect sound events. It also supports a variety of security protocols like WPA2-PSK authentication, allowing secure communication between devices. With its wide range of features and low power consumption, the ESP32-CAM is an ideal choice for embedded IoT applications.
The key components of the ESP32-CAM include a 400 MHz dual core processor, 520KiB RAM, 4 MiB Flash ROM, a 2MP camera with 1080p resolution and an integrated stereo microphone. It also features support for Bluetooth 5.0 and WiFi 802.11 b/g/n/e/i standards. The board has several built-in sensors, including temperature, humidity, pressure barometer and an accelerometer as well as a micro SD card slot for external storage. Additionally, the on-board OV2640 camera is capable of capturing still images and recording video in various resolutions (up to 1080p).
The ESP32-CAM is perfect for any project that requires wireless data transfer and image capture or video streaming. Its extremely small form factor makes it ideal for use in wearable devices and robots, as well as low-power applications such as security systems or home automation. With its wide range of features and low power consumption, the ESP32-CAM is an ideal choice for embedded IoT applications. [1]
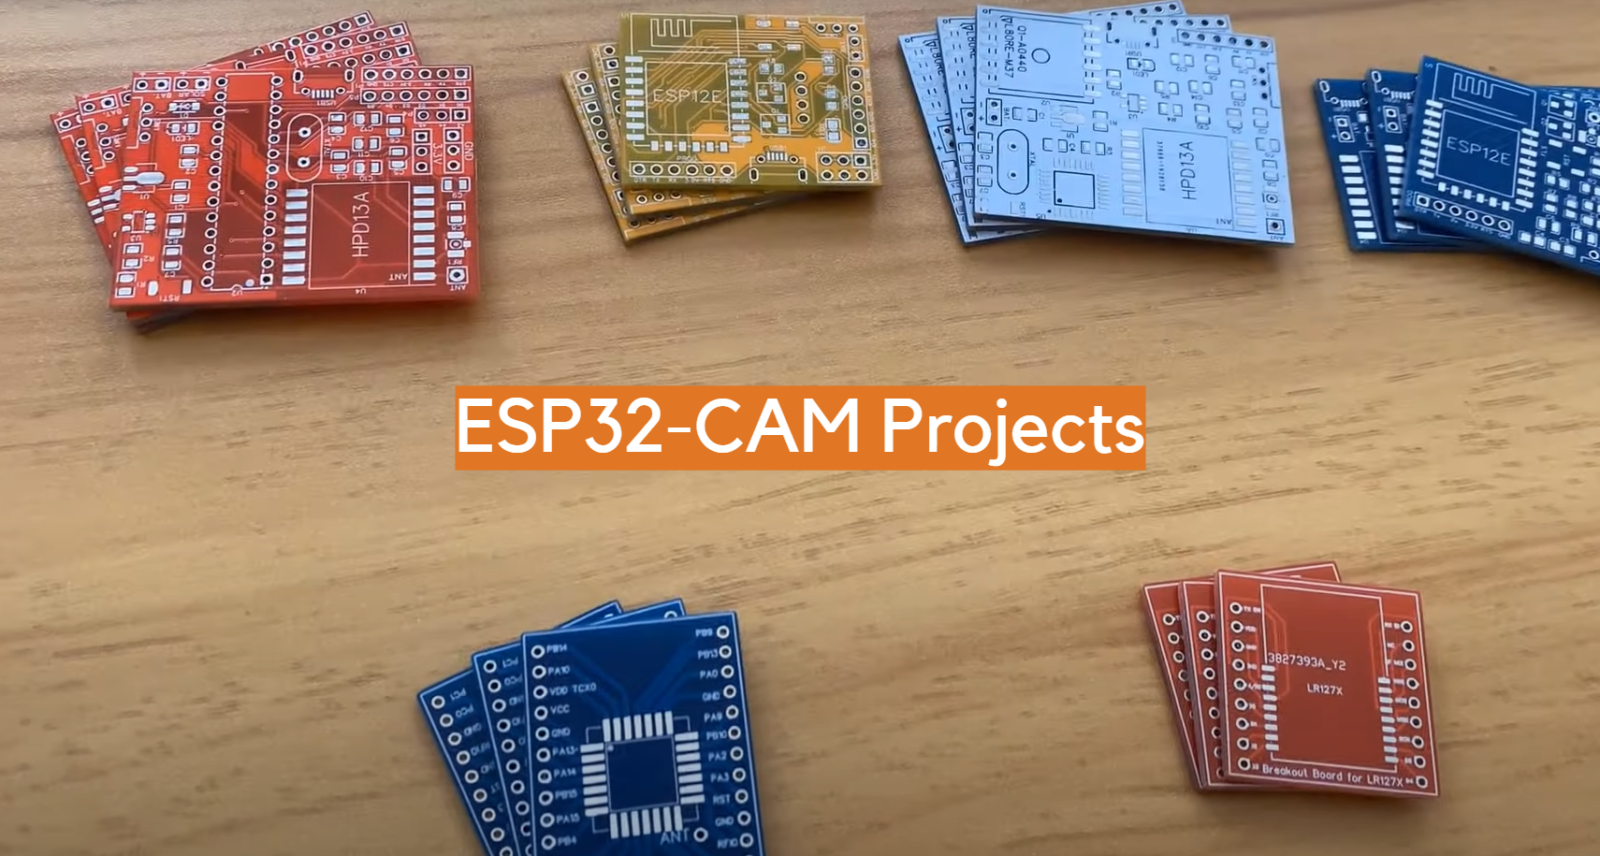
Best ESP32-CAM Projects
As you can see, ESP32-CAM is pretty versatile and can be used in a wide range of projects. Here are some of the best ESP32-CAM projects you can try. In this section, we’ll talk about some of the most popular projects!
Sending Photos to Gmail Via SMTP Server
One of the simplest and most useful projects you can do with the ESP32-CAM is to send a photo directly to your Gmail account. For this project, you need an internet connection as well as access to an SMTP server (such as Gmail’s smtp.gmail.com). SMTP stands for Simple Mail Transfer Protocol. It is a protocol that is used to send emails and attachments from one server to another, over the internet.
The first step is to install the ESP32 MailClient Library in the Arduino IDE. You can do this by clicking on the “Sketch” menu and then selecting “Include Library” > “Manage Libraries”. Enter ‘ESP32 MailClient’ in the search bar, select the library from the list that appears, and click Install.
For this you will need to create a new Google account and set up the ESP32-CAM with your new account information. Next, get an app password by heading to the 2FA menu in the Google Account Security settings. This should be followed by setting up the SMTP server and port (you can find instructions for doing this online)
Now it’s time to actually set up a SMTP server. To do this, you will need to enter the following details:
- SMTP Server: smtp.gmail.com
- SMTP username: Complete Gmail address
- SMTP password: Your Gmail password
- SMTP port (TLS): 587
- SMTP port (SSL): 465
- SMTP TLS/SSL required: yes
You can use another provider for other SMTP Servers, such as Outlook or Yahoo by changing the details you provide.
Once you have entered this information, the ESP32-CAM is ready to send a photo directly to your Gmail account. To use this feature, simply include the sketch. You can find the code for the sketch online.
After including the code, upload it to your ESP32-CAM. Once you have done this, you should be able to send a photo directly to your Gmail account. You can do this by pressing a physical button connected to the ESP32-CAM, or by using an app such as Blynk.
This will ensure that everything is working properly and that you don’t run into any unexpected issues when sending photos directly to your Gmail account!
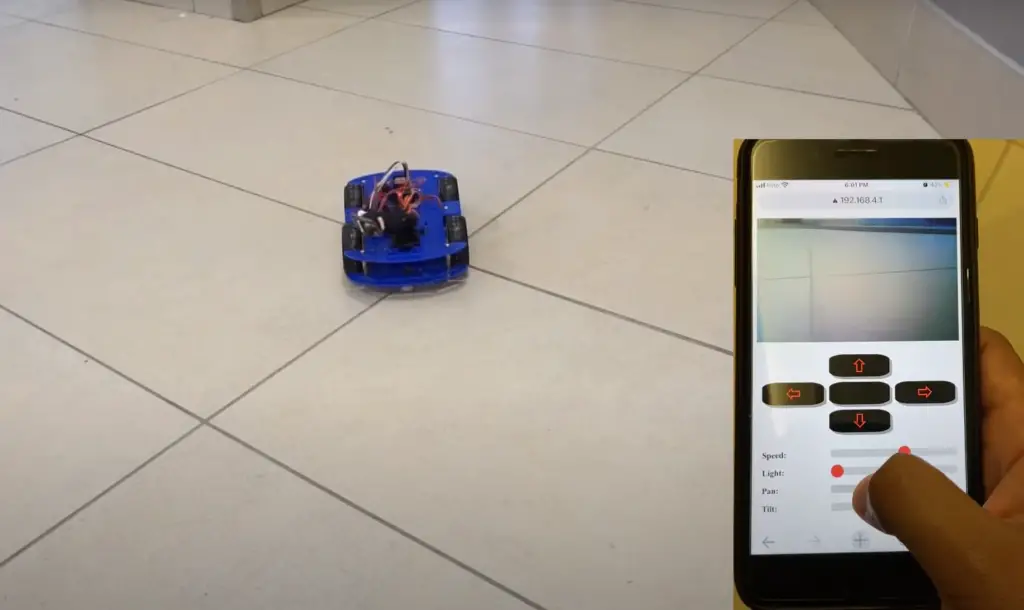
ESP32-CAM Remote Controlled Car Robot Web Server
Another interesting project to consider with ESP32-CAM is a remote controlled car robot web server. This project can be used to create a low-cost, remotely controllable car robot that streams live video from the ESP32-CAM module directly to the web browser.
The hardware components required for this project include an ESP32 microcontroller board with external antenna, L298N Motor Driver, Robot Car Chassis Kit, 5V power supply, Prototyping circuit board. The software components required are Arduino IDE for programming the ESP32 board, PlatformIO for deploying code on it and an open source library called WebCamServer which provides streaming video capability.
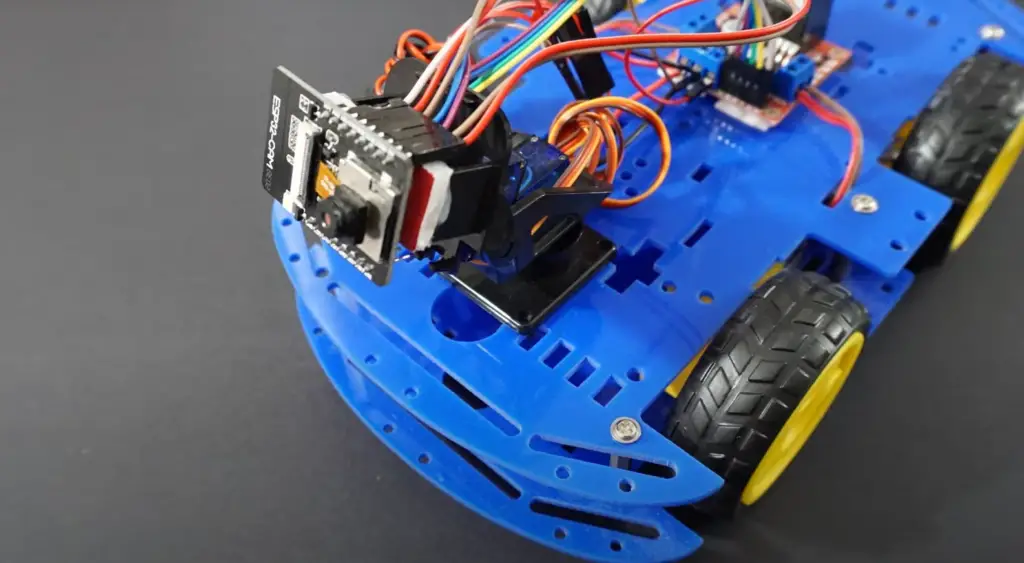
The robot you will build consists of a chassis with two DC motors for motion and the ESP32-CAM module mounted on top which will capture live video from its camera. The car robot can be controlled remotely using your web browser by entering in commands like forward, backward, left and right.
Luckily, you won’t necessarily need to create the whole car by yourself as you can take basically any chassis available in the market and it will fit in perfectly with the ESP32-CAM module. However we personally recommend you getting a Smart Robot Car Chassis Kit.
Power is also an important consideration for this project as the ESP32-CAM module requires 5V power. In order to make your robot autonomous you’ll need to use a 5V power supply and if you want it to be able to move while streaming video then you’ll need two separate power supplies, one for the ESP32 board and another one for the motors.
Now let’s connect everything together. To connect the L298N to ESP32-CAM: link the IN1 pin of the driver to GPIO 14 of the ESP32 board, IN2 to GPIO 15, IN3 to GPIO 13 and IN4 to GPIO 12. After that, wire each motor to its respective terminal block.
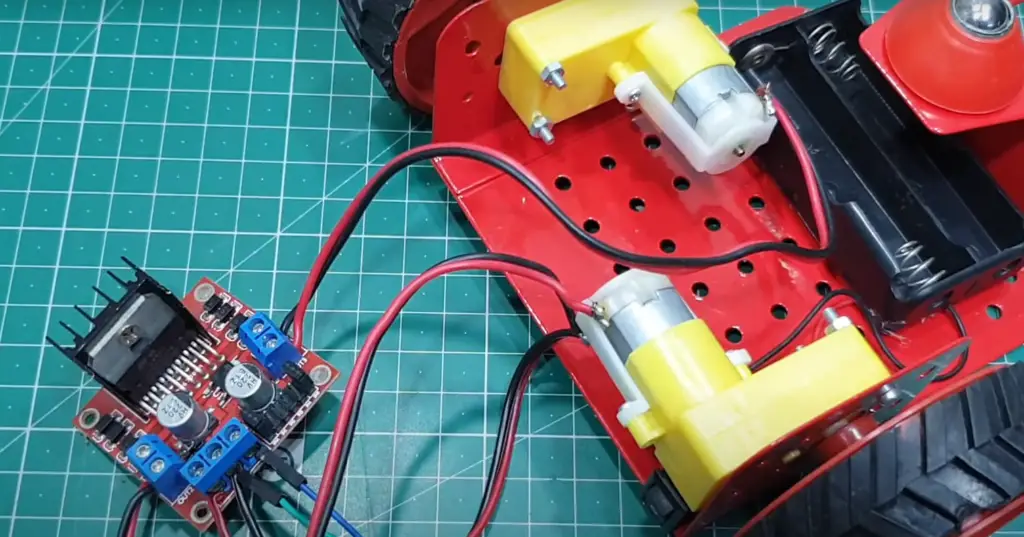
As for the power supply, connect the GND pin of the ESP32 board to a 5V power supply and also make sure you have a separate power source for the motors.
Once you have assembled all the hardware components, you can start programming your car robot with Arduino IDE. The code keeps track of commands entered by the user in a web page hosted on a local server created by the ESP32 microcontroller board. First you have to define the GPIO pins used by the motors and then you have to write the logic for controlling them based on commands from the web page. You will need to know some HTML for creating the web page.
To handle the logic of the robot car, utilize if and else statements in the code. This will allow you to define the logic for each command. Be sure to test out your car once you’re done with programming.
To sum it up, this project is an awesome way of learning about embedded systems and video streaming technology with low cost components available in the market. It’s also a great way of creating your own remotely controllable car robot which streams live video right through your web browser! [3], [4]

FAQ
What is the disadvantage of ESP32?
While ESP32 is generally considered to be a solid, reliable and cost-effective microcontroller, it does come with a few drawbacks. The biggest disadvantage of ESP32 is that it only supports 2.4 GHz Wi-Fi, which limits its range and compatibility with some devices. Additionally, it may be more confusing than its alternative like Arduino for those who are just starting with microcontroller development.
Still, when compared to other microcontroller boards, ESP32 is quite powerful and offers a lot of features. It can be used for a wide range of projects, including home automation systems, security systems, IoT devices and much more. It also has Bluetooth support which makes it even more versatile.
Does ESP32-Cam have WiFi?
Yes, ESP32-CAM has both WiFi and Bluetooth capabilities. It is based on the popular ESP32 microcontroller and incorporates a camera module. The built-in WiFi allows connection to local networks and the internet within range, while the Bluetooth allows communication with compatible devices. This makes it suitable for use in a variety of projects, from home automation systems to robotics.
The ESP32-CAM also includes several other features such as an SD card slot for storage, an SPI interface for communication with external devices, a PWM output, and more. The device can be programmed using the Arduino IDE or other development environments, allowing users to customize their projects in any way they wish. Additionally, there are a vast array of libraries available for the ESP32-CAM that make it easy to use for any number of applications.
What can you do with an ESP32-CAM?
The ESP32-CAM can be used in a variety of projects, from home security systems to wildlife monitoring. It is a powerful and versatile system that is capable of taking photos, recording video, and streaming data over Wi-Fi or Bluetooth. With its built-in camera module, SD card slot, microphone, and other I/O pins, the ESP32-CAM can be used for many different types of applications.
For example, you can use it to create a home security system with motion activated cameras that send an alert when movement is detected. You could also set up a wildlife monitoring system with cameras placed around your property to capture images of animals that pass by. Additionally, the ESP32-CAM can be used for applications such as facial recognition, object detection/tracking, and even creating a live video streaming system.
Is ESP32-CAM good?
Yes, ESP32-CAM is a great choice for projects that need Wi-Fi and Bluetooth connectivity. The module has all the necessary components including an antenna, camera, flash memory and more to make it easy for you to use in your project. It’s also relatively inexpensive compared to other similar modules which makes it even better.
The main advantage of this module is its low power consumption. This means you can use it with battery powered devices or in solar powered applications without having to worry about draining the battery quickly. Additionally, the built-in camera can be used for facial recognition applications or creating time-lapse videos with minimal effort.
Does ESP32-CAM need an SD card?
The ESP32-CAM does not strictly require an SD card to operate, but it adds many additional features and capabilities that make it a worthwhile investment. If you are planning on using the camera for image capture or video recording, then having an SD card is essential. This will allow you to store captured images and videos directly onto the card rather than using up precious RAM memory space.
An SD card also provides additional storage for scripts, libraries and other code resources used by your project. This makes programming much more efficient, since all of your required data is stored in one location without taking up valuable RAM memory space.
What is the difference between ESP32 and ESP32-CAM?
ESP32 and ESP32-CAM are two different boards which both run on the ESP32 microcontroller. The main difference between them is that the ESP32-CAM board has an integrated camera while the regular ESP32 does not.
The ESP32-CAM module also has a few extra components including an onboard antenna, temperature sensor, hall sensor, IR transmitter, low noise amplifier and amplifier for audio signals. This makes it a great choice for projects involving image processing or capturing video footage. Additionally, it features Bluetooth Low Energy (BLE) communication so that you can easily connect to other devices wirelessly.
The regular ESP32 board is more suitable for projects without any need for connectivity or data capture, such as driving LEDs or controlling motors. It has a slightly larger form factor and more GPIO pins, making it better suited to robotics and automation projects than the ESP32-CAM board.
Useful Video: Camera Car With Pan Tilt Control | ESP32Cam
Conclusion
ESP32-CAM projects are a great way to build creative and innovative projects while also taking advantage of the powerful ESP32-CAM platform. Whether you are looking to create a home surveillance system, a remote-controlled robot, or even an auto-stereo camera setup, the possibilities with ESP32-CAM are endless.
With this guide, we’ve outlined some useful tips and considerations for getting started on your next project. We have explained what exactly an ESP32-CAM is, how to set it up, and what projects you can use it for. We have also listed some of the most popular project ideas and what do you need to make them a reality.
If you’re ready to jump in and start creating with ESP32-CAM, check out all the tutorials available online and if you ever get stuck along the way you can always reach out to fellow makers via forums or social media networks for help. Good luck! Happy building!
References
- https://dronebotworkshop.com/esp32-cam-intro/
- https://randomnerdtutorials.com/esp32-cam-send-photos-email/
- https://randomnerdtutorials.com/esp32-cam-car-robot-web-server/