
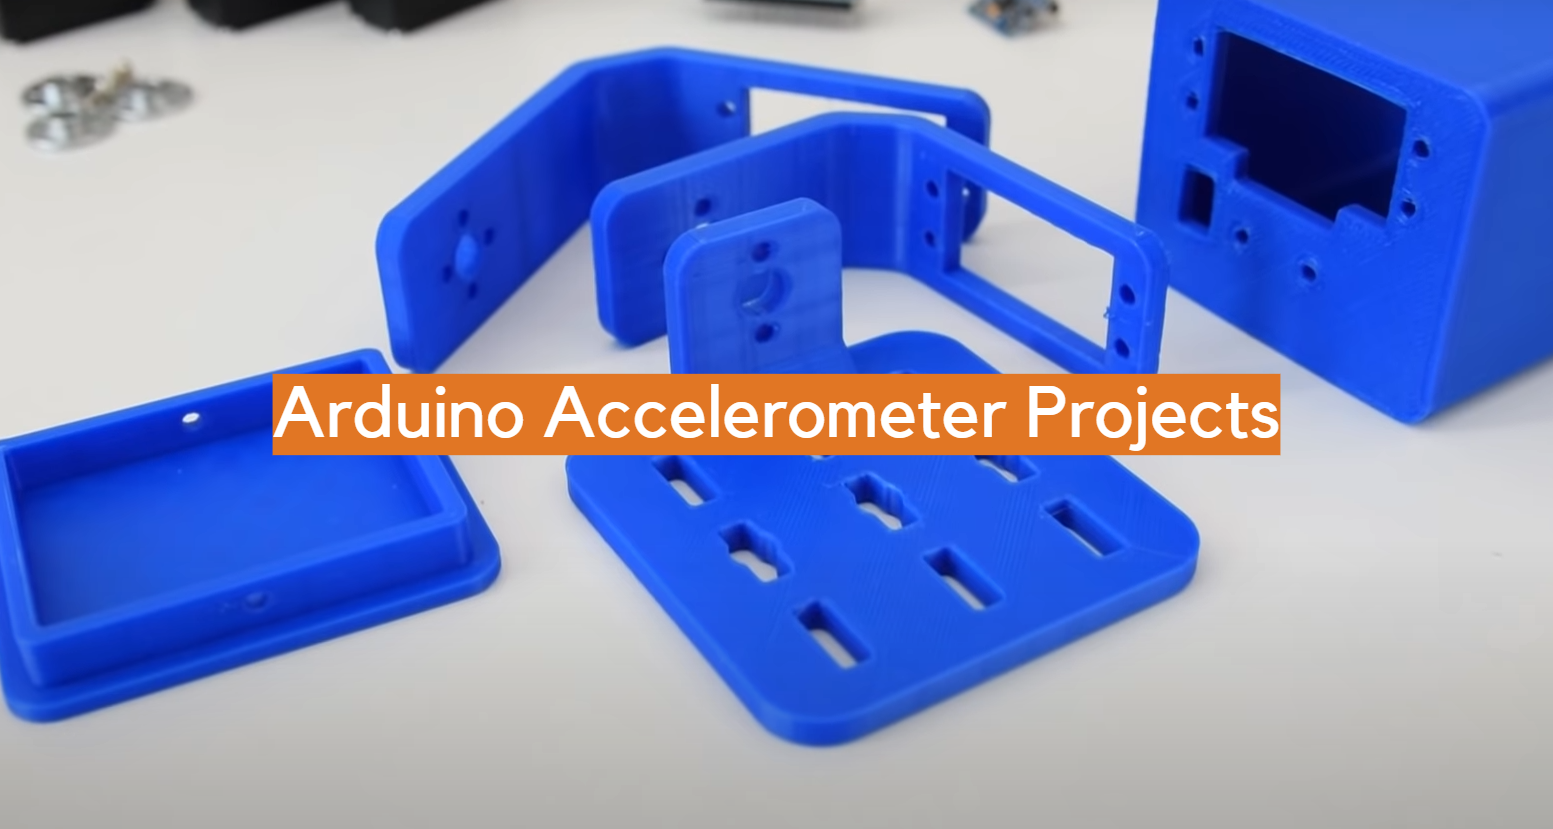
Arduino is an incredibly versatile, incredibly powerful microcontroller that can be used to build almost anything imaginable. From the mundane to the incredible — from an automatic pet feeder to a motion-sensing alarm system — Arduino accelerometer projects are limited only by your imagination.
Arduino accelerometer projects can be useful when you need to detect movement or orientation. In this guide, we will answer some of the most common questions about accelerometers and provide useful tips on how to get started with your own Arduino accelerometer project.
Arduino and Its Benefits
It was created by a team of developers led by Massimo Banzi in 2005. Arduino boards are used to create interactive objects, such as robots, musical instruments, and home automation systems.
The main benefit of Arduino is its ease of use. Even someone with no experience in electronics or programming can start developing projects within minutes. Additionally, Arduino boards are highly flexible; they can be programmed to work with almost any sensors, actuators or other peripherals available on the market. With the help of additional shields (modules which contain pre-programmed circuits) you can easily expand your project’s capabilities.
Another major advantage of Arduino is its cost-effectiveness. Arduino boards are usually very affordable and the open source software used to program them is free. This makes it a great choice for hobbyists, students, and professionals who want to get started with electronics without spending a lot of money.
Finally, there is an active community of users and developers working around Arduino which provides access to help, tutorials and projects. The wide range of resources available online can provide valuable assistance in troubleshooting or expanding your project ideas.
In summary, Arduino offers great flexibility, low cost and easy setup for anyone interested in building electronic projects. It’s also an excellent way to learn more about electronics and programming while making cool stuff. [1]
Best Arduino Accelerometer Projects
Now that you have an idea of what Arduino is and the benefits it brings, let’s look at some of the best accelerometer projects you can build with it. In this section, we’ll cover projects that use accelerometers to measure acceleration and orientation of an object in 3D space.
Arduino Mouse project
The first project you can try with your Arduino accelerometer is the Arduino mouse project. The purpose of this project is to create a computer mouse that uses acceleration information from the accelerometer, instead of moving parts like in traditional mice.
To get started, you’ll need:
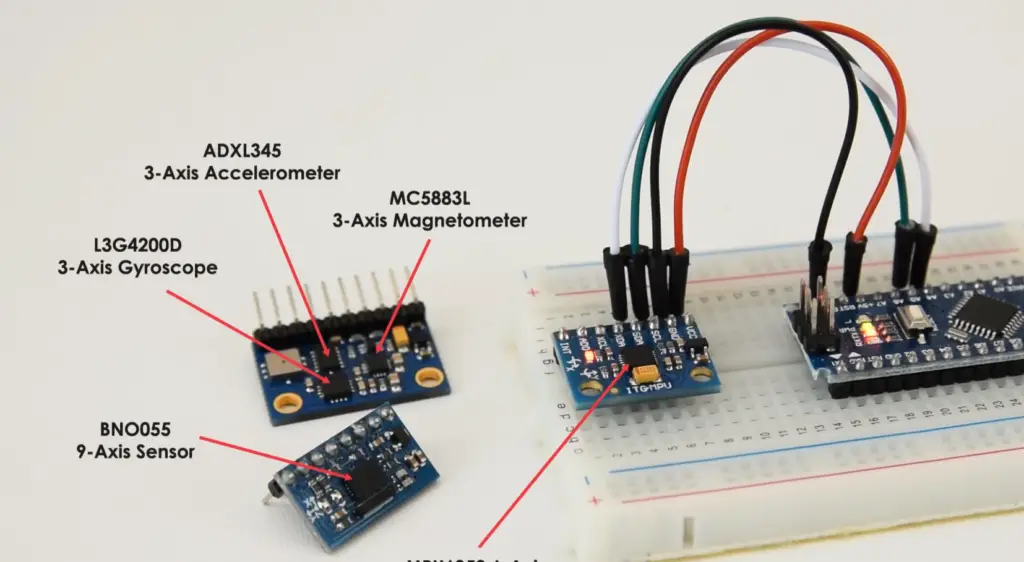
- SparkFun Triple Axis Accelerometer and Gyro Breakout – MPU-6050×1
- Arduino Leonardo With Headers×1
- Resistor 10k ohm×2
- Jumper wires (generic)×1
- Breadboard (generic)×1
- SparkFun Pushbutton switch 12mm×1
- USB-A to Micro-USB Cable
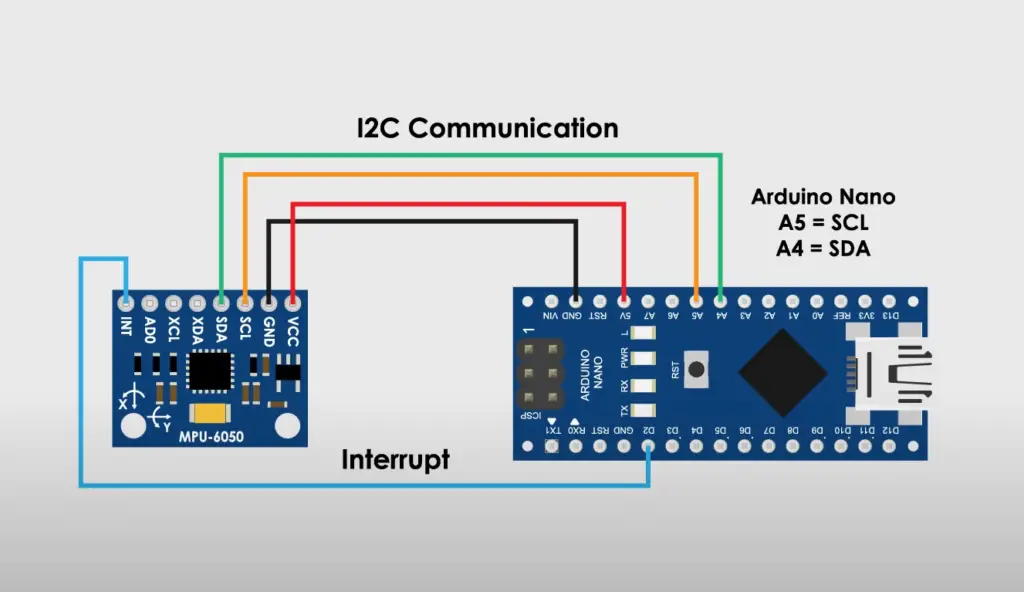
How this all works is pretty simple. The accelerometer senses the user’s hand movements and sends them to the Arduino via I2C communication. The Arduino then translates these movement signals into keyboard events that are sent to your computer via USB.
The first step is connecting all of the components together on the breadboard, making sure to use a 10k ohm resistor for each of the wires from MPU-6050 to GND and VCC. Follow the documentation for your accelerometer to make sure you’re connecting everything correctly.
Next, download the necessary libraries and code necessary for the project. These include wire.h, I2Cdev.h, MPU6050.h and Mouse.ino from the Arduino library manager. You’ll also need to install the necessary drivers for your Arduino board in order for it to communicate with your computer through USB.
Once everything is setup correctly and connected properly, you can upload the code to your Arduino and begin testing out your new mouse!
#include
#include
#include
#include
MPU6050 mpu;
int16_t ax, ay, az, gx, gy, gz;
int vx, vy;
const int button1 = 4;
const int button2 = 5;
int responseDelay = 10;
void setup() {
pinMode(button1, INPUT);
pinMode(button2, INPUT);
Serial.begin(9600);
Wire.begin();
Mouse.begin();
mpu.initialize();
if (!mpu.testConnection()) {
while (1);
}
}
void loop() {
mpu.getMotion6(&ax, &ay, &az, &gx, &gy, &gz);
vx = (gx – 400) / 200; // “-400” because the x axis of gyroscope give values about -350 while it’s not moving. Change this value if you get something different using the TEST code, chacking if there are values far from zero.
vy = -(gz – 200) / 200; // same here about “-200”
int buttonState1 = digitalRead(button1);
int buttonState2 = digitalRead(button2);
if (buttonState1 == HIGH) {
Mouse.press(MOUSE_LEFT);
delay(100);
Mouse.release(MOUSE_LEFT);
delay(200);
}
else if (buttonState2 == HIGH) {
Mouse.press(MOUSE_RIGHT);
delay(100);
Mouse.release(MOUSE_RIGHT);
delay(200);
}
Mouse.move(vx, vy);
delay(20);
}
Making an Arduino mouse is a great way to get started with projects using an accelerometer. It’s also very useful for controlling presentations or navigating applications without having to use a traditional mouse. With some practice and experimentation, you can use this same method to create a variety of projects with your Arduino accelerometer!
Accelerometer-Based Gesture-Controlled Robot Using Arduino
Another interesting project you can make with an Arduino and accelerometer is a Gesture-Controlled Robot. This project involves using your hand movements to control the motion of the robot by making use of an accelerometer. It’s quite simple to set up and requires minimal programming knowledge.
First, gather all the components you need:
- Arduino UNO
- DC Motors
- Accelerometer
- HT12D
- HT12E
- RF Pair
- Motor Driver L293D
- 9 Volt Battery
- Battery Connector
- USB cable
- Robot Chasis
As you may have guessed, the most important component in this project will be an accelerometer. This will be the main source of data for your robot, allowing it to track and interpret hand movements.
Once you have all the components, you can begin wiring them up according to a diagram – there are lots of great tutorials online with step-by-step instructions on how to do this.
In our case we used a RF pair is used for communication and connected with Arduino.
To power the robot, an Arduino board is connected to a Motor Driver. The input pins of the Motor Driver (2, 7, 10 and 15) are each wired to their respective digital pin on Arduino (6, 5, 4 and 3). To power our robot, we have included two DC motors connected to the output pins of a motor driver: 3 and 6 for one motor, 11 and 14 for the other. The 9 volt Battery is also essential for providing power to the motor driver, which in turn drives motors.
After you have your robot wired up, you can begin programming it. This is where the accelerometer comes in – by making use of Arduino’s ability to read data from sensors, we can track and interpret our hand movements in order to control the motion of the robot.
Here is the example code to get you started; you can modify it to fit the way you want your robot to work:
#define FD 16
#define BD 17
#define LD 18
#define RD 19
#define m11 3
#define m12 4
#define m21 5
#define m22 6
void forward()
{
digitalWrite(m11, HIGH);
digitalWrite(m12, LOW);
digitalWrite(m21, HIGH);
digitalWrite(m22, LOW);
}
void backward()
{
digitalWrite(m11, LOW);
digitalWrite(m12, HIGH);
digitalWrite(m21, LOW);
digitalWrite(m22, HIGH);
}
void left()
{
digitalWrite(m11, HIGH);
digitalWrite(m12, LOW);
digitalWrite(m21, LOW);
digitalWrite(m22, LOW);
}
void right()
{
digitalWrite(m11, LOW);
digitalWrite(m12, LOW);
digitalWrite(m21, HIGH);
digitalWrite(m22, LOW);
}
void Stop()
{
digitalWrite(m11, LOW);
digitalWrite(m12, LOW);
digitalWrite(m21, LOW);
digitalWrite(m22, LOW);
}
void setup()
{
pinMode(FD, INPUT);
pinMode(BD, INPUT);
pinMode(LD, INPUT);
pinMode(RD, INPUT);
pinMode(m11, OUTPUT);
pinMode(m12, OUTPUT);
pinMode(m21, OUTPUT);
pinMode(m22, OUTPUT);
}
void loop()
{
int temp1=digitalRead(FD);
int temp2=digitalRead(BD);
int temp3=digitalRead(LD);
int temp4=digitalRead(RD);
if(temp1==1 && temp2==0 && temp3==0 && temp4==0)
backward();
else if(temp1==0 && temp2==1 && temp3==0 && temp4==0)
forward();
else if(temp1==0 && temp2==0 && temp3==1 && temp4==0)
left();
else if(temp1==0 && temp2==0 && temp3==0 && temp4==1)
right();
else
Stop();
}
First, we include the libraries we need for the accelerometer, and then declare our digital pin settings. In setup() we define all of our pins as inputs or outputs. Then in loop() we read the accelerometer values, and depending on their value, call the respective functions that make the robot move forward, backward, left or right.
We then define the conditions for each direction, which is when the value for one direction is high and all others are low. Finally, you will want to connect your Arduino board to your computer using a USB cable so you can upload your program onto it. Once uploaded, disconnect the USB cable and power up your robot with a 9 volt battery – now it should be ready to go!
Arduino Accelerometer projects can be great fun and open up some exciting possibilities. With minimal setup and programming knowledge required, this type of project can easily be achieved in a relatively short amount of time – why not give it a try? Good luck! [2], [3]
FAQ
Does the Arduino have an accelerometer built in?
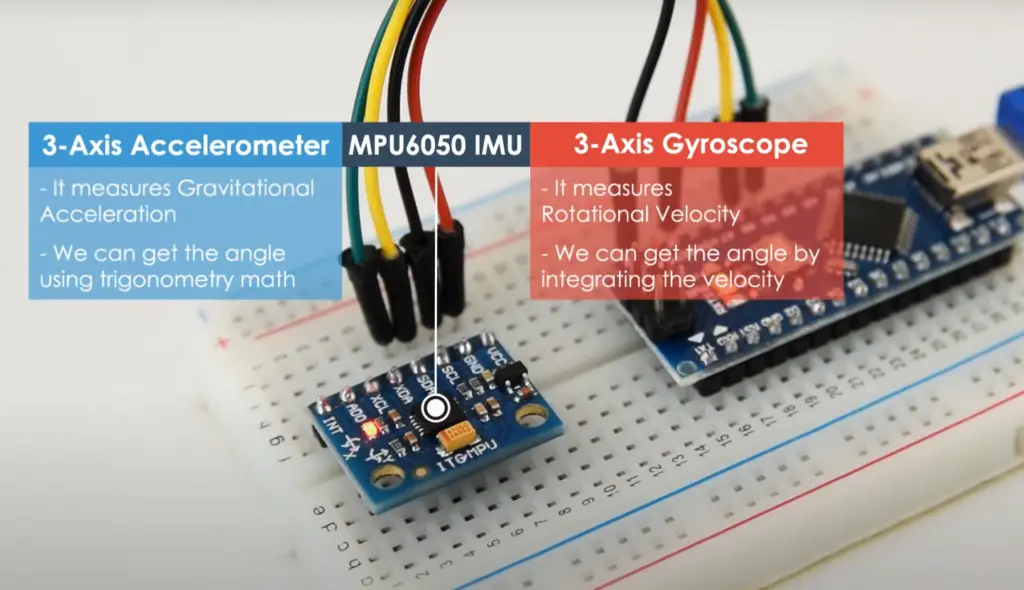
Arduino features the Inertial Measurement Unit (IMU) to measure acceleration, as well as rotation and changes in orientation. IMUs are typically used for motion tracking applications such as game controllers, air mouse devices, pedometers, and more. The Arduino Uno board has a built-in 3-axis accelerometer but the limitation is that it only measures linear acceleration in one direction: forward or backward.
How to use an accelerometer with Arduino?
In order to use an accelerometer with Arduino, you will need to first connect the accelerometer to your Arduino. This can be done by connecting the voltage and ground pins of the accelerometer to corresponding connections on your Arduino board, as well as its SDA and SCL pins for I2C communication. Once connected, you will then need to upload code written in the Arduino IDE onto your board which will allow it to read data from the accelerometer. This code should include instructions for sampling data from the accelerometer at regular intervals and sending it back over serial communication or storing it in memory on the board.
Once this is done, you can begin making use of this data to complete your projects. For example, if you are creating an Arduino-based robotic vehicle, you could use the accelerometer’s data to help it adjust its speed and direction. You can also use this data to measure the angle of incline or acceleration of a vehicle, as well as detect when it has been rotated in any direction. Additionally, you can use an accelerometer to measure movement within a 3D space, allowing for complex tracking applications such as virtual reality or robotics.
To find out the proper way to use an accelerometer with Arduino, it is important to consult the documentation that comes with the sensor you have purchased. This will provide details on how to configure and connect the device, as well as any libraries or programming examples which are available for your particular model. Additionally, there are a number of online resources which can provide more detailed instruction on using an accelerometer with Arduino.
What does an accelerometer do in Arduino?
It works by detecting changes in force, such as when a car brakes or takes off. In Arduino projects, this means that an accelerometer can be used to measure both linear and angular velocity. Additionally, some accelerometers provide tilt sensing which can detect the angle of inclination relative to the ground.
The most common application for an accelerometer in Arduino projects is motion-sensing; it can be used to detect movement and calculate speed, direction, and distance traveled (in 2D or 3D space). This capability makes them ideal for robotics projects where precise navigation is a requirement.
By combining data from more than one axis on the X, Y and Z planes, it is possible to measure acceleration in all directions. This makes the accelerometer an ideal tool for creating DIY projects where motion sensing needs to be tracked accurately. Furthermore, some accelerometers are capable of detecting vibration levels which can be used in a variety of applications such as monitoring machine health or controlling audio volume.
How to read data from the accelerometer in Arduino?
Reading data from the accelerometer in Arduino can be done using various programming methods. The most common way of doing this is to use a library called Wire, which allows you to communicate with I2C devices. You can then create an object that represents the accelerometer and read its values by calling functions such as `readX()`, `readY()` and `readZ()`. Additionally, you may need to set up the correct range for the sensor before taking readings.
Another method is to use interrupts, which allow your program to respond when certain events occur. For example, if an acceleration threshold is exceeded or a free-fall event occurs, you could call a function that performs some action like turning on an LED.
What is the difference between ADXL335 and adxl345?
The ADXL335 and ADXL345 are both three-axis accelerometer chips manufactured by Analog Devices Inc.
The main difference between the two chips is that the ADXL345 has a 25uA, while 335 is rated for 330uA, during operation. Additionally, 335 has three pins (X, Y, Z) while the 345 has eight. This means both accelerometers are solid devices that measure static and dynamic acceleration, but the ADXL345 is much more advanced.
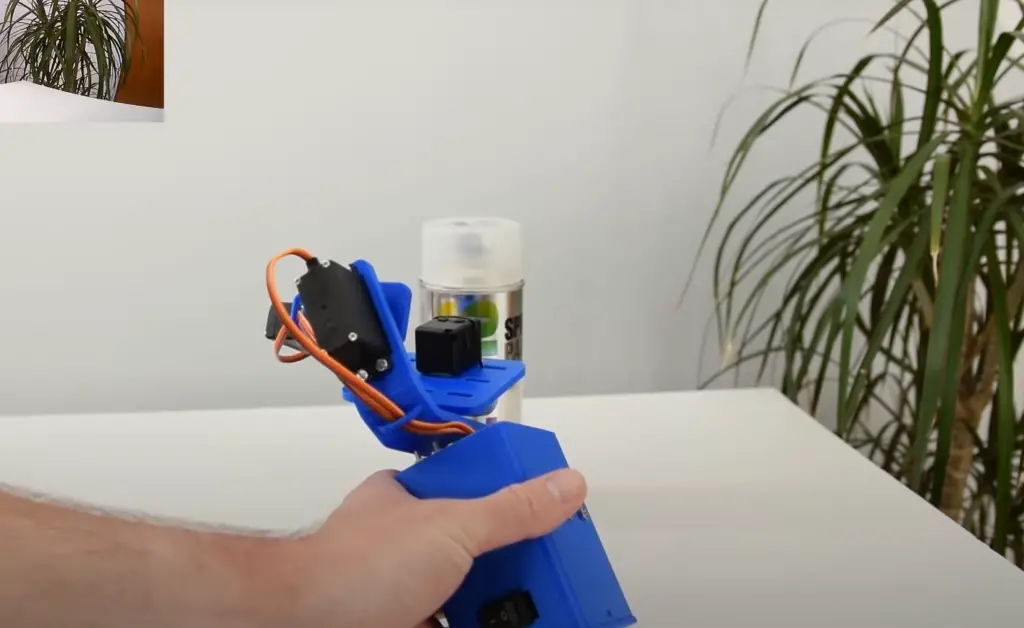
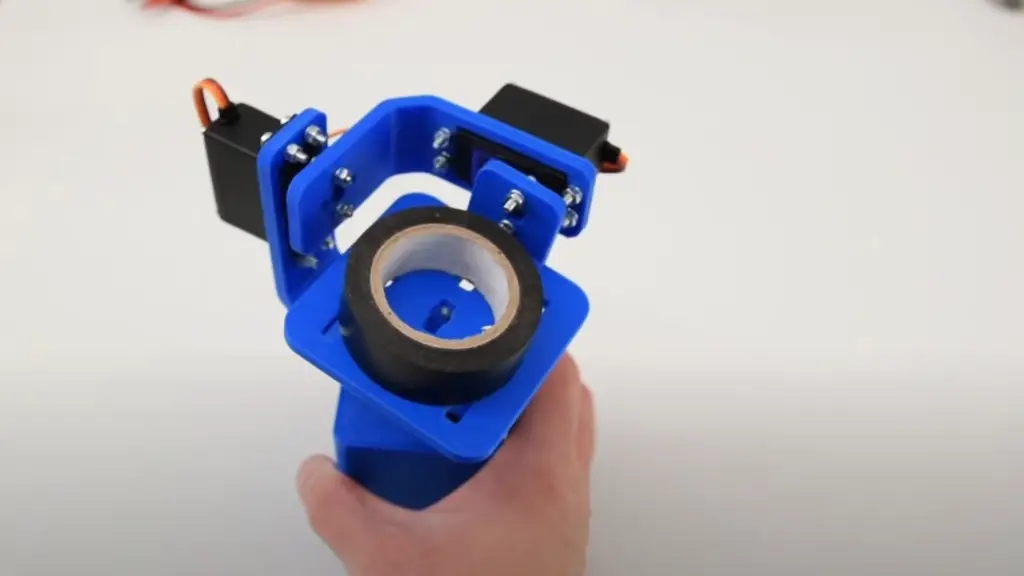
Useful Video: DIY Gimbal | Arduino and MPU6050 Tutorial
Conclusion
Arduino is a powerful and versatile platform that can be used to create a wide range of accelerometer-based projects. Arduino accelerometers are a great way to add motion detection capabilities to a project. This article has explored the basics of accelerometers, how they work and what kinds of projects you can create with them. We’ve also looked at some of the most popular Arduino accelerometer projects out there, as well as ways to build your own custom project.
With a little bit of experimentation, you can create all sorts of interesting projects using acceleration data! Try creating an auto-balancing robot or designing a game controller that uses hand movements as inputs. No matter what type of project you’re interested in, there’s sure to be something you can do with an Arduino accelerometer. Good luck and happy building!
References
- https://learn.sparkfun.com/tutorials/what-is-an-arduino/all
- https://www.hackster.io/edwardthe/mouse-using-arduino-mpu-6050-accelerometer-sensor-4cc715
- https://circuitdigest.com/microcontroller-projects/accelerometer-based-hand-gesture-controlled-robot-using-arduino