Arduino is a powerful open-source platform that enables developers to create sophisticated IoT projects with relative ease. If you’re just getting started with Arduino, or if you’re looking for some new ideas, this guide is for you. In it, we’ll provide an overview of the Arduino platform and show you how to get set up. We’ll also discuss a few common Arduino IoT projects and offer tips on how to get the most out of them. So whether you’re a beginner or an experienced developer, Arduino IoT Projects: Your One-Stop Shop for All the Information You Need has something for everyone!
Arduino in General
It makes use of simple, low-cost hardware and a programming language based on the popular Processing language. It’s easy to use design allows even beginners to quickly get started building their own projects. Arduino can be used for many applications, from robotics and automation to wearable technology and interactive art.
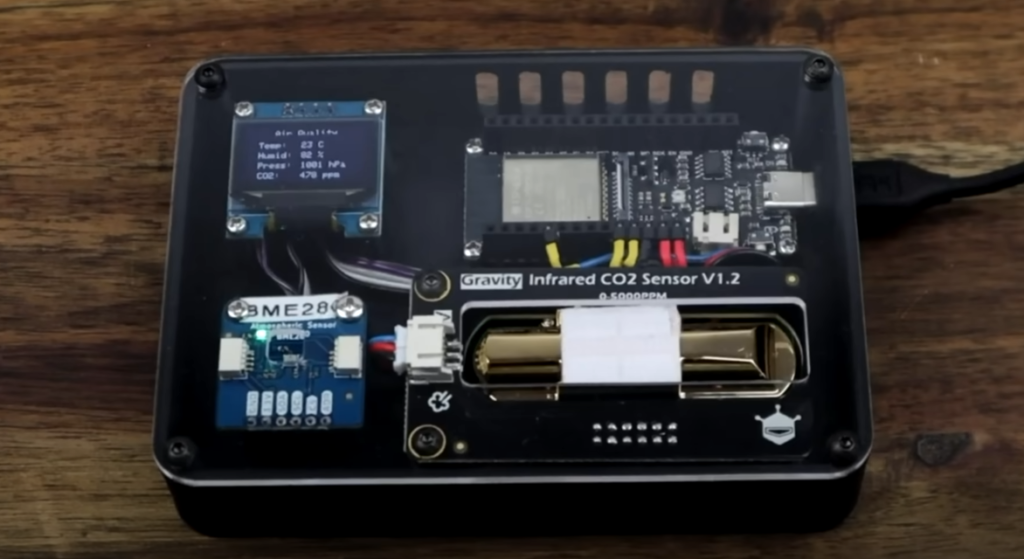
Arduino boards are composed of a number of digital input/output pins that allow connection to external hardware components such as sensors and actuators. These can be used to detect motion, measure temperature or light levels, control robotics or motors, etc. The programming language is designed specifically for Arduino development and provides basic commands for accessing the input/output pins, reading sensor values, sending output signals to connected devices etc. It also supports libraries which extend the scope of what can be done with Arduino even further.
The main advantage of using an Arduino board is its flexibility and versatility. It can be adapted easily to fit many different kinds of projects, making it an ideal choice for beginners. It is also quite easy to use and requires a minimal amount of coding knowledge, allowing users of any skill level to get started quickly. Additionally, it has a large online community and support network which provides plenty of resources and help when needed. [1]
The Impressive IoT Capabilities of Arduino
The most impressive thing about Arduino IoT projects is that they are extremely capable, even though the hardware and software used for them is relatively simple. The basic platform of an Arduino enables it to be programmed with a wide range of functions, from basic communication protocols like WiFi and Bluetooth, to complex data analysis algorithms.
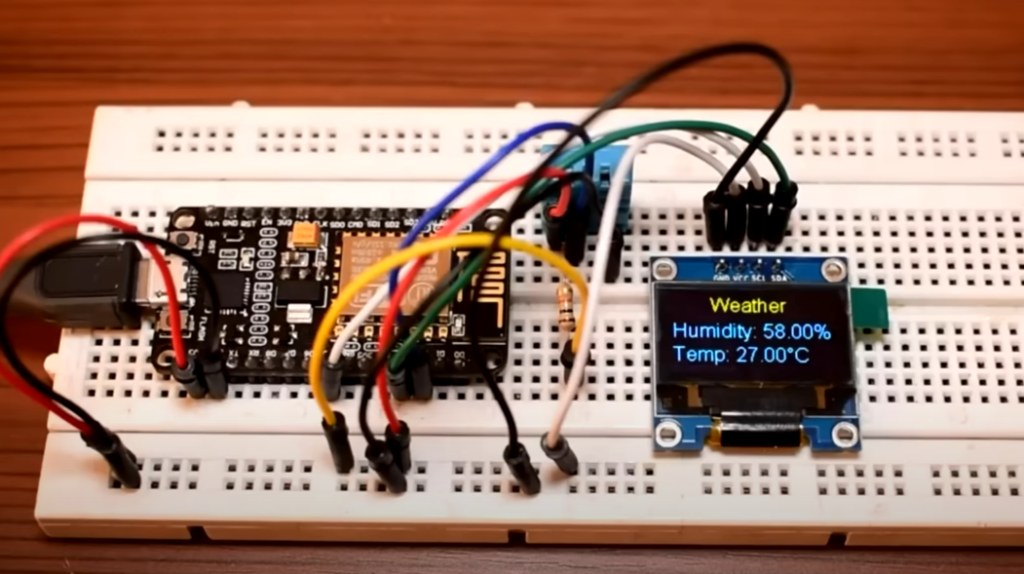
Arduino IoT projects can be used for a multitude of applications, ranging from home automation systems to smart agriculture solutions. For example, you can use an Arduino connected to sensors such as temperature or humidity sensors to monitor conditions in your house or garden. You could also monitor air quality and track energy consumption by connecting an Arduino to devices like air purifiers and thermostats.
Additionally, the Arduino’s capability isn’t limited to collecting data from sensors. It can be used as a powerful platform for controlling other devices, such as motors and LED lights. With smart programming, you can create complex projects that combine sensors with actuators (such as motorized robots) or even use the Arduino to control 3D printing systems.
In addition to its impressive capability, another great thing about Arduino IoT projects is their versatility – since they are open-source and have a large user base all over the world, it’s easy to find tutorials and resources that help with creating any kind of project imaginable. This makes it surprisingly simple to build anything from basic home automation systems to complex industrial solutions.
Best Arduino IoT Projects
Now that you have an understanding of the basics of Arduino for IoT development, let’s take a look at some of the best projects that you can create.
Energy Bill Monitoring
Monitoring your energy bills is now easy with the help of Arduino IoT projects. With a few simple steps, you’ll be able to create an automated system that records and monitors your energy usage and sends data directly to your smartphone or computer.
To start, you’ll need:
- Arduino Cloud IoT.
- Arduino Create Agent.
- Arduino Modbus library
- Arduino® MKR WiFi 1010 board.
- Arduino® MKR 485 Shield.
- Finder Type 7E.64 Energy Meter.
- Twisted single pair shielded cable.
- Micro USB cable.
Energy meters are one of the most valuable components in any home monitoring system. They measure the amount of energy consumed by a given appliance or device, such as an air conditioner, refrigerator, oven, etc., and can be used to monitor energy consumption over time. With the right project setup, you can monitor your energy bills in real-time and track how much electricity you’re using throughout the day.
The first thing you need to do is connect an energy meter with the breaker box in your home. Install the meter using an appropriate current transformer, and according to the color convention. Remember, that at this step you will be working with electricity so make sure to use caution.
Next, connect the energy meter and our MKR WiFi 1010 board. The MKR WiFi 1010 board acts as a bridge between the energy meter and our Arduino Cloud IoT. The RS-485 conventions say that the places where the wires go are called A, B and COM. People usually call the TX+/RX+(or D+) terminal B (high for mark) and the TX-/RX-(or D-) terminal A (low for mark).
Now it’s time to install the MKR 485 shield. Connect the red cable to Y terminal and the white cable to Z terminal, the brown cable (COM) must go into ISOGND terminal. In order to achieve half-duplex communication, we must set the second switch OFF (2 to OFF) and third switch ON (3 to ON): The first one does not have a role in this form of communication. Furthermore, the third switch is responsible for setting up termination–a resistor which links both data terminals together and suppresses interferences.
Finally, connect the MKR 485 Shield and the MKR WiFi 1010 board. We will be using a micro USB cable. Now it’s time to connect the energy meter to Arduino Cloud IoT. To do this, we’ll use the Arduino Create Agent.
Once you’re in the Arduino Cloud IoT, add your device and create an account. On your PC, install the Arduino Create Agent and connect the Wi-Fi board to the computer. Use the agent to configure the device and connect it to your Arduino Cloud IoT account. Once you have done this, go to the configure thing page and add the variables to your project. Finally, you need to provide valid credentials for your energy meter and establish a connection.
Now it’s time to write a sketch in order to read data from our energy meter.
After uploading your code to the board, you should head to the ‘Dashboard’ and visualize your energy meter data. You can also use it to find out which appliances in your home are consuming the most energy and set up alerts when it reaches a certain level. Proceed to link all the variables you previously added to the dashboard and select ‘Actuate’ if you want to control any of your devices as well
By using the Arduino Cloud IoT, you can now view your energy bills and monitor your data in real-time from anywhere. You can also set up alarms and notifications that alert you when certain thresholds have been reached.
You now have a full-fledged IoT system that not only monitors your energy consumption, but also allows you to remotely control it from anywhere in the world. With this guide, you should be able to create an easy and efficient Arduino IoT project with no prior experience! Good luck on your future projects!
Pushing Data to Google Docs Project
If you want to push data from an Arduino board to a Google Docs spreadsheet, the process is a bit more involved. You will need to create a script that translates your data into something readable by Google Docs and upload it to your Arduino. To do this, you will first need to set up an account with Google and pushingbox.com.
Once you have your account set up, create a google form and a form key. The key is the unique identifier for your form.
Next, go to the pushinbox and log-in using the form factor that you just created. Use the same form key when logging in. To create a custom service, head to My Services and fill out your Google form. Once you submit the response page of your form, simply copy that URL and paste it into the Pushingbox Service URL field. You can give this new service any name you’d like as well as set its method to GET for easy access!
Then, head to the ‘My scenarios’ tab and create a new scenario. In this scenario, you will specify the form key and the response page URL that you just created.
Paste the following into the scenarios field: FORMKEY=$status$&submit=Submit C. Replace the FORMKEY with your own form key.
Finally, click the ‘Add Action’ button and receive your Device ID. Copy this Device ID and remember it for later use in the code.
Speaking of which, now it’s time to code your Arduino board.
The code needed to upload data to the Google Docs spreadsheet is slightly complex, but you should be able to do it with the help of some tutorials and documentation.
#include
#include
#include
#include
#include
#undef int
#undef abs
#undef double
#undef float
#undef round
dht11 DHT11;
#define DHT11PIN 3
byte mac[] = {0xAA, 0xBB, 0xCC, 0xDD, 0xEE, 0xFF }; //Replace with your Ethernet shield MAC
byte ip[] = {123,456,7,890}; // Your Arduino device IP address
char devid = v42FE15BC09B20df // THIS IS THE DEVICE ID FROM PUSHINGBOX
int del=300; // Amount of seconds delay between posting to google docs.
char postmsg[100];
int k=0;
int temp_av = 0;
char server[] = “api.pushingbox.com”;
EthernetClient client;
void setup()
{
Serial.begin(9600);
Ethernet.begin(mac, ip);
delay(1000);
Serial.println(“connecting…”);
}
void loop(){
// average temp reading for ‘del’ time…………………………………..
for(int j=0; j<del;j++)
{
// Read local temp………………………………….
int chk = DHT11.read(DHT11PIN);
int temp = Fahrenheit(DHT11.temperature);
temp_av=temp_av+temp;
delay(1000);
}
int avtemp=temp_av/(del);
temp_av=0;
// Post to Google Form………………………………………
if (client.connect(server, 80))
{
k=0;
Serial.println(“connected”);
sprintf(postmsg,”GET /pushingbox?devid=%c&status=%d HTTP/1.1″,devid,avtemp);
client.println(postmsg);
client.println(“Host: api.pushingbox.com”);
client.println(“Connection: close”);
client.println();
Serial.println(postmsg);
Serial.println(“Host: api.pushingbox.com”);
Serial.println(“Connection: close”);
Serial.println();
delay(1000);
client.stop();
}
delay(1000);
if (!client.connected())
{
Serial.println();
Serial.println(“disconnecting.”);
client.stop();
k==1;
return;
}
}
double Fahrenheit(double celsius) // Function to convert to Fahrenheit
{
return 1.8 * celsius + 32;
}
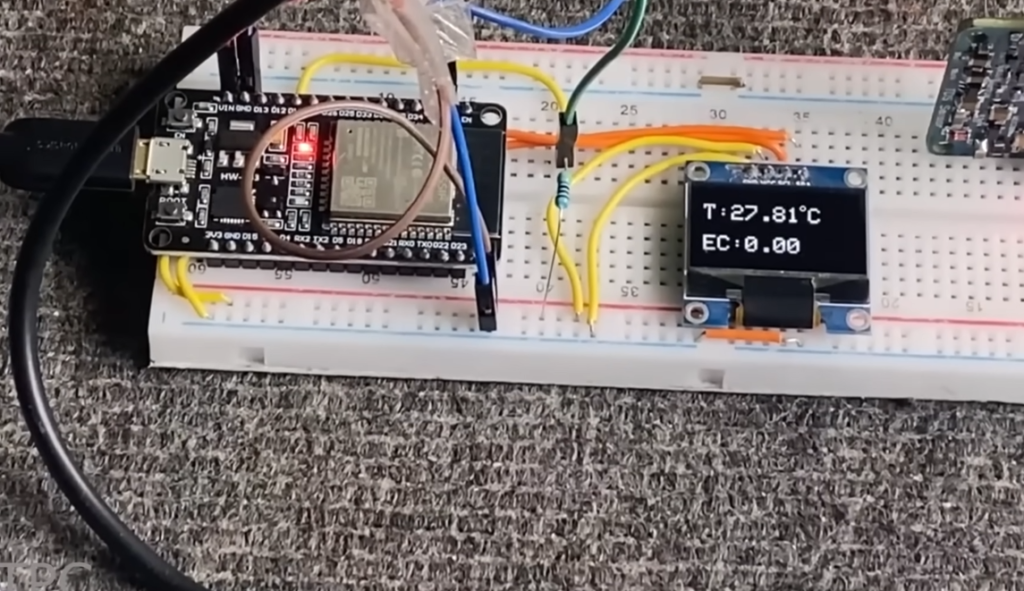
Once your code is ready, compile it and upload it onto your board. Then, open up the Google Docs spreadsheet linked to your form and you should see all the data from your Arduino project uploaded in real-time. [2], [3], [4]
FAQ
Can we use Arduino for IoT projects?
Yes, Arduino boards are widely used to develop IoT projects. They offer the perfect combination of affordability, flexibility, and power to create a range of different projects. With an Arduino board, you can easily connect components like sensors and actuators to transmit data over networks or wireless protocols. This makes it possible to monitor environmental conditions or control devices remotely.
Arduino also offers support for many communication protocols such as WiFi, Bluetooth Low Energy (BLE), 3G/4G cellular networks and Ethernet, which add even more flexibility when designing IoT projects. Furthermore, the vast number of libraries available for different types of sensors and connected components make it easy to quickly get started with building an IoT project using Arduino.
What is an Arduino in an IoT example?
Arduino in IoT (Internet of Things) is an example of using Arduino microcontrollers to create a networked system to control and monitor various components. By connecting sensors, actuators, and other devices, you can create an interconnected web of data exchange within your home or workspace. With its superior processing power, lightweight hardware design and open-source software platform, Arduino makes it easy for makers and hobbyists alike to get started with the Internet of Things.
For example, using an Arduino microcontroller board allows you to make automated systems that detect movement or temperature changes in your home. The sensor readings can then be sent over a wireless connection to the internet where they can be accessed by a website dashboard or mobile app. This allows you to monitor and control your home environment remotely.
Other Arduino IoT projects include creating a smart irrigation system, setting up an automated pet feeder and making door locks that can be opened with voice commands. With the right components and programming skills, you can develop almost any kind of internet-connected device using Arduino.
What are some good IoT projects?
There are many interesting projects that can be developed using Arduino and IoT. A few of the most popular include home automation, weather monitoring, robotic arms, and GPS tracking systems.
With the right components, such as a Wi-Fi module or Bluetooth BLE shields, it’s possible to design an automated system that can control various appliances in your home from anywhere you have Internet access. Some examples of what could be automated include lighting systems, air conditioning units, security systems, and even curtains or blinds.
How is Arduino useful for IoT development?
Arduino is a popular open-source platform for creating Internet of Things (IoT) projects. It is an easy-to-use and cost effective development platform that simplifies the process of programming and connecting hardware to the internet. Arduino provides a wide range of sensors, actuators, communication mechanisms, storage options, and other components that can be used to create IoT projects quickly. With its user friendly software libraries and well documented tutorials Arduino makes it simple to start developing your own IoT project from scratch.
The most basic application of Arduino in an IoT project involves sensing data from an environment such as temperature or humidity levels and passing this information over the internet for remote monitoring purposes. Additionally, with more complex configurations you can even control devices from the internet, such as switching on a light or setting the temperature in a room.
Another great advantage of Arduino for IoT development is its flexibility and scalability. With Arduino, it is possible to create customized solutions for your project since you have access to all of the underlying components and code.
Useful Video: 15 Brilliant IoT Projects for Beginners
Conclusion
Arduino IoT projects can be complex and time consuming, but the results are rewarding. By understanding the basics of building Arduino IoT projects and having some practical experience with coding and electronics, you’ll be able to build your own internet-connected devices that extend the capabilities of your Arduino boards.
In this article, we’ve gone through the basics of Arduino IoT projects and seen some examples. We’ve also discussed how to choose components, write code, and troubleshoot any problems you may encounter in your projects.
With this knowledge, you can now go out and start building your own Arduino IoT projects! With a bit of practice, you will be able to quickly create internet-connected devices that can help improve your life. Have fun tinkering!
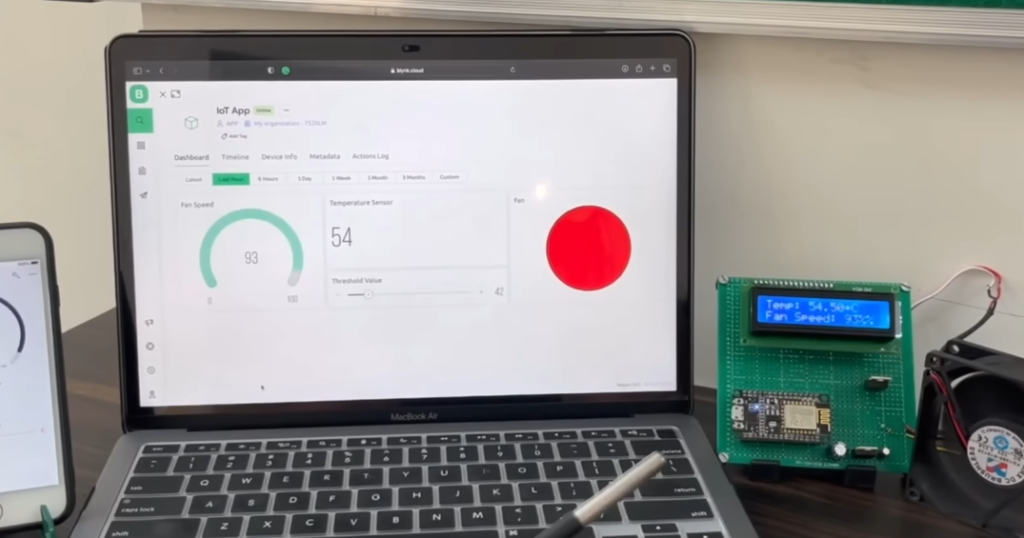
Or if you want to take things a step further, there are plenty of open source libraries and frameworks available for use with Arduino boards such as ESP8266/ESP32s or Raspberry Pi’s. From controlling robots remotely with Blynk or Home Automation
As always, practice makes perfect – start small, then move on to more complicated projects once you have a good handle on how everything works. With the help of this guide, you now have all the information necessary to get started creating amazing Internet of Things projects with Arduino!
Good luck and happy tinkering!
References
- https://learn.sparkfun.com/tutorials/what-is-an-arduino/all
- https://www.watelectronics.com/arduino-projects/
- https://docs.arduino.cc/arduino-cloud/tutorials/modbus-energy-meter
- instructables.com/Post-to-Google-Docs-with-Arduino/






Leave a Reply