
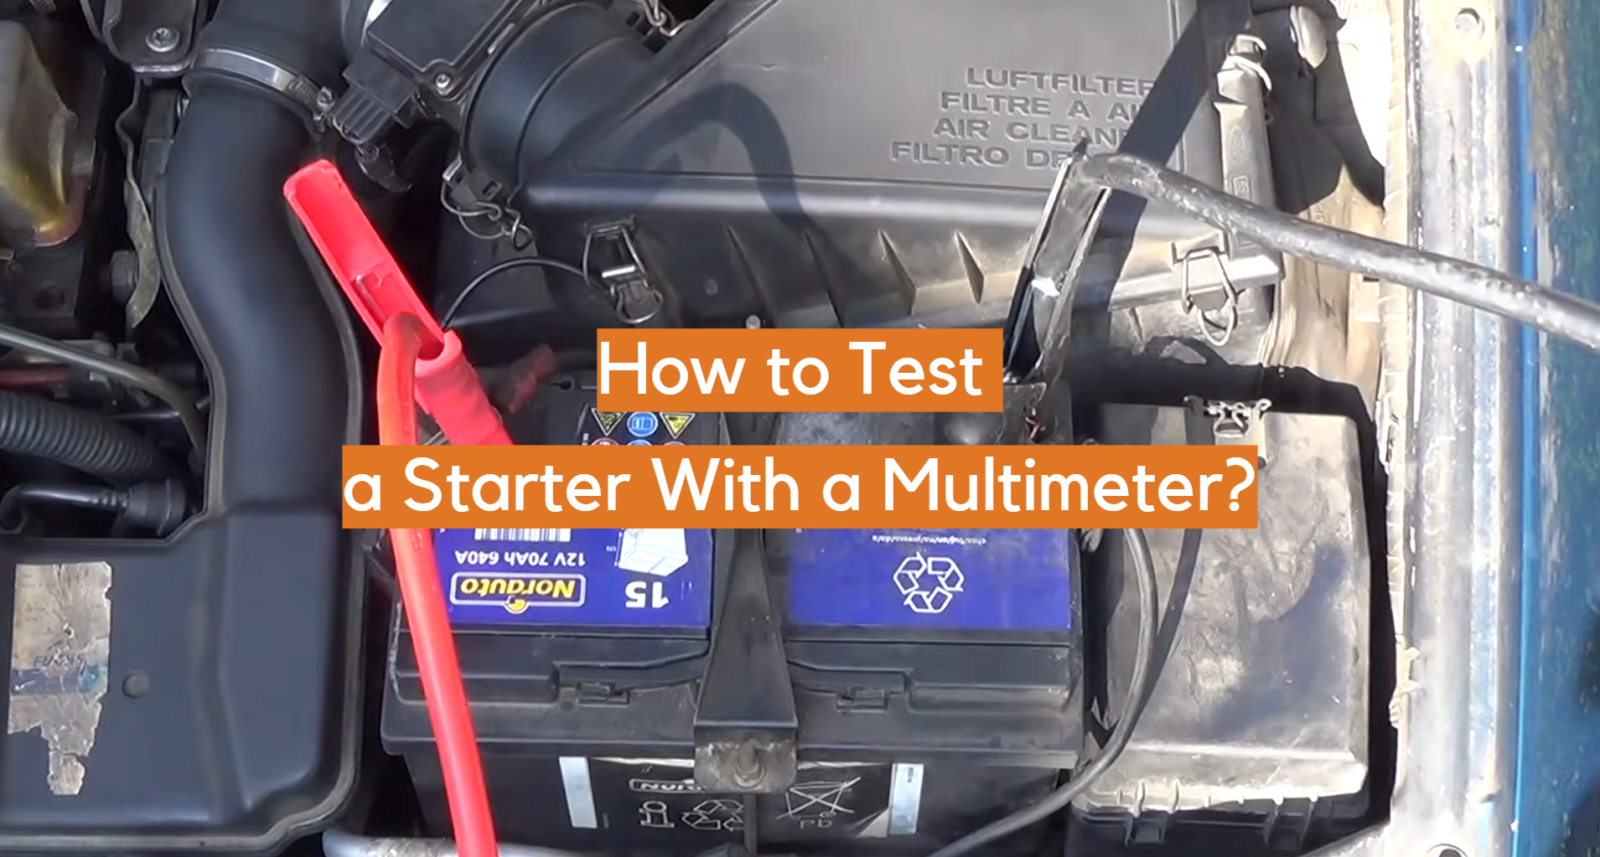
Have you ever puzzled over how to check the condition of a starter using a multimeter? If so, then this blog post is for you! In this post, we’ll walk through the process of testing a starter with a multimeter, step by step. We’ll also provide some tips on troubleshooting starters that may not be working properly. So if you’re ready to learn more about how to test a starter with a multimeter, read on!
What Is a Multimeter?
Do you need to measure multiple electrical values such as amperage, voltage, resistance or capacitance? Then a multimeter (also known as a multitester) is the device for you! This versatile tool can easily and quickly assess any of these values with just one unit. The meter may also be used to measure other values such as temperature, frequency and continuity.
How to Test a Starter Solenoid with a Multimeter
- Step 1: Locate the starter solenoid. It is usually found near the starter motor on the engine block.
- Step 2: Connect the positive and negative leads of the multimeter to the corresponding terminals on the solenoid. Generally, these are marked with a “+” and “-” sign respectively. Make sure that your meter is set to measure in Ohms (Ω) or resistance readings.
- Step 3: Turn the ignition key to start position while holding down the brake pedal. This will activate the starter solenoid’s electromagnetism, which should pull its plunger inwards when current flows through it from the battery power supply. The meter reading should change from infinity (no electricity flowing) to a low resistance as the plunger closes.
- Step 4: If the meter reading does not change, then starter solenoid is malfunctioning. In such cases, it should be replaced with a new one.
- Step 5: Once you have confirmed that the starter solenoid is working properly, disconnect your multimeter leads and return the ignition key to “off” position before further testing or repairs. This will ensure that no electrical current flows into other components of the vehicle’s starting system.
These steps demonstrate how to test a starter solenoid with a multimeter in order to troubleshoot any potential issues with your vehicle’s starting system. With this knowledge, you’ll be able to easily identify any issues that may be preventing your vehicle from starting properly.
Note: If you are unfamiliar with how to use a multimeter, please consult an experienced mechanic or refer to the user manual before attempting these steps. Doing so will ensure that all tests are conducted safely and accurately. Additionally, if the starter solenoid is found to be defective, always replace it with one of the same make and model for better performance. This is important as a mismatched part can cause further damage in the long run. [2]
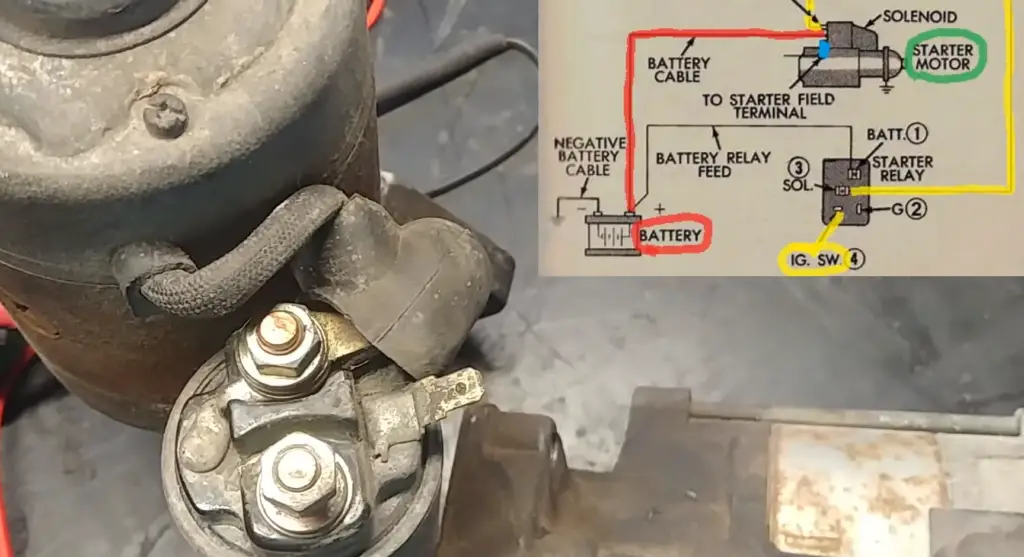
Bench Test a Starter Motor with Solenoid
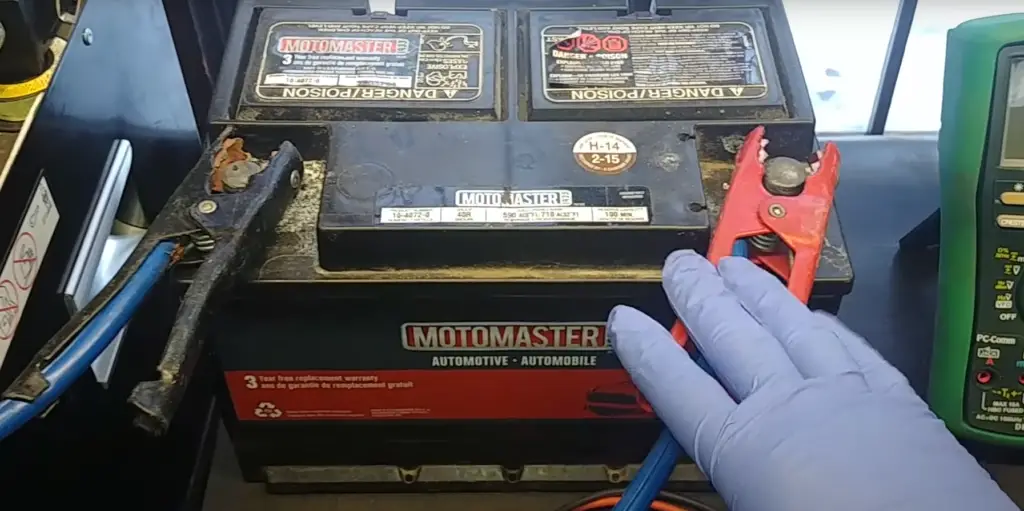
To test a starter motor with a multimeter, the initial action is to connect the meter probes to the solenoid. The two posts on the solenoid are labeled “S” and “B”. Connect one lead of your meter to B (battery) and the other lead to S (starter). Turn your multimeter setting to Ohms. If you get a reading that shows continuity between B and S, then your starter motor is working properly.
Next, disconnect the battery cables from both ends of the starter motor’s solenoid. Reconnect them both on the same side (positive or negative). Place your meter leads across both battery cable terminals, if there is still continuity between the two, then your solenoid is working properly.
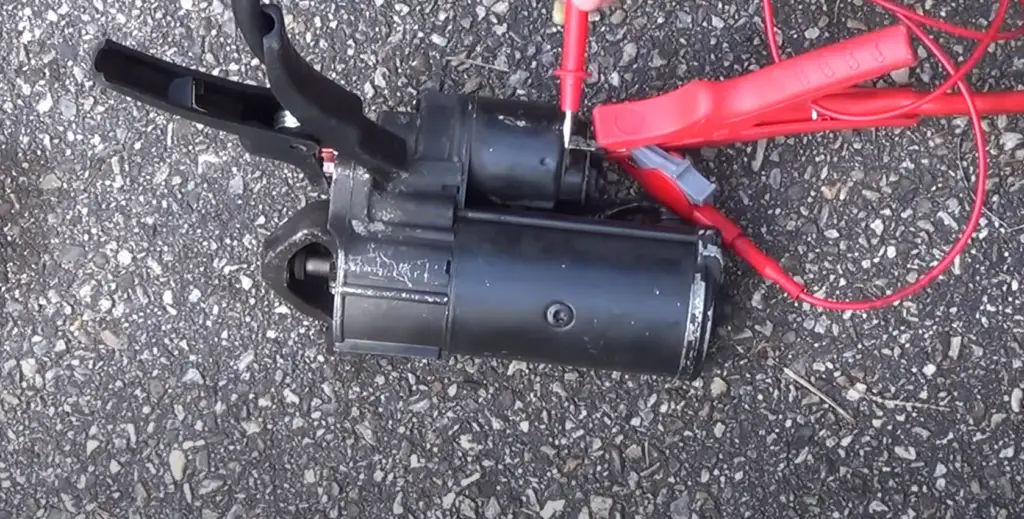
Finally, if you want to check the actual starter motor, attach one meter lead to the battery post of the starter and the other lead to a ground on the engine block or another good ground source. If you get continuity, then your starter motor is functioning correctly. However, be sure to disconnect all leads when testing the starter because leaving them connected can damage it.
Bench Test a Starter Motor without Solenoid
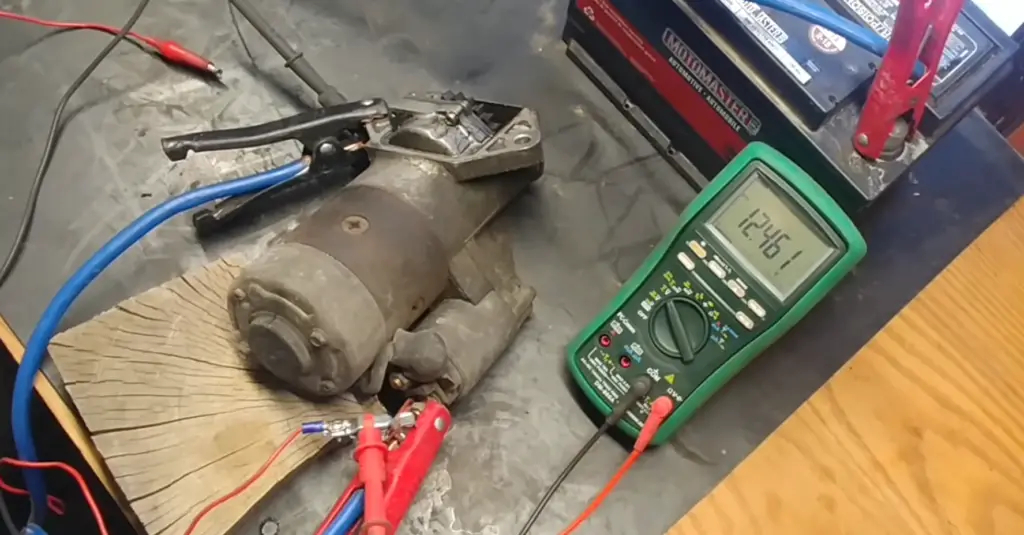
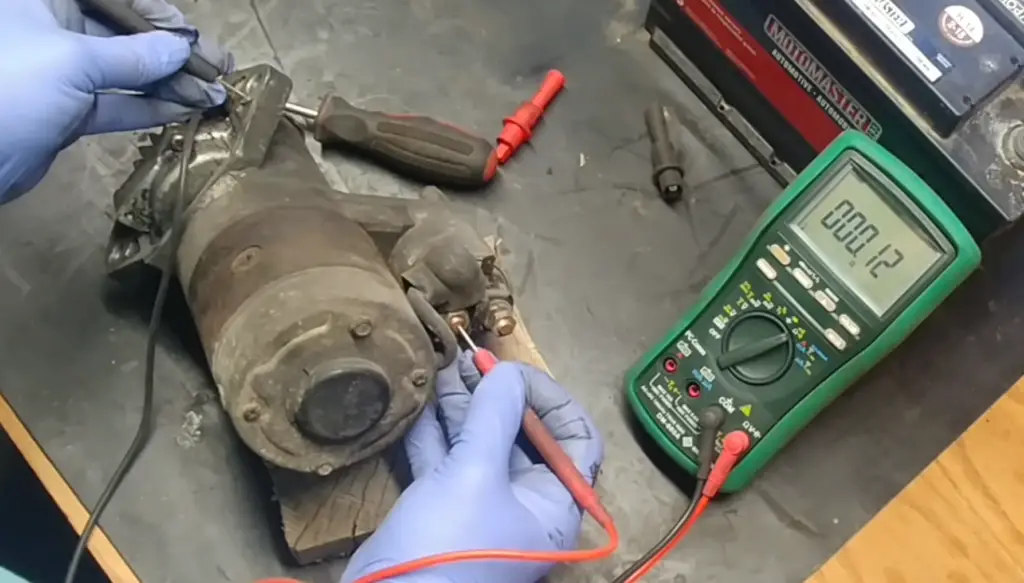
If your starter motor isn’t connected to a solenoid, you’ll need to bench test it. To do this, make sure the starter is grounded properly and then connect the multimeter across its terminals. Set the multimeter to measure voltage and turn the key in the ignition far enough for the starter motor to engage. The voltage should read 12V or close when tested like this. If not, check your connections as there may be an issue with grounding or wiring somewhere along the line.
You can also run continuity tests across specific components in order to search for potential problems in individual parts of the system. Make sure all cables are secure and free from corrosion before doing these tests. Once you’ve done that, take readings from each point and compare them with the manufacturer’s specifications. If any of the readings don’t match, this may indicate a faulty part and should be replaced.
Finally, if everything appears to be in order, turn the key again and listen for any unfamiliar noises coming from the starter motor. If it makes an odd sound, this could mean that it needs to be serviced or repaired. In such cases, taking it to a professional is often recommended as they can more accurately diagnose the issue and make proper repairs without causing additional damage. [3]
Causes of Starter Failure
There are several different causes of starter failure. Commonly, an issue may be caused by a faulty battery or poor connections between the battery and other components. In some cases, the starter itself may be malfunctioning due to age or wear and tear. Corrosion can also lead to starter problems, as can worn out brushes or armatures within the unit itself. Lastly, low levels of engine oil can cause excessive heat buildup in the starter motor, leading to a breakdown in its performance over time.
It is important to take note of any signs that your starter motor could be failing before it is too late, as this can be a costly repair if left unchecked. Be sure to also have your vehicle serviced regularly to ensure that all of its components are working correctly and up-to-date. This will help you avoid any major issues in the future and keep your car running smoothly!
Points to Consider Before Performing Voltage Drop Test
Before attempting the voltage drop test, ensure that the following points are taken care of:
- Ensure your multimeter is set to the correct DC volts setting (usually 20V). Also make sure that you have good clean battery cables and fuses before proceeding.
- Make sure all electrical connections are securely tightened when testing. Loose wires can lead to faulty readings and inaccurate results.
- When testing a starter with a multimeter, it is important to use insulated pliers or gloves when connecting the meter probes as there may be a risk of electric shock due to exposed metal parts or wires on the starter motor.
- Once the proper connection has been made between the two probes, turn the key in the ignition to activate the starter motor.
- Make sure that you keep a steady eye on the multimeter and record any drop in voltage when the starter motor is engaged.
- It is important not to leave the probes connected for too long, as this may cause damage to both your car battery and starter motor.
- If no voltage drop is detected, then it could be a sign of a faulty starter motor or poor electrical connection between components of the circuit. In these cases, it may be necessary to replace or repair parts of the circuit before further testing can be done.
Following these simple points will help ensure that voltage drop tests are accurately performed and maintained in order to find any possible faults and resolve them quickly. [4]
Checking the Voltage Drip of the Ground Level of the Starter Motor
Once the battery and starter are both connected to the multimeter, it is time to check the voltage drop at the ground level of the starter motor. This step ensures that there is no current leaking out of the starter motor when it is in its operation mode. To do this, first connect the red lead of a multimeter to one side of the starter motor’s ground terminal, and then touch the black lead to other sides of terminals on both sides of the ground terminal.
Finally, finish testing by connecting back up wires and re-installing the starter motor in its place. It is important to check all connections before finally putting everything together.
Checking the Voltage Drip of the Positive End of the Starter Motor
To test the voltage drip of the starter motor, begin by connecting one end of the multimeter to the positive terminal of the battery. Then connect the other end of the multimeter to a good ground point on your vehicle such as an unpainted metal surface or negative terminal of another battery. Set your multimeter to read DC Volts and turn the key in ignition while watching for any drop in voltage reading. The acceptable range should not exceed 0.3 volts. It is over this then you know there is a problem with your starter motor.
Additional Testing
If there aren’t any visible signs of wear or damage on your starter motor and you have tested the voltage drop but still suspect an issue then additional testing may be required. This includes checking the starter motor’s solenoid and testing the continuity of your ground connection. Both these tests should be performed with a multimeter set to measure resistance between two points.
The Procedure of a Voltage Drop Test with Multimeter
- Connect the multimeter to the starter’s positive and negative terminals. Set the meter to its lowest DC voltage setting.
- Have someone turn the ignition key off then back on while you measure the voltage drop between the starter’s terminals. The voltage should not drop more than one volt from its original reading after being turned on. If it does, this indicates a problem with either your battery or starter motor.
- Turn off the ignition switch and check for any corrosion or damage to either terminal post as well as in-line cables connecting them together. Corrosion or other signs of damage can cause resistance which may lead to an inaccurate result in your test measurement readings.
- If no signs of damage are present, disconnect the meter from the starter’s terminals and reconnect it to the motor’s ground terminal as well as its positive battery cable.
- Have someone turn on the ignition key again while you measure voltage drop between these two points. This time, if the voltage drops more than one volt, this indicates a problem with either your battery or starter motor.
- Once you have finished testing for both conditions, switch off all power to the vehicle, properly disconnecting any wiring attached to the multimeter before doing so. If you see that your readings come back negative in any of these tests then further investigation may be needed to determine what is causing this issue such as running a compression test or checking for worn-out components.
- If everything tests out okay and no signs of corrosion or damage are present then your starter should be in good working condition and you can move on to troubleshooting other potential issues with the vehicle.
The voltage drop test is a great way to quickly diagnose any potential issues with your starter, as well as check its overall health. And don’t forget to always take proper safety precautions when doing electrical work and testing! [5]
More Tips On Troubleshooting Starters With a Multimeter
- Check the battery first: Even before attaching a multimeter, check that the battery is charged and functioning properly. If it isn’t, the starter may be getting insufficient power to operate.
- Identify which circuit you are testing: To accurately troubleshoot your starter with a multimeter, identify which circuit you need to test in order to access what section of your vehicle’s electrical system you will be working on (i.e., engine/starter/ignition).
- Set the dial correctly: Your multimeter should have several settings specific for DC voltage or resistance tests that must be set prior to using them. Make sure you select the correct setting for the type of test you are performing.
- Pay attention to your readings: As you take readings while testing, note any abnormal results that could indicate a short circuit, open circuit, broken wire or other problem.
- Make sure all connections are secure: When connecting the multimeter to both terminals and the starter’s battery post, make sure there is a good connection otherwise your reading may be inaccurate. Make sure all connections are clean and tight before taking any readings.
- Clean up after yourself: After completing the test, disconnect everything in reverse order and ensure that all connections are tight and sealed off properly in order to prevent corrosion buildup over time. Any tools used should also be cleaned and stored away properly.
By following these tips, you can ensure accurate readings and effective troubleshooting when using a multimeter to test a starter. However, if the problem is still not identified or unable to be repaired by yourself then it’s best to take your vehicle to a professional mechanic for further examination. This will prevent any potential risks and keep you safe while performing such tasks.
FAQ
What is the best way to test a starter?
The best way to test a starter is with a multimeter. This device allows you to measure resistance, current, and voltage in order to troubleshoot electrical components. Before testing the starter, make sure the battery is fully charged and all connections are clean and secure. Once the multimeter is properly connected, follow manufacturer instructions for testing using appropriate settings to obtain accurate results.
What are some signs of a bad starter?
When a starter fails it can cause several different symptoms such as slow cranking speed when attempting to start the engine or complete lack of power when turning the key. Strange noises such as grinding or clicking may also be present and often indicate that internal components are failing within the starter motor itself. Finally, if there is a burning smell coming from the battery area, this can indicate that electrical issues are at play.
What should I do if my starter fails?
If your starter fails, it is important to have it inspected by a qualified mechanic. They will be able to determine the root cause of the issue and provide any necessary repairs or replacements. If you decide to replace the starter yourself, make sure you follow all safety precautions and use appropriate tools for the job. Additionally, consult your vehicle’s service manual for instructions specific to your make and model.
What should a starter read on a multimeter?
The readings of a starter will vary depending on the multimeter settings being used and the type of starter. For example, a standard 12-volt battery should measure 12 volts on the multimeter when connected to the starter’s positive terminal. Likewise, resistance readings for various components within the starter should also be checked in order to confirm proper operation.
Are there any precautions I should take when testing a starter?
Yes, it is important to take certain safety precautions whenever working with electrical components. Make sure all connections are secure before beginning testing and disconnect the negative cable from the battery during testing to avoid shocks or short circuits. Additionally, keep away from moving fan blades or other spinning parts as they can cause serious injury or damage to equipment. Finally, always wear protective gear such as gloves, eye protection, and clothing when working with electricity. Doing so will help ensure your safety and the proper functioning of your vehicle’s electrical system.
How many ohms should a starter have?
The number of ohms a starter should have will vary depending on its particular make and model.
To get more exact readings, consult your vehicle’s service manual or contact a qualified technician for further assistance.
What is the normal voltage drop at the starter?
The normal voltage drop at the starter is typically between 0.2 – 0.5 volts. This reading can be taken by connecting the multimeter to both the positive and negative terminals of the starter, ensuring that all connections are secure before testing. If you have any doubts about your results, be sure to consult your vehicle’s service manual or contact a qualified mechanic for further assistance.
Useful Video: How to test your starter motor & solenoid – Starter troubleshooting
Conclusion
Testing a starter with a multimeter is a simple process that does not require any special skills or tools. All that is needed is the multimeter, some basic knowledge of how to read it and a few safety precautions. By following these steps, anyone can quickly and accurately determine whether the starter on their vehicle is functioning properly. This will ensure that cars are running safely, reliably, and efficiently. It also prevents costly repairs from being incurred due to components that are malfunctioning when they shouldn’t be. Taking proper care of one’s vehicle by using tools like this will prolong its life and help keep it running in top shape for years to come!
You should always use caution when working around electrical connections as there is potential for electric shock. If you are at all unsure of what you are doing, consult a professional technician or mechanic to help you diagnose and repair any issues with your vehicle’s starter.
References
- https://electrouniversity.com/how-to-test-starter-with-multimeter/
- https://www.howacarworks.com/ignition-system/checking-the-starter-circuit
- https://meterreviews.com/how-to-test-starter-with-multimeter/
- https://toolsweek.com/how-to-test-a-starter-with-a-multimeter/
- https://www.wikihow.com/Test-a-Car-Starter