In this article, we will explore how to convert a switched outlet into a hot outlet that provides a constant power supply. Switched outlets are convenient for controlling devices with a wall switch, but in certain situations, having a continuous power source is more practical.
Whether you need to power devices that require constant electricity or eliminate the inconvenience of a switched outlet, making this modification is a straightforward process. However, it requires a basic understanding of electrical systems and safety precautions.
We will guide you through the step-by-step process, ensuring you can confidently and safely convert a switched outlet to be hot all the time.
Understanding Switched Outlets
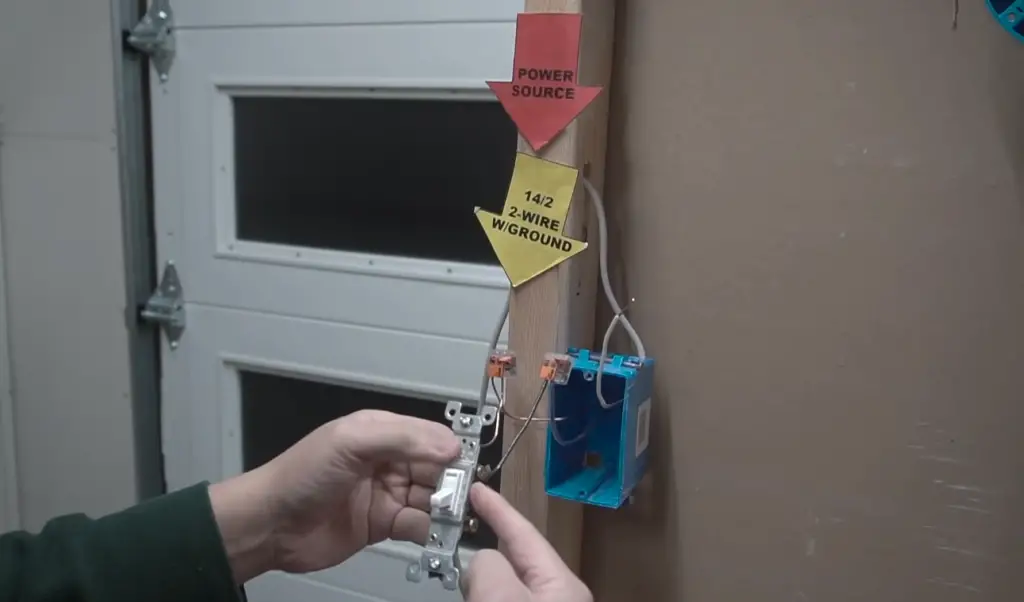
The primary advantage of switched outlets is the ability to control multiple devices from a single switch. For example, you might have a set of decorative lamps or string lights connected to a switched outlet, and you can easily turn them all on or off with a flick of the switch.
This can be particularly useful for lighting arrangements in bedrooms, living rooms, or dining areas, where you might want to create a certain ambiance without having to unplug each device individually.
However, homeowners sometimes encounter confusion when they plug appliances like coffee makers or televisions into switched outlets. These devices are designed to receive a continuous power supply and are not ideal for switched outlets. If mistakenly plugged into a switched outlet, these devices may lose power unexpectedly, disrupting their functions and potentially causing inconveniences.
To avoid such issues, it is essential to identify switched outlets in your living or working space. One way to recognize a switched outlet is by locating the wall switch that controls it. Typically, the switch will be in close proximity to the outlet and may have a label indicating its function. Additionally, some switched outlets have a faint indicator light when they are powered off, helping users to identify them more easily.
If you find switched outlets in your home and want to ensure their proper use, consider the following tips:
- Choose the right appliances: Reserve switched outlets for lamps, decorative lighting, or other suitable devices. Avoid connecting critical appliances that require continuous power to these outlets;
- Add labels: If you have switched outlets that are not immediately apparent, add small labels or stickers near the outlet to remind you and others of their switched nature;
- Seek professional help: If you want to modify or install switched outlets, it’s best to consult a licensed electrician to ensure safety and compliance with electrical codes;
Reasons For Making A Switched Outlet Hot All The Time:
1. Convenience
One of the primary reasons for making a switched outlet hot all the time is convenience. Switched outlets are typically used for lighting fixtures and decorative lamps, allowing users to turn them on or off with ease.
However, when it comes to certain appliances and devices, having a switched outlet can become a hassle. Imagine waking up to a programmed coffee maker that fails to brew your morning coffee because someone accidentally switched off the outlet. This scenario is not only frustrating but also avoidable.
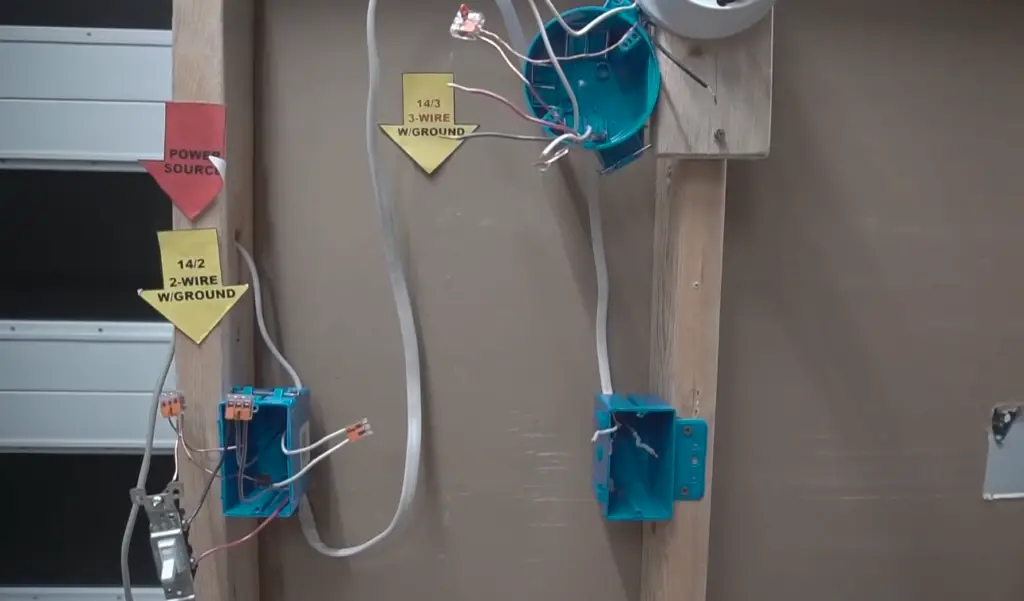
By converting a switched outlet to be hot all the time, you eliminate the need to deal with the wall switch, ensuring uninterrupted power to essential appliances. Devices such as Wi-Fi routers, smart home hubs, and alarm systems rely on continuous power to function correctly. Making these outlets hot all the time ensures that these devices can operate 24/7, allowing you to maintain a connected and functional household without interruptions.
Moreover, having constant power to outlets in workspaces, kitchens, and entertainment areas can simplify daily routines. You won’t need to repeatedly check and adjust the outlet’s switch position or worry about devices unexpectedly turning off. It also reduces wear and tear on the switch mechanism, as it will no longer be frequently toggled.
2. Safety
While convenience is essential, safety should always be a top priority when dealing with electrical systems. Surprisingly, a switched outlet can sometimes pose safety risks, especially if critical appliances are connected to them. Devices that require continuous power, like refrigerators, freezers, or medical equipment, should never be plugged into a switched outlet.
When such appliances are accidentally connected to a switched outlet, they may shut off unexpectedly, leading to potential spoilage of food items or, in medical settings, compromising patient care. This can be avoided by making these outlets hot all the time, ensuring that essential appliances remain powered continuously, without any risk of accidental power interruptions.
Furthermore, safety concerns can extend to dimly lit areas where switched outlets are present. People may struggle to locate and toggle the switch in the dark, leading to accidents and injuries. Keeping certain outlets hot all the time can help prevent these situations and enhance overall safety within the living or working space.
3. Compatibility
The third significant reason for keeping outlets hot is compatibility with specific devices and smart technologies. As the world becomes increasingly connected through the Internet of Things (IoT), many devices are designed to be always on and connected to the Internet. These devices often rely on continuous power to perform essential functions, such as receiving updates, staying connected to a network, or being accessible via mobile apps [2].
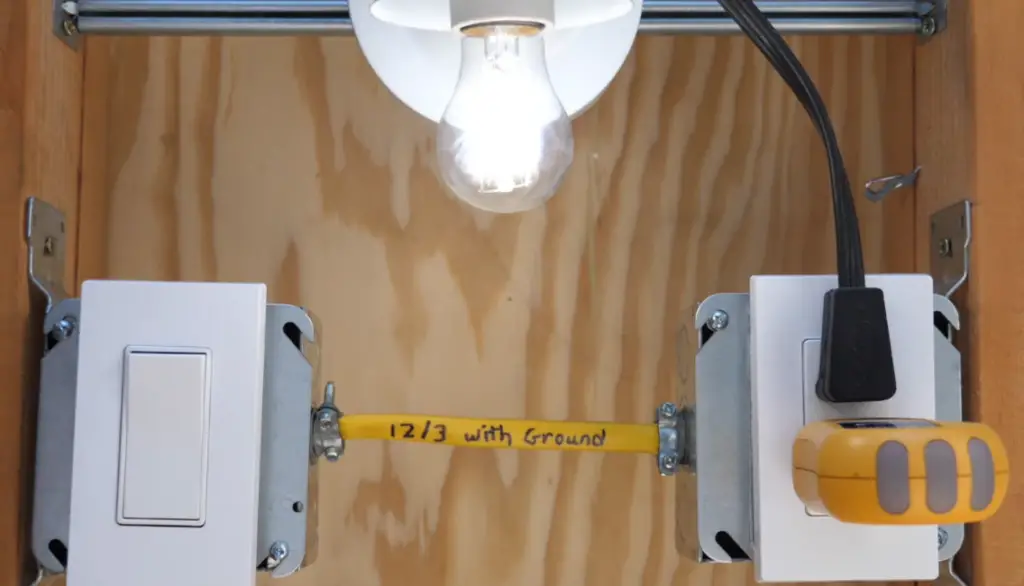
Smart home devices, like security cameras, thermostats, and voice-activated assistants, fall into this category. When plugged into switched outlets, these devices may lose power whenever the switch is off, disrupting their functionality and disconnecting them from the network.
By converting the appropriate outlets to remain hot all the time, you ensure seamless integration and operation of these smart technologies. This is especially critical for home security systems, where any downtime caused by a switched outlet could compromise the safety of the property and its occupants.
Switched Vs Unswitched Outlet
Switched Outlets:
- Purpose and Functionality: Switched outlets are wired to be controlled by a wall switch. When the switch is turned on, the outlet provides power to any device or appliance plugged into it. Conversely, when the switch is turned off, the outlet ceases to supply electricity, cutting off power to the connected devices;
- Convenience: Switched outlets are ideal for scenarios where you want to control multiple devices from a single switch. For example, in living rooms or bedrooms, you might have a set of lamps or decorative lights connected to a switched outlet. With a simple flip of the switch, you can turn all the lights on or off, creating a specific ambiance without having to unplug each lamp individually;
- Limitations: While convenient for controlling lighting, switched outlets may not be suitable for appliances that require continuous power. Plugging essential devices like refrigerators, freezers, or medical equipment into a switched outlet could lead to unexpected power interruptions, potentially causing spoilage or compromising patient care in medical settings;
- Safety Considerations: In certain situations, having switched outlets can pose safety concerns. Dimly lit areas may make it difficult to locate and toggle the switch, increasing the risk of accidents. Additionally, mistakenly plugging high-power appliances into switched outlets could overload the circuit, leading to electrical hazards [3];
Unswitched Outlets:
- Constant Power Supply: Unswitched outlets, also known as “hot outlets”, provide a continuous power supply regardless of any external control switch. As long as the outlet is functional, it supplies electricity to devices plugged into it, without the need for any on/off switch;
- Convenience: Unswitched outlets are convenient for appliances and devices that require continuous power, such as refrigerators, washing machines, computer servers, and smart home hubs. By using unswitched outlets for these devices, you ensure they operate smoothly without the risk of accidental power interruptions;
- Safety: Using unswitched outlets for critical appliances promotes safety, as these devices can function as intended without any sudden loss of power. This is especially important for appliances like medical equipment, where power interruptions could have severe consequences;
- Compatibility: Modern smart home devices, Wi-Fi routers, and network-connected appliances are designed to be always on and require continuous power. Unswitched outlets are well-suited for these devices, ensuring they remain connected to the internet and function optimally without any downtime;
Basic Principles Of Electrical Wiring:
1. Safety First
Safety should always be the top priority when working with electricity. Before starting any electrical work, ensure the power is turned off at the main circuit breaker or fuse box. Use proper personal protective equipment (PPE) like insulated gloves and goggles. If you’re unsure about any aspect of the electrical project, consult a qualified electrician.
2. Understanding Voltage, Current, and Resistance
Electricity is measured in volts (V), current is measured in amperes (A or amps), and resistance is measured in ohms (Ω). Voltage represents the force or pressure pushing electricity through a circuit, while current is the flow of electrons through the circuit. Resistance opposes the flow of current in a circuit, and understanding these concepts is crucial for designing and troubleshooting electrical systems.
3. Circuit Basics
4. Series and Parallel Circuits
In a series circuit, components are connected in a single path, one after the other. If one component fails or is disconnected, the entire circuit breaks, and no current flows. In a parallel circuit, components are connected across separate branches, allowing current to flow even if one branch is broken or has a failed component.
5. Proper Wire Sizing
Using the correct wire size is crucial to ensure safety and prevent overheating. Thicker wires have lower resistance and can handle higher currents without heating up. Always refer to wire size charts and National Electrical Code (NEC) guidelines to determine the appropriate wire gauge for the intended load.
6. Grounding and Earthing
Grounding is the process of connecting electrical circuits and equipment to the earth to prevent electric shocks and reduce the risk of electrical fires. Grounding provides a safe path for excess electrical current to dissipate into the ground. Proper grounding is essential for ensuring electrical safety.
7. Color Coding of Wires
In most electrical systems, wires are color-coded to identify their purpose. For example, black or red wires are commonly used for hot (live) wires, white wires for neutral, and green or bare copper wires for ground connections. Adhering to standard color codes helps prevent wiring errors and simplifies troubleshooting.
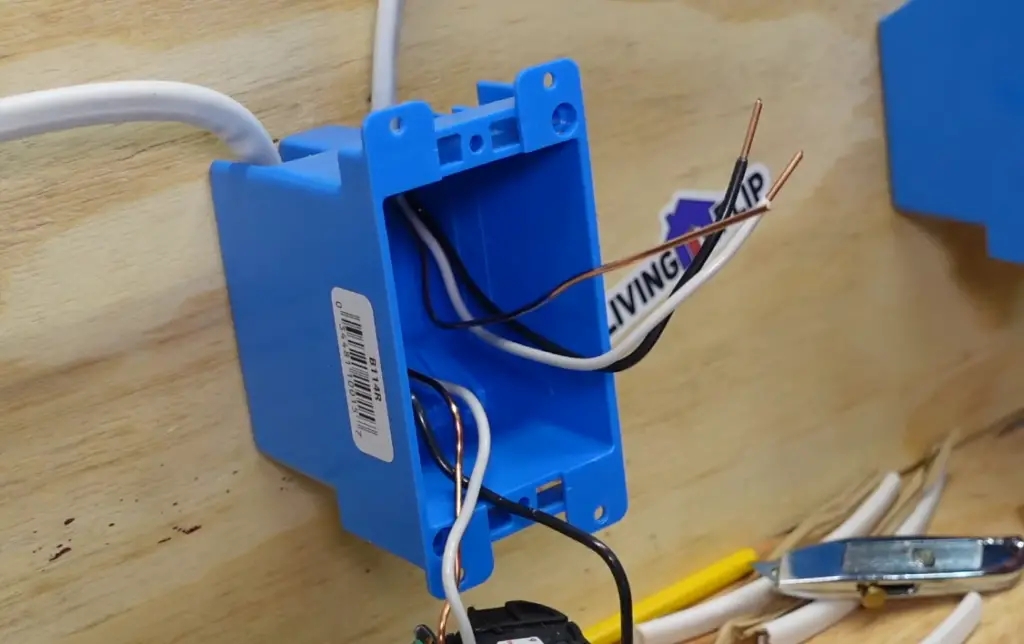
8. Proper Use of Electrical Boxes
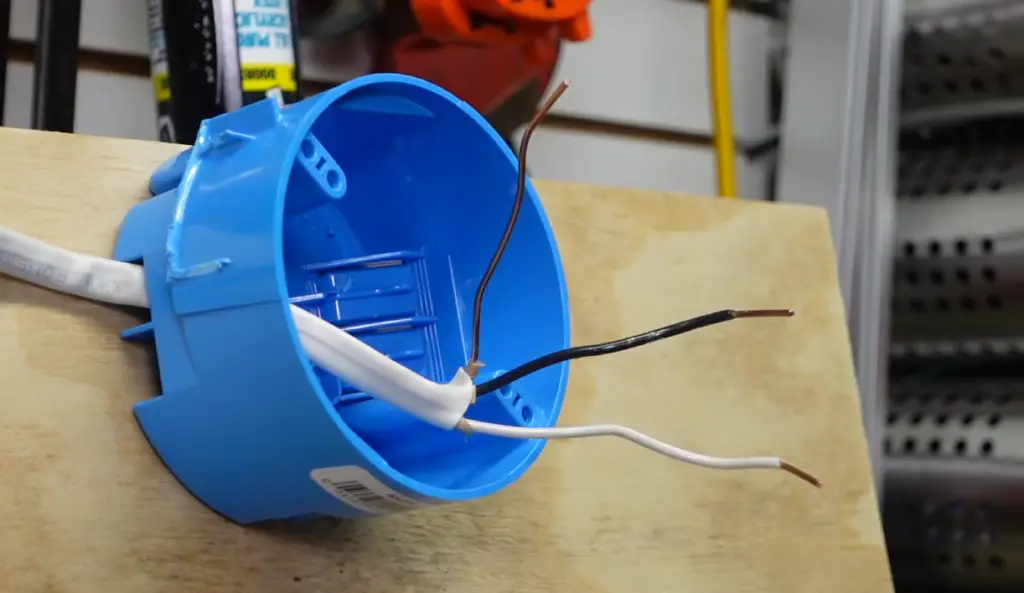
Electrical boxes provide a safe enclosure for electrical connections. They protect wires from damage and prevent accidental contact with live wires. Always use the appropriate type and size of electrical boxes for specific applications and ensure they are properly secured [4].
9. Wire Termination and Connection Techniques
Properly terminating and connecting wires is essential to maintain electrical integrity. Techniques like wire nuts, crimp connectors, terminal blocks, and wire ferrules are commonly used for secure and reliable connections.
10. Regular Maintenance and Inspection
Electrical systems require regular maintenance and inspection to ensure they remain safe and efficient. Periodically check for signs of wear, loose connections, or damaged wires, and address any issues promptly.
Steps To Make A Switched Outlet Hot All The Time:
Step 1: Turn Off The Power
Before working on any electrical components, always prioritize safety by turning off the power to the outlet. Locate the circuit breaker or fuse box that controls the circuit to which the switched outlet is connected. Flip the switch or remove the fuse corresponding to that circuit to cut off the electricity supply. To be extra cautious, use a non-contact voltage tester to verify that the power is off at the outlet.
Step 2: Remove The Cover Plate
Using a screwdriver, carefully remove the cover plate of the outlet. The cover plate is the flat piece that conceals the electrical wiring and the outlet itself. Unscrew the screws that hold the cover plate in place and set the cover plate aside.
Step 3: Cover The Red Wire With A Cap
Inside the electrical box, you will likely see three wires connected to the outlet: black (hot), white (neutral), and red (switched hot). The red wire is responsible for carrying the switched power to the outlet. To make the outlet hot all the time, you need to cap or insulate the red wire so that it is no longer connected to the outlet.
Use a wire nut, electrical tape, or a wire cap to cover the end of the red wire securely. This step ensures that the switched power from the wall switch will no longer reach the outlet, effectively making it hot all the time.
Step 4: Arrange The Wires Correctly
With the red wire safely capped, it’s time to rearrange the remaining wires to accommodate the change. Typically, the black wire (hot) and the white wire (neutral) will be connected to the outlet. Remove the black wire from its current connection point on the outlet, and then connect it to the terminal or wire connector where the red wire used to be connected.
Now, both the black and white wires should be connected to the outlet, ensuring a continuous power supply to the receptacle.
Step 5: Disconnect Wires From The Switch
Since you no longer want the outlet to be controlled by the switch, it’s necessary to disconnect the wires that link the switch to the outlet. Locate the wall switch that controls the outlet and remove the switch cover plate.
Again, remember to turn off the power to the circuit before proceeding. Once the switch cover plate is removed, you should see three wires connected to the switch: typically black, white, and ground (bare or green wire). Carefully disconnect these wires from the switch, ensuring they are no longer connected to each other [5].
Tools And Equipment Required For Turning A Switched Outlet Hot All The Time:
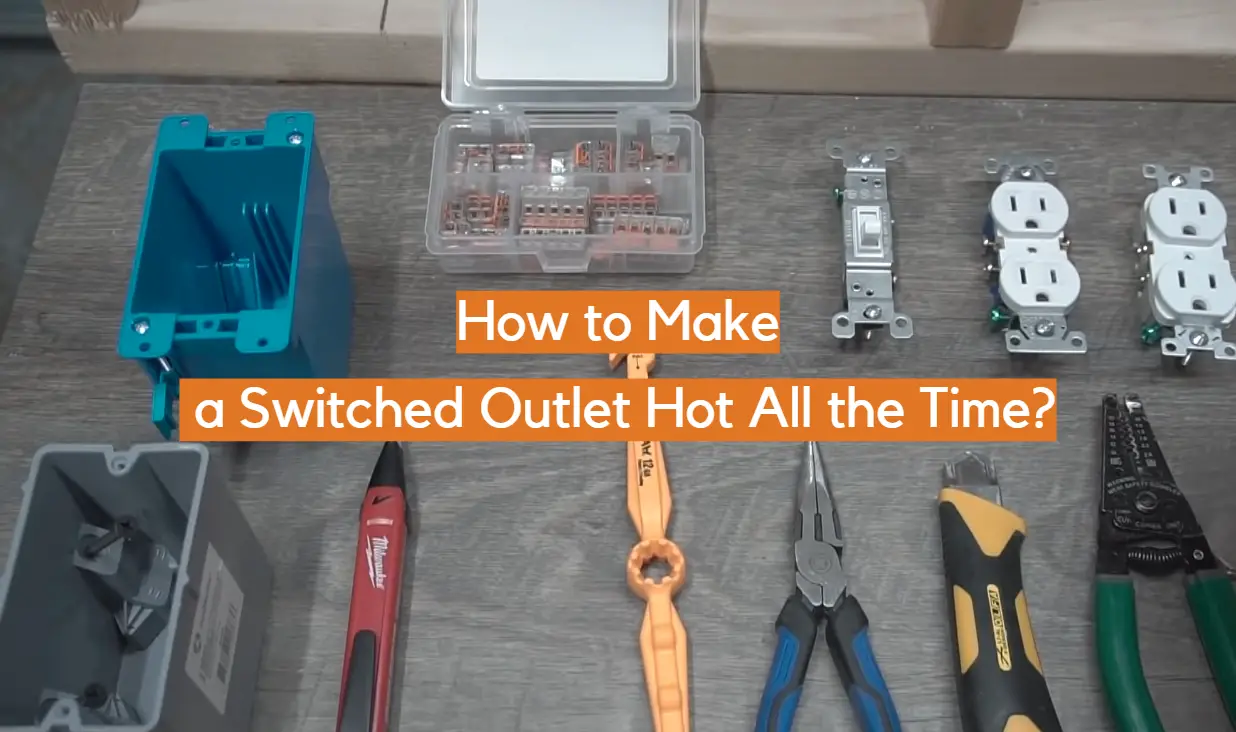
- Screwdriver: A standard flat-head or Phillips-head screwdriver is needed to remove the outlet cover plate and access the outlet’s wiring;
- Voltage Tester: A non-contact voltage tester is crucial for verifying that the power to the outlet is off before starting any work. It allows you to detect the presence of voltage without direct contact with live wires, helping to prevent electric shock;
- Wire Strippers: Wire strippers are used to remove the insulation from the ends of electrical wires, exposing the conductors for making new connections;
- Wire Nuts: Wire nuts, also known as wire connectors, are essential for securely connecting and insulating wires together. You’ll need these to cap the red wire safely when converting the outlet to be hot all the time;
- Electrical Tape: Electrical tape provides additional insulation and helps secure wire connections. It’s helpful in covering wire nuts or exposed wire ends;
- Wire Caps: Wire caps are used to cover and insulate individual wire ends, ensuring they do not come into contact with other wires or conductive surfaces;
- Pliers: Pliers can be handy for bending and shaping wires, especially if you need to make precise connections;
- Outlet Box Screwdriver: Some outlets are secured in place with screws through the outlet box. A specific outlet box screwdriver may be needed to remove and install the outlet securely;
- Flashlight: A flashlight will help you see clearly inside the outlet box, especially if the area is dimly lit;
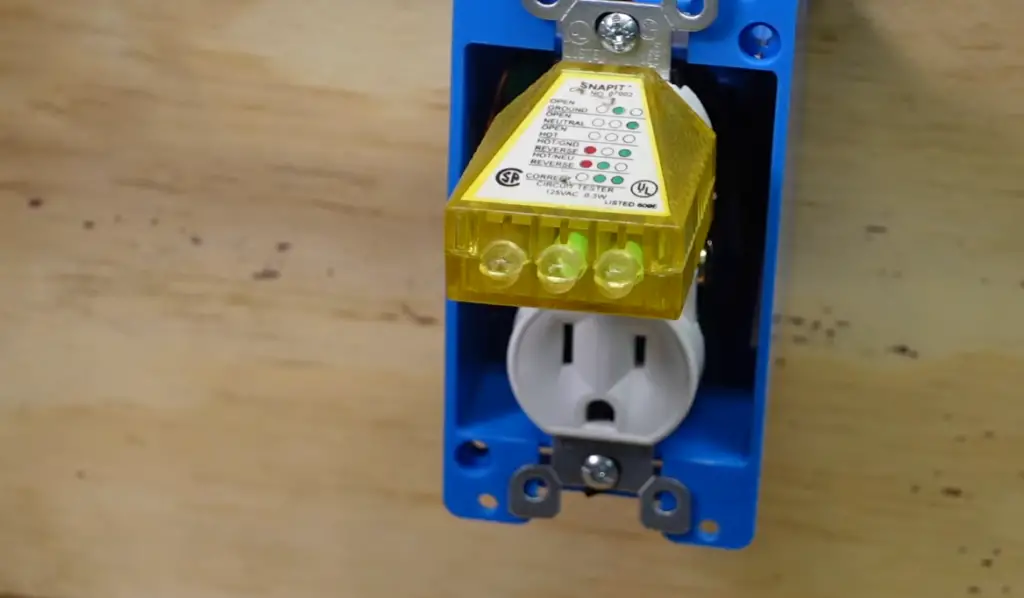
- Outlet Tester (Optional): An outlet tester is a small device that plugs into the outlet and indicates the correct wiring configuration. It can be useful for verifying the outlet’s functionality after the modifications are made;
Safety Precautions When Working With Electrical Outlets:
- Turn Off the Power: Before starting any work on electrical outlets, always turn off the power to the circuit at the main circuit breaker or fuse box. Use a voltage tester to double-check that there is no electricity flowing to the outlet. Never assume that an outlet is not live just because a switch is off; always verify with a voltage tester;
- Wear Personal Protective Equipment (PPE): Use appropriate PPE, such as insulated gloves and safety goggles, to protect yourself from electrical shock and potential debris or sparks;
- Work in a Dry Environment: Ensure the work area is dry. Avoid working on outlets in wet or damp conditions to reduce the risk of electric shock;
- Use Proper Tools: Use insulated tools designed for electrical work. Avoid using damaged tools or those with cracked handles;
- Inspect Cords and Plugs: Check the power cords and plugs of your tools and equipment for any signs of damage. Damaged cords can pose electrical hazards and should be replaced or repaired before use;
- One Hand Rule: When working on live electrical components, use the “one hand rule”. Keep one hand in your pocket or behind your back to prevent electric current from flowing through your heart if an electrical shock occurs;
- Avoid Overloading Circuits: Do not overload electrical outlets with too many devices or appliances. Use power strips and surge protectors with built-in circuit breakers to prevent overloads;
- Properly Ground Outlets: Ensure outlets are correctly grounded to reduce the risk of electric shock or fire. Consider having a qualified electrician inspect and update the grounding system in your home if needed;
- Avoid Using Metal Objects: Do not use metal objects, such as knives or screwdrivers, to remove objects stuck in outlets or to test live circuits. Only use appropriate tools designed for electrical work;
- Check for Damaged Outlets: Regularly inspect outlets for signs of damage, such as cracks, burns, or loose connections. Damaged outlets should be replaced immediately;
- Keep Outlets Covered: Keep outlet covers on when not in use to prevent accidental contact with live electrical components;
- Follow Electrical Codes and Regulations: Adhere to local electrical codes and regulations when installing or modifying electrical outlets. These codes are designed to ensure safety and prevent potential hazards;
- Avoid DIY for Complex Electrical Projects: For complex electrical projects, it is best to hire a qualified electrician. Avoid attempting tasks that are beyond your skill level;
- Educate Children about Electrical Safety: Teach children about the dangers of playing with electrical outlets and devices. Use childproof outlet covers in homes with young children;
- Use GFCI Outlets in Wet Areas: Install Ground Fault Circuit Interrupter (GFCI) outlets in areas where water is present, such as kitchens, bathrooms, and outdoor spaces. GFCIs provide added protection against electrical shocks in damp conditions;
How To Replace A Switched Outlet With A Standard Outlet?
Replacing a switched outlet with a standard outlet involves converting the outlet so that it remains hot all the time, providing a continuous power supply to devices or appliances. Before starting the replacement process, make sure to turn off the power to the circuit at the main circuit breaker or fuse box and use a voltage tester to confirm that there is no electricity flowing to the outlet.
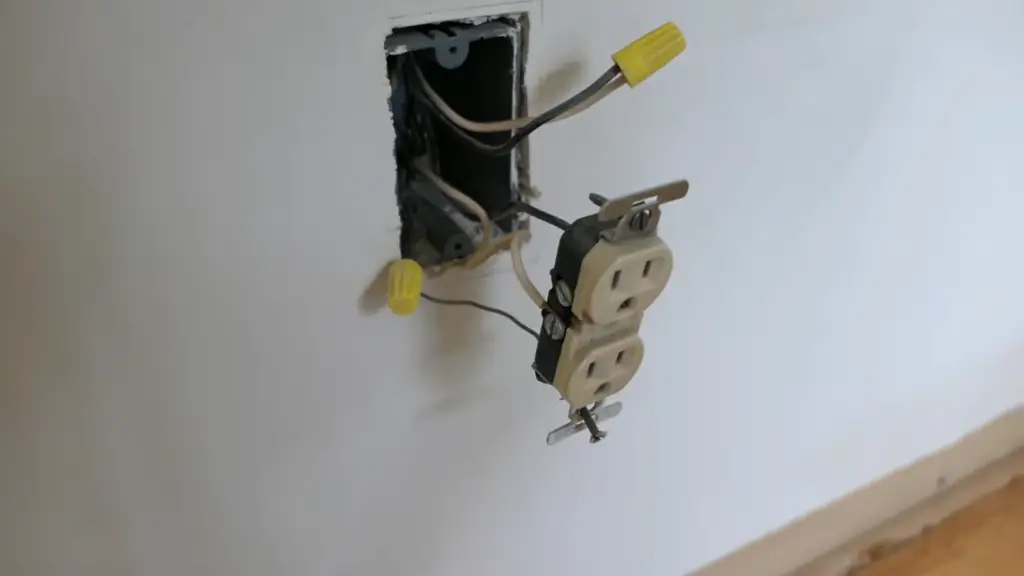
Follow these step-by-step instructions to safely replace a switched outlet with a standard outlet:
Step 1: Gather the Necessary Tools and Materials
Ensure you have the following tools and materials:
- Screwdriver;
- Wire stripper;
- Wire nuts or wire connectors;
- Electrical tape;
- Standard electrical outlet (receptacle);
- Voltage tester;
- Insulated gloves;
- Safety goggles;
Step 2: Remove the Switched Outlet:
- Remove the cover plate: Unscrew and remove the cover plate from the switched outlet;
- Unscrew the outlet: Use a screwdriver to loosen the screws securing the outlet to the electrical box. Carefully pull the outlet out of the box, but do not disconnect any wires just yet;
- Inspect the wiring: Take note of how the wires are connected to the switched outlet. Typically, you’ll find three wires connected to the outlet: black (hot), white (neutral), and red (switched hot). The red wire is the one providing the switched power from the wall switch;
- Cap the red wire: Using a wire nut or wire cap, securely cover the end of the red wire that was connected to the switched outlet. This step ensures that the switched power from the wall switch will no longer reach the outlet;
Step 3: Arrange the Wires for the Standard Outlet
Reconnect the black and white wires: Disconnect the black wire from its current connection on the switched outlet. Connect this black wire to the brass or gold-colored screw terminal on the new standard outlet. Similarly, disconnect the white wire from the switched outlet and connect it to the silver-colored screw terminal on the new outlet.
Step 4: Secure the New Outlet
Gently push the wires and the new outlet back into the electrical box. Use the screwdriver to secure the outlet to the box by tightening the screws. Make sure the outlet is level and flush with the wall surface.
Step 5: Test the Outlet
After the new outlet is securely installed, turn the power back on at the circuit breaker or fuse box. Use a voltage tester to confirm that the outlet is hot all the time, meaning it provides continuous power. Test the outlet with a small electrical device or a voltage tester to ensure it is functioning correctly.
Step 6: Replace the Cover Plate
Finally, attach the cover plate over the new standard outlet and secure it with the screws [6].
Common Issues When Making A Switched Outlet Hot All The Times:
- Misidentification of Wires: One of the most common issues is misidentifying the wires during the modification. Electrical wiring can be complex, and if you mistakenly disconnect the wrong wires or fail to cap the correct wire, you may create a new problem or even cause a short circuit;
- Unsecure Wire Connections: Inadequate or loose wire connections can lead to power fluctuations, sparking, or electrical arcing, which can be dangerous. It’s crucial to ensure all wire connections are secure and properly tightened;
- Overlooking Grounding: Neglecting to properly ground the new standard outlet can be hazardous. Grounding protects against electrical shocks and ensures safe operation of electrical devices;
- Overloading the Circuit: If the circuit was already heavily loaded before converting the outlet, adding more devices may overload the circuit and cause the breaker to trip or the fuse to blow;
- Incompatible Devices: Converting a switched outlet to be hot all the time may result in incompatible devices being connected to it. For instance, if a high-power appliance that should not be left plugged in all the time is connected, it can cause issues or damage;
- Incorrect Outlet Type: Using an outlet that is not rated for the appropriate voltage or current can lead to overheating and pose a fire hazard;
- Insufficient Capacity: In some cases, the electrical circuit may not have enough capacity to support all the devices connected to the converted outlet, leading to frequent tripping of the circuit breaker;
- Disrupted Switch Functionality: If the wall switch is still connected to the modified outlet, it may lose its functionality. This can be confusing and inconvenient for users who expect the switch to control the outlet;
- Damaged Outlet Box: During the modification process, the outlet box or its components may become damaged, potentially compromising the safety and integrity of the electrical system;
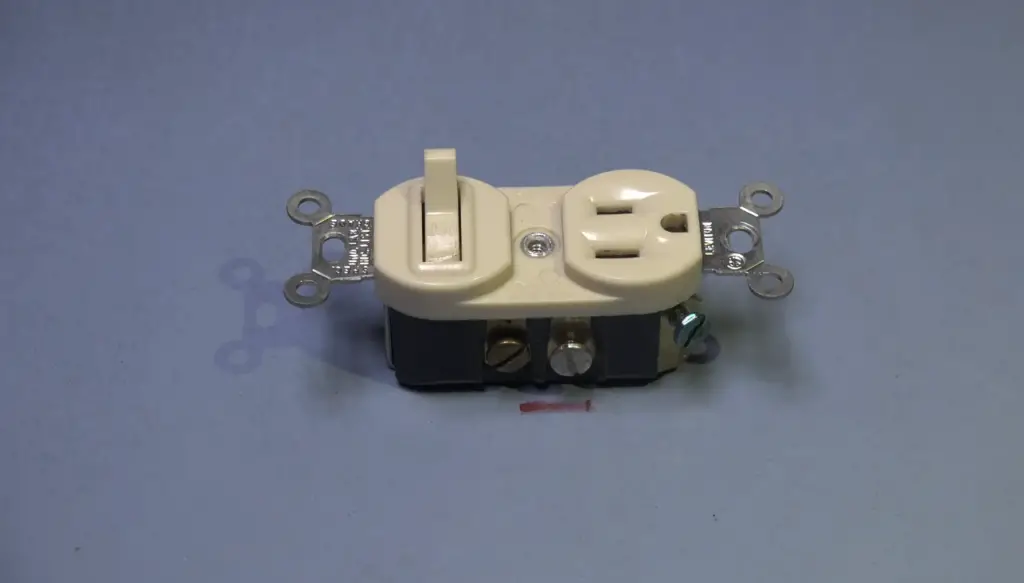
To avoid these common issues, it’s essential to follow these precautions:
- Always turn off the power at the circuit breaker or fuse box before working on electrical outlets;
- Double-check wire identification and connections to ensure proper wiring;
- Test the outlet with a voltage tester to verify that it is hot all the time after the modification;
- Use the correct outlet type and ensure it is rated for the intended voltage and current;
- Do not overload the circuit; distribute the load evenly among different circuits if needed;
- If unsure about any step or aspect of the modification, consult a qualified electrician to ensure a safe and proper conversion;
FAQ:
1. How do you make a switched outlet constant?
To make a switched outlet constant, you need to modify the wiring so that the outlet receives a continuous power supply, regardless of the position of the wall switch. This involves capping or disconnecting the wire that provides the switched power from the wall switch and rearranging the other wires to ensure a constant hot connection to the outlet.
It’s essential to turn off the power at the circuit breaker or fuse box before attempting any electrical work and to follow safety precautions throughout the process.
2. How do you make a light switch permanently on?
To make a light switch permanently on, you need to bypass the switch’s functionality and directly connect the wires that were originally controlled by the switch. This effectively eliminates the switch’s ability to turn the light on or off. Keep in mind that permanently bypassing a light switch is not recommended unless you fully understand the electrical system and safety implications. It’s usually best to leave this type of modification to a qualified electrician.
3. How do you stop a light switch from turning off the outlet?
If a light switch controls an outlet, and you want to stop the switch from turning off the outlet, you’ll need to convert the outlet to be hot all the time. This involves capping or disconnecting the wire that provides the switched power from the wall switch, rearranging the wires, and ensuring a constant power supply to the outlet. Again, it’s essential to follow safety precautions and consider consulting a professional electrician for this modification.
4. Can you get constant power from a switched light?
Yes, you can get constant power from a switched light by converting the switched light to be always on. This involves bypassing the switch’s functionality and ensuring that the light fixture receives a continuous power supply, regardless of the switch’s position. As with any electrical modifications, it’s crucial to follow safety guidelines and consider seeking the expertise of a qualified electrician.
5. Can you get power off a light switch?
Yes, you can get power from a light switch. Light switches are typically wired to provide power to light fixtures or other devices connected to them. When the switch is turned on, it completes the electrical circuit, allowing electricity to flow and power the connected load (e.g., a light bulb or an outlet). When the switch is off, the circuit is open, and the power is cut off.
6. What would make an outlet hot to the touch?
An outlet may feel hot to the touch due to several reasons, including:
- Overloading: Plugging in too many devices or appliances that draw a high amount of current can cause the outlet to heat up;
- Loose Connections: Loose wires or terminal screws can create resistance and generate heat;
- Faulty Outlet: A faulty outlet with damaged components can cause it to overheat;
- Wiring Issues: Problems with the electrical circuit or improper wiring can lead to overheating;
If you notice an outlet is hot to the touch, it’s essential to turn off the power and investigate the issue promptly to prevent potential hazards.
7. Is there a permanent live in a light switch?
In a typical light switch setup, there is no permanent live connection. When the light switch is off, the circuit is open, and there is no electrical flow. When the switch is on, it completes the circuit, allowing electricity to flow and power the connected load, such as a light fixture.
8. Why is my light switch always hot?
If your light switch feels hot to the touch, it could be due to loose connections, a faulty switch, or excessive current flowing through the switch. Hot switches are a sign of potential electrical issues and should be investigated by a qualified electrician to ensure safety.
9. Can an outlet be controlled by a switch?
Yes, an outlet can be controlled by a switch. A switched outlet is wired to receive power from the electrical circuit, but the power is controlled by a wall switch. When the switch is on, the outlet provides power, and when the switch is off, the outlet is de-energized, cutting off the power supply.
10. What is a half-hot switched outlet?
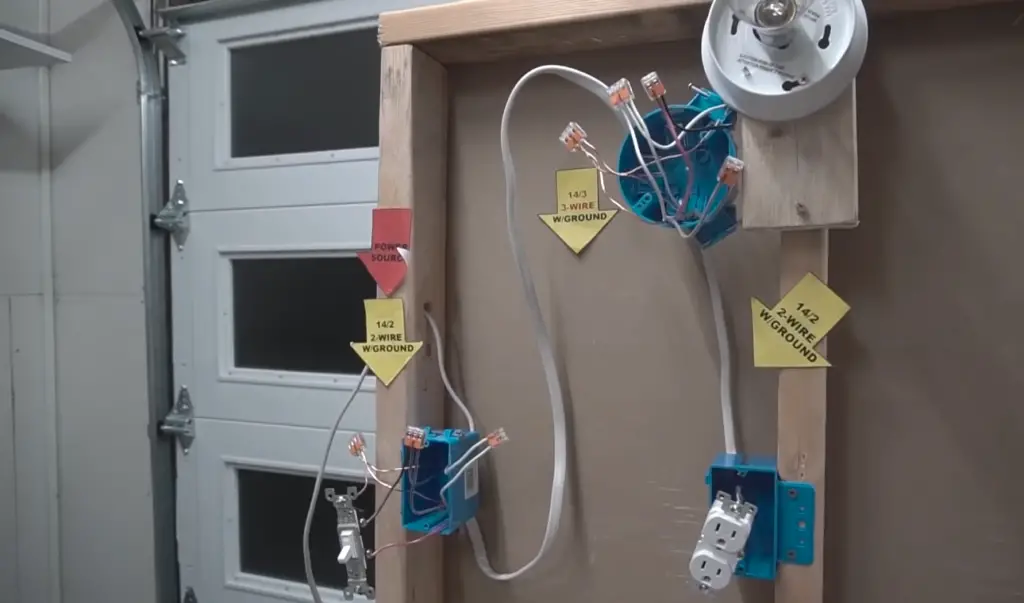
A half-hot switched outlet is a type of outlet where only one of the receptacles is controlled by a switch. The other receptacle remains hot all the time and is not affected by the switch. This setup allows you to have a switched outlet for controlling a lamp or other device while still having a constant power supply available for other devices or appliances.
11. How do you control another outlet from a switched outlet?
To control another outlet from a switched outlet, you need to run a new electrical cable (e.g., 12/3 or 14/3 cable) from the switched outlet to the desired outlet. This new cable will include an additional wire (usually red) that will serve as the switched hot wire. Properly connect the new cable to both outlets, ensuring the switched outlet’s red wire is connected to the hot terminal of the other outlet.
12. Is it safe to touch an outlet?
Under normal conditions, it is safe to touch an outlet when it is not in use. However, if an outlet feels hot, emits sparks, or shows signs of damage, it is not safe to touch. In such cases, immediately turn off the power at the circuit breaker or fuse box and seek the assistance of a qualified electrician.
13. How do you power off and power on a switch?
To power off a switch, simply flip it to the “OFF” position. To power it on, flip it back to the “ON” position. This action opens or closes the circuit, allowing or interrupting the flow of electricity.
14. Can I turn a light into an outlet?
Yes, it is possible to convert a light fixture into an outlet. This requires rewiring the fixture and installing an outlet in its place. However, keep in mind that modifying a light fixture in this way should be done with proper knowledge of electrical work, and it is generally best to consult a qualified electrician for such modifications.
15. Does a 3-way switch have a constant hot?
A 3-way switch configuration allows control of a light fixture from two different locations. While a 3-way switch does not have a constant hot terminal, it does have a common terminal (sometimes labeled “COM”) that receives the constant hot supply from the electrical circuit. The other two terminals (often labeled “1” and “2”) control the flow of electricity between the common terminal and the light fixture, depending on the positions of the switches.
Useful Video: How to Change a Switched Outlet to a Continuous Hot Outlet (2022)
References
- https://www.circuitsgallery.com/how-to-make-a-switched-outlet-hot-all-the-time/
- https://mrelectrician.tv/convert-switched-outlet-to-hot
- https://urbanhomecorner.com/how-to-make-switched-outlet-hot-all-the-time/
- https://ask-the-electrician.com/how-to-convert-a-switched-outlet-to-non-switched/outlets/switched-outlet-outlets/
- https://dengarden.com/home-improvement/home-wiring-guide-how-to-wire-a-switched-half-hot-outlet
- https://www.bhg.com/home-improvement/electrical/how-to-install-a-switched-receptacle/






Leave a Reply