Are you having trouble getting a smooth idle from your car engine? If that’s the case, it might be a good idea to test out the idle air control valve (IACV). A faulty IACV can cause idling problems and damage other components if left unchecked. Testing an IACV is surprisingly easy with nothing more than a digital multimeter and some basic hand tools. In this blog post, we’ll walk through how to accurately test the IACV using a multimeter step-by-step. Read on to discover the key steps for confidently assessing your vehicle’s essential valving device performance!
How The Idle Air Control Valve Works
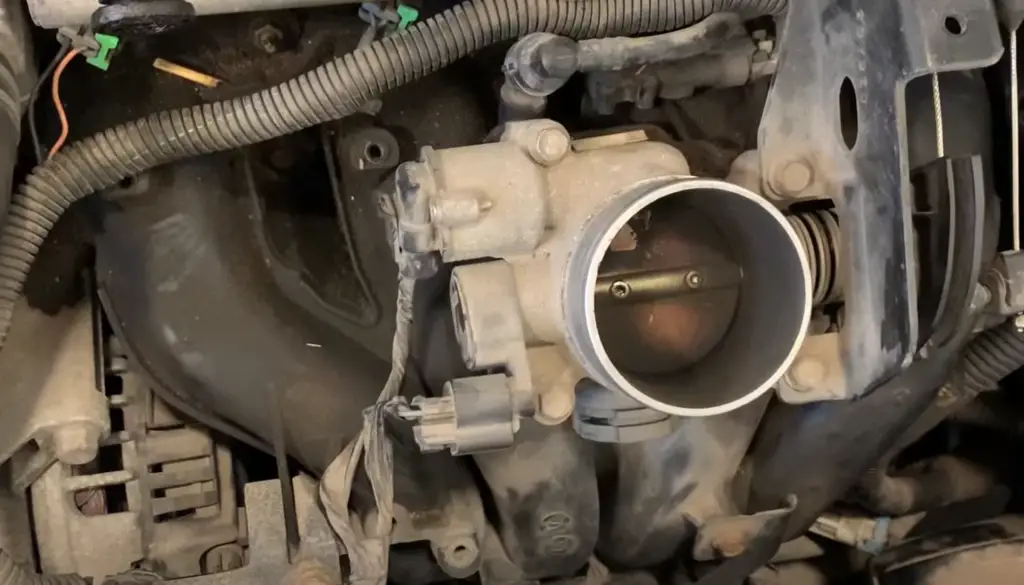
Utilizing its ability to modulate the air intake while idling, this mechanism reduces emissions and conserves fuel – a double-win! The IACV is usually located in the throttle body and consists of a valve and electrical connections.
When the vehicle is idling, the IACV opens to allow additional air into the intake manifold. This helps to increase or decrease engine speed as needed to keep it running smoothly at low speeds. The amount of air that passes through the IACV can be adjusted by changing its settings with a diagnostic tool or manually adjusting screws on some vehicles. [1]

Symptoms Of A Bad Idle Air Control Valve
If your vehicle’s idle air control valve fails, you will likely notice several indicators of an issue, like a bumpy idling engine, hesitance when accelerating, stalling out or misfiring. If the issue is not addressed in time it can lead to serious damage and expensive repairs. The malfunctioning of the idle air control valve is indicated by a range of symptoms, such as reduced fuel efficiency, an illuminated check engine light, and unsteady RPMs when the vehicle is idling.
It is important to note that these symptoms could indicate other issues with the vehicle, so it is best to have a professional mechanic inspect and diagnose any potential problems before attempting to repair them yourself. Furthermore, testing the idle air control valve with a multimeter should only be performed by someone who is experienced in car diagnostics and repairs.
Tools Required
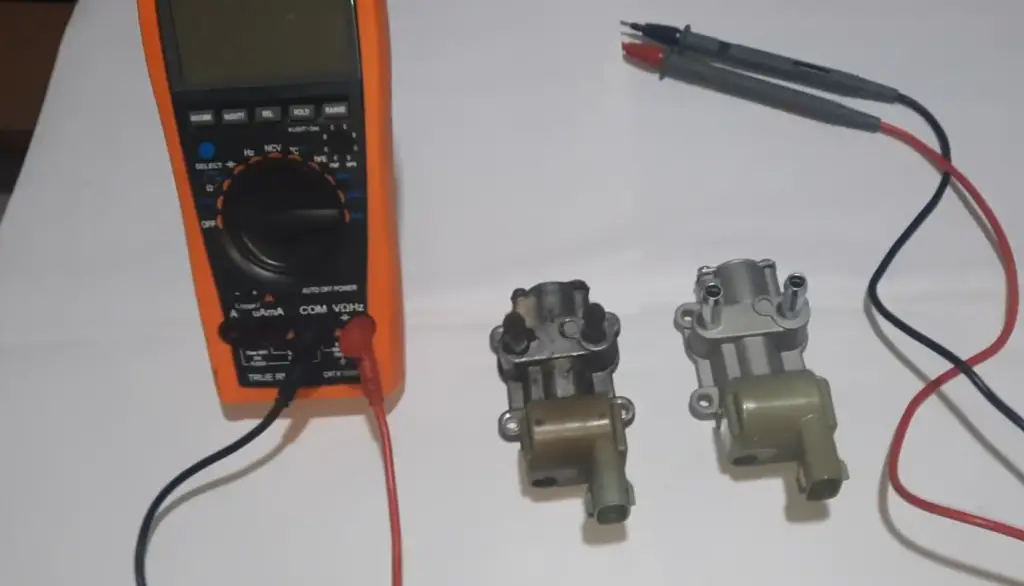
- Multimeter
- Phillips head screwdriver
- Socket wrench
- Replacement idle air control valve (optional) [2]
Diagnosing Using Scan Tools
Scan tools, also known as diagnostic code readers, are a type of computerized diagnostics system used to identify and troubleshoot problems with a vehicle’s engine and components. Scan tools plug into the car’s OBD port and communicate with the onboard computer to detect error codes that may indicate an issue with the idle air control valve. When connected to the OBD port, scan tools can display real-time data from various engine sensors, allowing you to pinpoint which component is causing trouble.
Additionally, some scan tools provide live data streams that allow you to monitor the performance of different parts while they are in operation. This makes it easier for mechanics to see what is happening when an issue arises and quickly diagnose any problem areas before further repairs or replacements are needed.
Finally, scan tools can also provide helpful maintenance information such as oil change intervals and service schedules. This lets mechanics know when a vehicle’s idle air control valve might need to be inspected or serviced, helping prevent future issues that could arise from neglecting regular maintenance tasks.

With the right scan tool, problems with an idle air control valve can easily be identified and repaired before they get out of hand. [3]
How To Test Idle Air Control Valve With Multimeter
Locate The Idle Air Control Valve And Take It Out
The idle air control valve is usually located on the side of the engine near the throttle body. It is typically linked to an electrical connector and a vacuum line. To test it, you will need to remove it from the engine.
Disconnect The Connectors And Vacuum Line
Once you have located the idle air control valve, disconnect both its electrical connectors and the vacuum line attached to it. Be careful not to damage any of these components as they are essential for proper functioning of your vehicle’s system.
Inspect Idle Air Control Valve
Once the valve is removed, inspect it for any signs of wear and tear. If you see any corrosion or physical damage, then replacing the part will be necessary before you can proceed with testing.
Test The Connector For Power
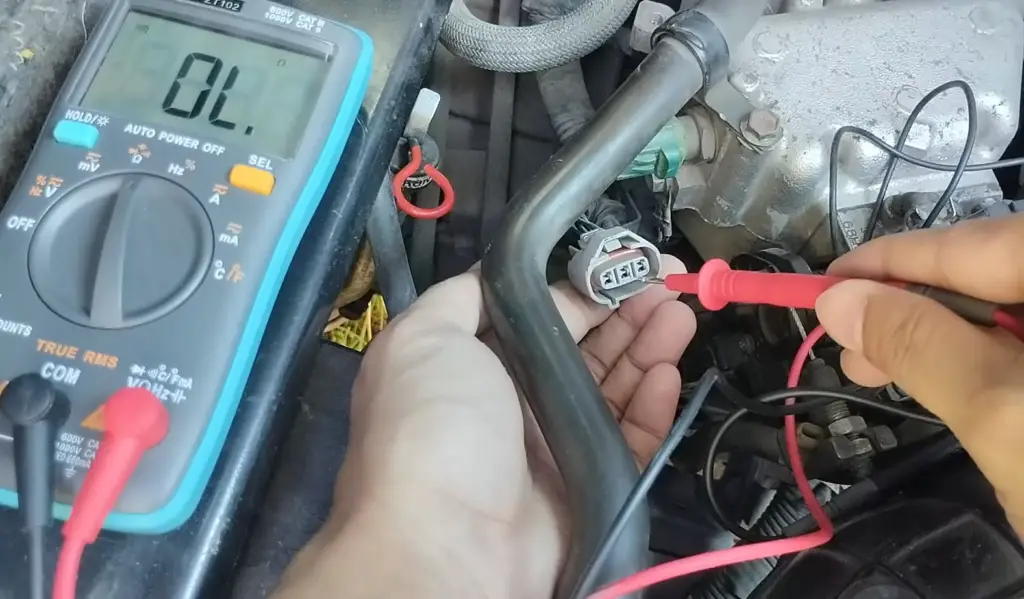
Next, you should use a multimeter to test the connector for power. Set your multimeter to measure voltage and connect it to the positive and negative terminals of the connector. If you see any readings, then this indicates that there is power present. [4]
Set Multimeter To Measure Resistance
Now, you can set your multimeter to measure resistance. Connect the probes to the terminals of the idle air control valve and observe the readings. A healthy valve should give a reading between 12-20 ohms. Any reading outside this range indicates that there is a problem with the part and needs to be replaced.
Place Multimeter Leads On IAC valve Solenoid Terminals
Finally, you should place the multimeter leads on the IAC valve solenoid terminals. The readings should show a range between 1-4 volts when the engine is running. If there is no voltage present or if it exceeds 4 volts then you have an issue with the valve and will need to replace it.

Check Resistance Reading
Once you have completed all these tests, check the resistance reading again. If it is within the range of 12-20 ohms, then your IAC valve is in working order and should be back in its place.
Reattach The Connectors And Vacuum Line
To finish off, reattach both the electrical connectors and the vacuum line to the idle air control valve. Make sure everything is securely attached before putting it back into its original position.
Testing Using Idle RPM
To test an idle air control valve (IAC) with an rpm test, start the engine and allow it to warm up.
If the idle is too low, then the IAC may be malfunctioning, as it should help raise engine RPM when activated.
If the idle speed appears out of range, use a multimeter to check that voltage is reaching the IAC motor. With the engine still running, set your multimeter to DC voltage mode and probe both sides of the two-wire connector attached to the IAC valve, with one wire on each terminal. If the voltage is within range, then that indicates the problem lies with the valve itself and not with the electrical connection.
To further test the IAC valve, use a hand-held vacuum pump to apply suction directly into the two-wire connector attached to it. When you do this, watch for any increase or decrease in engine RPM. If there is a change—either an increase or decrease—then that indicates that the IAC valve is working properly and may be functioning normally.
If there’s no change in engine RPM when applying vacuum, then either the motor inside of the IAC is faulty or possibly clogged up with debris. In this case, you should replace your idle air control valve as soon as possible to prevent any further damage to your engine.
Remember, if you’re ever unsure of how to properly test an IAC valve using a multimeter or any other diagnostic tool, always be sure to get help from a certified mechanic. They can provide the right advice and guidance for whatever car repair or maintenance issue you may be facing. [5]

Things to Avoid
- Never place any objects inside or around the idle air control valve while testing it as they can give false readings or damage the component.
- Do not use a paperclip or other makeshift tools when connecting the multimeter probes to the IAC valve; always use proper test leads and clamps for better precision and accuracy in your measurements.
- Avoid overfilling or under-filling with oil, which can lead to incorrect idle speed adjustments or cause a wide array of engine issues.
- When connecting back all wiring, ensure that there is no loose connection that could cause inaccurate readings during testing and result in faulty results.
- Always adhere to safety guidelines when working with electrical components such as the IAC valve.
- Never try to fix a failed idle air control valve without performing proper diagnostics and testing first.
- Avoid making any sudden or drastic adjustments to the IAC valve during the test process, as it could disrupt its functioning and lead to even more problems with your vehicle’s engine performance.
- Do not forget to disconnect the battery before beginning any repairs or maintenance of the idle air control valve for safety reasons.
Additional Note: If you’re unsure about how to properly use a multimeter when testing an idle air control valve, be sure to consult a professional mechanic who can help guide you through the process safely and efficiently. This will ensure that you get accurate readings and avoid any potential damage to the component.
Safety Measures
Before testing an Idle Air Control (IAC) valve with a multimeter, it is important that safety measures are taken. The battery must be disconnected and the circuit fuses removed before beginning any work on the IAC valve. It is also important to wear protective gear such as gloves, glasses and clothing in order to avoid any accidents while handling the electrical components of the vehicle. Additionally, make sure that all tools being used are in good condition to ensure accurate readings. Once all of these safety precautions have been taken then you can proceed with testing the IAC valve with a multimeter. [6]

FAQ
How do you test an idle air control valve?
To test an idle air control valve with a multimeter, first disconnect the negative battery cable and locate the IAC valve. Then remove the electrical connector from the IAC valve. Set your multimeter to read ohms (resistance) and connect one lead of the meter to each of the two terminals on the electrical connector. A healthy IAC valve should measure between 10-20 Ohms.. If it measures any higher than that, then it’s likely bad. Lastly, reconnect the negative battery cable once finished testing.
What could cause an idle air control valve to go bad?
The most common cause for an Idle Air Control Valve to go bad is due to clogging or contamination caused by dirt or grease. This can block the air getting to the valve, causing it to malfunction. Additionally, an IAC valve can go bad due to age, corrosion, and wear over time.
What would happen if an idle air control valve was not functioning properly?
This could be dangerous as it will make your car more difficult to control when you are driving and may cause damage to other components such as the transmission and catalytic converter. Additionally, if left unaddressed this issue may even lead to stalling issues while driving or when starting up the engine.
What is the voltage of the idle air control valve?
When testing an idle air control valve with a multimeter, the voltage should be between 0.1 and 0.9 volts DC (direct current). If it’s too low or too high, this is an indication that the idle air control valve may need to be replaced. Additionally, if you note that the engine speed is fluctuating when the vehicle is in neutral, this could also be a sign of an issue with the idle air control valve. When checking for voltage at the idle air control valve using a multimeter, make sure to use the appropriate settings so as not to damage your electronic components. You can refer to your vehicle’s manual for specific instructions on how to most safely and accurately test your idle air control valve.
How do I know if my ICV valve is bad?
If you’re experiencing a problem with your idle air control valve, there are certain symptoms that you should look out for. These may include: rough idling, stalling, and hesitation when accelerating, as well as fuel economy issues. If these symptoms persist after performing basic maintenance on your vehicle such as checking the spark plugs and cleaning the throttle body, then it’s likely that the ICV valve or its related components need to be checked or replaced. Additionally, if you notice that your engine speed is fluctuating when the vehicle is in neutral, this could also indicate an issue with the idle air control valve. In any case, it’s best to consult a certified mechanic for advice before attempting repairs yourself.
Can you bypass the idle air control valve?
Yes, it is possible to bypass the idle air control valve (IACV) in certain cars. This allows you to temporarily disable the IACV and take a reading with a multimeter without having to disconnect the harness. To do this, simply connect one end of a jumper wire to the positive terminal on the battery and the other end to one of the two terminals on the IACV. Doing this will effectively bypass the IACV and allow you to take readings from it directly. However, be sure that all connections are secure before you start taking any measurements. Also, make sure that you disconnect your jumper wire after taking the measurements so that your car does not suffer any damage due to electrical shorts or overloads.
What happens if I unplug the IAC valve?
If you unplug the IAC valve, your car will likely experience a lack of engine power and may even stall. Additionally, it could cause your engine to run at an abnormally high or low RPM without any input from the accelerator. This can be potentially damaging to your vehicle if not addressed in a timely manner. Therefore, it is important that you avoid unplugging the IAC valve unless absolutely necessary.
Can I clean the IaC valve without removing it?
Yes, it is possible to clean the IAC valve without removing it from the car. This can be done by using a spray-on electrical contact cleaner, which will help remove any dirt or grime that has built up on its contacts. Simply spray the cleaner onto a cloth and then wipe down the terminals of the IAC valve. Make sure to avoid getting any liquid into the valve itself as this could cause damage to its internal components. Additionally, ensure that all surfaces are completely dry before reconnecting your IACV or starting your engine. Finally, if you find that cleaning does not resolve your issue with the idle air control valve, you may need to replace it entirely in order to restore normal functioning of your vehicle’s engine.
Useful Video: IACV Testing Using a Multimeter
Conclusion
In conclusion, testing an idle air control valve with a multimeter is a straightforward process that can be done in a short amount of time. It may require basic knowledge of electrical systems and automotive parts but following the steps outlined above should help you successfully test your IACV. Remember to always wear safety glasses and gloves when working on any type of automotive project as components or liquids may fly or splatter during the process. Additionally, consult your vehicle’s manual if you are ever unsure about any step or avoid doing it altogether if it requires advanced skills. Testing an idle air control valve can prevent major issues from occurring down the road and will allow you to keep your vehicle running optimally for many years to come.
Good luck!
References
- https://electrouniversity.com/how-to-test-idle-air-control-valve-with-multimeter/
- https://mrfixitca.com/test-idle-air-control-valve-with-multimeter/
- https://toolsweek.com/how-to-test-iac-valve-with-multimeter/
- https://mystolenhome.com/how-to-test-idle-air-control-valve-with-multimeter/
- https://www.electronicmultimeter.com/how-to-test-an-iac-valve-with-a-multimeter/
- https://www.wikihow.com/Check-an-Idle-Air-Control-Valve


Leave a Reply