The Raspberry Pi, a versatile and cost-effective single-board computer, has emerged as a playground for innovation, enabling enthusiasts and professionals to explore an array of creative projects. From home automation to robotics and web development, its compact size and affordability have made it a beloved choice in the tech community.
However, to fully unlock the potential of this remarkable device, integrating the capabilities of Node.js, a powerful JavaScript runtime, becomes crucial. This comprehensive guide delves into the intricate process of seamlessly installing Node.js on your Raspberry Pi, facilitating the execution of server-side applications and scripting tasks in JavaScript.
As we navigate through the installation steps, prerequisites, and diverse installation methods, you will gain the expertise needed to harness the synergy of Raspberry Pi and Node.js for your innovative ventures. Whether you’re a seasoned developer or a passionate hobbyist, this article equips you with the knowledge to infuse your Raspberry Pi projects with the dynamic prowess of Node.js, propelling your creations to new heights of functionality and interactivity.
What Is NodeJS?
The Birth of Node.js
Node.js was created by Ryan Dahl and was first released in 2009. It was built on the Chrome V8 JavaScript engine, which is known for its exceptional speed and performance. Unlike traditional server-side technologies that relied on multithreading, Node.js adopted a non-blocking, asynchronous approach. This approach allowed developers to handle a large number of connections simultaneously without being slowed down by traditional bottlenecks.
Key Features and Benefits:
Asynchronous and Event-Driven
Node.js operates on a non-blocking event loop, which means that it can handle multiple connections and requests concurrently. This architecture is especially well-suited for applications that involve real-time interactions, such as chat applications, online gaming, and collaborative tools. The asynchronous nature of Node.js allows developers to write code that doesn’t wait for one operation to complete before moving on to the next, resulting in more efficient resource utilization.
Single Programming Language
Node.js enables developers to use JavaScript for both client-side and server-side programming. This eliminates the need to switch between different languages for front-end and back-end development, streamlining the development process and reducing the learning curve. This unified language approach has also led to the rise of “full-stack” developers who can work on all aspects of an application.
Vast Ecosystem of Packages
Node.js comes with a built-in package manager called npm (Node Package Manager) that provides access to a vast ecosystem of open-source packages and libraries. These packages cover a wide range of functionalities, from building web servers and databases to integrating with third-party APIs and handling authentication. This rich ecosystem accelerates development by allowing developers to leverage pre-built components, saving time and effort.
Scalability
Node.js’s lightweight and event-driven architecture makes it highly scalable. It’s well-suited for applications that need to handle a large number of concurrent connections, such as social media platforms, online marketplaces, and real-time analytics dashboards. Developers can efficiently distribute incoming requests across multiple processes or machines, ensuring smooth performance even under heavy loads.
Use Cases
Web Servers
Node.js is often used to build fast and efficient web servers. Its non-blocking nature allows it to handle a large number of concurrent connections with minimal resource usage. Developers can easily create APIs, handle HTTP requests, and deliver dynamic content to clients.
Real-Time Applications
Node.js excels at building real-time applications like chat applications, online gaming, and collaborative tools. Its event-driven architecture allows developers to handle asynchronous events in real-time, enabling seamless and instant interactions.
Microservices Architecture
Node.js is well-suited for building microservices, a software architectural style where complex applications are broken down into smaller, independently deployable services. Its modular design and lightweight nature make it an ideal choice for creating and managing microservices.
What Is NPM (Node Package Manager)?
In the world of Node.js development, NPM plays a pivotal role as a fundamental tool that enhances the efficiency, modularity, and scalability of projects. NPM, which stands for Node Package Manager, is an essential component of the Node.js ecosystem that empowers developers to manage dependencies, share code, and streamline the development process [2].
Managing Dependencies
At its core, NPM serves as a robust dependency management system. In software development, dependencies are external libraries, modules, or packages that your project relies on to function correctly. NPM allows developers to specify these dependencies in a dedicated configuration file (usually named package.json). This file not only lists the required packages but also includes version information to ensure consistent and reliable builds.
When you start a new project or collaborate with a team, you can simply share the package.json file and use NPM to automatically download and install all the specified dependencies. This streamlined approach simplifies the setup process and eliminates the need for manual installation of each library, saving valuable development time.
Discovering and Sharing Code
One of NPM’s remarkable features is its extensive repository of open-source packages. This repository contains a vast collection of pre-built modules and libraries that cover a wide range of functionalities, from handling HTTP requests to managing databases and authentication. Developers can explore the repository to discover packages that meet their project’s requirements and seamlessly integrate them into their applications.
Command-Line Interface (CLI)
NPM provides a user-friendly command-line interface (CLI) that allows developers to interact with the package manager effortlessly. Through simple commands, developers can perform various tasks, such as installing and updating packages, managing versions, and running scripts defined in the package.json file.
Some common NPM commands include:
- npm install: Installs the project’s dependencies based on the package.json file;
- npm install package-name: Installs a specific package;
- npm update: Updates the project’s dependencies to their latest versions;
- npm uninstall package-name: Removes a specific package from the project;
- npm search keyword: Searches the NPM repository for packages related to a specific keyword;
Semantic Versioning (SemVer)
NPM follows a versioning convention known as Semantic Versioning (SemVer). SemVer consists of three version numbers: MAJOR.MINOR.PATCH.
When developers specify dependencies in the package.json file, they can use SemVer to indicate the desired level of compatibility:
- MAJOR version: Indicates significant changes that may introduce breaking changes;
- MINOR version: Introduces new features in a backward-compatible manner;
- PATCH version: Includes backward-compatible bug fixes and improvements [3];
This versioning system ensures that projects can safely update their dependencies without unexpected compatibility issues.
Reasons to Use NodeJS on Raspberry Pi:
- JavaScript Familiarity: Node.js enables developers already familiar with JavaScript to leverage their existing skills, creating a seamless transition for building applications on the Raspberry Pi;
- Asynchronous I/O: Node.js’ event-driven, non-blocking architecture enhances the Raspberry Pi’s multitasking capabilities, allowing it to efficiently handle concurrent tasks, such as managing sensors, controlling actuators, and responding to user interactions;
- Web Server and API Development: Node.js simplifies the creation of lightweight web servers and RESTful APIs on the Raspberry Pi, facilitating seamless communication with other devices and enabling remote control and data exchange;
- IoT and Home Automation: Node.js empowers the Raspberry Pi to function as a hub for IoT (Internet of Things) applications, enabling seamless integration and interaction with various smart devices and sensors around the home;
- Real-time Applications: The low-latency capabilities of Node.js make it an ideal choice for real-time applications, such as live data streaming, video processing, and interactive applications;
- Package Ecosystem: Node.js boasts an extensive package ecosystem (npm), providing access to a wide range of open-source libraries and modules, streamlining development and reducing the need for reinventing the wheel;
- Rapid Prototyping: The combination of Node.js and Raspberry Pi expedites prototyping and experimentation, allowing developers to quickly iterate and test ideas without a significant overhead;
- Educational Resources: Node.js enjoys a vibrant and active community, providing a plethora of tutorials, guides, and forums that Raspberry Pi enthusiasts can tap into for learning and troubleshooting;
- Cross-Platform Development: Node.js is inherently cross-platform, making it possible to develop applications on one platform (such as a development machine) and deploy them seamlessly to the Raspberry Pi;
- Customizable Solutions: Node.js offers a level of flexibility that empowers developers to create customized solutions tailored to specific project requirements, from interactive displays to data logging systems;
- Community Support: Both Node.js and Raspberry Pi have strong and supportive communities, which means you can find ample resources, examples, and assistance when developing with this technology stack;
- Scalability: While the Raspberry Pi is a great starting point, Node.js also allows you to scale your applications as needed, making it possible to begin with a small-scale project and later expand it to accommodate higher demands;
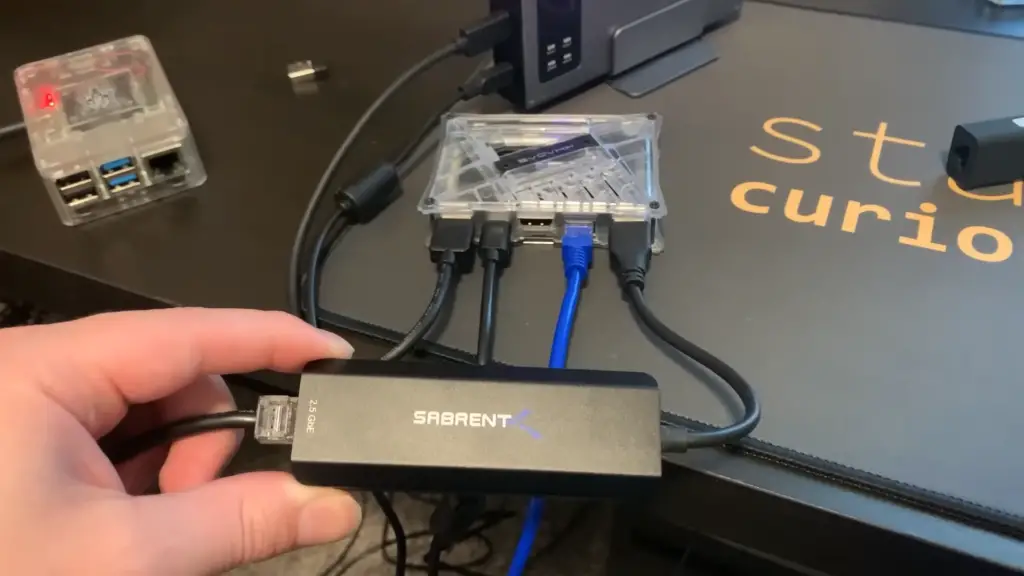
Installing NodeJS on the Raspberry Pi:
1) Required Equipment:
- Raspberry Pi: The heart of your setup, responsible for running Node.js applications;
- Micro SD Card: Provides storage for the Raspberry Pi’s operating system and applications;
- Power Supply: Supplies power to the Raspberry Pi;
- Ethernet Cable or Wi-Fi: Allows your Raspberry Pi to connect to the internet;
- Raspberry Pi Case: Provides protection and organization for your Raspberry Pi;
- HDMI Cable: Needed if you plan to connect your Raspberry Pi to a monitor;
- USB Keyboard: Allows you to input commands;
- USB Mouse: Provides navigation and control;
2) Choosing a Raspberry Pi Model
While Node.js can be installed on various Raspberry Pi models, it’s worth considering the performance requirements of your project. Newer models, such as the Raspberry Pi 4, offer improved CPU performance and increased memory compared to earlier models. These enhancements can contribute to a smoother experience when running Node.js applications.
Method 1: Install Node.js and NPM From the NodeSource Repo
This method involves using the NodeSource repository to install the latest version of Node.js and npm.
Enable the NodeSource Repository
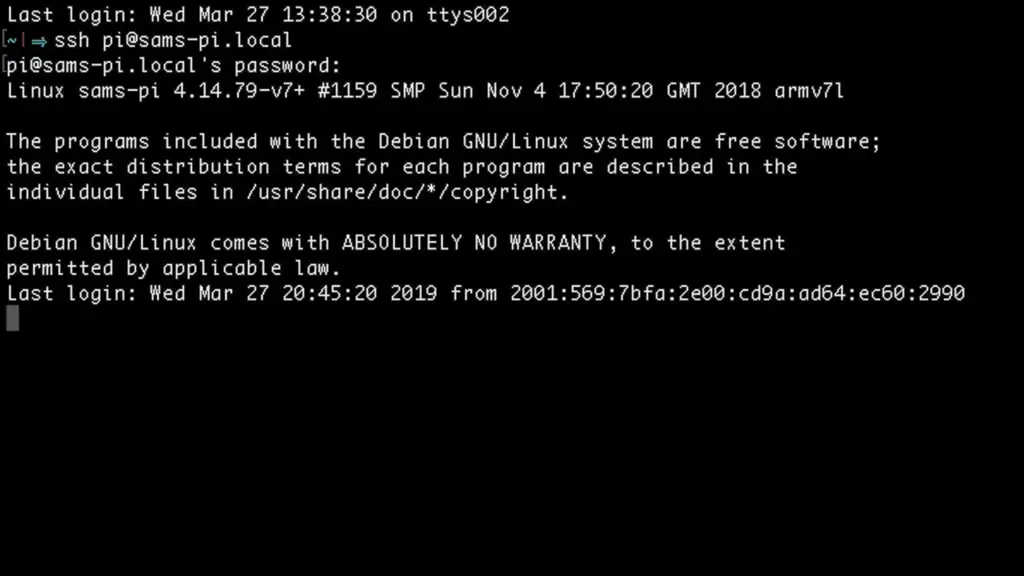
Open a terminal on your Raspberry Pi.
Run the following commands to download and install the NodeSource setup script:
curl -fsSL https://deb.nodesource.com/setup_16.x | sudo -E bash –
Once the script has finished executing, you can install Node.js and npm:
sudo apt-get install -y nodejs
Verify Installation
To ensure that Node.js and npm are successfully installed, run the following commands [4]:
node -v
npm -v
You should see the versions of Node.js and npm displayed in the terminal.
Uninstall/Remove Node.js and NPM
If you ever need to uninstall or remove Node.js and npm, you can do so with the following commands:
sudo apt-get remove –purge nodejs npm
sudo apt-get autoremove
Method 2: Install Node.js and NPM From Source Code
This method involves compiling Node.js from its source code. It gives you more control over the installation process.
Update and Upgrade Your System
Before installing Node.js, it’s a good practice to update and upgrade your system’s packages:
sudo apt update
sudo apt upgrade
Check the Node Version You Need to Download
Visit the Node.js website (https://nodejs.org) to determine the latest LTS (Long-Term Support) version available. Take note of the version number.
Download NodeJS
In the terminal, use the wget command to download the Node.js source code:
wget https://nodejs.org/dist/v{VERSION}/node-v{VERSION}.tar.gz
Replace {VERSION} with the version number you noted earlier.
Extract the File
Next, extract the downloaded tarball:
tar -xzvf node-v{VERSION}.tar.gz
Replace {VERSION} with the actual version number.
Copy the Extracted Files to Directory Path
Move into the extracted directory and begin the compilation process:
cd node-v{VERSION}
./configure
make
sudo make install
Verify Installation
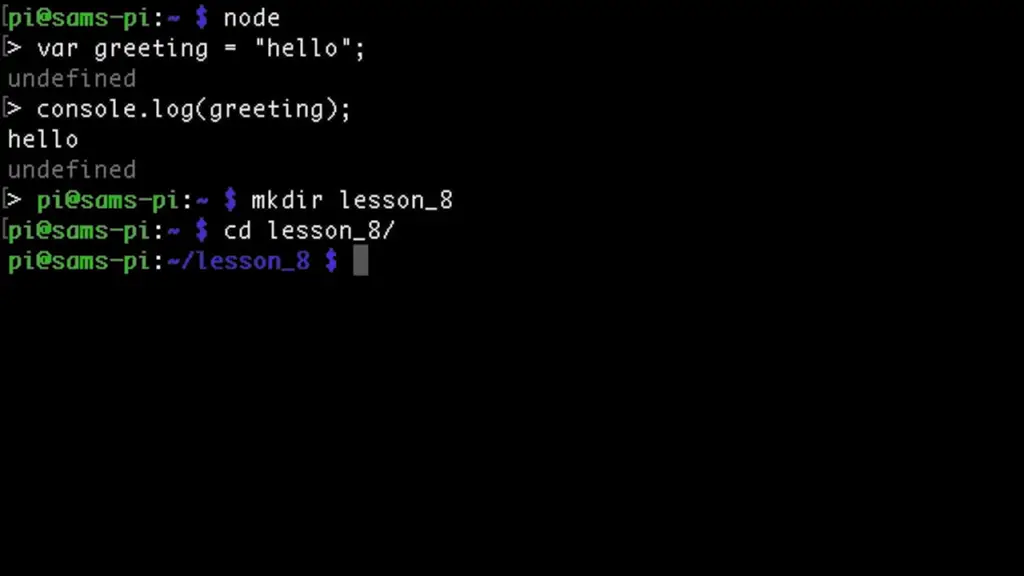
To verify that Node.js and npm are successfully installed, use the following commands:
node -v
npm –v
You should see the versions of Node.js and npm displayed in the terminal.
Troubleshooting Problems When Installing NodeJS on Raspberry Pi
Internet Connectivity Issues:
Problem: The Raspberry Pi may not have a stable internet connection, preventing it from downloading
the required packages.
Solution: Check your Wi-Fi or Ethernet connection and ensure the Raspberry Pi can access the internet. Retry the installation after verifying the connection.
Dependency Issues:
Problem: Missing or outdated dependencies may lead to installation errors.
Solution: Before installing Node.js, ensure you’ve updated your system’s packages using sudo apt update and sudo apt upgrade. Additionally, make sure you’ve installed the required dependencies mentioned in the installation guide.
Outdated Raspberry Pi OS:
Problem: An outdated operating system might not be compatible with the latest version of Node.js.
Solution: Update your Raspberry Pi OS to the latest version by running sudo apt update and sudo apt upgrade, then proceed with the Node.js installation.
Insufficient Disk Space:
Problem: Limited storage space on your Raspberry Pi’s microSD card can prevent installation.
Solution: Check the available disk space using df -h. If space is low, consider freeing up space or using a larger microSD card.
Permissions Issues:
Problem: Insufficient permissions can prevent the installation process.
Solution: Use sudo before commands that require administrative privileges, such as sudo apt-get install or sudo npm install –g [5].
Conflicting Node.js Versions:
Problem: If you have multiple Node.js versions installed, conflicts can arise.
Solution: Use the node -v and npm -v commands to check the installed versions. Uninstall any conflicting versions and then proceed with a clean installation.
Compilation Errors (Source Installation):
Problem: Compiling Node.js from the source might fail due to missing dependencies or other issues.
Solution: Check the error messages during the compilation process for specific details. Ensure you have all necessary build tools and dependencies installed. You can also consider using the package manager installation method.
Memory Issues:
Problem: Insufficient memory on older Raspberry Pi models may lead to installation errors.
Solution: If you’re using an older model, consider creating a larger swap file to provide additional virtual memory during the installation process.
Network Firewall or Proxy:
Problem: Network firewalls or proxies may restrict access to external resources required for installation.
Solution: Configure your network settings to allow the Raspberry Pi to access the required resources. Consult your network administrator if necessary.
Corrupted Installation:
Problem: Corruption of files during download or installation can lead to errors.
Solution: Delete the partially installed Node.js files and start the installation process again from the beginning.
FAQ:
1. How to install NodeJS on Raspberry Pi 4?
To install Node.js on a Raspberry Pi 4, follow these steps:
Update Your Raspberry Pi:
Open a terminal and run the following commands:
sudo apt update
sudo apt upgrade
Install Node.js:
You can install Node.js using the package manager (npm). Run the following commands:
curl -sL https://deb.nodesource.com/setup_14.x | sudo -E bash –
sudo apt-get install -y nodejs
Verify Installation:
Check if Node.js and npm are installed by running [6]:
node -v
npm -v
2. Can you run NodeJS on Raspberry Pi?
Yes, you can run Node.js on a Raspberry Pi. Node.js is compatible with the ARM architecture, which Raspberry Pi uses.
3. How to install NodeJS by npm?
To install Node.js using npm (Node.js Package Manager), follow the steps mentioned in the previous answer under “Install Node.js”.
4. How to install NodeJS in SSH?
You can install Node.js through SSH (Secure Shell) by accessing your Raspberry Pi remotely using SSH and then following the installation steps mentioned earlier. SSH into your Raspberry Pi and run the installation commands in the terminal.
5. How to install NodeJS on Raspberry Pi from the terminal?
The installation steps provided in the answer to the first question outline how to install Node.js on a Raspberry Pi using the terminal.
6. What is Raspberry Pi in NodeJS?
Raspberry Pi is a small, affordable, single-board computer that can run various operating systems, including Linux. In the context of Node.js, Raspberry Pi serves as a platform to run Node.js applications, enabling developers to build and execute server-side applications using JavaScript.
7. How to manually install NodeJS?
You can manually install Node.js on a Raspberry Pi by downloading the Node.js source code from the official website (https://nodejs.org) and then compiling and installing it using the terminal. Detailed manual installation steps can vary depending on your specific Raspberry Pi model and the desired Node.js version.
8. Does installing NodeJS also install NPM?
Yes, when you install Node.js, npm (Node.js Package Manager) is also included by default.
9. Can Raspberry Pi Zero run NodeJS?
Yes, Raspberry Pi Zero can run Node.js. However, due to its limited hardware resources, it may not perform as well as newer Raspberry Pi models for resource-intensive applications.
10. How to update NodeJS in Raspberry Pi?
To update Node.js on a Raspberry Pi, follow these steps:
Update npm:
sudo npm install -g npm
Install Node.js and npm:
Run the installation commands again, as mentioned earlier in the installation steps.
11. How do I know if NodeJS is installed?
You can check if Node.js is installed by running the following command in the terminal:
node -v
If Node.js is installed, it will display the installed version number.
12. How to setup NodeJS on a server?
Setting up Node.js on a server involves installing Node.js and npm on the server and then deploying your Node.js applications. The process may vary depending on your server’s operating system and setup.
13. How to install NodeJS PowerShell?
To install Node.js using PowerShell, follow these steps:
Open PowerShell with administrative privileges.
Run the following command to install Node.js:
vbnet
iex ((New-Object System.Net.WebClient).DownloadString(‘https://chocolatey.org/install.ps1’))
choco install nodejs
14. How to install NodeJS and ReactJS?
Node.js and React.js are separate technologies. To install Node.js, follow the installation steps mentioned earlier. To install React.js, you would typically create a new Node.js project using npm and then install React.js as a dependency using the following command:
npm install react
15. How to start a NodeJS application?
To start a Node.js application, navigate to the directory containing your application’s code in the terminal and run:
node your-app.js
Replace your-app.js with the actual filename of your Node.js application.
16. How to run NodeJS on a local server?
You can run a Node.js application on a local server by creating a web server using Node.js itself or using frameworks like Express.js. After creating the server, you can access your Node.js application by opening a web browser and navigating to the specified local address.
17. How to install NodeJS on Raspberry Pi Zero?
The installation steps for Node.js on Raspberry Pi Zero are the same as for other Raspberry Pi models. Refer to the installation steps provided earlier.
18. Can Raspberry Pi run NodeJS?
Yes, Raspberry Pi can run Node.js. It supports the execution of Node.js applications.
19. Can a Raspberry Pi run JavaScript?
Yes, Raspberry Pi can run JavaScript. It can execute JavaScript code using Node.js, which is a JavaScript runtime.
20. Can NodeJS work without V8?
No, Node.js relies on the V8 JavaScript engine to execute JavaScript code. V8 is an open-source JavaScript engine developed by Google.
21. Can you install Node.js locally?
Yes, you can install Node.js locally on your computer. This allows you to develop and test Node.js applications on your machine before deploying them to a server or another platform. Visit the official Node.js website (https://nodejs.org) to download and install Node.js for your operating system.
22. Is Node.js compatible with Raspberry Pi?
Yes, Node.js is compatible with Raspberry Pi. It can be installed and used on various Raspberry Pi models to develop and run JavaScript applications.
23. How do I install Node.js on Raspberry Pi?
You can install Node.js on Raspberry Pi by using the package manager (npm) or by compiling from the source. Detailed installation steps can be found in the installation guide provided earlier.
24. Does installing Node.js also install npm?
Yes, installing Node.js also installs npm (Node.js Package Manager) by default. You can verify npm installation by running npm -v in the terminal.
25. Can Raspberry Pi Zero run Node.js?
Yes, Raspberry Pi Zero can run Node.js. However, due to its limited resources, it might be suitable for less resource-intensive applications.
26. How do I update Node.js on Raspberry Pi?
To update Node.js on Raspberry Pi, first update npm using sudo npm install -g npm, then reinstall Node.js using the installation method you prefer.
27. How do I check if Node.js is installed on my Raspberry Pi?
You can check if Node.js is installed by running node -v in the terminal. It will display the installed version if Node.js is present.
28. Can I install Node.js locally on my Raspberry Pi?
Yes, you can install Node.js on your Raspberry Pi, enabling you to develop and run JavaScript applications directly on the device.
29. What are the benefits of using Node.js on Raspberry Pi?
Using Node.js on Raspberry Pi allows you to leverage JavaScript skills, create web servers, develop IoT applications, handle asynchronous tasks efficiently, and tap into the extensive npm package ecosystem.
30. Are there any troubleshooting steps for Node.js installation issues on Raspberry Pi?
Yes, if you encounter installation problems, consider checking your internet connection, dependencies, disk space, and permissions, and ensuring your Raspberry Pi OS is up to date. For more detailed troubleshooting steps, refer to the troubleshooting section in the installation guide.
31. Can I run multiple versions of Node.js on my Raspberry Pi?
Yes, it’s possible to have multiple versions of Node.js installed on your Raspberry Pi, but managing them can be complex. Tools like nvm (Node Version Manager) can help you switch between different Node.js versions.
32. Is it recommended to compile Node.js from source on Raspberry Pi?
Compiling Node.js from source is an advanced option and is not typically necessary for most users. Using the package manager (npm) is the recommended and simpler approach for installing Node.js on Raspberry Pi.
33. Can I install both Node.js and Python on my Raspberry Pi?
Yes, you can install and use both Node.js and Python on your Raspberry Pi. They are separate programming languages and runtime environments that can coexist on the same device.
34. Is Node.js on Raspberry Pi suitable for production use?
While Node.js on Raspberry Pi is great for prototyping and small-scale projects, for production use or larger applications, consider the capabilities and limitations of the Raspberry Pi hardware and its potential impact on performance and scalability.
Useful Video: Installing Node.js – Raspberry Pi & JavaScript
References
- https://www.hackster.io/kamaluddinkhan/installing-nodejs-on-a-raspberry-pi-in-easy-steps-62d455
- https://pimylifeup.com/raspberry-pi-nodejs/
- https://www.golinuxcloud.com/install-nodejs-and-npm-on-raspberry-pi/
- https://www.w3schools.com/nodejs/nodejs_raspberrypi.asp
- https://www.instructables.com/Install-Nodejs-and-Npm-on-Raspberry-Pi/
- https://linuxhint.com/install-node-js-raspberry-pi-4/





Leave a Reply